Monday, June 27, 2022

Best way to Bake Potatoes ever!


Step aside potato wedges, shove off hasselbacks, we have a new baked potato dish in town, and it is daaaamn yummy.
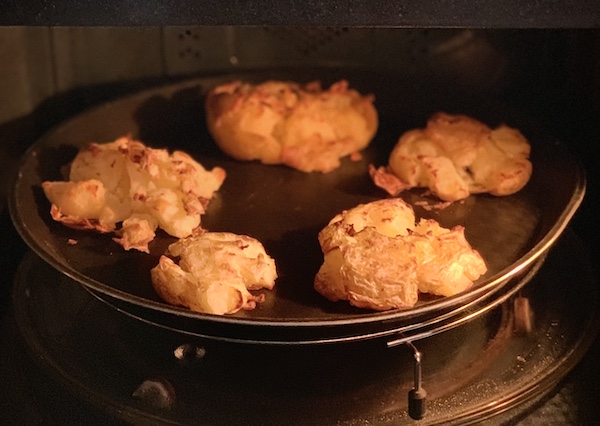

Golden baked, gently crushed potatoes in an oven tray still in the oven.


Last week, my friend Smitha Hemadri shared her method for steamed and baked potatoes. ๐Ÿ˜ฑ The moment I saw it I knew I HAD to make it RIGHT AWAY!

The simplicity of this recipe just blows my mind. It has literally ONE ingredient – Potatoes.

  • Scrub and clean potatoes very well, and remove the eyes
  • DO NOT peel them (you’ll see how the skin turns out to be the *tastiest* part by the end)
  • Pierce all over with a clean needle or toothpick (but be careful that the toothpick doesn’t break off into the potato ๐Ÿ˜‚)
  • Steam the potatoes whole for 20-30 mins, depending on the size
  • Preheat oven to 250C (450F)
  • Line the steamed potatoes on a baking tray and then, this is the most important bit, gently press down on each one using something flat and heavy (I used a rock). They should get crushed lightly and open up, but not mashed completely. If they fall apart a bit, it’s okay (the larger potatoes do this), very gently squish the bits together into one crumbled mass.
  • Bake for 30 minutes
  • Serve hot


That’s it! No salt, no oil, no garlic, no herbs. Nothing else required.


If you like, you can drizzle a little hot sauce over it and serve (Bhut Jholokia FTW ๐Ÿ”ฅ), but you won’t believe how freaking scrumptious it tastes just on its own.


The gentle crushing is the KEY here. It creates multiple textures while baking. Soft in some parts, crispy and crunchy in some. Like seriously, I can’t even explain it in words. You have to try it to get what I mean.


Oh and as a chef, you might get very tempted to add things into the crevices before baking – crushed garlic, vegan butter, olive oil, salt, herbs, pepper, nooch... I really wanted to! But resist the temptation. Just make these potatoes plain, at least the first time.


You need to experience the pure potato flavours and textures in all their glory. ๐Ÿ˜ƒ


If you try this, let me know how you like it. Also, Smitha is the queen of highly creative, super healthy recipes. Check out more of her Insta posts if you’re into eating clean.

Friday, May 27, 2022

Vegan Hobnobs Style Biscuits


My first attempt at homemade Hobnobs. They turned out reaaaaally yummy and crunchy, though not exactly like the packaged ones.

I did quite a bit of research online to find a recipe to work off of. Among them all, the one from Wendy Finn was the most appealing to me because she's simplified it beautifully.

I modified that recipe considerably to incorporate ingredients that are more accessible in India. I also switched the measurements from weight to volume because I know a lot of casual bakers here don't own food weighing equipment. And of course, in my usual lazy style, I had to make it even easier to make and clean up after. Haha

Commercial Hobnobs are often vegan too, but these are slightly healthier. Only because they don’t contain unpronounceable/numbered/chemically ingredients. There’s plenty of sugar and oil in there though. ๐Ÿ˜›

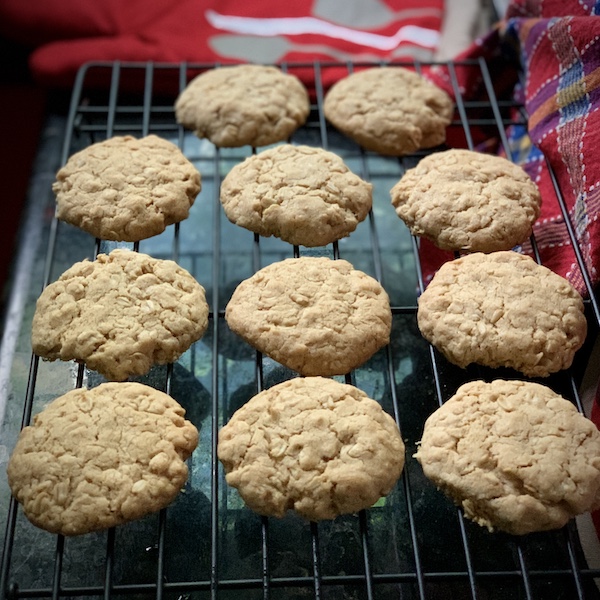
Vegan homemade hobnobs biscuits lined up on a wire rack. Oven mitt in the background.


I fully intend to develop a much healthier version of these biscuits at some point. But for now, here’s the recipe if you’d like to try your hand at them.

Dry Ingredients

1 C Rolled Oats (I used the gluten free rolled oats from Jus'Amazin*)
1/2 C Whole Wheat Flour (use the slightly rough kind)
1/2 C Maida
Little more than 1/2 C Powdered Sugar (brown and white mixed)
1 tsp Baking Soda
1/4 tsp Salt

Wet Ingredients

Little more than 1/2 C Coconut Oil
1 T Maple Syrup
1 T Plant Based Mylk (a little more if needed)


Preheat oven to 180C/350F

  • Whisk together dry ingredients 
  • Add coconut oil and rub it in until the mixture is crumbly
  • Mix in the maple syrup and mylk and form into a soft dough 
  • Shape into balls, lightly flatten and place in a baking tray 
  • Leave a decent amount of gap because these babies expand big time 
  • Bake for 15-18 mins until golden 
  • Cool completely and enjoy {crunch} ๐Ÿ˜


*Use my code “VEGANOSAURUS10” during checkout on Jus’Amazin if you plan to order the rolled oats from them. They have many other absolutely delicious products too. When you use my code, you get 10% off on every order you place. This is above the already discounted prices on the website. And they offer free pan India shipping.

Affiliations Disclosure Page

Thursday, March 03, 2022

Bite Sized Okara Patties – What's Okara, and how to use it?


"What do you do with your Okara?"
“Wait, did you mean Okra?”
“No, no. I meant Okara only.”
“What’s that now?” ๐Ÿคจ

When you make plant mylks, some of them need straining right? The leftover paste is Okara. It refers to soy pulp, but the term can loosely be used for other mylk pulps too.

When I make peanut curds, I don’t strain the mylk. I feel the pulp gives the curd a more thick and creamy texture. Plus the fibre is a good prebiotic. (Also I’m too lazy to strain it).

But the designated peanut curd maker in our house is way too particular about the texture. He claims that the pulp makes the curd pasty and insists on straining the mylk every single time. ๐Ÿ™„ And since peanut curd is made at home at least once a month (curd rice is a staple at our monthly Bengaluru Vegans Potluck), there's a constant supply of Okara at home.

A bit of the pulp can be mixed into chapathi/bread dough, gravies, sambar, etc. But there’s always more pulp than can be used this way. So more often than not, it sits in the fridge getting old and then we have to compost it.

Dry and tasteless as it is, Okara's still full of healthy fibre and easily digestible proteins. I always feel guilty about wasting it.

In my pursuit of using it up creatively, I made Okara Choco Chip Cookies last year. The recipe was a combination of this one from The Okara Project, and my signature Chocolate Chip/Chunk Cookies. They were daaaammmmmnnn yum! ๐Ÿคค

But my tummy flab quavers in dread at the thought of cookies appearing every time we have Okara at home. ๐Ÿ˜‚

So lately I’ve been making savoury snacks with it instead – patties, cutlets, neat balls…

You mix a bunch of stuff into the paste, shape and bake. Once you get the hang of it, it’s quite flexible to experiment with.

The three key things to keep in mind are – textures, flavours and binding.

๐ŸŒบ Since Okara is bland (all the tasty stuff goes into the mylk), it needs super strong flavouring. Be verrrry generous with the spices and seasonings you put in!

๐ŸŒบ Good binders are important to counter the moisture. I’ve tried random combinations of corn starch, arrowroot powder, psyllium husk, flaxseed powder, Banamin's gota/vada mix*, etc.

๐ŸŒบ The Okara by itself doesn’t have an enjoyable mouthfeel, so mix in some crunchy/chewy ingredients for texture. I’ve done chopped mushrooms, seeds/nuts, crumbled tofu, leafy greens…

Then it’s just a matter of shaping and baking. I usually do 200-220°C for 15 mins, gently flip them and then bake for another 15 mins. The temperature and baking time depends on the size of the patties/balls, and how wet your mixture is. So adjust accordingly.

Here's a recipe for you. Use it as a guideline and do your own thing. There's plenty of potential for variety. :)


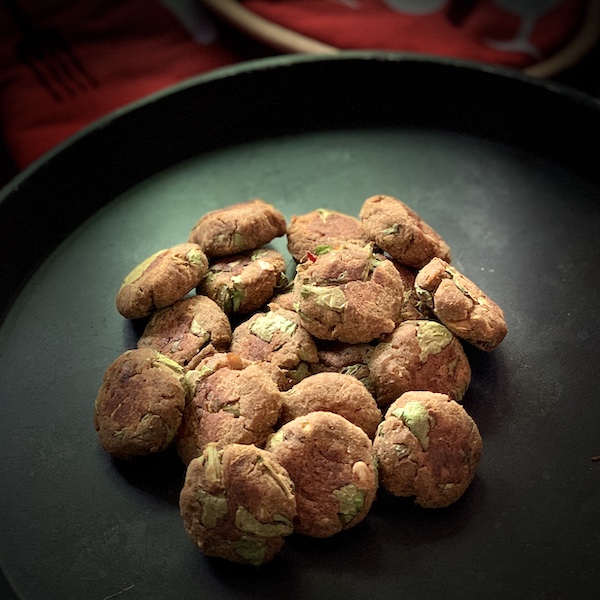
Dark background, black tray with small, bite sized patties on it.