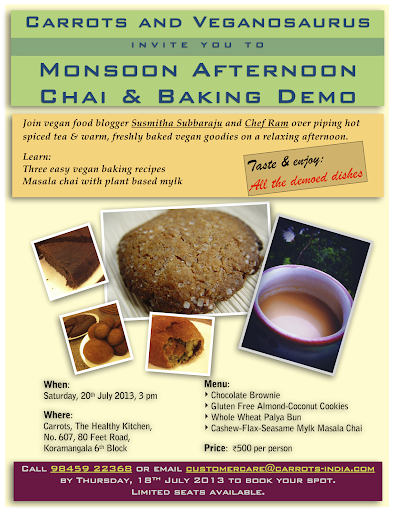
About ten days ago, I had a vegan baking demo at Carrots, The Healthy Kitchen and Store. I've mentioned Carrots, the first vegan restaurant in Bangalore, in my blog posts many times this year.
A few weeks ago, Krishna, the co-founder of Carrots, invited me to teach baking/cooking classes to his staff. Many people who follow my blog and facebook page have asked me to conduct vegan baking classes, so I figured that since I was going to teach some recipes to Chef Ram (Carrots' new Bakery Chef), we could extend that into an interesting demo event. We decided on a Monsoon Afternoon Chai and Baked Goodies theme.
About 11 people signed up to attend the event but we had a bunch of walk-ins and ended up with a total of 15 participants. A couple of them were my good friends who attended to support me but most others were people I met for the first time. I was very happy that I got to meet and speak with all these new, interesting people. It was also nice to hear that some of them have been following my blog and trying out the recipes here for a while now. :)
The event went well for the most part and despite certain imperfections, many participants said that they enjoyed the demo and would be trying out the recipes at home once I posted them here.
My darling hubby, Milesh, patiently recorded the demo. It has taken me some time to edit the videos. I wanted to do this last week but I was travelling. As soon as I got back this week, I started working on the videos so I could share them here along with the recipes. I've divided them into multiple parts for the purpose of organisation.
I apologize in advance for the annoying background noises in the videos. The screaming toddler, creaking buffet vessels, clanking cutlery, the buzz of customers and staff talking in the background - we hadn't anticipated any of these disturbances. The expectation was that the buffet would be closed and the crowd cleared out by 3:30 or so, leaving us with a fairly silent space to do the demo. The participants themselves were watching the demo with rapt attention and were NOT the ones responsible for the ruckus. :p
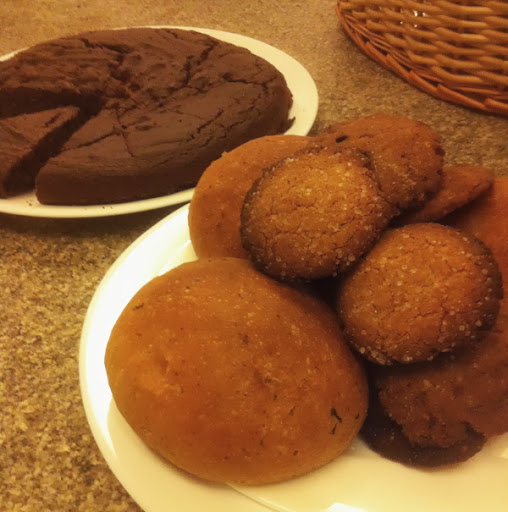
Now without further ado, let's move on to the recipes you've all been waiting for.
--
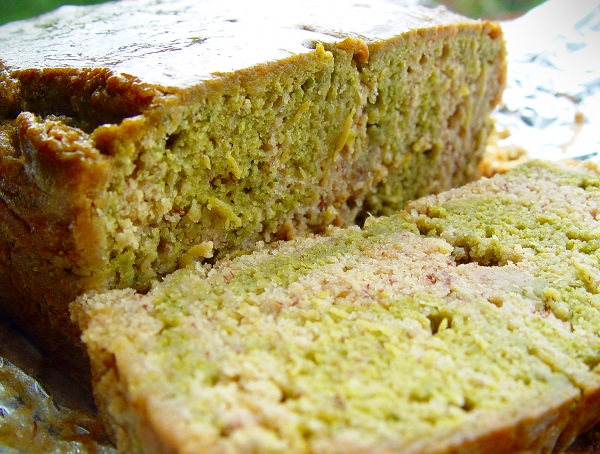
Basic Vegan Chocolate Cake
Dry Ingredients:
1 1/2 C Whole Wheat Flour or Maida
3 T Good Quality Cocoa
1/2 tsp Salt
1 tsp Baking Powder (or 1/2 tsp Baking Powder and 1/2 tsp Baking Soda)
Wet Ingredients:
3/4 to 1 C White or Brown Sugar
5 T Coconut or Olive Oil
1 T White or Apple Cider Vinegar
1 tsp Coffee Powder - or Vanilla/Orange/Almond/Mint Extracts
1 C Cool or Cold Water
* Preheat oven to 180°C / 350°F.
* Lightly grease an 8 or 9 inch, round or square cake pan (no greasing required if using a non-stick pan).
* Sieve the dry ingredients together a few times.
* Whisk all the wet ingredients (except oil) together until at least half the sugar has dissolved.
* Add the oil and whisk some more.
* To make the cake batter, pour the wet ingredients over the dry ingredients and quickly mix until there are no large lumps.
* Pour the cake batter into the prepared pan and immediately pop it into the preheated oven.
* Bake for 40-45 minutes, until a few cracks have formed on the cake's surface.
* Cool completely in the pan.
* Slice and Serve.
* Enjoy! :)
--
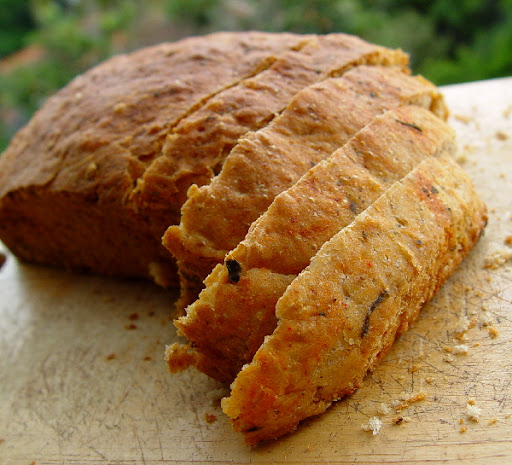
Whole Wheat Buns
For the yeast proofing:
1/2 C Warm Water
2 tsp Active Dry Yeast
2 T Sugar
Dry ingredients for the dough:
3-4 C Whole Wheat Flour
1/4 C Sugar - can be less
2 tsp Salt
2 T Flax Seed Powder
Wet ingredients for the dough:
1 C Vegan Mylk or Water
3 T Coconut Oil or Olive Oil
* Add 2 T sugar and yeast to 1/2 C warm water.
* Stir and keep aside for 10-15 minutes, until the yeast has dissolved and is frothing a bit.
* Mix 3 C of the whole wheat flour with the remaining dry ingredients in a large bowl.
* Add the oil and mix.
* Add the yeast mixture and 1 C vegan mylk or water and whisk.
* Gradually add whole wheat flour and mix until the dough comes together into a rough ball.
* Transfer to a floured surface and knead very well until you get a soft, elastic ball of dough.
* Pour some oil in the large mixing bowl, place the ball of dough in it and twirl to coat with oil.
* Cover and allow to rise in a warm spot for 2 hours, until doubled in volume.
* Press down on the risen dough and shape into buns.
* Optionally stuff the buns with your favourite vegetable mixture (a potato palya filling tastes yum).
* Place the buns on a tray, cover and keep aside for 1 hour, until the buns have risen well.
* Preheat oven to 190°C / 375°F.
* Bake the buns for about 40 minutes.
* Cool in the tray for 10 minutes.
* Transfer to cooling rack and cool well.
* Enjoy! :)
--
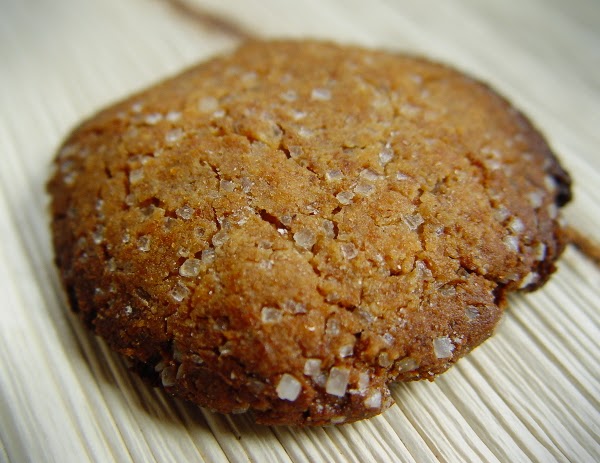
Quick and Easy, Gluten Free Almond Coconut Cookies
1 C Almond-Sesame Flour (grind almonds and sesame seeds in a ratio of 3:1 to get this flour)
1 C Desiccated Coconut Powder
1/2 C Bajra (Pearl Millet) Flour
1/2 C Sugar
1/4 tsp Salt
Water
* Preheat oven to 250°C / 480°F.
* Lightly grease a baking tray or line it with aluminium foil.
* Mix all the dry ingredients.
* Add a little water at a time to form a stiff dough.
* Pinch off small balls of the dough and flatten into 1 1/2 inch cookies that are about 1/4 inch thick.
* Bake for 10 minutes.
* Allow to cool slightly and transfer to wire rack.
* You can have it warm or at room temperature.
* Enjoy! :)
--
Vegan Mylk and Masala Chai
For the Nut and Seed Mylk:
1/4 C Cashews
1/4 C Sesame Seeds
1/4 C Flax Seeds
Water
* Grind the nuts and seeds together into a fine powder.
* Add a little water at a time and blend to get a smooth, creamy paste.
* Add more water and blend until you reach the desired consistency.
For the Masala Chai:
3/4 C Water
3 Cloves
1 Cardamom Pod
1/2 inch Cinnamon Stick
1/2 inch Fresh Ginger - crushed
5 Black Pepper Corns - crushed
1/2 to 1 tsp Sugar (optional)
1/2 tsp Tea Powder
1/2 to 3/4 C Nut and Seed Mylk (should not be too thick)
* Boil the spices in the water for a couple of minutes.
* Add sugar at this point and boil.
* Add the tea powder and boil for a few seconds.
* Reduce the heat to low, quickly pour in the mylk and stir.
* Bring to a short boil and turn off the heat.
* Strain and serve hot.
* Enjoy! :)
--
If you attended the demo, I'd love to hear your thoughts about how you liked it and how we can make future events a better experience for you.
Thanks for reading and watching all the videos. When you try out the recipes, do leave a comment here letting me know how you like them. :)