Showing posts with label Cakes. Show all posts

Thursday, January 20, 2022

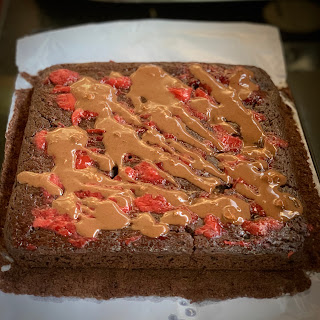
Gluten Free Banana Flour Chocolate Hazelnut Cake


generally don’t venture too much into gluten free baking. My forté is vegan baking, and I tend to stick to it.

But recently I scored some highly nutritious allergy friendly flours from Banamin Health Care and I wanted to see if I could come up with a completely GF cake with the Green Banana Flour. I was totally surprised by the results!

 
The texture is on the crumbly side and also more fudgy than cakey. But overall a very yummy thing.


GF Banana Flour Chocolate Hazelnut Cake

Dry Ingredients:

1 C Banamin Green Banana Flour

3 Tbsp Cocoa Powder

1/2 tsp Baking Sada

1/2 tsp Baking Powder

1 tsp Arrowroot Powder

1/2 tsp Salt


Wet Ingredients:

1 Cup Brown Sugar

2 Tbsp Jus’Amazin Crunchy Hazelnut Spread

2 Tbsp Coconut Oil

1 Tbsp Apple Cider Vinegar

1/4 tsp Pure Vanilla Extract

1 tsp Psyllium Husk

1 C Warm Water


  • Whisk together wet ingredients & allow to cool completely in fridge
  • Preheat oven to 180 c/350 F
  • Lightly grease a cake pan and line it with baking paper
  • Mix together dry ingredients
  • Quickly mix wet & dry mixtures (don’t overmix)
  • Pour into cake pan
  • Bake for 35 mins and test with a toothpick for doneness (bake for 5-10 mins longer if required)
  • First cool the cake in the pan for 15 mins, then gently transfer to a wire rack along with the paper and cool completely before slicing


For the Icing:


  • Whisk Jus’Amazin Crunchy Hazelnut Spread in a few spoons of Warm Water 
  • Pour over the cake 
  • Optionally layer with Strawberry Compote (made by cooking down chopped strawberries with sugar)


If you'd like some sweet discounts:


Use my referral* code "VEGANOSAURUS10" on Jus'Amazin or Banamin websites to get 10% off on all your orders, every time.


Jus'Amazin has free pan India shipping on all orders.

* I receive an affiliate commission when you use my code at no additional cost to you. Read my disclosure page for more details.

Wednesday, July 31, 2013

Vegan Baking Demo at Carrots on Saturday, 20th July 2013


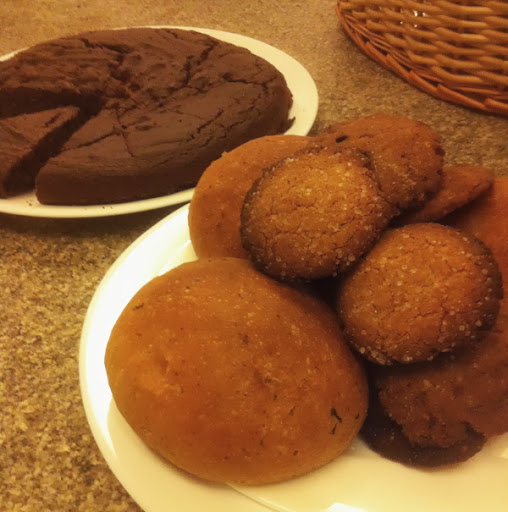
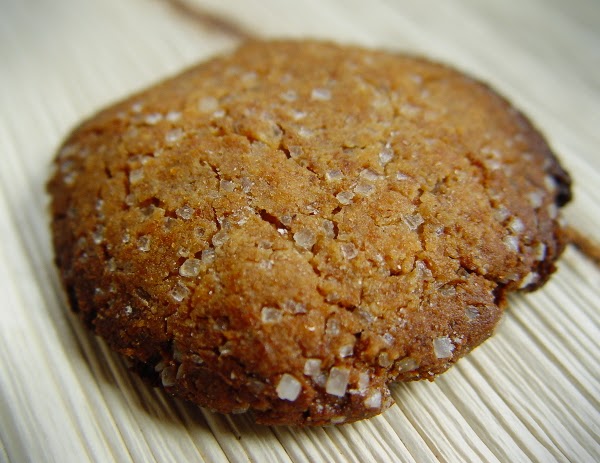
Coconut Almond Sugar Cookie

About ten days ago, I had a vegan baking demo at Carrots, The Healthy Kitchen and Store. I've mentioned Carrots, the first vegan restaurant in Bangalore, in my blog posts many times this year.

Carrots Board

A few weeks ago, Krishna, the co-founder of Carrots, invited me to teach baking/cooking classes to his staff. Many people who follow my blog and facebook page have asked me to conduct vegan baking classes, so I figured that since I was going to teach some recipes to Chef Ram (Carrots' new Bakery Chef), we could extend that into an interesting demo event. We decided on a Monsoon Afternoon Chai and Baked Goodies theme.

Carrots Demo Poster

About 11 people signed up to attend the event but we had a bunch of walk-ins and ended up with a total of 15 participants. A couple of them were my good friends who attended to support me but most others were people I met for the first time. I was very happy that I got to meet and speak with all these new, interesting people. It was also nice to hear that some of them have been following my blog and trying out the recipes here for a while now. :)

The event went well for the most part and despite certain imperfections, many participants said that they enjoyed the demo and would be trying out the recipes at home once I posted them here.

My darling hubby, Milesh, patiently recorded the demo. It has taken me some time to edit the videos. I wanted to do this last week but I was travelling. As soon as I got back this week, I started working on the videos so I could share them here along with the recipes. I've divided them into multiple parts for the purpose of organisation.

I apologize in advance for the annoying background noises in the videos. The screaming toddler, creaking buffet vessels, clanking cutlery, the buzz of customers and staff talking in the background - we hadn't anticipated any of these disturbances. The expectation was that the buffet would be closed and the crowd cleared out by 3:30 or so, leaving us with a fairly silent space to do the demo. The participants themselves were watching the demo with rapt attention and were NOT the ones responsible for the ruckus. :p

Now without further ado, let's move on to the recipes you've all been waiting for.

Vegan Baked Goodies

--

Basic Vegan Chocolate Cake


Dry Ingredients:
1 1/2 C Whole Wheat Flour or Maida
3 T Good Quality Cocoa
1/2 tsp Salt
1 tsp Baking Powder (or 1/2 tsp Baking Powder and 1/2 tsp Baking Soda)

Wet Ingredients:
3/4 to 1 C White or Brown Sugar
5 T Coconut or Olive Oil
1 T White or Apple Cider Vinegar
1 tsp Coffee Powder - or Vanilla/Orange/Almond/Mint Extracts
1 C Cool or Cold Water

* Preheat oven to 180°C / 350°F.
* Lightly grease an 8 or 9 inch, round or square cake pan (no greasing required if using a non-stick pan).

* Sieve the dry ingredients together a few times.
* Whisk all the wet ingredients (except oil) together until at least half the sugar has dissolved.
* Add the oil and whisk some more.

* To make the cake batter, pour the wet ingredients over the dry ingredients and quickly mix until there are no large lumps.
* Pour the cake batter into the prepared pan and immediately pop it into the preheated oven.
* Bake for 40-45 minutes, until a few cracks have formed on the cake's surface.
* Cool completely in the pan.
* Slice and Serve.
* Enjoy! :)

--

Whole Wheat Buns


For the yeast proofing:
1/2 C Warm Water
2 tsp Active Dry Yeast
2 T Sugar

Dry ingredients for the dough:
3-4 C Whole Wheat Flour
1/4 C Sugar - can be less
2 tsp Salt
2 T Flax Seed Powder

Wet ingredients for the dough:
1 C Vegan Mylk or Water
3 T Coconut Oil or Olive Oil

* Add 2 T sugar and yeast to 1/2 C warm water.
* Stir and keep aside for 10-15 minutes, until the yeast has dissolved and is frothing a bit.

* Mix 3 C of the whole wheat flour with the remaining dry ingredients in a large bowl.
* Add the oil and mix.
* Add the yeast mixture and 1 C vegan mylk or water and whisk.

* Gradually add whole wheat flour and mix until the dough comes together into a rough ball.
* Transfer to a floured surface and knead very well until you get a soft, elastic ball of dough.
* Pour some oil in the large mixing bowl, place the ball of dough in it and twirl to coat with oil.
* Cover and allow to rise in a warm spot for 2 hours, until doubled in volume.

* Press down on the risen dough and shape into buns.
* Optionally stuff the buns with your favourite vegetable mixture (a potato palya filling tastes yum).
* Place the buns on a tray, cover and keep aside for 1 hour, until the buns have risen well.

* Preheat oven to 190°C / 375°F.
* Bake the buns for about 40 minutes.
* Cool in the tray for 10 minutes.
* Transfer to cooling rack and cool well.
* Enjoy! :)

--

Quick and Easy, Gluten Free Almond Coconut Cookies


1 C Almond-Sesame Flour (grind almonds and sesame seeds in a ratio of 3:1 to get this flour)
1 C Desiccated Coconut Powder
1/2 C Bajra (Pearl Millet) Flour
1/2 C Sugar
1/4 tsp Salt
Water

* Preheat oven to 250°C / 480°F.
* Lightly grease a baking tray or line it with aluminium foil.

* Mix all the dry ingredients.
* Add a little water at a time to form a stiff dough.
* Pinch off small balls of the dough and flatten into 1 1/2 inch cookies that are about 1/4 inch thick.

* Bake for 10 minutes.
* Allow to cool slightly and transfer to wire rack.
* You can have it warm or at room temperature.
* Enjoy! :)

--

Vegan Mylk and Masala Chai


For the Nut and Seed Mylk:
1/4 C Cashews
1/4 C Sesame Seeds
1/4 C Flax Seeds
Water

* Grind the nuts and seeds together into a fine powder.
* Add a little water at a time and blend to get a smooth, creamy paste.
* Add more water and blend until you reach the desired consistency.

For the Masala Chai:
3/4 C Water
3 Cloves
1 Cardamom Pod
1/2 inch Cinnamon Stick
1/2 inch Fresh Ginger - crushed
5 Black Pepper Corns - crushed
1/2 to 1 tsp Sugar (optional)
1/2 tsp Tea Powder
1/2 to 3/4 C Nut and Seed Mylk (should not be too thick)

* Boil the spices in the water for a couple of minutes.
* Add sugar at this point and boil.
* Add the tea powder and boil for a few seconds.
* Reduce the heat to low, quickly pour in the mylk and stir.
* Bring to a short boil and turn off the heat.
* Strain and serve hot.
* Enjoy! :)

--

If you attended the demo, I'd love to hear your thoughts about how you liked it and how we can make future events a better experience for you.

Thanks for reading and watching all the videos. When you try out the recipes, do leave a comment here letting me know how you like them. :)

Tuesday, March 19, 2013

Vegan Hazelnut Chocolate Cake and oh so many updates!


I made this deliciously hazelnutty chocolate dessert for my dad's birthday. Thought it would be a great come back recipe to share here after a long hiatus from blogging.

Vegan Hazelnut Chocolate Cake

Before the recipe though, I thought I'd give you a few updates about what's happening with me.

It's been nearly a month since my last blog post and longer than that since my last recipe post. I feel bad to have ignored my blog all these weeks, however, the reason for this is that there are so many interesting things happening in my *real* life that I haven't had much time to be online. :)

VGF

The last I wrote here, I was talking about the VGF event that hubby and I were in the process of organising (with help from my parents and sis) for 24th February 2013. The vegan fair was overwhelmingly successful! :) The response was just wonderfully heartening! People, vegans and non vegans alike, turned up in droves even before we were ready to begin the event.

I had made double dark chocolate chunk walnut orange cookies, cinnamon rolls, pizzas with a chunky herbed tomato sauce and foxtail millet puliyogare to sell at my table. VGF started at 12 noon and by 2:15 pm, my stall had been cleaned out. Haha

It worked out perfectly too because I was scheduled to do a demo on extracting mylk out of peanuts and turning it into curds at 2 pm, so as soon as I ran out of food to sell, I was able to rush to the demo area without having to worry about my stall.

By 4 pm, most tables had sold out their goodies. Even though we'd scheduled the event to be from noon to 7 pm, by 5:30, we'd all started to pack up. :)

It was nice to see have so much support and interest from everyone. Many people even hung around for a few hours just eating and chatting, without being in any rush to leave.

Our friend Sharath captured some beautiful photographs at the event.

VGF - photo by Sharath Ramanna

VGF - photo by Sharath Ramanna

VGF - photo by Sharath Ramanna

VGF - photo by Sharath Ramanna

You can view the whole VGF album on his Facebook page Sharath Ramanna Photography.

The whole VGF experience was so encouraging that we've decided to make it a regular vegan event. Something to have 3-4 times a year. We're also full of ideas to make the next event even *more* interesting and fun for everyone.

Vegan cooking demo

A couple of weeks ago, I was contacted by a person about doing a vegan cooking demo at a local restaurant. I've been in talks with the people involved and planning out the menu and recipes. We're going to have a tasting session later this week and then I'll announce all the details of the event here. :)

More on the Vegan front

Apart from VGF and this demo, I have been busy with one more project that is going to take veganism in Bangalore to a whole new level. Something awesome is going to happen within the next few weeks. I'm not going to give anything away since things are still at the planning stage right now, but I will say that I'm *really* excited about this! You'll just have to wait and see what the big deal is all about. :D

Stuffing my face

Other than being busy hatching plots to turn the world vegan, I've also been getting plump eating at the very first all vegan restaurant that has opened up here in Bangalore. WOOHOO!

Carrots launched a little over a month ago. Even before they were officially open for business, Krishna (whose baby Carrots is), invited us over for a series of food tasting sessions. The chef, Anantha, isn't vegan but he does cook some really delicious plant based fare. It was nice to be involved with the menu creation process, give inputs and share vegan recipes and tips with him.

Now every time I want to eat out with friends, the first place that comes to mind is Carrots. Ah the joys of being spoilt for choice!

I'll do a full feature on the restaurant here on my blog at some point in the near future, but until then, I wanted to mention the place here so I could tell those of you who live in and around Bangalore to definitely visit and enjoy a meal at Carrots. And those who aren't close by, Carrots is a great reason to plan your next holiday at Bangalore. :)

Here are a few pics I clicked of the dishes at Carrots to entice you.

Carrots Vegan Restaurant

Carrots Vegan Restaurant

Carrots Vegan Restaurant

My virtual life

Even though I haven't been updating my blog as regularly as I used to, I have been sharing food related posts via two of my favourite phone apps - Instagram and HowDo.

If you're on Instagram, you can find me @veganosaurus. If you're not, or you're getting over your Instagram app addition, you can still view all my photos on your computer's browser at my online Instagram profile page - Veganosaurus without any need to login.

I'm really enjoying clicking photos on my phone and applying the filters on the app to them. I also regularly share my Instagram pics with my related Facebook pages. The food photos go onto Veganosaurus and the jewellery photos go on to Art by Susmitha.

I have been addicted to HowDo for a while now but ever since they enabled the feature to embed HowDo clips onto websites and blogs, my obsession with the app has reached a whole new level! It's not easy clicking step by step pictures during the process of cooking/baking. For one thing the phone can get quite messy, what with being handled with ingredient covered hands. Regardless, these days, I often have the phone next to me on the kitchen counter so that I can grab pics as I prepare food.

Once the food is ready and I have the final pic, I sit down and record the voice clips (often with additional sounds like the blender running or microwave beeping) and put the HowDo together. I then upload my HowDo tutorial and watch it at least two times with deep satisfaction. I really seem to like the sound of my own voice. Narcissistic much? :P

I recently created a dedicated HowDo section on my blog where you can see all my tutorials in one place. I'm hoping I will update it with more discipline than I do my blog's recipe index. :D

Vegan Hazelnut Chocolate Cake

Now that I've made you read all my updates, I'll finally get to today's recipe. I've created a HowDo tutorial for it. It's a lot more fun to click pics and record instructions by talking rather than typing it all out. I'm sure you'll have more fun watching the clip than reading the recipe.

I'll list out the ingredients for your benefit though.

For the cake:
150 gms hazelnuts
3/4 C cocoa powder
1 C whole wheat flour
3/4 C brown sugar
2 T flax seed powder
1/2 tsp baking soda
1/2 tsp baking powder
1/2 tsp salt
1 T apple cider vinegar
1 C water

For the cream:
100 gms hazelnuts
1 T cocoa powder
2-3 T sugar
pinch of salt
1/4 C water

Procedure:


Enjoy! :)

Monday, August 20, 2012

Healthy Steamed Chocolate Cake - my guest post on Shinsveganlovin


Ooooo what do we have here? It's a ridiculously healthy and incredibly tasty vegan chocolate cake. It has no oil, no white flour and here's the kicker... it's not baked, it's STEAMED! *gasp*

Wanna know what went into it and how my friend Arun (one of the awesome guys behind Samabhava) is responsible for it? Of course you do! :D

Well, you can find all the details in my guest post on my friend Bou Shin's blog - Shin's Vegan Lovin'.

You won't be able to resist trying it out. When you do, come back here and let me know how you like it. I'm sure Arun will be very happy to hear the results.

Arun got the original recipe from another of our vegan friends, Sneha. She is also a great vegan chef and comes up with all kinds of yummy concoctions while experimenting in her kitchen.


The recipe on Bou's blog is a modified version by me with ingredients I had on hand. If you'd like the original recipe that Arun sent me, here it is, directly copy/pasted:

Dry Ingredients:
Whole Wheat Flour: 1.5 cups,
Sugar: 1 cup, (I use white)
Cocoa Powder: 1/3 cup,
Baking Soda: 1 teaspoon (tsp)
Salt: 1/2 tsp

Wet Ingredients:
Apple Sauce: 1/3 cup
Apple Cider Vinegar/Lime Juice: 3 tsp,
Vanilla Flavour/Essence: 1 tsp
Water: 0.8 cup

Put some water in a cooker and allow it to come to a boil.
Grease a container for the cake.
Mix dry and wet ingredients separately well, and then combine them and quickly transfer to the greased container.
Immerse a plate inside the boiling water in the cooker, place the container containing cake mixture inside the cooker, cover it, and allow it to get cooked like idly (don't put weight).
After 30-45 mins, check for done-ness of the cake by inserting a toothpick at the center, and checking if it comes out clean.

Notes:
- We can keep the cooker open after 30 mins or so, if we feel that the mixture is still wet. Opening the cooker will let the steam go, and can reduce the moisture of the cooking environment (but keep cooking).
- Original recipe for oven calls for 1 cup of water, but since there will be a lot of moisture inside cooker, I added less water (convection mode blows dry air; steam is wet and hot).
- Apple sauce: Peel apple (eat skin), chop into fine pieces, add 1/4 volume water, and blend it. If we are using it just for cake, we can use just this juice. If we want sauce, we need to heat the juice in low flame for 10 mins.

Wednesday, May 18, 2011

Vegan Pineapple Pastry


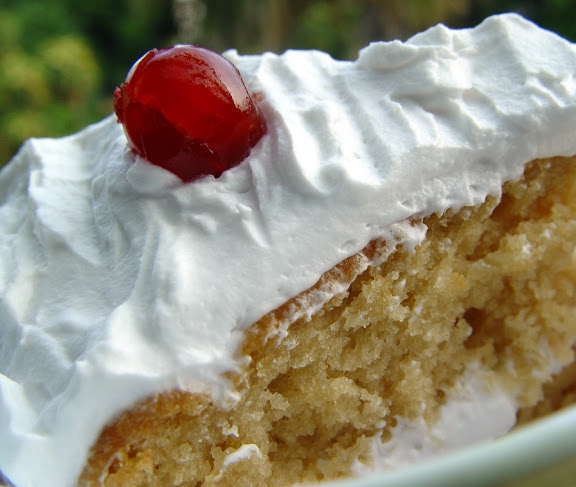
Since my very vanilla cake recipe was such a hit, I thought I'd share the pineapple pastry recipe too. When we say 'pastry' here in India, we refer to a form of extra succulent cake. The main way this decadence is obtained is by dousing the cake with flavored sugar syrup to add moistness. Another thing that makes a pastry what it is, is the inclusion of fresh or canned fruits to enhance the richness of the flavors and textures.

Vegan Pineapple Pastry

1 Basic Yellow Cake made by replacing the pure vanilla extract with 1/2 t of pineapple essence
1 small can of Pineapple Slices in Syrup
Vegan Whipped Cream like Rich's Non-Dairy Whip Topping or Merry Whip

After the cake has cooled completely, slice it horizontally to form two layers.
Place one layer of cake in a large container and pierce randomly with a fork.
Pour half the syrup from the pineapple can over this layer of cake.
Cover with a thin layer of vegan whipped cream.
Spread most of the pineapple pieces over this saving some for the final topping.
Cover with the second layer of cake and pierce it randomly with a fork.
Pour the remaining syrup evenly over this.
Spread vegan whipped cream over the top and sides of the cake and cover it completely.
Place the remaining pineapple slices on top of the cake in an aesthetically appealing way.

Cover the container and place the pineapple pastry in the fridge. Let it sit for at least a day to soak up the syrup and some of the whipped cream. Serve cold and enjoy! :)

Will last for a minimum of one week when stored in a tightly closed container inside the fridge.

Vegan Pineapple Pastry

Note: Pastries and cakes taste more delicious as the days go by. Especially chocolate flavored ones. I personally prefer them most two days after they've been made.

Wednesday, May 11, 2011

Vegan Very Vanilla Cake


Basic Vanilla Cake:

1 3/4 C all purpose flour
2 t arrowroot powder (optional)
1 t baking powder
1 t baking soda
1/4 C brown sugar
3/4 C white sugar
3 t pure vanilla extract
1 t vinegar or lemon juice
5 T oil (canola or sunflower)
1 C cold water

Preheat oven to 180C/350F.

Lightly oil a 9 inch baking pan and keep it aside.

In a large mixing bowl, sieve together the flour, arrowroot powder, baking powder and baking soda about 6-7 times (the more number of times you sieve, the fluffier the cake will be).

Mix the remaining ingredients separately and beat well to dissolve the sugar to some extent.

Pour the wet ingredients over the dry ingredients and whisk together with a few quick strokes just until no lumps remain (too much mixing is not advisable). Pour the cake batter into the baking pan and immediately pop into the preheated oven.

Bake for about 35 minutes. Test by inserting a toothpick into the center of the cake and see if it comes out clean. If so, the cake is done. If not, then bake for a few more minutes.

Remove the pan from the oven and keep it aside. Let the cake cool completely before you remove it from the pan.

This cake is delicious eaten as it is but it can also be enjoyed layered with vegan whipped cream.

Vegan Very Vanilla Cake

Vanilla Cream Cake:

Prepare vegan whip topping by carefully following the directions on the package. Rich's is the most well known brand of non-dairy whip topping in India. I also like to use the Merry Whip brand which is available at the Institute of Baking, Bangalore (these guys also carry another non-dairy brand called Gold Top but stay away from that one because it tastes too artificial essence-y!)

Slice the cooled cake horizontally to form two layers. On a large plate, place the bottom layer. Cover it with some of the whipped cream. Place the top layer over this and cover the whole cake with whipped cream with the help of a spatula.

Chill in the fridge for a couple of hours before serving.

The cake is best stored in a closed container in the fridge. It will last at least a week IF it hasn't been finished well before that. :)

Thursday, December 10, 2009

Oatmeal Peanut Butter Coconut Crumble Cookie-Cake


Oatmeal Peanut Butter Coconut Crumble Cookie-Cake picture 1Made this for my granny's birthday. Since she's a huge peanut butter fan and prefers cookies over cakes, it was a perfect recipe. The inspiration was a no-bake cookie recipe which I modified in various ways to concoct this one. :)

Adjust quantities of all ingredients according to your taste. This is an extremely flexible dish. I made this one extra sweet just for her because she has a predominant sweet tooth. Just remember that the coconut oil tends to bring out the sweetness even more so always start with a lower quantity of sweetner and then increase it if required.

I just threw the ingredients into a bowl by handfuls and container tilts, but I've tried to put down measurements here to give you a general starting point.

Oatmeal Peanut Butter Coconut Crumble Cookie-Cake.


1 1/2 C Oatmeal
2 T Rice Flour
1/2 C Dry Coconut Powder/Flakes
1/2 C Chopped Walnuts
1/4 C Vegan White Chocolate Chips
2 T Coconut Oil
1 large scoop Peanut Butter
3/4 C Sugar

1. Toast the oatmeal in a dry pan for a few minutes by stirring constantly.

2. Put this into a mixing bowl. While it is still hot/warm add the peanut butter, coconut oil and sugar onto it and mix well. This softens the peanut butter and coconut oil helping them to get incorporated well.

3. Finally mix in the rest of the ingredients. Taste and adjust.

4. Put this 'batter' into a microwave safe dish and nuke for about 2-3 minutes. You can skip this step and directly go to step 5 but I liked doing this so the sugar would be slightly caramelized to add an extra crunch.

5. Cool down to room temperature. Press into a desired container/plate and pop into the freezer. Let it set for at least 20 minutes.

6. Meanwhile, get your toppings ready. You can serve the cookie just as is but since I made it for an occasion, I figured it called for a bit of decorating.

For the Topping:

1/4 C Vegan Semi-Sweet Dark Chocolate Chips
2 T Peanut Butter
2 t Tutti-Frutti (or other dried, chopped fruit)

Put the peanut butter and chocolate chips in a microwave safe bowl and nuke for 30 seconds. Stir and put it back in for another 30 seconds if required. Just stirring well now will melt the chocolate chips completely and mix the peanut butter in.

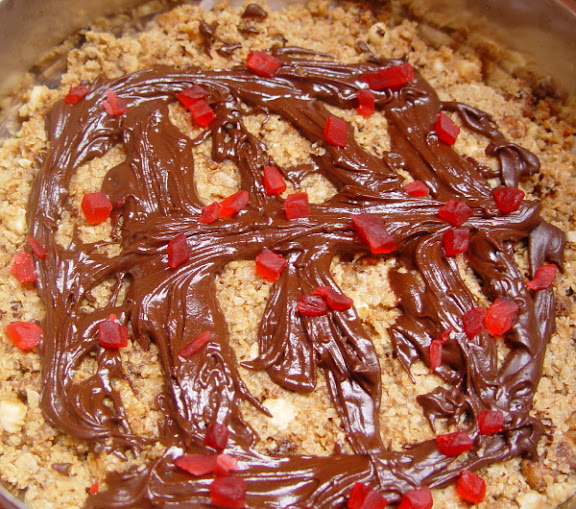
7. Once the cookie is set completely, take it out of the freezer. Decorate it with the melted chocolate (you can pipe it on but I just used a fork and drizzled it on in thick lines) and sprinkle the tutti-frutti over it.

8. Pop it back into the freezer for 10 more minutes for the chocolate to set.

Enjoy! :)

Please do share the variations (vegan only of course :)) you used to make your own in the comments section.

Oatmeal Peanut Butter Coconut Crumble Cookie-Cake picture 2

Monday, March 23, 2009

Espresso Brownies


Even for a tea drinker like me, it feels great to start Sunday morning (if waking up at 11:30 counts as morning) with coffee, especially when I've been Malibu-ed out from Saturday night. Yesterday while glugging down my coffee the thought of Espresso Brownies came floating into my head.

It had been such a long time since I made them. And since we've been drinking filter coffee mostly there was this pile of truly delicious super strong 100% (absolutely no chicory) instant coffee powder sitting around barely used. I just had to make some right away!


Espresso Brownies
Adapted from Jannequin Bennet's Very Vegetarian.

1/2 C very hot espresso or strong coffee (I mixed 2 heaping T of instant Nescafe 100% coffee powder in 1/2 C hot water)
1/3 C cocoa (the Cadbury's baking cocoa powder has a bit of something mmmmm to its flavor)
3/4 C sugar (original recipe calls for 1 C but the slight reduction in quantity of sugar brings out the mocha nuances better)
1 t vanilla extract (use pure extract and not essence if possible)
1/3 C coconut oil (it adds a mild, delicious flavor and goes really well with the coffee and cocoa combination).
1 1/4 C All Purpose Flour
1 t baking powder
1/4 t salt

Preheat the oven to 180 C / 350 F
Grease an 8 inch square baking pan

Seive together flour, baking powder and salt.

Put the coffee, cocoa powder and sugar in a blender (with the whisking blade attachment) and blend thoroughly. Add vanilla and coconut oil and blend again. (Everything can be whisked together with a spoon but I use a blender since it adds more air bubbles to the liquid which gives the brownies a better crumb).

Mix together the wet and dry ingredients in a bowl and stir quickly until just blended. Do not stir too much as over mixing will toughen the brownies. The way you mix decides the outcome so this is a very important step!

Pour the batter into the pan and bake for 35 minutes. And while it bakes, enjoy licking the remaining batter off the mixing bowl (it tastes a bit like Koffee Bite) :)

Let the brownies cool to room temperature before cutting. The way these smell, you'll want to dig into them right out of the oven but please be patient because cutting into the brownies while they're hot will spoil them.

These are really quick and easy to make and depending on how strong the coffee is they pack a lot of kick.

Friday, February 15, 2008

Couscous Mousse Cake (Vegan)


It all stared with me buying a box of Couscous at the grocery store. I thought cooking with it would be just about the same as making pasta. No recipes. Just experiment. Bay was I about to find out otherwise!

I fist made a delicious pesto with green peppers and tomatoes. It was bursting with the flavors of garlic, herbs and olive oil. So far so good. Then I followed the instructions on the box and cooked the couscous as recommended. The texture came out right I guess. THEN I made the mistake of mixing the two! Gawd that was awful!! For some reason any kind of regular pasta sauce doesn't go well with couscous at all. Fortunately, I had prepared only a small amount of couscous. So I just stuffed my guinea pig aka husband with the mixture and dropped the matter.
(Had to dangle my special Vegan Chocolate Chip Walnut Cookie so he'd finish up dinner fast heheh)

Since the experimenting hadn't worked out as planned I decided to consult my favorite vegan site for a couscous recipe. That's when I came across this delicious dessert! Who would've thunk that desserts could be made out of pasta? And such a mouth watering one at that!!

What more, it's decadence completely masks it's ease of preparation :)

Of course, with my inclination to experiment, I tweaked the recipe a bit to suit my tastes.

Couscous Mousse Cake (Vegan)
(adapted from the original recipe Chocolate Cream Cous Cous Cake)

      Couscous Layer

    • 1 1/2 cups water
    • 3/4 cup sucanat/brown sugar (1/2 cup if using sweetened cocoa like I do)
    • 1/4 cup cocoa (preferably Dutch processed, my favorite is )
    • 2/3 cup couscous
    • 1 T vanilla

      Chocolate Mousse Layer

    • 1 cup dairy-free chocolate chips
    • 3 T sugar/maple syrup/date syrup
    • 1 boxes firm silken tofu
    • 2 T soy milk
    • 1 t vanilla
    • 1 T rum (more if you like:) )

In a medium saucepan combine water, cocoa, sugar and couscous. Bring to a simmer, stirring occasionally and cook until thickened (10 to 15 minutes). Remove from stove. Add vanilla and stir. Spread mixture into spring form pan (I just use a 6" square box) and press it down.

Melt chocolate chips in a double boiler. If unavailable, add water to a saucepan and place a metal bowl over the steam to create a homemade version. (Melting chocolate directly over an electric stove or microwaving it will not work-the chocolate will crystalize).

Blend tofu, soymilk, sugar, rum and vanilla till the mixture is smooth. Take a scoop full out and keep aside. Add the melted chocolate to the mixture in the blender and blend again till it's all thoroughly blended. Pour evenly over couscous. Put the scooped out 'white mousse' over this and spread gently, then swirl lightly with a spoon (or your finger) in a circular motion to marble the chocolate and white mousses.

Refrigerate for at least 2 hours to give it time to set and chill. I usually make this a day in advance and hide it in some corner of the fridge. I love how this tastes after sitting in there for a whole day. Serve cold.