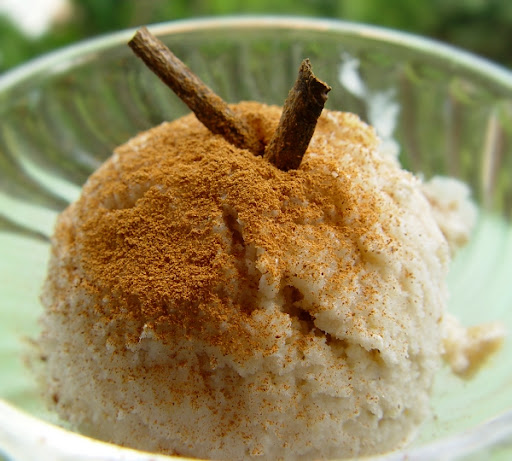
Showing posts with label Ice Creams. Show all posts
Wednesday, October 01, 2014
Tiramisu Ice Cream - Vegan MoFo 2014 Day 6
It's the last day of Vegan MoFo. I can't believe I'm sharing recipe number six! I'm not sure if I should be surprised that I created only 6 ice creams or that I even managed to create that many at all. Ha!
I made this Tiramisu Ice Cream at Carrots a few weeks ago and it was quite a hit among everyone who tried it out. I've used our famous Almond Jowar cookies in the recipe. At the end of the post, I've shared a video of Ram and me making the cookies. They're really easy to make and super yum!
You're welcome to switch the cookies out with your favourite vegan cookies or biscuits too.
Tiramisu Ice Cream
100 g Cashews
80 g Sugar
500 g Water
500 g Strong Black Coffee
100 g Vegan Whipped Cream
6 Almond Jowar Cookies (recipe video follows)
For the garnish:
Almond Jowar Cookies
Melted Dark Chocolate mixed with a splash of Soy Mylk
- Grind the cashews into a fine powder
- Add the sugar and coffee and blend to a creamy consistency
- Pour in the water and blend well
- Add the vegan whipped cream and blend until it's incorporated
- Pour into an airtight container and freeze for 8-10 hours
- Transfer to mixer jar and blend the frozen mixture once again
- Stir in crumbled cookies and re-freeze for 8-10 hours
- Scoop onto a plate and top with melted dark chocolate
- Crumble a cookie over the ice cream
- Serve and enjoy! :)
Here's the recipe for our Almond Jowar Cookies:
ENJOY! :)
Labels:
Cookies & Biscuits,
Demo Videos,
Desserts,
Ice Creams
Friday, September 12, 2014
Boozy Raisin Ice Cream and Giveaway - Vegan MoFo 2014 Day 5
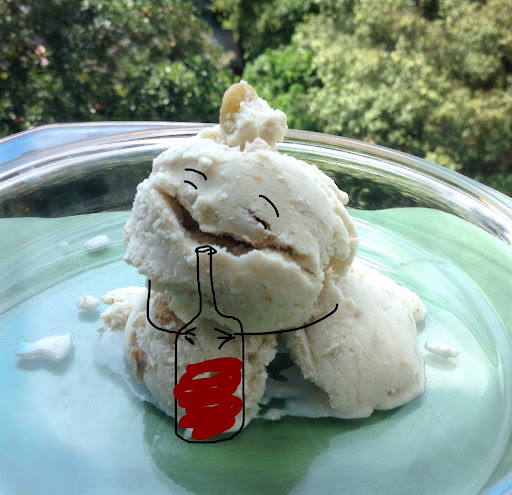
I started out with the idea of making the classic Rum and Raisin Ice Cream, but just when I had all the base ingredients blended and poured into the ice cream maker, I realised that we'd run out of rum! So I grabbed the bottle of brandy that was at hand and decided to make a Boozy Raisin Ice Cream instead.
Before I move on to the recipe, I'd like to share that the good folks at Vegan MoFo are running a giveaway of one of my creations. Click on the pic below to enter to win my Vegan Superstar Handmade Pendant. :)
The pendant above will be shipped worldwide. I have a more localised giveaway coming up next week right here on my blog. It may or may not involve vegan ice creams. :D Keep an eye out.
Now on to today's recipe...
Boozy Raisin Ice Cream
100 g Cashews
100 g Raisins soaked in 100 g Water
100 g Merry Whip Non-Dairy Cream
50 g Sugar
500 ml Cold Water
50 ml Brandy
- Place an airtight container in the freezer to chill
- Soak raisins in water for 2-4 hours in the fridge
- Grind the cashews to a fine powder
- Set aside a handful of the soaked raisins
- Add the remaining raisins, along with the soaking water and blend to a creamy paste
- Add the cold water and sugar and blend well
- Freeze in an ice cream maker according to instructions
- In the last few minutes of the freezing process, pour in the brandy
- Transfer the ice cream to the chilled container and stir in the raisins that had been set aside
- Place in the freezer for 1-2 hours
- Scoop and enjoy! *hic*
Labels:
Desserts,
Ice Creams
Wednesday, September 10, 2014
Spicy Peanut Sauce Ice Cream - Vegan MoFo 2014 Day 4
Ack! It's the 10th already and I'm still on my 4th post. I have a lot of catching up to do.
When I decided to do the Ice Cream theme for Vegan MoFo this time, I knew I'd be experimenting with atleast a few "weird" flavours. I mean, where's the fun in just making predictable, sweet ice creams and leaving it at that? :P
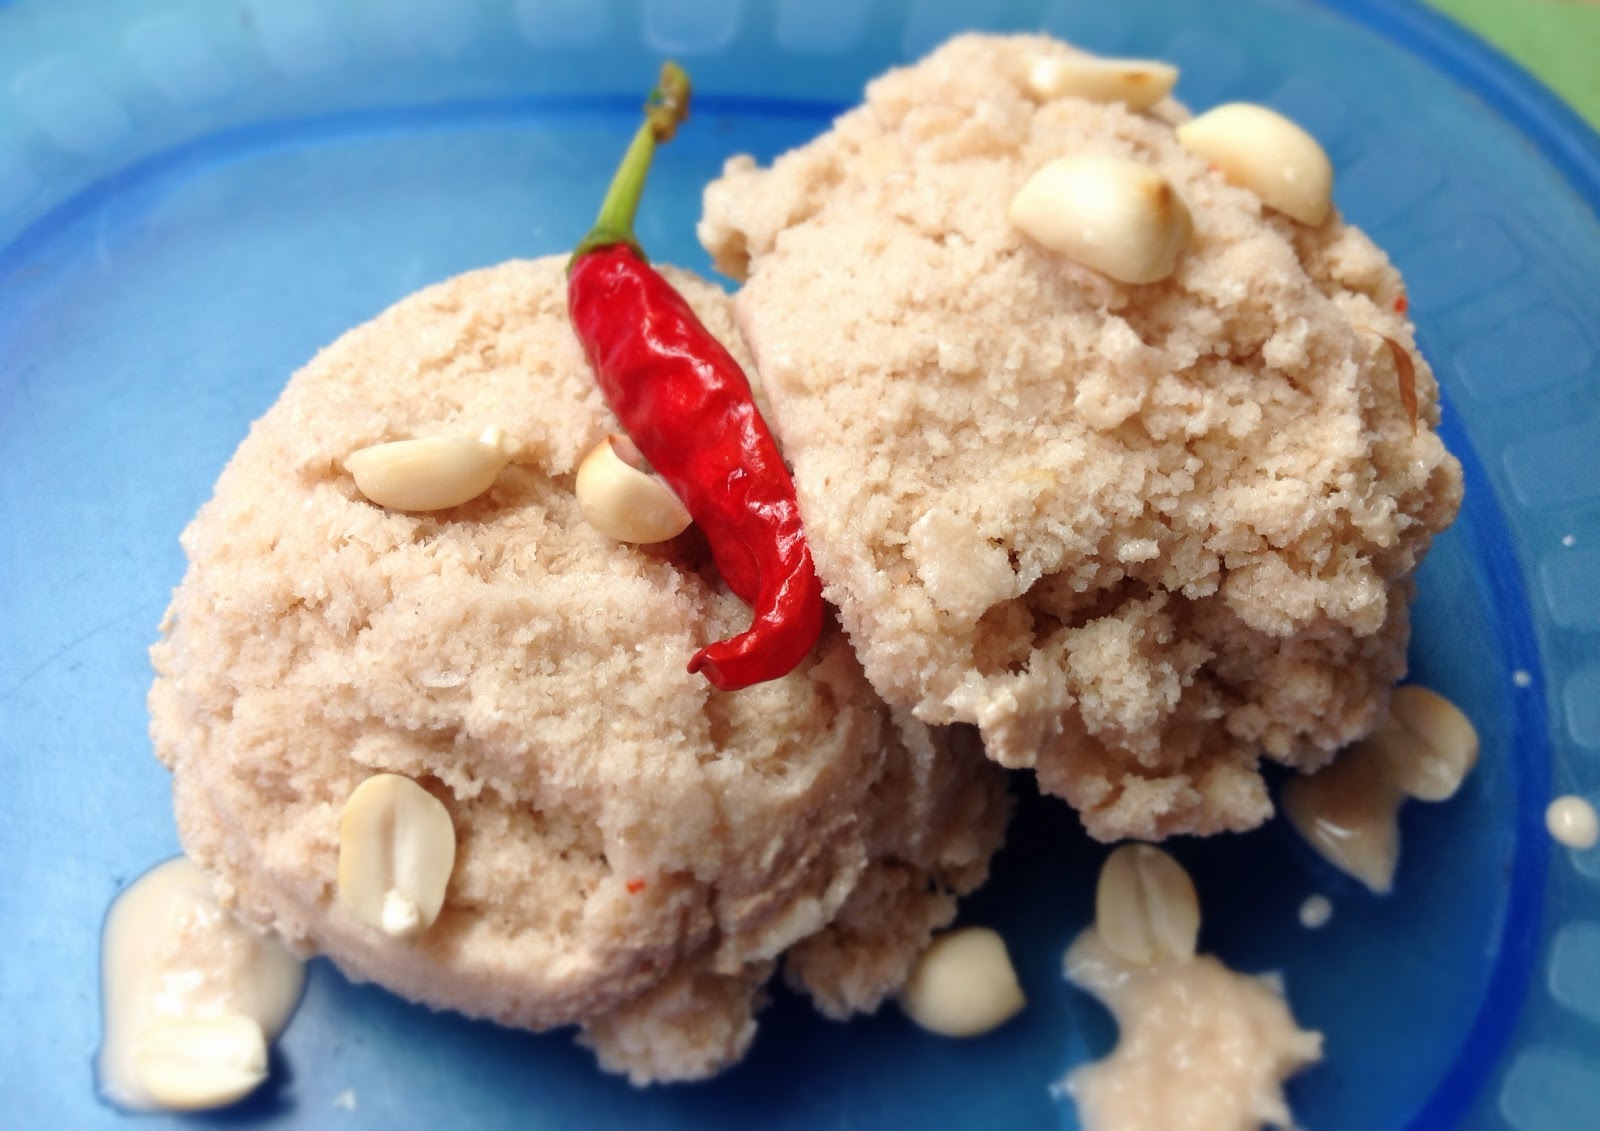
So on Sunday I put together a crazy combination of peanuts, chillies, garlic, jaggery and tamarind and turned it into ice cream. It's sweet, spicy, tangy and meant for the adventurous soul. Dudes and dudettes, I present the...
Spicy Peanut Sauce Ice Cream!!! :D
Spicy peanut sauce is the *best* dip in the whole wide world. I can never get enough of it!!! So it just made sense that my first savoury ice cream was based on it. :)
This ice cream is on the crunchy, icy side but the texture suits the flavours well. It is super easy to make too.
I've used just two chillies because the ones I grow in my Veganic Terrace Garden are super spicy. You can adjust the quantity depending on the kind of chillies you get your hands on.
Spicy Peanut Sauce Ice Cream!!!
100 g Peanuts
100 g Jaggery
1/2 t Salt
1/2 t Tamarind Paste
2 Chillies
4 Garlic Cloves
1 ltr Water
- Toast the peanuts and let them cool
- Grind all the ingredients together into a creamy paste, with a little water
- Add the remaining water and blend well
- Freeze according to your ice cream maker's instructions
- Blend again
- Refreeze for another 8-10 hours
- Scoop and enjoy! :)
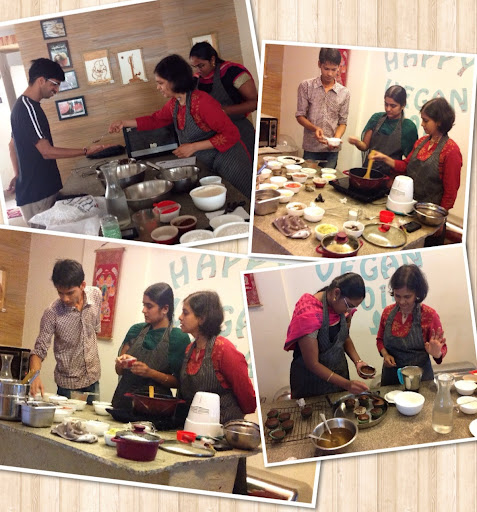
Before I signed off last Wednesday, I promised you pictures from my baking and cooking workshops at Carrots. Here they are...
On Thursday, 4th September I first had a Decadent Cakes baking class, followed by a session on cooking an Oil-Free Healthy Indian Meal:
On Friday, 5th September I had a workshop on Sweet Soulful Breads:
I love teaching and I find that I'm always in my element during my classes. I'm so grateful that I now have a beautiful space like Carrots to conduct these workshops. I don't have to be stressed out about the prep work. All I need to do is hand over a list of ingredients and my boys from the kitchen set things up perfectly for the class!
And having the service guys from downstairs nearby through the sessions is very helpful too. Anything I might need gets brought to me in a matter of minutes. At the end of a lengthy session of standing and talking, I'm about ready to crash. It's a huge blessing to be able to just sit down and relax while the clean-up gets done by my helpful team mates. :)
I'm looking forward to doing more and more of these one-on-one workshops and some group demos too. If you'd like to attend one of my Vegan Kitchen Ninja Series workshops, check out the list of classes here and schedule your private session.
I'll leave you now with a bonus recipe video that we shot at Carrots on Thursday. Here, Gokul and I show you how to make a quick, easy, healthy, oil-free Coconut Mint Rice. Enjoy! :)
When I decided to do the Ice Cream theme for Vegan MoFo this time, I knew I'd be experimenting with atleast a few "weird" flavours. I mean, where's the fun in just making predictable, sweet ice creams and leaving it at that? :P
So on Sunday I put together a crazy combination of peanuts, chillies, garlic, jaggery and tamarind and turned it into ice cream. It's sweet, spicy, tangy and meant for the adventurous soul. Dudes and dudettes, I present the...
Spicy Peanut Sauce Ice Cream!!! :D
Spicy peanut sauce is the *best* dip in the whole wide world. I can never get enough of it!!! So it just made sense that my first savoury ice cream was based on it. :)
This ice cream is on the crunchy, icy side but the texture suits the flavours well. It is super easy to make too.
I've used just two chillies because the ones I grow in my Veganic Terrace Garden are super spicy. You can adjust the quantity depending on the kind of chillies you get your hands on.
Spicy Peanut Sauce Ice Cream!!!
100 g Peanuts
100 g Jaggery
1/2 t Salt
1/2 t Tamarind Paste
2 Chillies
4 Garlic Cloves
1 ltr Water
- Toast the peanuts and let them cool
- Grind all the ingredients together into a creamy paste, with a little water
- Add the remaining water and blend well
- Freeze according to your ice cream maker's instructions
OR
- Transfer to airtight box and freeze for 8-10 hours- Blend again
- Refreeze for another 8-10 hours
- Scoop and enjoy! :)
Before I signed off last Wednesday, I promised you pictures from my baking and cooking workshops at Carrots. Here they are...
On Thursday, 4th September I first had a Decadent Cakes baking class, followed by a session on cooking an Oil-Free Healthy Indian Meal:
On Friday, 5th September I had a workshop on Sweet Soulful Breads:
I love teaching and I find that I'm always in my element during my classes. I'm so grateful that I now have a beautiful space like Carrots to conduct these workshops. I don't have to be stressed out about the prep work. All I need to do is hand over a list of ingredients and my boys from the kitchen set things up perfectly for the class!
And having the service guys from downstairs nearby through the sessions is very helpful too. Anything I might need gets brought to me in a matter of minutes. At the end of a lengthy session of standing and talking, I'm about ready to crash. It's a huge blessing to be able to just sit down and relax while the clean-up gets done by my helpful team mates. :)
I'm looking forward to doing more and more of these one-on-one workshops and some group demos too. If you'd like to attend one of my Vegan Kitchen Ninja Series workshops, check out the list of classes here and schedule your private session.
I'll leave you now with a bonus recipe video that we shot at Carrots on Thursday. Here, Gokul and I show you how to make a quick, easy, healthy, oil-free Coconut Mint Rice. Enjoy! :)
Labels:
Demo Videos,
Desserts,
Ice Creams,
South Indian Cuisine
Wednesday, September 03, 2014
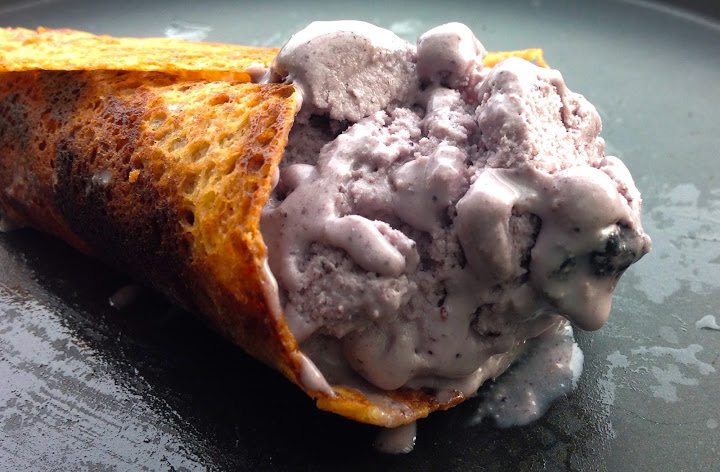
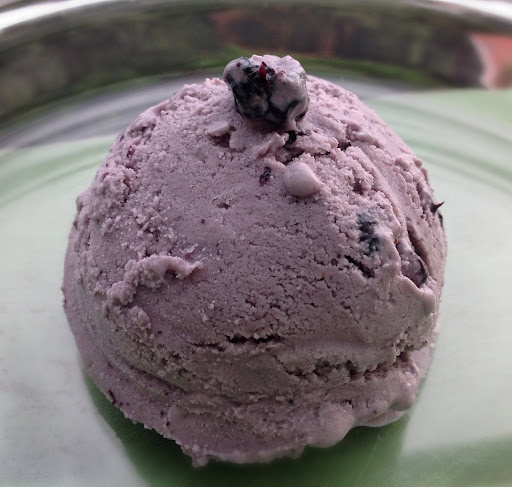
Blueberry Ice Cream - Vegan MoFo 2014 Day 3
After making the first two ice creams for Vegan MoFo at Carrots, today I decided to make some at home because my Ice Cream Monster wanted a whole batch of ice cream just for himself! :p
I started the day by digging around in the kitchen to see what ingredients I could use in today's recipe and was delighted to find a long forgotten pack of dried blueberries at the bottom of the dry fruits drawer in the fridge. I'd purchased them a while ago from Manak Mewa (just off Commercial Street). Those people have all kinds of awesome dried fruits and nuts...local, exotic, what have you! And their prices are pretty decent too.
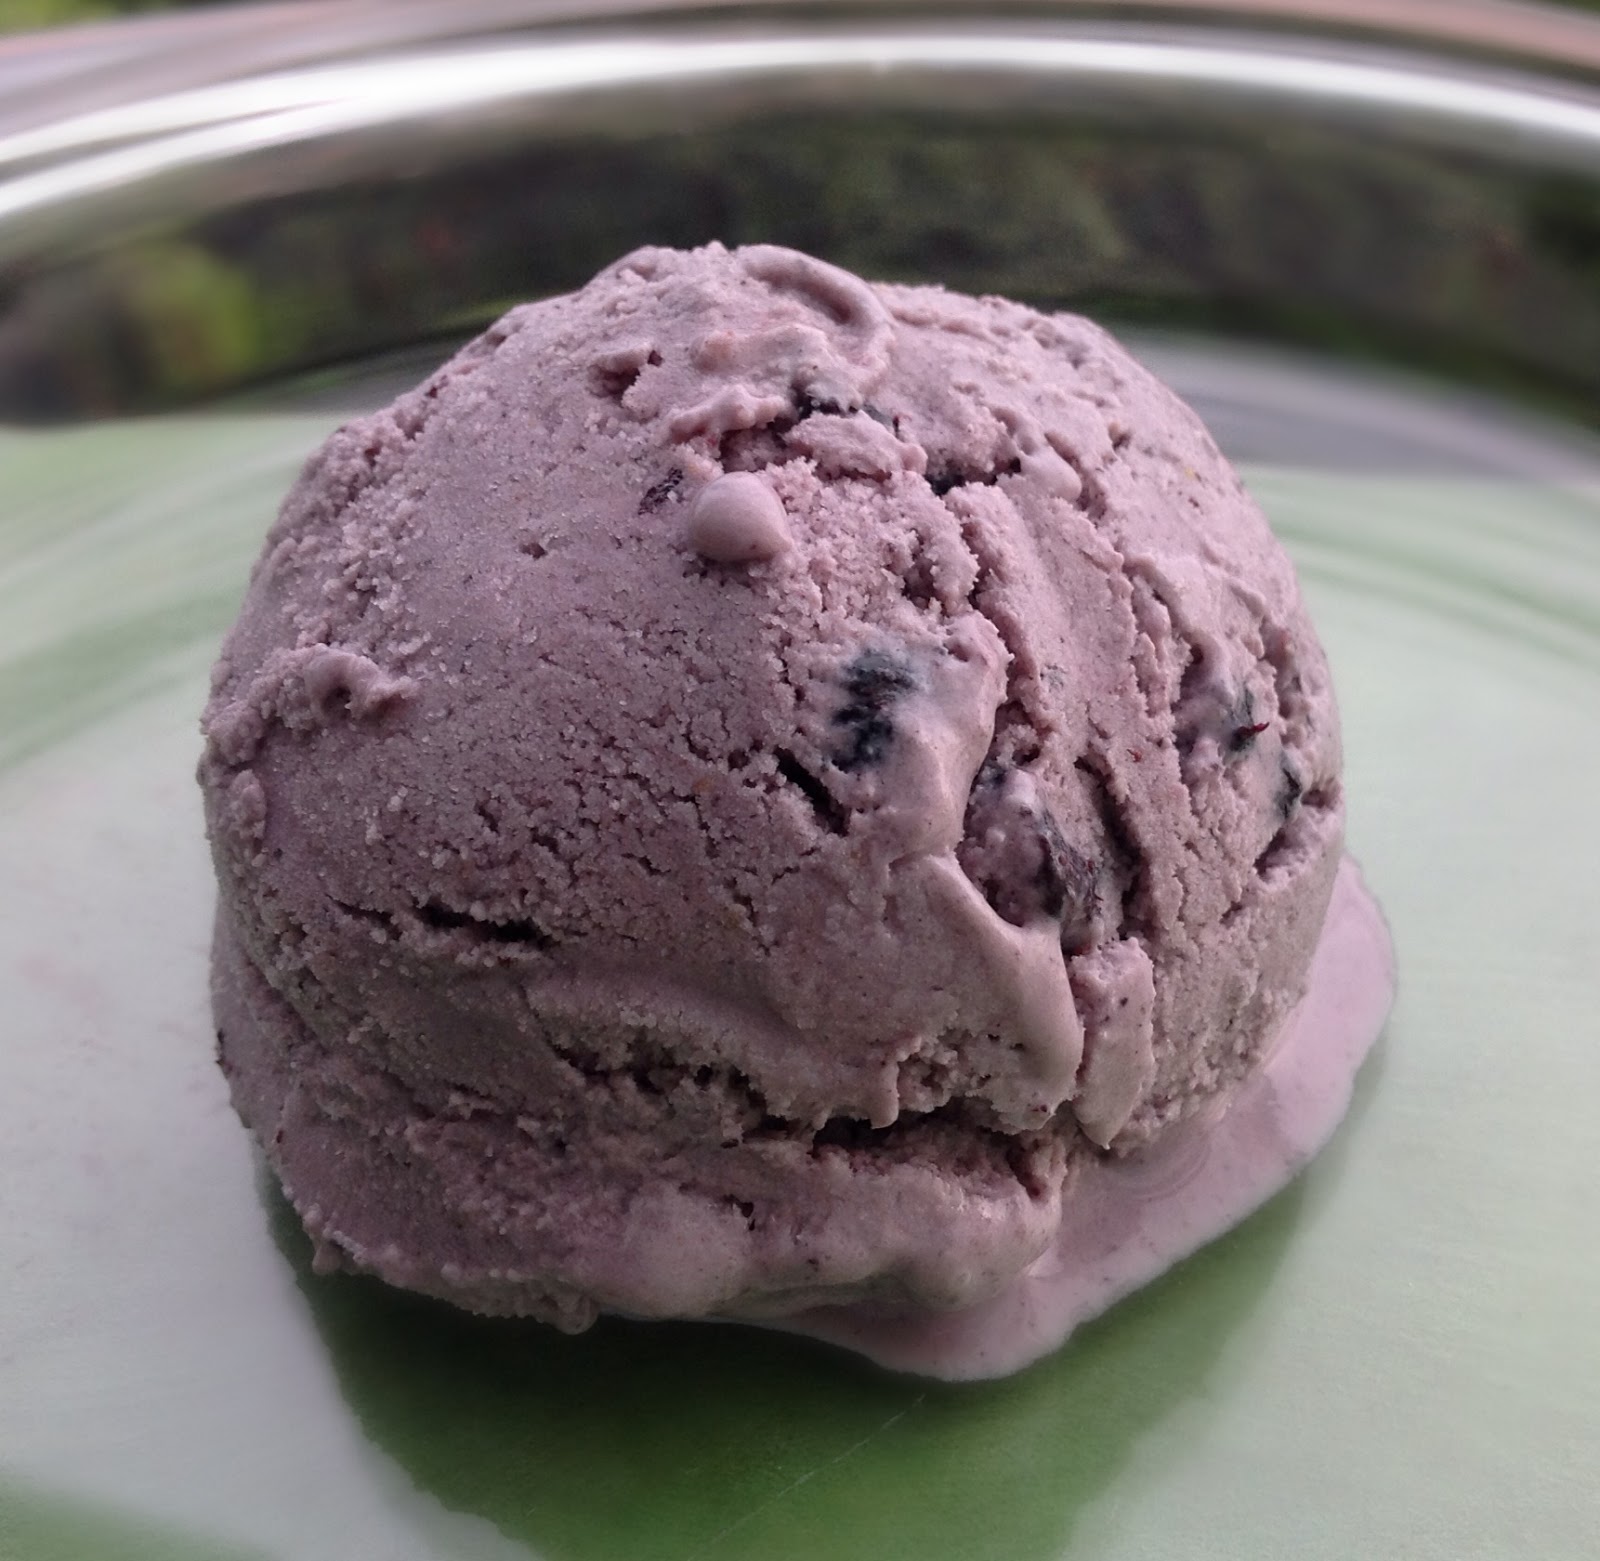
I decided to make plain blueberry ice cream. Turned out to be a great decision! Pure blueberry goodness with no other flavours getting in the way. It's a really simple 5 ingredient recipe (well, 6 if you count the pinch of salt). You can blend up the mix really fast and it's ready to be frozen.
I made this one with an ice cream maker. Turned out a lot creamier and quicker this way. But you can use the freeze-blend-freeze method to make it too.
On a side note, shouldn't blueberries actually be called purpleberries? Just look at the gorgeous colour!
Before I move on to the recipe, I wanted to give a quick shout out to RandoMoFo - the bestest way to blog hop throughout the Vegan Month of Food! Take him for a ride and you'll see what I mean.
I won't be blogging tomorrow or the day after because I'm swamped with a bunch of Vegan Kitchen Ninja Classes on both days. I'm really looking forward to teaching cooking and baking, and there's a lot of prep work to do. I'll be back here at some point over the weekend with pictures from the classes. And more ice cream recipes of course. :)
Blueberry Ice Cream
100 g Cashews
100 g Vegan Whipped Cream (Rich's or Merry Whip)
50 g + 50 g Dried Blueberries
50 g Sugar
500 g Cold Water
Pinch of Salt
- Grind the cashews and half the blueberries into a fine powder
- Add the sugar, salt and a bit of water and blend to form a creamy paste
- Pour in the remaining water and blend well
- Now add the whipped cream and blend on low speed for a few minutes
- Your ice cream base mixture is ready
- Freeze this in your ice cream maker according to the instructions
- Transfer to an airtight box and stir in the remaining blueberries
- Freeze for another hour or two
- Scoop and enjoy! :)
Labels:
Desserts,
Ice Creams
Tuesday, September 02, 2014
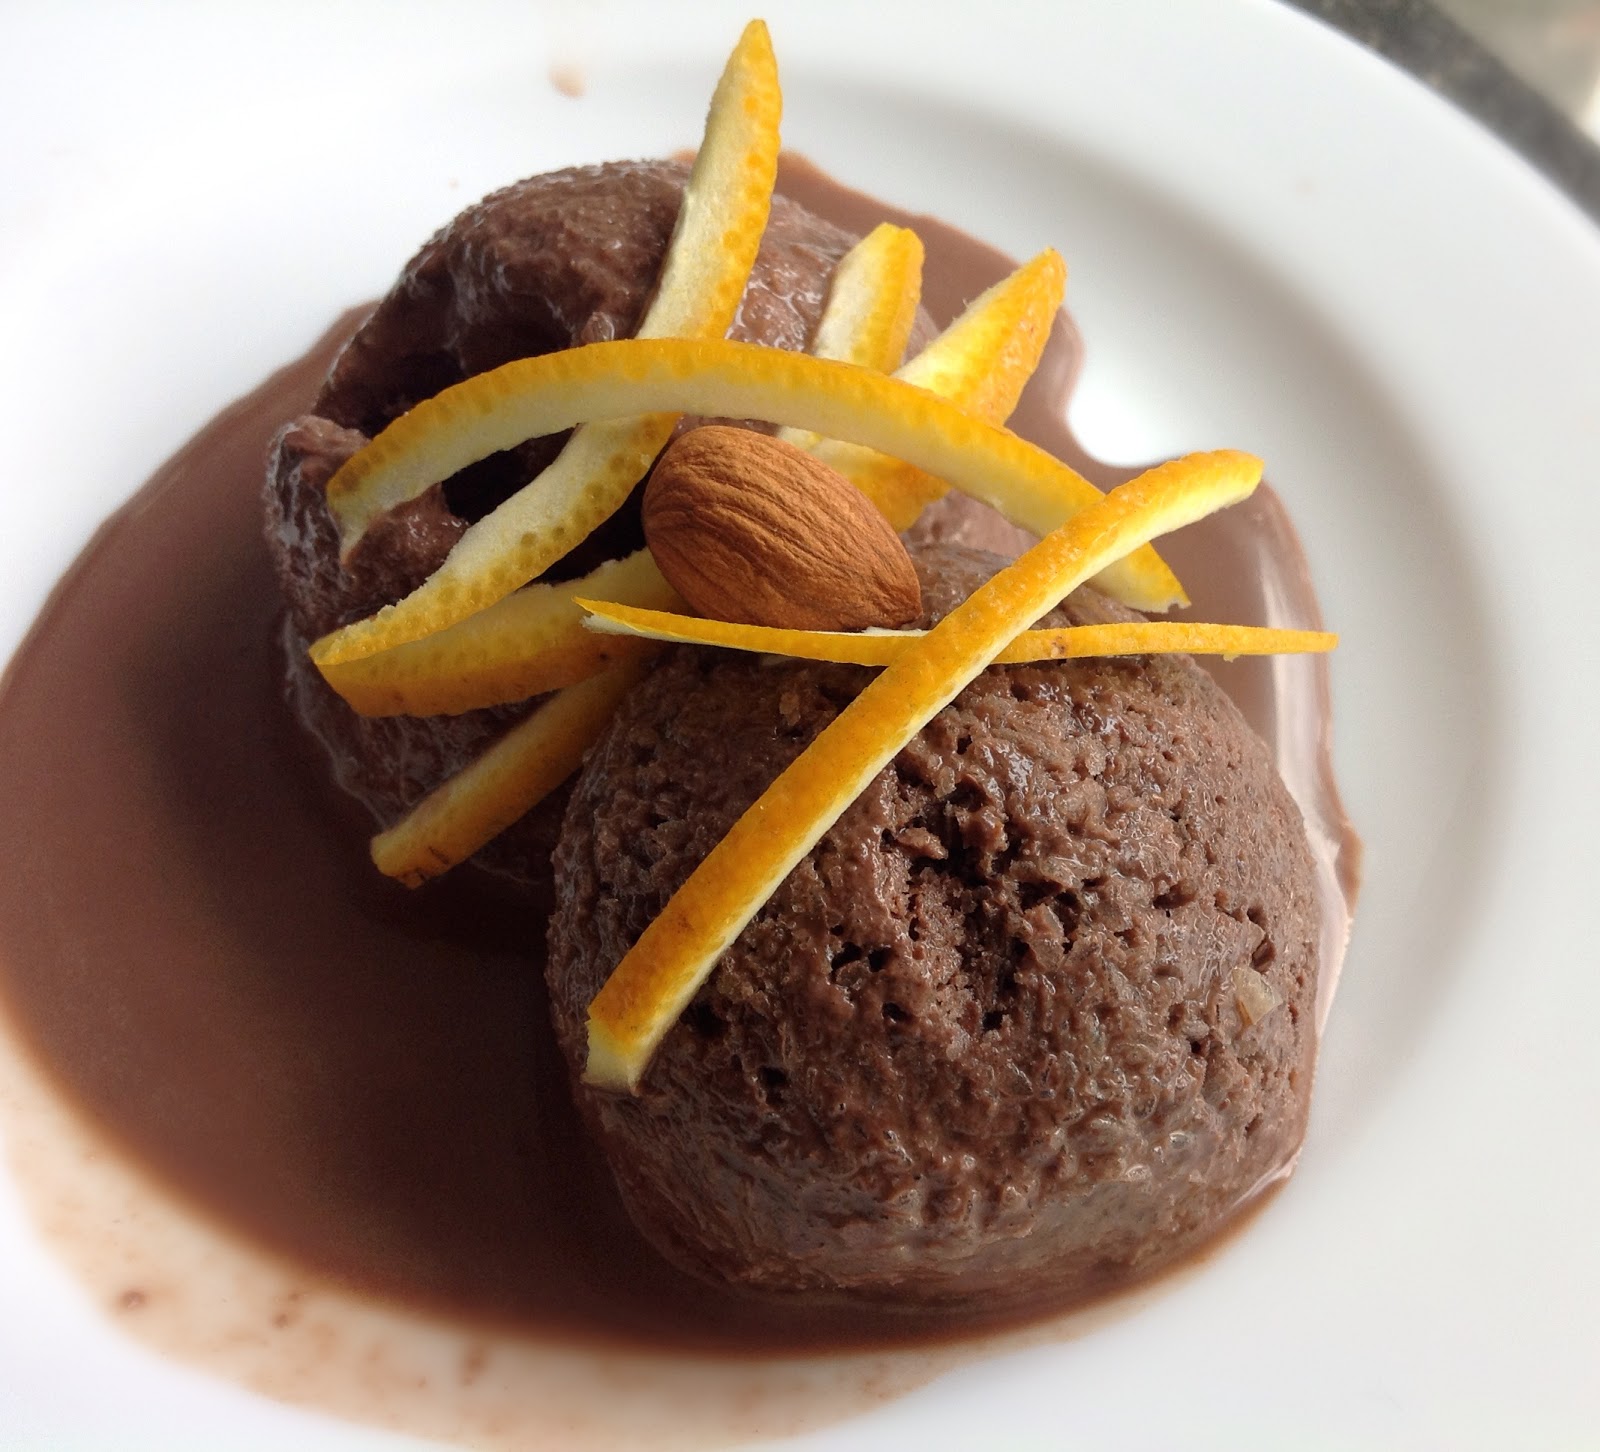
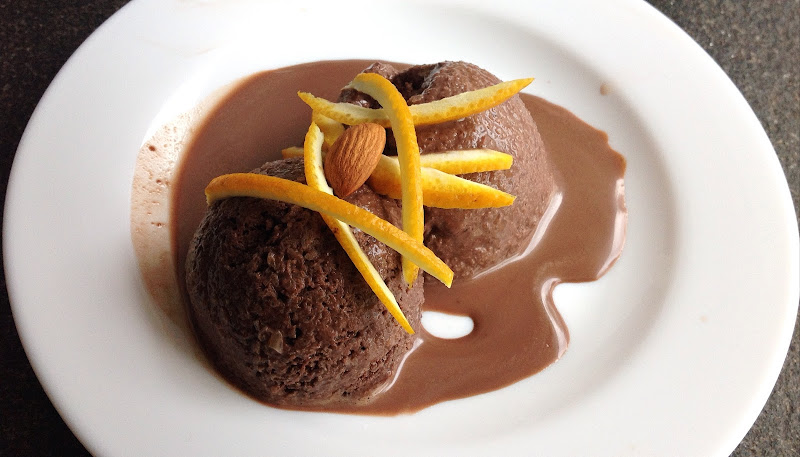
Almond Orange Chocolate Ice Cream - Vegan MoFo 2014 Day 2
I'm a big fan of the orange-chocolate combination. When I started making vegan chocolates at home many years ago, one of the first things I tried was to put dried orange peel powder in the melted chocolate and I fell in love with the way the flavours melded together.
Recently a friend of ours brought us a box of gourmet chocolate covered candied orange peels. One bite and I knew I just *had* to try my hand at making them.
So I made orange peel candy at Carrots. Thanks to Mohan who expertly sliced the peels into strips of just the right thickness for me, the end result was fantastic! But by the time the candy had cooled down, I'd decided to put them into an ice cream instead of dipping them in tempered chocolate.
And so we come to today's recipe...
Almond Orange Chocolate Ice Cream
100 g Almonds
50 g Soymilk Powder
300 g Pure Orange Juice (juice of about 3 oranges with no water added)
30 g Cocoa Powder
100 g Sugar
550 g water
Pinch of Salt
200 g Chopped Candied Orange Peels (recipe follows)
- Grind the almonds and sugar into a fine powder
- Add the soymilk powder, cocoa powder and salt
- Add a little water at a time and blend into a creamy paste
- Blend in the remaining water
- If you have an ice cream maker, turn this mixture into ice cream according to the machine's instructions and stir in the candied orange peels
- If you don't have an ice cream maker then transfer the mixture to an airtight container and freeze for 8-10 hours
- Re-blend the mixture
- Stir in the candied orange peels and refreeze for 8-10 hours
- Scoop and enjoy! :)
For the Candied Orange Peels:
Peel of 3 Oranges
220 g Sugar
220 g Water
- Slice oranges into thin strips
- Place sugar and water in a *heavy bottomed* saucepan
- Heat until sugar has dissolved
- Stir in the orange peels and cook on a medium flame, stirring once in a while
- The peels should be ready in about 15-20 minutes
- Transfer to a plate immediately
- After they've cooled slightly, gently separate them
- Cool completely and store in an airtight container
Labels:
Desserts,
Ice Creams
Monday, September 01, 2014
Vanilla Tahini Ice Cream - Vegan MoFo 2014 Day 1
Woot!!! Vegan Month of Food 2014 has begun! :)
This is my 4th time participating in MoFo. Even though there's a lot going on in my life this time around, I couldn't help but sign up for the event yet again because I've really enjoyed it each and every year! Blogging on an almost daily basis is one part of the excitement, but also visiting the various participating blogs, drooling over the delicious foods and interacting with my fellow MoFo-ers is a truly delightful experience.
For Vegan MoFo 2013 I had chosen a Raw Foods theme. I created and shared a bunch of video tutorials using an app called HowDo and they were a big hit. Unfortunately HowDo closed. :( I'm going to miss that app terribly this year. But once the Vlogging bug has bitten, it's hard to let go. So I plan to shoot at least a few YouTube videos through MoFo this time around.
My theme for this time is ICE CREAMS!!! :D I'm expanding that to include other frozen desserts too so there's a lot more variety.
Today's recipe is a Vanilla Tahini Ice Cream. I made it at Carrots as soon as I signed up for MoFo. Everyone who tried it absolutely loved it. So now our bakery chef Kanchan makes it often. :)
This ice cream does not require an ice cream maker (but if you have one then feel free to use it). It melts quickly and has a light, soothing feel to it. The roasted sesame and pure vanilla flavours go together beautifully.
I've used Merry Whip (commercially available non-dairy whipping cream) in this ice cream. But if you'd like to avoid this, you could use whipped coconut cream in it if you like. However, it might takeaway from the flavour a bit.
I've also used whole vanilla pods as the flavouring because I can't stand the artificial vanilla essence that's available locally. Besides, we don't use any artificial colours or flavours at Carrots so I couldn't have used it in this recipe anyways.
Getting good, pure vanilla extract that's vegan isn't easy here. But if you have the patience and inclination, you could make your own extract at home by putting chopped vanilla beans into rum or vodka for about 6 months. I have tried this at home (again, not at Carrots because we're an alcohol-free restaurant) but compared to that, I am in *love* with the depth of flavour and texture that whole vanilla beans give. So I recommend using them.
Vanilla Tahini Ice Cream
40 g Cashews
20 g Toasted Sesame Seeds
150 g Commercial Vegan Whipped Cream (Rich's or Merry Whip)
1.5 pods Whole Vanilla Beans
200 g Sugar
1 litre Water
- Grind cashews, sesame seeds and broken vanilla pods into a fine powder
- Add a little water at a time and blend into a creamy paste
- Add the remaining water, sugar and whipped cream and blend well
- Freeze in an airtight box for 8-10 hours
- Re-blend this icy mixture
- Freeze again for 8-10 hours
- Scoop and enjoy! :)
Labels:
Desserts,
Ice Creams
Tuesday, September 03, 2013
Fruit Sweetened Almond Mylk Ice Cream - Vegan MoFo 2013 Day 3
Into the third day of Vegan MoFo. For the past two days, I've been suspended in a state of perpetual hunger. Oh how the grumbling in my tummy competed with the rumbling in the skies! Yeah, the weather we've had here for the past two evenings has been matching the exact parallel I wanted to draw for you to describe my tummy sounds. :oP
For the first two days I made the terrible mistake of visiting fellow MoFo bloggers' spaces first thing in the morning, before breakfast. Today I've become smarter. My blog hopping has begun right after a heavy, filling brunch. And I've additionally equipped myself with cherry tomatoes and bourbon biscuits to pop into my mouth at the very first signs of any cravings.
So phooo, you evil Buffalo Tempeh Wraps and Sourdough Gingerbread, you don't have any power over me! Ain't no Vegan Mac and Cheese or Apple and Blackberry Pie gonna give me the munchies. Humph!
*Pops a tomato into mouth* *munch* *munch* *munch*
Today I have my *first* raw dessert recipe for the month. Yes, of course there will be more desserts! Whose blog do you think you're visiting? :D
This is an ice cream made with a base of thick almond mylk and soaked dry fruits. Raw ice creams tend to be lighter and therefore a tiny bit on the icy side rather than smooth and creamy like their cooked counterparts. But they are super delicious, not to mention easy to make and bursting with all the nutrients of the nuts and fruits. So you can have the whole batch of ice cream in one sitting with absolutely no guilt. :)
To make thick almond mylk, follow the steps in this Almond Mylk tutorial. Except, start with 1 C of dry almonds and after they've been soaked and rinsed, blend them with only 3 cups of clean, filtered water (usually the almond to water ratio is 1:6 to make regular almond mylk).
Fruit Sweetened Almond Mylk Ice Cream
4 C Thick Almond Mylk
25-30 Seedless Dates
1/4 C Raisins
Pinch of Salt
* Soak the dates and raisins in clean, filtered water overnight.
* Blend the soaked dates and raisins with their soaking water.
* Pour in the thick almond mylk, add a pinch of salt and blend well.
* Cover and chill in the fridge for a day.
* If you have an ice cream maker, follow the instructions provided in the manual and freeze the chilled almond mixture in it.
* Then pour into an airtight jar and freeze for two more hours before serving.
* If you don't have an ice cream maker, then freeze the chilled almond mixture in an airtight jar for an hour.
* Transfer to a blender and blend well.
* Freeze for another hour.
* Blend once again.
* Follow this freeze-blend-freeze procedure four to five times.
* After the final blend, freeze for two hours and serve.
* You can drizzle agave nectar or jaggery syrup (not raw but soooo yummy) over the ice cream if you like.
* Enjoy! :)
--
By the way, Happy First Annual International Day of Kale! If I had access to Kale, I'd have definitely created a recipe with it for today but since I don't (yet), here's a photo of the first baby kale plant that's sprouted in my kitchen garden right now. Isn't she a cutie pie? :) I can't wait to have fresh, organic kale leaves to harvest soon!
Have a wonderful day! :) I'm off to visit more Vegan MoFo blogs now.
Labels:
Desserts,
Ice Creams,
Raw Food
Tuesday, October 02, 2012
Raw Fig and Cinnamon Ice Cream Vegan MoFo day 2
Continuing in this week's desserts theme for Vegan MoFo 2012, I have a raw Fig and Cinnamon ice cream that I made with home made Almond-Coconut Mylk. I found the sweetness of the figs to be enough but if you like, you could add a bit of sugar to make it more sweet. It won't be completely raw in that case, but hey, mostly raw is great too.
Dessicated coconut powder is made out of dried coconut but it might have been exposed to a some heat in the grinding process. So if you're particular about keeping it a 100% raw, then just start with whole dry coconut/copra and grate it at home. You can also use fresh, grated coconut to make coconut mylk but that will change the taste and texture a bit.
Since the ice cream has no added oils and also because it isn't cooked, the texture is slightly icy, as opposed to smooth. I really like it that way because it has a more natural feel to it. Needless to say, it's also very healthy and you can indulge in multiple scoops and feel good about it too. :)
1 1/2 C Dry Figs
1 C Almonds
1 C Dessicated Coconut Powder
1 T Cinnamon Powder
2-3 T Sugar (optional)
A pinch of Salt
4 C Filtered Water + 2 C to soak Figs
Wash and soak the figs overnight in 2 C of clean, filtered water.
Wash and soak the almonds over night. In the morning drain them and rise well (throw away the soaking water).
Place soaked almonds and coconut powder with a pinch of salt in a blender jar and grind for a few minutes.
Add 4 C of filtered water (a little at a time) and blend well.
Keep aside for 10-15 minutes.
Place a thin cloth over a large vessel and strain the almond-coconut mylk through it. Squeeze out as much liquid as possible.
Save the pulp in the fridge. It can be mixed into bread or chapathi dough. I will also be posting another recipe later during MoFo to show you what I made with my almond-coconut pulp, so watch out for it. ;)
Keep a few figs aside and slice them.
Put the rest of the figs, along with the soaking water and the cinnamon powder in the blender jar and blend to a smooth paste. It's okay if the fig seeds remain grainy.
Stir the fig pulp into the strained almond-coconut mylk. Taste and optionally add sugar at this point.
Whisk this mixture for a few minutes. Cover and chill in the fridge (not freezer) for a day.
If you have an ice cream maker, follow the directions and freeze in it. Toss in the sliced figs during the last few minutes of the freezing process.
If you don't have an ice cream maker, pour the ice cream mixture into an airtight container, stir in the sliced figs and freeze for half an hour. Whip vigorously with a wire whisk for a few minutes. Cover and freeze again for another half hour. Use a spatula and whip again. Freeze for an hour this time and whip once more. Do this 5-6 times until you reach the desired consistency.
Scoop into serving bowls, dust with cinnamon and enjoy! :)
Wanna know what else I have coming up on my blog this month? Take a look at my Vegan MoFo 2012 Sneak Peek Album.
Dessicated coconut powder is made out of dried coconut but it might have been exposed to a some heat in the grinding process. So if you're particular about keeping it a 100% raw, then just start with whole dry coconut/copra and grate it at home. You can also use fresh, grated coconut to make coconut mylk but that will change the taste and texture a bit.
Since the ice cream has no added oils and also because it isn't cooked, the texture is slightly icy, as opposed to smooth. I really like it that way because it has a more natural feel to it. Needless to say, it's also very healthy and you can indulge in multiple scoops and feel good about it too. :)
Raw Fig and Cinnamon Ice Cream
1 1/2 C Dry Figs
1 C Almonds
1 C Dessicated Coconut Powder
1 T Cinnamon Powder
2-3 T Sugar (optional)
A pinch of Salt
4 C Filtered Water + 2 C to soak Figs
Wash and soak the figs overnight in 2 C of clean, filtered water.
Wash and soak the almonds over night. In the morning drain them and rise well (throw away the soaking water).
Place soaked almonds and coconut powder with a pinch of salt in a blender jar and grind for a few minutes.
Add 4 C of filtered water (a little at a time) and blend well.
Keep aside for 10-15 minutes.
Place a thin cloth over a large vessel and strain the almond-coconut mylk through it. Squeeze out as much liquid as possible.
Save the pulp in the fridge. It can be mixed into bread or chapathi dough. I will also be posting another recipe later during MoFo to show you what I made with my almond-coconut pulp, so watch out for it. ;)
Keep a few figs aside and slice them.
Put the rest of the figs, along with the soaking water and the cinnamon powder in the blender jar and blend to a smooth paste. It's okay if the fig seeds remain grainy.
Stir the fig pulp into the strained almond-coconut mylk. Taste and optionally add sugar at this point.
Whisk this mixture for a few minutes. Cover and chill in the fridge (not freezer) for a day.
If you have an ice cream maker, follow the directions and freeze in it. Toss in the sliced figs during the last few minutes of the freezing process.
If you don't have an ice cream maker, pour the ice cream mixture into an airtight container, stir in the sliced figs and freeze for half an hour. Whip vigorously with a wire whisk for a few minutes. Cover and freeze again for another half hour. Use a spatula and whip again. Freeze for an hour this time and whip once more. Do this 5-6 times until you reach the desired consistency.
Scoop into serving bowls, dust with cinnamon and enjoy! :)
Wanna know what else I have coming up on my blog this month? Take a look at my Vegan MoFo 2012 Sneak Peek Album.
Labels:
Desserts,
Ice Creams
Tuesday, June 19, 2012
Mango Ginger Ice Cream - vegan, almost raw
This gingerlicious mango ice cream is not for the faint of heart. Last year, when I made mango ice cream, I thought I'd add a small piece of ginger into the concoction while grinding and loved how the flavors melded. But once I froze it, the ginger got overpowered by the mango.
So ever since this year's mango season started, I'd been really wanting to make a mango ice cream with a super strong ginger kick. When the time came to add ginger into the mixie jar, I did not hold myself back. And boy oh boy did it turn out amazing!!
I ran out of raw agave nectar so I used sugar. If it hadn't been for the sugar, this ice cream would've been categorized under "raw food".
I was feeling lazy and didn't want to wash the ice cream maker, so I decided to use the freeze/whip/freeze method to make this ice cream. I wanted it to have a slightly icy texture for an added crunch, so I didn't let it get too creamy during the freezing process.
3 Ripe Mangoes - peeled and diced
2 inches Ginger - sliced
1 T Sesame Seeds
1/2 C Cashews
1/2 C Sugar
1 T Flax Seed Powder
A pinch of Salt
2 C Filtered Water
Grind the cashews and sesame seeds together in a dry jar until they start to release oil and begin to turn slightly buttery.
Add the ginger, sugar, salt and flax seed powder and process.
Add the mango and process till smooth and creamy.
Add the water and blend well.
Let this mixture sit in the fridge (not freezer) for a day to chill thoroughly.
Transfer to an airtight container and whip well with a whisk.
Pop in the freezer for half an hour.
Whip again.
Freeze again for an hour.
Whip again.
Let the mixture freeze for 6-8 hours.
Transfer this icy mixture into a blender jar in batches and process for a few minutes.
Transfer back into the airtight container and freeze for two hours.
To get beautiful scoops, let the container thaw inside the fridge for five minutes before you serve each time.
Scoop and serve.
Enjoy! :)
So ever since this year's mango season started, I'd been really wanting to make a mango ice cream with a super strong ginger kick. When the time came to add ginger into the mixie jar, I did not hold myself back. And boy oh boy did it turn out amazing!!
I ran out of raw agave nectar so I used sugar. If it hadn't been for the sugar, this ice cream would've been categorized under "raw food".
I was feeling lazy and didn't want to wash the ice cream maker, so I decided to use the freeze/whip/freeze method to make this ice cream. I wanted it to have a slightly icy texture for an added crunch, so I didn't let it get too creamy during the freezing process.
Almost Raw, Vegan Mango Ginger Ice Cream
3 Ripe Mangoes - peeled and diced
2 inches Ginger - sliced
1 T Sesame Seeds
1/2 C Cashews
1/2 C Sugar
1 T Flax Seed Powder
A pinch of Salt
2 C Filtered Water
Grind the cashews and sesame seeds together in a dry jar until they start to release oil and begin to turn slightly buttery.
Add the ginger, sugar, salt and flax seed powder and process.
Add the mango and process till smooth and creamy.
Add the water and blend well.
Let this mixture sit in the fridge (not freezer) for a day to chill thoroughly.
Transfer to an airtight container and whip well with a whisk.
Pop in the freezer for half an hour.
Whip again.
Freeze again for an hour.
Whip again.
Let the mixture freeze for 6-8 hours.
Transfer this icy mixture into a blender jar in batches and process for a few minutes.
Transfer back into the airtight container and freeze for two hours.
To get beautiful scoops, let the container thaw inside the fridge for five minutes before you serve each time.
Scoop and serve.
Enjoy! :)
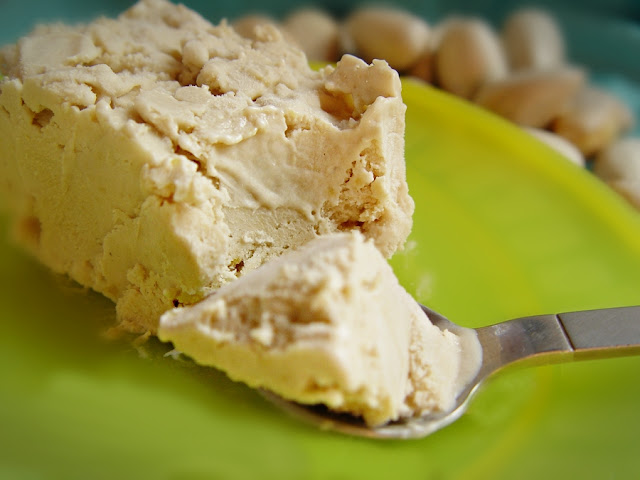
Labels:
Desserts,
Ice Creams
Tuesday, April 24, 2012
Cherry Nirvana Vegan Ice Cream
A few days ago my dear friend GiGi of Veganville said to me, "you are an ice cream inspiration". I know I have made some kickass vegan ice creams but so have many other vegans I know, including GiGi herself. So I never really thought of myself as an inspiration in the field until she said those words. Now when someone gives you that kind of a heartfelt compliment, you just *got* to live up to it. Thank you Geegers! :)
Turtle Mountain is hubby and my most favorite vegan ice cream company. Whenever we go to the US, we fill our freezer and our tummies with Purely Decadents and So Deliciouses to the point of bursting! If they branched out to India, we'd be their biggest (pun intended :oP) customers. Hubby wrote in and told them this. Sadly they don't plan to come here in the near future. :( Something about logistics and maintaining optimum temperatures while shipping overseas blah blah blah. Excuses, excuses! We can find all kinds of international puscreams on the shelves here so I don't see why veganlicious TM can't come too. Humph! But enough of the ranting, because making something happen is waaaay more rewarding than sitting around pining for it.
I have tapped into my vegan ice cream ninja powers and there's going to be no vegan ice cream that I will be left desiring for. Whether it's an existing flavor from a brand that isn't available to me or a new combination that suddenly clicks in my head, it's going to get created in my kitchen. So there!
I started by making an ice cream inspired by one of Turtle Mountain's *best* offerings... Cherry Nirvana. It's hubby's absolute favorite and when I grabbed a can of dark cherries in syrup to make Black Forest Pastries, I decided to save some and attempt Cherry Nirvana. The result wasn't the exact same as the original of course, but it was pretty close and extremely delicious.
2 C thawed but cold unwhipped non-dairy whipping cream (Rich's is the commonly available vegan one in Bangalore but there are other brands too and this time I used something called Value Star which I found at Metro)
2 C chilled soymilk
1/2 C sugar (or more if you like)
pinch salt
drop of almond essence
1/2 C dark cherries along with the syrup
1/2 C dark chocolate chunks (I broke into chunks Trader Joe's Almonds in Dark Chocolate Pound Plus bar which a very kind friend brought back for me from the US, but any other vegan plain dark chocolate bar can be used too)
Blend the first five ingredients together. Add the cherries in syrup and pulse a few times so there are cherry pieces floating around.
Chill in the fridge for a a few hours.
If you have an ice cream maker:
Pour into your ice cream maker and process.
In the last few minutes, add the chocolate chunks.
Transfer to airtight container and freeze for another hour at least before serving.
If you don't have an ice cream maker:
Whip the thoroughly chilled mixture with a wire whisk for a few minutes.
Mix in the dark chocolate chunks.
Pour into an airtight container and pop it into the freezer.
After half an hour, take it out, whip it with a spatula or fork and freeze it again.
Continue doing this every half an hour for about 2-3 hours until you reach the desired ice cream consistency.
Note: Whether you use an ice cream maker or not, after a day of freezing the ice cream, you will need to thaw it for a few minutes each time to be able to scoop it into neat, round servings.
Enjoy! :)
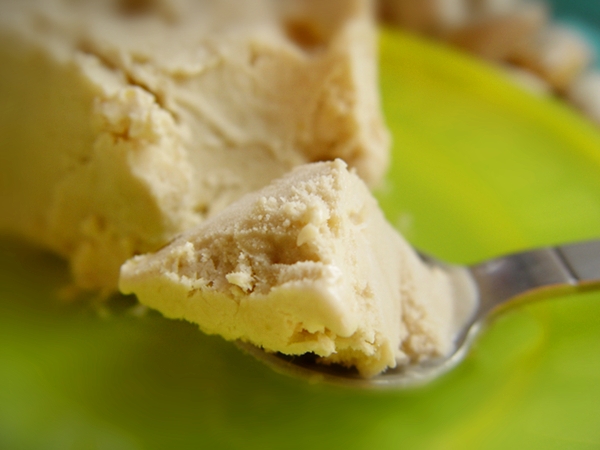
Turtle Mountain is hubby and my most favorite vegan ice cream company. Whenever we go to the US, we fill our freezer and our tummies with Purely Decadents and So Deliciouses to the point of bursting! If they branched out to India, we'd be their biggest (pun intended :oP) customers. Hubby wrote in and told them this. Sadly they don't plan to come here in the near future. :( Something about logistics and maintaining optimum temperatures while shipping overseas blah blah blah. Excuses, excuses! We can find all kinds of international puscreams on the shelves here so I don't see why veganlicious TM can't come too. Humph! But enough of the ranting, because making something happen is waaaay more rewarding than sitting around pining for it.
I have tapped into my vegan ice cream ninja powers and there's going to be no vegan ice cream that I will be left desiring for. Whether it's an existing flavor from a brand that isn't available to me or a new combination that suddenly clicks in my head, it's going to get created in my kitchen. So there!
I started by making an ice cream inspired by one of Turtle Mountain's *best* offerings... Cherry Nirvana. It's hubby's absolute favorite and when I grabbed a can of dark cherries in syrup to make Black Forest Pastries, I decided to save some and attempt Cherry Nirvana. The result wasn't the exact same as the original of course, but it was pretty close and extremely delicious.
Cherry Nirvana Vegan Ice Cream
2 C thawed but cold unwhipped non-dairy whipping cream (Rich's is the commonly available vegan one in Bangalore but there are other brands too and this time I used something called Value Star which I found at Metro)
2 C chilled soymilk
1/2 C sugar (or more if you like)
pinch salt
drop of almond essence
1/2 C dark cherries along with the syrup
1/2 C dark chocolate chunks (I broke into chunks Trader Joe's Almonds in Dark Chocolate Pound Plus bar which a very kind friend brought back for me from the US, but any other vegan plain dark chocolate bar can be used too)
Blend the first five ingredients together. Add the cherries in syrup and pulse a few times so there are cherry pieces floating around.
Chill in the fridge for a a few hours.
If you have an ice cream maker:
Pour into your ice cream maker and process.
In the last few minutes, add the chocolate chunks.
Transfer to airtight container and freeze for another hour at least before serving.
If you don't have an ice cream maker:
Whip the thoroughly chilled mixture with a wire whisk for a few minutes.
Mix in the dark chocolate chunks.
Pour into an airtight container and pop it into the freezer.
After half an hour, take it out, whip it with a spatula or fork and freeze it again.
Continue doing this every half an hour for about 2-3 hours until you reach the desired ice cream consistency.
Note: Whether you use an ice cream maker or not, after a day of freezing the ice cream, you will need to thaw it for a few minutes each time to be able to scoop it into neat, round servings.
Enjoy! :)
Labels:
Desserts,
Ice Creams
Thursday, March 29, 2012
Vegan Hazelnut Butter Chocolate Ice Cream
I admit that I am verrrry partial to the combination of toasted hazelnuts with chocolate over other flavours so my claims here might seem like they're coloured by this favoritism, but believe me when I say that is not the case.
This ice cream starts tasting amazing even before it becomes ice cream! Each step of the recipe process is more delicious than the previous one - the simple nut butter, the sweet chocolate hazelnut cream, the heavenly pre-ice cream mylk... OMG the things they did to my tongue!!
I took a lot of will power on my part for this thing to actually reach its goal of becoming ice cream. But I am so glad I pushed through because this is THE BEST ice cream that I have ever made. Period.
And the kicker? It is dangerously simple to make!
So without further ado, I present to you...
Vegan Hazelnut Butter Chocolate Ice Cream
3/4 C Hazelnuts
3/4 C Cashew Nuts
6 T + 2 tsp Sugar
2 T Cocoa Powder
Pinch of Salt
Pinch of Soy Lecithin (optional)
Handful of Ice Cubes
3 C Filtered Water
Toast the hazelnuts to bring out their flavor and set aside until they are cooled completely.
Rub them between your fingers to remove as much of the skin as possible.
Grind the hazelnuts and cashews together, with breaks in between to scrape down the sides of the jar, until they start releasing oil and turn buttery.
Add the sugar, cocoa powder, salt and soy lecithin (if adding) and blend again.
Add 1 C of water, a little at a time and bring to a creamy consistency. Throw in the ice cubes and blend well. Add the remaining water and blend and whip for a minute or so until it's a nice, frothy mixture.
If you have the patience, let this chill in the fridge for a few hours and then pour into your ice cream maker. I didn't have the patience nor the confidence in my resistance to glug, therefore I skipped the chilling step and went straight to the ice cream making step.
In the ice cream maker, it will reach a soft-serve consistency. After it's ready, transfer to an airtight container and freeze for an additional hour or two to get a scoopable consistency.
If you don't own an ice cream maker, don't worry. Just pour the pre ice cream mylk in an airtight container and freeze. Every half an hour, take it out of the freezer and whip vigorously with a spatula. Repeat this step 3-4 times. Then finally freeze for an hour and you have your ice cream ready.
After a day or so in the freezer, I've seen that home made ice creams become slightly hard/icy. For the perfect consistency, transfer the container to the fridge and let it thaw for half an hour before serving.
Enjoy!! :)
Labels:
Desserts,
Ice Creams
Wednesday, January 04, 2012
Vegan Jackfruit Coconut Mylk Ice Cream
It all began on Sunday, the first day of the new year, when we were on the way back from buying jackfruits from our regular vendor. My sis had an inspired thought, she said, "hey ka, you should make some awesome dessert with jackfruit... like jackfruit ice cream!" I laughed at first but then I got to thinking for a moment and I was like, "you know what chinni, I think I could!"
My little sis is craaaaazy about jackfruit! In fact, I think it is her favorite fruit in the whole wide world. If she were left on a deserted island with nothing but jackfruit trees, she'd happily survive.
Every time she arrives at the cart, the vendor has a huge, welcoming smile on his face. Maybe it's because he knows he's getting big business or perhaps it heartens him to see someone express so much joy while they eat the fruits of his labor.
Jackfruits are very commonly sold by street vendors here in South India. These men and women open shop in the morning and spend all day cutting open the large fruits, oiling their palms and separating the juicy jackfruit pods from the body of the fruit and selling them. It's a slow, sticky, not so easy procedure but the vendors are pros at it and thanks to them we get to relish the sweet, delicious flavor of these heavenly tropical fruits.
We add jackfruit to a variety of South Indian dishes (we even save the seeds and make some yummy stews and curries with them) but as far as I know, jackfruit ice cream has not been done before. I can proudly say that I invented this whole recipe from scratch. And this means I did keep a note of the measurements, well mostly. :op
10 Jackfruit pods - deseeded and sliced
1/3 C Brown Sugar
1 very small drop Apple Cider Vinegar
1/2 C Cashews
2 200ml packs of Coconut Mylk (I use the Dabur Hommade brand)
3/4 C Vegan Whipping Cream Liquid (I use Merry Whip but Rich's can be substituted too)
2 T Agave Nectar
Pinch of Salt
Place the jackfruit slices in a heavy bottomed pan, add the brown sugar and the tiny drop of apple cider vinegar on top and cook them together on low heat while stirring continuously to allow the brown sugar to caramelize and the jackfruits to cook and become soft. You should reach a halwa/jam like consistency (5-10 mins). Keep aside and let it cool down to room temperature. Warning: This jam/halwa is highly yummy by itself so you'll have to overcome the temptation to finish it off straight.
In a blender, turn the cashews into a fine powder. To this add the coconut mylk and blend again. Add the rest of the ingredients, including the caramelized jackfruit, and blend some more. Taste and add more agave nectar if required.
Chill everything in the fridge for 8 hours or more.
If you have an ice cream maker, follow the instructions and freeze into ice cream. If you don't, then pour the ice cream liquid into a freezable container and freeze for half an hour, then whip and freeze again for another half an hour and then whip again and so on for 2-3 hours until you get the consistency you desire.
Enjoy! :)
This thing turned out absolutely amazing!! My dad who recently turned vegan, but still has some misgivings about the superiority of vegan desserts over the non vegan ones, was totally blown away by the Jackfruit Ice Cream. He was like, "Wow! This doesn't taste vegan!" Well, I am now on a mission to teach him that the *best* tasting desserts are the vegan ones. :)
My little sis is craaaaazy about jackfruit! In fact, I think it is her favorite fruit in the whole wide world. If she were left on a deserted island with nothing but jackfruit trees, she'd happily survive.
Every time she arrives at the cart, the vendor has a huge, welcoming smile on his face. Maybe it's because he knows he's getting big business or perhaps it heartens him to see someone express so much joy while they eat the fruits of his labor.
Jackfruits are very commonly sold by street vendors here in South India. These men and women open shop in the morning and spend all day cutting open the large fruits, oiling their palms and separating the juicy jackfruit pods from the body of the fruit and selling them. It's a slow, sticky, not so easy procedure but the vendors are pros at it and thanks to them we get to relish the sweet, delicious flavor of these heavenly tropical fruits.
We add jackfruit to a variety of South Indian dishes (we even save the seeds and make some yummy stews and curries with them) but as far as I know, jackfruit ice cream has not been done before. I can proudly say that I invented this whole recipe from scratch. And this means I did keep a note of the measurements, well mostly. :op
10 Jackfruit pods - deseeded and sliced
1/3 C Brown Sugar
1 very small drop Apple Cider Vinegar
1/2 C Cashews
2 200ml packs of Coconut Mylk (I use the Dabur Hommade brand)
3/4 C Vegan Whipping Cream Liquid (I use Merry Whip but Rich's can be substituted too)
2 T Agave Nectar
Pinch of Salt
Place the jackfruit slices in a heavy bottomed pan, add the brown sugar and the tiny drop of apple cider vinegar on top and cook them together on low heat while stirring continuously to allow the brown sugar to caramelize and the jackfruits to cook and become soft. You should reach a halwa/jam like consistency (5-10 mins). Keep aside and let it cool down to room temperature. Warning: This jam/halwa is highly yummy by itself so you'll have to overcome the temptation to finish it off straight.
In a blender, turn the cashews into a fine powder. To this add the coconut mylk and blend again. Add the rest of the ingredients, including the caramelized jackfruit, and blend some more. Taste and add more agave nectar if required.
Chill everything in the fridge for 8 hours or more.
If you have an ice cream maker, follow the instructions and freeze into ice cream. If you don't, then pour the ice cream liquid into a freezable container and freeze for half an hour, then whip and freeze again for another half an hour and then whip again and so on for 2-3 hours until you get the consistency you desire.
Enjoy! :)
This thing turned out absolutely amazing!! My dad who recently turned vegan, but still has some misgivings about the superiority of vegan desserts over the non vegan ones, was totally blown away by the Jackfruit Ice Cream. He was like, "Wow! This doesn't taste vegan!" Well, I am now on a mission to teach him that the *best* tasting desserts are the vegan ones. :)
Labels:
Desserts,
Ice Creams
Monday, October 03, 2011
I Scream You Scream We All Scream For Ice Cream - Vegan Mofo post 3
Today's Vegan Mofo post is a photo blog of a few vegan ice creams I've made in the recent past and my ice cream making process.
I never follow exact recipes while making anything (except in my baking) and ice creams are no exception. I just have a method that I stick to and have developed a 'feel' over time for attaining the right texture.
For the base, I usually use a combination of a nut and a creamy fruit or a vegan mylk and vegan whipped cream. To this I add any flavor that hubby and I are in a mood for - coffee powder, melted dark chocolate, pure vanilla extract, saffron, cardamom, rum (any alcohol is to be added only in the last minutes of the freezing process)...- and a sweetener of some sort - sugar, raw agave nectar, maple syrup... - et voila, the vegan ice cream mix is ready! :)
Pointers:
*Tasting and adjusting is of course a must.
*Make it a wee bit sweeter than you might like because after the freezing process the level of sweetness reduces.
*Add a tiny pinch of salt to enhance the taste.
*Chill the mix for over a day before freezing - either in an ice cream maker or by following the whipping and freezing method.
The latter involves whipping and freezing and whipping and freezing and so on once every half an hour for the first two hours of the freezing process. And then once an hour for the next two hours (or until the consistency feels about right). The way to achieve a good ice creamy texture is to use a blender (hand blender would be more convenient than transferring the ice cream into a jar each time) but you can also use a wire whisk, a spatula or a fork.
Without further ado, here are my droolalicious, creamy, scoop-able vegan ice creams. :)
Very Vanilla Cashew Mylk Ice Cream
- recipe for the vanilla cake in the background hereCashew Mocha Rum Ice Cream
Raw Pistachio Mango Ice Cream
- recipe hereMango Ice Cream
Labels:
Desserts,
Ice Creams
Tuesday, June 28, 2011
Raw Vegan Mango Pistachio Ice Cream
This one is soooooo easy peasy to make! Doesn't look like it and definitely doesn't taste like it. It's so delicious that you'd think it took hours of labor. Well, I didn't even need to make the effort of pulling out the ice cream maker for it. :oP
When you start with just plain fruits you can get a sorbet out of it. Well sorbets are light and slightly icy and can be nice sometimes, but they are just not ice creams! However, by adding a nut into the mix, you can achieve the kind of rich, creamy texture that all ice creams should have.
The beauty of this raw ice cream is that it has only healthy ingredients and you can eat as many scoops as you like without guilt (unless you're allergic to nuts).
3 very ripe mangoes (I used large Alphonsos)
1/4 cup plain, raw pistachios (without the shells) + 1-2 tsp (chopped/sliced)
Raw agave nectar to taste
Peel, cube and chill the mangoes in the fridge for a day.
Soak the 1/4 C pistas in filtered water for 5-6 hours.
Drain the pistas completely and chuck the water away.
Place the pistas in a blender/grinder/food processor and grind well.
Add the mangoes and blend some more, until you get a creamy mixture (it'll have the color of avocado).
Squirt in a little bit of the raw agave nectar and blend again.
Taste, add more agave if you desire and blend more.
Transfer to a freezer safe container, add sliced pista and whip with hand whisk for a few minutes.
Freeze overnight.
Transfer to fridge and leave for about an hour to soften it. Serve with an ice cream scoop. Enjoy! :)
Note: You can refreeze it after you've had your fill and then leave it in the fridge again for a while before eating each time.
When you start with just plain fruits you can get a sorbet out of it. Well sorbets are light and slightly icy and can be nice sometimes, but they are just not ice creams! However, by adding a nut into the mix, you can achieve the kind of rich, creamy texture that all ice creams should have.
The beauty of this raw ice cream is that it has only healthy ingredients and you can eat as many scoops as you like without guilt (unless you're allergic to nuts).
Raw Vegan Mango Pistachio Ice Cream
3 very ripe mangoes (I used large Alphonsos)
1/4 cup plain, raw pistachios (without the shells) + 1-2 tsp (chopped/sliced)
Raw agave nectar to taste
Peel, cube and chill the mangoes in the fridge for a day.
Soak the 1/4 C pistas in filtered water for 5-6 hours.
Drain the pistas completely and chuck the water away.
Place the pistas in a blender/grinder/food processor and grind well.
Add the mangoes and blend some more, until you get a creamy mixture (it'll have the color of avocado).
Squirt in a little bit of the raw agave nectar and blend again.
Taste, add more agave if you desire and blend more.
Transfer to a freezer safe container, add sliced pista and whip with hand whisk for a few minutes.
Freeze overnight.
Transfer to fridge and leave for about an hour to soften it. Serve with an ice cream scoop. Enjoy! :)
Note: You can refreeze it after you've had your fill and then leave it in the fridge again for a while before eating each time.
Labels:
Desserts,
Ice Creams,
Raw Food
Subscribe to:
Posts (Atom)