Saturday, September 22, 2012

Green Guava Grainee and Vegan MoFo Preparations


Though this is a technically a smoothie, I'd like to call it a "grainee" because the guava seeds get ground to a fine, grainy texture. It's a nice way to enjoy a smoothie, with a wee bit of crunchiness in every mouthful. :)

Makes for a delicious, nutritious, filling breakfast. Consume it as soon as it's made, to get the maximum benefits of the fruits and the spinach.

Guava Smoothie

1 large Guava - cubed
3 Yelakki Bananas (small) - cut into chunks
1 1/2 C Spinach
8 Dates - seeds removed
1/2 C Cashews
1/4 tsp Turmeric Powder
3 Black Pepper Corns
A pinch of Salt
Lemon Juice

Blend everything together along with some water into a creamy smoothie.
Serve into large mugs.
Start slurping immediately.
Enjoy! :)

Green Guava Grainee

While you're slurping, let me tell you about what I've been up to and what's about to happen on my blog in October.

Shhhh, listen...can you hear that low rumbling sound? It's the chorus of thousands of tummies growling in anticipation. And soon you'll be hearing buckets drool dripping onto keyboards all over the world too because, it's that time of the year again...Vegan MoFo time!! :D

Vegan MoFo Banner

For those who are new to this, Vegan MoFo aka Vegan Month of Food, is a global blogging event. Hundreds of bloggers from all over the world take part each year and all month long blogs are flooded with talk about about vegan food, vegan food and more vegan food.

Last October was my first time participating in MoFo and it was a mad, last minute scramble. I did a lot of huffing and puffing and just barely reached my quota of posts for the month. This year however, I've turned into a super smart cookie (pun intended) and have started to cook and capture and choreograph.

I'd like to have at least half the blog posts ready and scheduled over the next week so that during MoFo I can chill and hoppity hop hop through all the awesome participating blogs.

I've even got a theme going this time - Super Scrumptious Four Course Meal. Each week, I will feature recipes for one course of a meal.

Week One - Desserts (well of course I have to start with desserts!)
Week Two - Soups and Salads
Week Three - Appetizers and Snacks
Week Four - Main Courses

There may or may not be sub-themes within each week. We'll just have to wait and watch. :oP

If you would like a taste of what's to come, here's my Vegan MoFo 2012 Sneak Peek album. It's going to keep getting filled up all week long and through October as the recipes start rolling out.

Until then, here are a few recipes from my last year's Vegan MoFo collection for you to try out:

Super Loaded Burritos

Vegan Burritos

Idlis

South Indian Idly

Maize Bread

South Indian Idly

And of course, the MOST popular post of them all...Vegan Ice Cream Basics :D

Vegan Cashew Mocha Rum Ice Cream

If you're taking part in Vegan MoFo this year, do leave a comment and let me know so I can visit you often through October. Enjoy making magic in the kitchen and have a wonderful weekend! :)

Wednesday, September 12, 2012

Navané Dosé - Foxtail Millet Dosas: guest post by Chinmayie of Love Food Eat


It was a lovely Friday afternoon in April, the day before the first Vegan lunch/demo at Graze, Taj. Himani and I were lounging on bar stools and sipping on green tea. In the open kitchen we were facing, Uday was chatting with us while preparing scrumptious vegan dishes for us to taste for the next day's event. He told us that a food blogger was coming by soon to review the vegan menu on her blog. I remember thinking it'd be nice to meet another local food blogger in person.

The blogger was Chinmayie of Love Food Eat and she arrived at Graze with her husband and her adorable daughter. When I went up and introduced myself, she immediately said, "I visit your blog. A lot!" and then she called over her hubby and said, "you know that vegan blogger I was talking about on the way here? It's her". I was not expecting that at all and needless to say, I was totally flattered. :)

We didn't get to talk much that day because both of us were busy with having lunch and taking photographs. We just exchanged cards and spoke about how we should cook together sometime. It was only after coming back home and visiting her beautiful blog for the first time did I begin to learn about Chinmayie and her work.

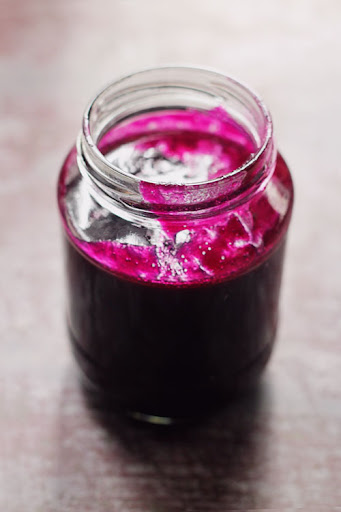
Chinmayie is a vegetarian, but a very large portion of her recipes happen to be vegan. Like me, she is an intuitive cook. That means, instead of following recipes, she prefers to experiment with different ingredients and cuisines and whip up all kinds of interesting concoctions. Just look at this gorgeous, gorgeous Jamun Jam she invented!

Jamun Jam

Doesn't it make you want to dip your whole fist in and lick it up? :P

Over the past few months I've gotten to know Chinmayie better, mainly on our Foodies in Bangalore group on Facebook. She leans towards healthy cooking and is quite knowledgeable about plant based nutrition. And she is always interested to learn more about vegan cuisine and try out vegan recipes.

I'm very happy to have her here today with her Navané Dosé. Navané means Foxtail Millet in Kannada and in Karnataka, the word for Dosa is Dosé (the 'e' in both words is pronounced 'ay', as in - say, day, hay...).

Chinmayie has taken lovely shots of the ingredients and the steps involved in making these crispy Foxtail Millet Dosas. Thank you for being here Cinnmayie! :)

Let's move ahead to her guest post now...

--

Navane Dose

Hey All! This is Chinmayie from the blog Love Food Eat. I am here with a guest post for Susmitha's blog.

I have been seeing Veganosaurus from a long time, even before I started blogging. I initially came across her super cool miniature clay sculptures and beautiful jewelry which then lead me to her vegan food blog. I finally met her at a local restaurant recently in a vegan food event. The first words to slip out of my mouth were 'I am a big fan of you and your blog!'

Let's come to the recipe now. Those who know me and my blog, already know my love for millets. I have been working on adding more millets to my diet for more than just health benefits associated with it. While I enjoy them in most forms, my husband and daughter haven't really liked it much. They definitely prefer rice over millets in our daily meals.

A lot of people find it hard to figure out where to start. I also understand that if you are a rice+rasam loving South Indian like me, it'll be hard for you to include a foxtail millet salad into your everyday menu.

Foxtail Millet

I noticed that it's always easier to start liking a new ingredient when it is used in a familiar way. We all love our good old south Indian breakfast staple dosas. We never get tired of them. I grew up eating all kinds of different dosas, not just the rice+lentil kind. We made dosas out of plantains, jackfruit, cucumbers, water melon rind, tender coconut, wheat, finger millets and a lot more… some sweet, some spicy and everything in between. Having eaten all those different kinds, I was sure foxtail millets would work perfectly in a dosa and I wasn't wrong.

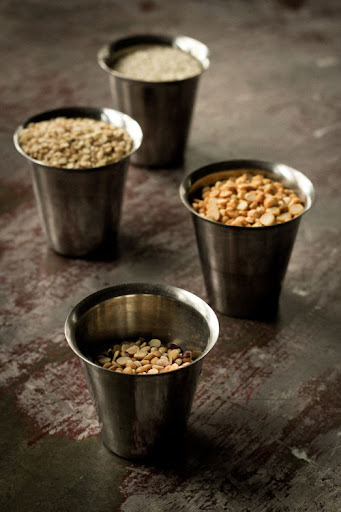
Dosa Ingredients

If you wanted to include foxtail millet into your diet and wasn't too sure about using it in its whole form, try this dosa recipe. It works like a dream and tastes super good. You can eat them not just because they are healthy! I served my dosa with some sambar but even a simple coconut chutney will be good.

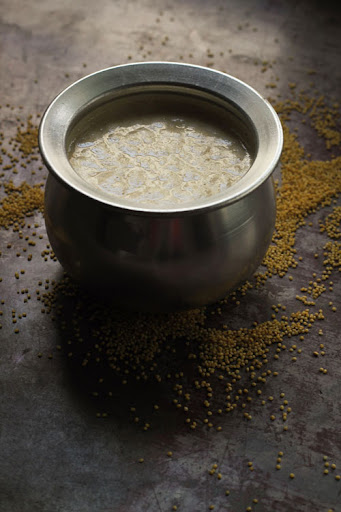
Dosa Batter

Notes:

You should be able to skip the rice altogether and make the dosas with just millets+lentils also.

Add green or red chilies, cumin, coriander seeds, cilantro leaves etc... while grinding the batter for more flavor.

You can also add grated vegetables and greens to the batter and make thick, pancake like dosas.

If you live in a cooler climate, cover the batter with something warm to help it ferment better.

Left over batter can be refrigerated and used for 3-4 days.

Dosa Roasting

Ingredints:

Foxtail millets - 2 cups

Rice - 1/4 cup

Channa dal - 1/4 cup

Urad dal - 1/4 cup

Toor dal - 1/4 cup

Chopped onion - 1/2 cup

Ginger - 1 inch piece

Salt


Combine the foxtail millet with rice and all the lentils and wash them once. Soak them in clean water for 3-4 hours.

Drain the water fully and place them in a blender with onion, ginger and salt and blend it into a smooth paste. Add enough water to get the batter to a thick pancake batter consistency. Cover and let it ferment for 8-10 hours (or overnight).

After 8-10 hours or the next day, the dosa batter would have fermented well. There might be small little bubbles on the surface and it might smell slightly sour. Mix the batter well.

To make the dosas -

Heat a griddle well, brush it with a thin layer of oil. Pour a ladleful of batter in the center and spread it into a dosa with the help of your ladle. You can either make it thick like a pancake or thin like Crêpes.

When one side of the dosa looks lightly cooked with small bubbles on top, apply a little bit of oil and flip it.

Once ready, serve it with sambar or any kind of chutney.
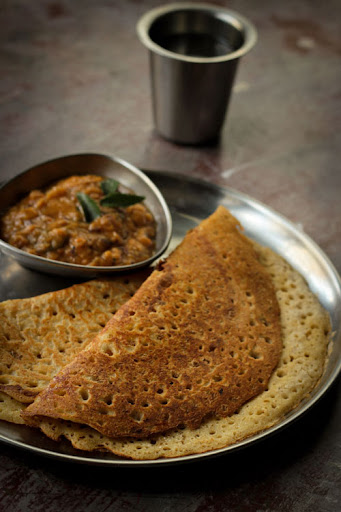
Yummy Dosa

Friday, September 07, 2012

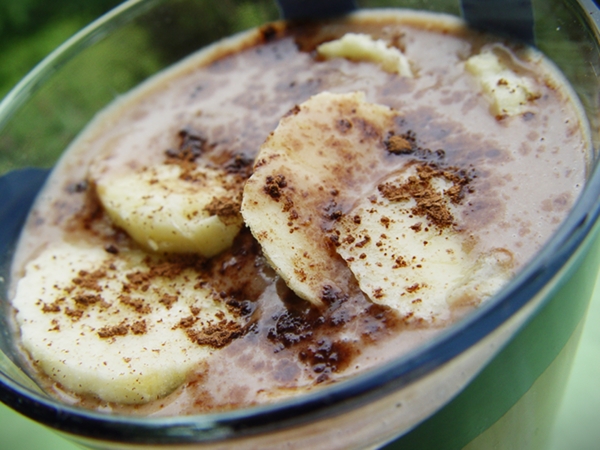
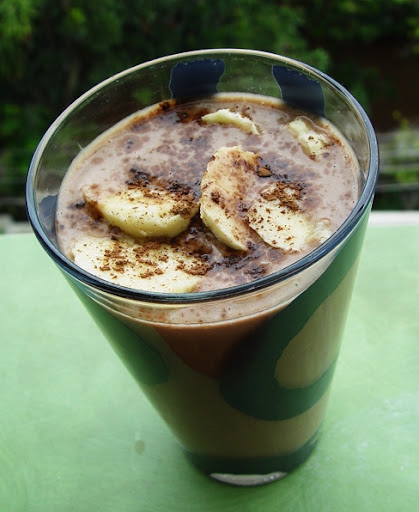
Peanut Butter and Banana Fusion Smoothie


Peanut Butter and Banana smoothies are pretty common these days. The first time I tasted one was at a local vegetarian, organic restaurant called The Green Theory. Their smoothies are more like milkshakes - decadent, creamy and well, fattening (hey, I'm not complaining :D). If you let them know in advance that you'd like your smoothies to be made with soy mylk (instead of animal milk), they usually oblige.

Bikash Parik, who owns the restaurant, is a really nice guy and very helpful and accommodating. I've seen him there almost every time I've visited. He's the tall guy wearing the glasses. If he's around, then it's a guarantee that you'll have a good, vegan dining experience after explaining to him that you're vegan upon entering the restaurant.

Coming back to my smoothie, I personally feel that a smoothie doesn't need any sort of mylk to be added. Especially not one with peanuts or bananas in it. You have all the creaminess required right there, in those two ingredients. Here's my version of the Peanut Butter and Banana smoothie. I added a small pinch of a special ingredient to give it a more Indian flavour. Hence the 'fusion' in the title. :)

Peanut Butter and Banana Fusion Smoothie

1 big scoop of Peanut Butter
1 large, ripe Bananas (the Pachbale kind) - peeled and cut into large chunks with a few small slices kept aside for topping
4 Dates - seeds removed
2 tsp Sugar (optional for additional sweetness)
1 T Cocoa Powder (optional)
A pinch of Pachha Karpura (Edible Camphor)
A pinch of Salt

Blend everything (you can adjust thickness with a little water if you like).
Serve into tall glasses.
Top with banana slices.
Dust with cocoa powder.
Enjoy! :)

Peanut Butter and Banana Fusion Smoothie

Sunday, September 02, 2012

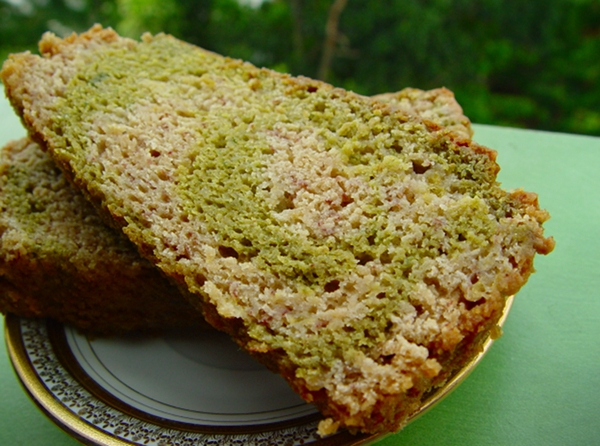
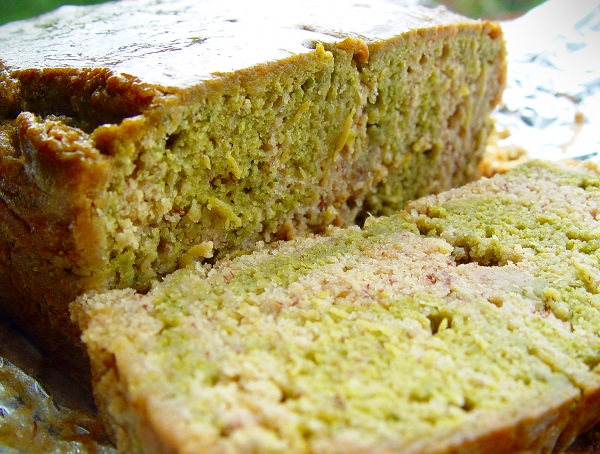
Marbled Green Smoothie Banana Bread


Why is banana bread called banana bread? Fruit, flour, sugar, soda, oil...one could say that banana cake would be a more appropriate name. Perhaps calling it bread is just our way of cheating. You know, you could polish off half a loaf of bread and feel pretty smug about it, but imagine eating half a cake. Egad! Guilt trip galore!! :oP

DH and I spent a long weekend at Chennai having a super duper fun time playing with our nephew and nieces. There were run off the mill games like hide and seek, chinese whispers, running and catching, lego connect four and there were crazy ass made up games like evil robot, mind reading and pretending to be asleep because we were so freaking tired by the end. Well that last bit was just hubby and me. Try keeping up with a pack of highly active kids and you'll know exactly what I mean.

Anyways, we came back home from these three days away to find some verrrrrry ripe bananas on the counter. When we'd left on Friday night, they were raw, but three days is plenty of time to ripen and ripen some more. I love eating bananas in this state but there are only so many I can have. Hence, I decided to make banana bread.

Marbled Spinach Banana Bread

I found a nice marbled chocolate-banana bread recipe on the PPK and used that as the base recipe. But as much as I luuuurrrrve chocolate, I wanted to make something non chocolatey. So I thought about the things that go well with banana, and spinach suddenly popped into my head. If spinach and bananas can be a great duo in green smoothies, why not in bread, right?

And while I was at it, I adjusted the ingredients a bit and made it even more healthy by substituting a portion of the white flour with pearl millet flour. So here is my Marbled Green Smoothie Banana Bread. I feel comfortable calling it bread now. :)

Marbled Spinach Banana Bread

Dry ingredients:

3/4 C Pearl Millet Flour (Bajra/Sajje Hittu)
3/4 C + 3 T All Purpose Flour (Maida Hittu)
3/4 tsp Salt
3/4 tsp Baking Soda

Wet ingredients:

1 C Mashed Very Ripe Bananas - about 3 large bananas (Pachbale Hannu)
3/4 C Sugar
2 T Coconut Oil - at room temperature
1/3 C Vegan Mylk - soy, almond or cashew
1 tsp Pure Vanilla Extract

Additional ingredients:

1/4 C (tightly packed) Blanched Spinach
5 T Boiling Water

Preheat the oven to 170C/340F.

Line a loaf pan with aluminum foil.

Place the dry ingredients in a large mixing bowl and whisk a few times to mix well and incorporate air. Transfer 3/4 C of this flour mixture to another large mixing bowl. 1 C of the flour mixture will remain in the first mixing bowl.

Beat together all the wet ingredients (not the spinach and water). It should come to about 2 C.

Bring 1 C of water to a rolling boil.

Meanwhile, blend the blanched spinach with 3/4 C of the banana mixture to form a smooth, creamy liquid.

Pour the spinach mixture into the mixing bowl with the 3/4 C of flour and mix lightly. Add 2 T boiling water to this and mix well with a fork to get a smooth paste.

Pour the remaining 1 1/4 C of banana mixture into the bowl with the 1 C of flour and gently mix. It's okay if some flour can be seen but DO NOT OVER MIX. Add 3 T boiling water and mix quickly with a fork until fairly smooth.

Now pour about 1/2 C of the plain banana bread batter into the prepared loaf pan. Top this with about 1/2 C of the green banana bread batter. Keep alternating them until you've finished transferring all the batter into the pan.

To form a pretty, marbled pattern, take a butter knife and swirl it through the batter in circles for a few seconds.

Bake in the preheated oven at 170 C / 340 F for 60 minutes. Increase the temperature to 180 C / 350 F and bake for 20 minutes.

About 10 minutes into the 180 C baking, test with a butter knife poked into the center for doneness.

Remove the pan from the oven and let it rest for a few minutes.

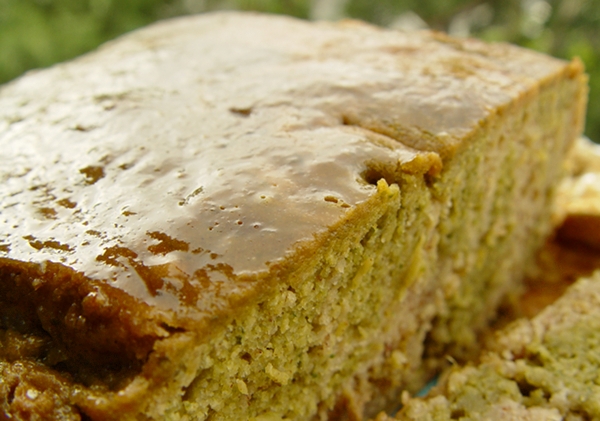
Lift the bread along with the foil and transfer to a cooling rack. Let it cool completely before slicing.

Enjoy! :)

Marbled Spinach Banana Bread

Wednesday, August 29, 2012

Vegan Vanilla Sugar Cookies: guest post by Harini of Tongue Ticklers


Today I have a very special guest on my blog - Harini of Tongue Ticklers. I have mentioned her beautiful vegan blog here many times before and I also guest blogged for her early last year.

I 'met' Harini on a Facebook group (way back when her blog was called Tum Yum Treats) and we became friends because of our shared passion for vegan food photography and blogging. I should thank Preethi of Krya for connecting us, otherwise I might not have seen Harini's blog when I did.

I have since then had the pleasure of meeting Harini in person. And today I am really happy to finally have her here with a recipe for delicious Vegan Vanilla Sugar Cookies. I am especially thrilled to have Harini's GLORIOUS photographs of the cookies here on my blog.

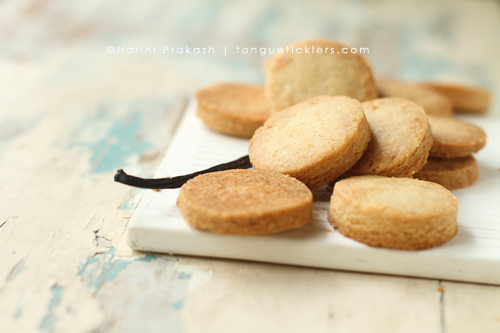
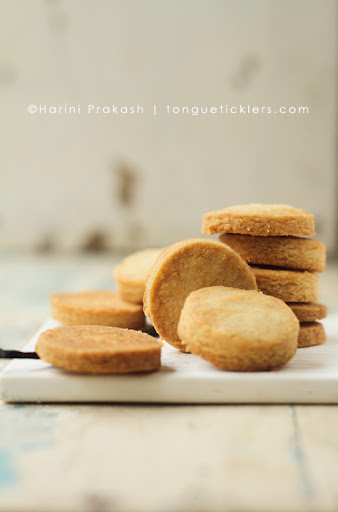
Harini's Vegan Vanilla Sugar Cookies

In the pic above, I want to have my mouth open at the end of the white slab so the cookie comes rolling right into my mouth. :oP

Harini, thank you so much for taking the time to do this blog post on Veganosaurus and for all the love and effort you have put into the photographs. :)

Now on to Harini's post...

--

Susmitha and I are very well acquainted but I am not sure whether you know me. Since I believe in forging bonds over food, I won’t take up much of your time. Let’s proceed quickly over to the introduction to what I think are the best vanilla sugar cookies I have ever baked. Does that make you curious?

Harini's Vegan Vanilla Sugar Cookies

Calling these ‘my vanilla cookies’ is not entirely correct. I made them mine but they originally belonged to Maggie Beer. I don’t think she will be able to tell that because they have taken quite a turn from the original recipe. So much that I do not recall the original recipe anymore. I first came to know Maggie Beer through MasterChef Australia, and most of her recipes introduced in the show sounded well. You know what I mean, don’t you? I do not try recipes that do not ‘sound’ good, by which I mean that reading the recipe should make my mouth water, must look good and look technically sound. Most of Maggie Beer’s recipes are just that, except that they are not vegan. They are, however, easily adaptable.

Harini's Vegan Vanilla Sugar Cookies

You do not need any special or hard-to-find ingredients for making these cookies. All ingredients, save the olive oil, are usually available in any pantry.

Harini's Vegan Vanilla Sugar Cookies

Recipe: Vegan Vanilla Sugar Cookies
(Inspired and modified from a Maggie Beer recipe)
Yield: 24 cookies, about 1.5inches in diameter

Ingredients:
Refined flour – 2 cups | 288g
Soaked and ground cashewnut paste – 2 tbsp | 32g
Pink salt – 2 generous pinches | 1g
Baking powder – about ½ tsp. | 3g
Vanilla seeds from 2 vanilla sticks
Olive oil – ½ cup | 80g
Caster sugar – ½ cup | 88g
Soy milk / Water / Coconut milk – 1-2 tbsp.

Method:

Place flour, cashew paste, salt, baking powder and vanilla seeds in a blender and blend till even. Remove the blended dry flour into a mixing bowl.

Blend olive oil, caster sugar and 1 tbsp. of soy/coconut milk/water lightly and add this to the dry mixture to form a soft dough. Do not knead. Make the dough by mixing with your finger tips, gather and press with your palm. The resultant dough should be soft but break when pressed. Add more milk only if needed. Adjust consistency by sprinkling a teaspoon of flour if too soft. You should not feel the liquid on your finger tips while gathering.

Divide the dough into two thick discs. Wrap them in separate cling films and refrigerate for at least an hour, or till needed. I usually prepare the dough in the night and bake the cookies the next morning.

When ready to bake, remove the dough and let thaw till it softens slightly and you can handle it. Pre-heat oven to 160 deg. C.

Sprinkle your platform with a little flour; place the disc with the cling film on it. Open the cling film and fold it back a little loose. Dust the rolling pin with flour and roll the disc to desired thickness, preferably 3-4mm. The cling film may break as you roll but that should not be a bother. When rolled, peel away the cling film.

Using a 1.5 inch circular cookie cutter, cut several circles. Place them on a baking tray lined with foil/baking sheet. Gather the remnants into a ball, flatten into a disc, place inside the cling film and roll again. Cut and continue making cookies as before.

These do not spread much after baking; hence they can be placed close, separated by just an inch. Place the baking tray in the center rack of the pre-heated oven and bake for about 15-20 minutes or till the cookies start turning golden around the edges.

Remove and using a flat spatula, carefully transfer the cookies onto a wire rack and cool completely.

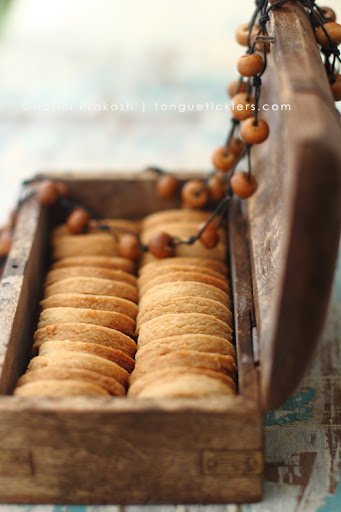
Store in air-tight containers till needed. If you are traveling, stack ten cookies and roll them in cling film, and again with foil. Fold the ends. They will travel well this way without breaking.

Harini's Vegan Vanilla Sugar Cookies