Because of the chocolate, the mousse is only about 70% raw. If you'd like to make it completely raw then use raw cacao powder and eliminate the alcohol and orange essence/extract, but be warned that it will compromise the taste and texture quite a bit. Also, I find the sweetness from the chocolate bar to be sufficient but if you like it sweeter, then you could add 2 or 3 soaked, pitted dates or a few spoons of sugar (I would not recommend jaggery as its flavour will overpower the others). You could use raw agave nectar but even though it's raw it's a highly processed product so you're better off using a small amount of sugar instead.
I found this delicious 74% Dark Chocolate with Orange Peel at Brown Tree and love to use that in my avo-orange-choclate mousse. Rs.120 is a fairly good price for a bar of 100 gms (3.5 oz).
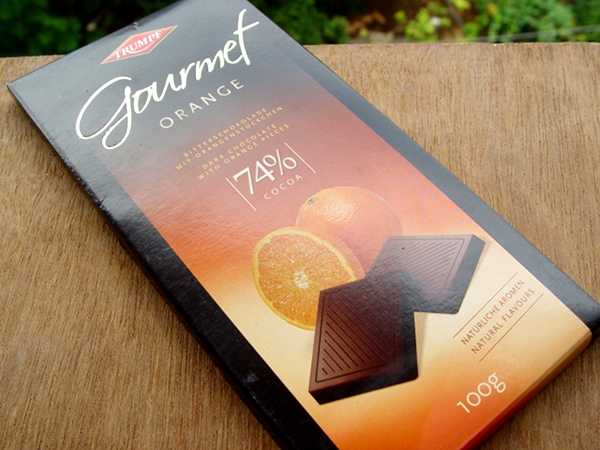
Even though I usually prefer actual dark chocolate, with a *minimum* of 74% cocoa content, I have to admit that this mousse tastes pretty delicious even when it's made with the cheaper, more commonly available Morde 45% "Dark" Chocolate. I've seen those at Nilgiris, MK Retail and Metro, among other places. But watch out for the Morde Dark Compound (different from Morde Dark Chocolate) and DO NOT even consider touching it with a ten foot pole because it is pumped with all kinds of disgusting processed crap and hydrogenated fats which are horrid for health (even if they are technically vegan). Not that I never have processed foods, but the compound is worse than most processed foods and it doesn't taste good either (yep, I tried it once long ago, before I knew how bad for health it was).

If you have ripe avocados at home, this mousse can be whipped up very quickly. It's almost as if a genie said, "yes master" *poof* and there it is, your delicious vegan mousse! :oP
I prefer to melt my chocolate using the double boiler method because somehow the texture seems better that way. But you can further reduce the preparation time by melting the chocolate in a microwave. Just place the chocolate in a micro safe glass dish, heat for 30 seconds, stir, heat for another 30 seconds and stir again and repeat until the chocolate is completely melted.
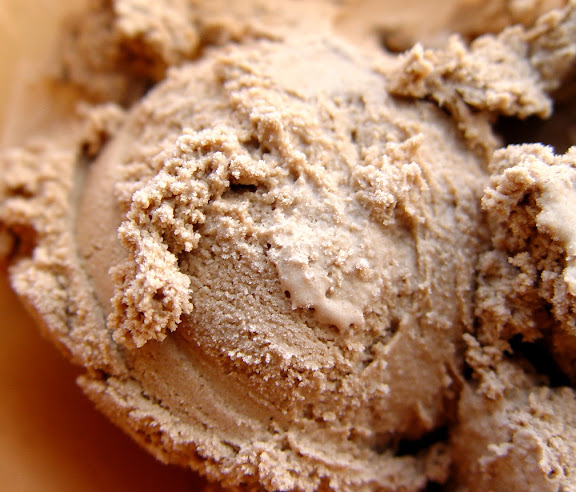
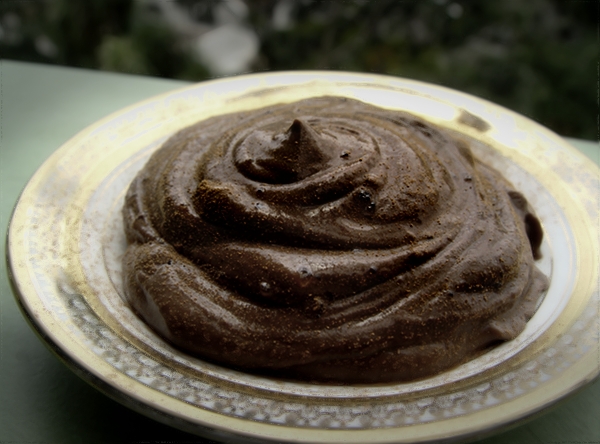
Avocado Orange Chocolate Mousse
150 gms (1 1/2 Bars) Vegan Dark Chocolate with Orange Peel
1 large, ripe Avocado
1/4 - 1/2 C Raw Cashew or Almond Mylk
1/8 tsp Orange Extract/Essence or 1/4 tsp Dried and Powdered Orange Peel
Pinch of Salt
Sugar or Soaked Pitted Dates (optional)
A great, big splash of Scotch or Rum
Cocoa or Cinnamon Powder for dusting
To melt the chocolate using the double boiler method:
Break the chocolate into chunks and place in a medium sized, heat proof glass or ceramic bowl (steel is fine too but I find glass/ceramic easier to clean).
In a small pan, heat a cup of water and place the ceramic bowl on the pan (it should cover the mouth of the pan completely so no steam escapes).
Keep the heat on low so as not to allow the water at the bottom to boil and stir the chocolate with a spoon or small whisk.
When the chocolate is half melted, turn off the heat and keep stirring until completely melted.
Take the ceramic bowl off the pan and keep aside to cool for a few minutes.
For the mousse:
Scoop out the avocado flesh into a blender jar, add the melted chocolate and salt and blend to a creamy consistency, using a little almond or cashew mylk at a time.
Add the rum/scotch and the orange extract/essence/peel powder and blend well.
Taste and add the sugar or dates if required.
Blend again and transfer to a glass dish (I use the same bowl that I melted the chocolate in).
Whip for a couple of minutes with a wire whisk.
Tastes good at this point, tastes great after chilling in the fridge for at least half an hour and tastes amazingly awesome after sitting in the fridge for a day because the flavours ripen nicely.
Serve with cocoa powder or cinnamon dusted over it.
Enjoy! :)