Umm remember how I didn't do a blog post on Friday? Well, today's post is going to totally make up for it, plenty and more. It's a super awesome Vegan Jamoon recipe!!! Yeah!
Yes, yes, I do know it's not a part of this week's Main Courses theme, nor last week's Snacks and Starters theme for that matter, but who cares? It's Dessert! And *everything* moves aside for Dessert. :D
Many of you might already know about my lengthy quest for the perfect Vegan Gulab Jamoon. I even spoke about it on a
video two weeks ago when GiGi interviewed me for her weekly program,
Who Dat Vegan on her blog
Veganville.
It started way back when hubby and I lived in Bloomington, IL. I had made a *large* quantity of Vegan Therattu Paal (Khova) out of soymilk. It's a traditional dessert made by boiling milk while stirring continuously until it turns into a thick cream, then adding jaggery (or sugar) and cardamom and cooking it to a very thick, shape-able consistency. I think I'd made it for some festival and after hubby and I had eaten plenty, the rest had been sitting in the fridge for a couple of days.
One evening, I decided to attempt making Jamoon out of it. I vaguely remembered how my grandma used to make them out of Khova when we were living in a big, happy joint family. My grandpa used to bring these pre made packages of Khova and grandma, my mom and my aunts used to mix it with maida (white flour), shape balls, deep fry them and soak them in sugar syrup.
So I mixed a random quantity of flour and a pinch of baking soda (or was it baking powder?) with the Khova and made Jamoons. I was thrilled with the results! The Jamoons seemed especially delicious since it had been over a year since I'd become vegan and I hadn't even eaten non-vegan Jamoons for a long time before that. But alas, I never wrote down the quantities or exact method I followed to make the Jamoons and to this day I regret it!
After that, my next attempt at Jamoons was only after returning to Bangalore. The result was a huge disappointment! The balls were thick skinned and rubbery and did not absorb any sugar syrup. :( This was especially painful since I'd spent over an hour in front of the stove, stirring soymilk to turn it into the Khova that went into the Jamoons. And that was only the first of my frustrating Jamoon attempts.
I unsuccessfully tried making Jamoons with a soymilk powder and tofu a few times over the years. With each attempt that was a flop, I used to get disheartened and swear I'd never bother making Jamoons again. Then again on a day I was in a particularly adventurous mode, I'd give it another go and end up feeling disappointed all over again.
Then last year during Vegan MoFo I made
Jamoons again, following Richa's
recipe from her blog
Vegan Richa. They were made of almonds and oats and were delicious, but their texture pretty different from the Jamoons I had eaten while growing up.
My next attempt was a few months later, when I suddenly had a light bulb moment of deep frying cupcake batter and soaking that in sugar syrup. The result was yummy! Slightly more close to 'real' Jamoons. But I had made the mistake of frying the Jamoons in coconut oil, so upon refrigeration, they became hard and more like
Baadushas than Jamoons. I figured I'd make them again with oil that doesn't harden upon chilling and then share the recipe here but I guess I must've finally gotten bored of trying to make Jamoons, so I never got around to doing it.
I finally remembered Jammons again last week, after all this time, when someone on our
Vegan Bangalore facebook group asked for a vegan Jamoon recipe. That's when Dr.Varadarangan shared a link to his wife's fantastic
Sweet Potato Jamoon recipe on their website,
Prevanka. The moment I read the recipe, I just knew I had to try it out. And the next thing I knew, I was ordering sweet potatoes.
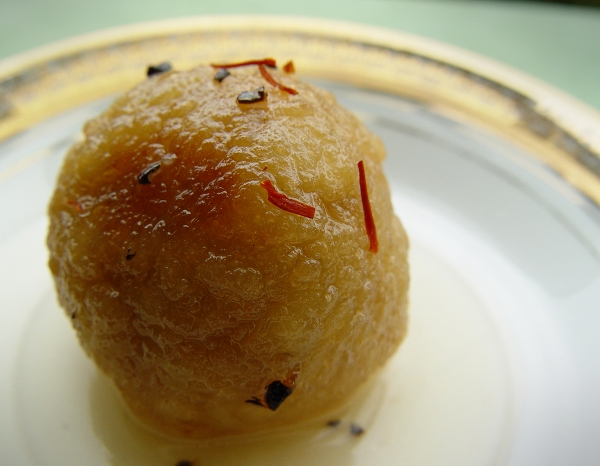
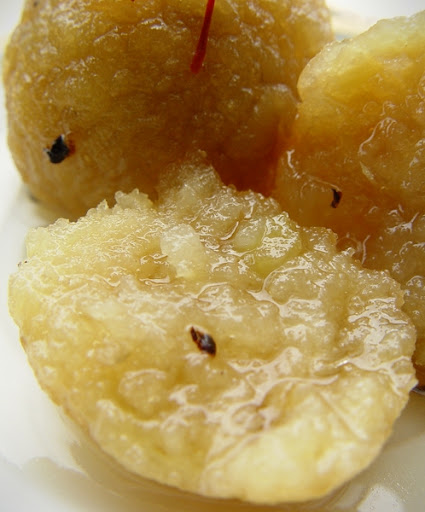
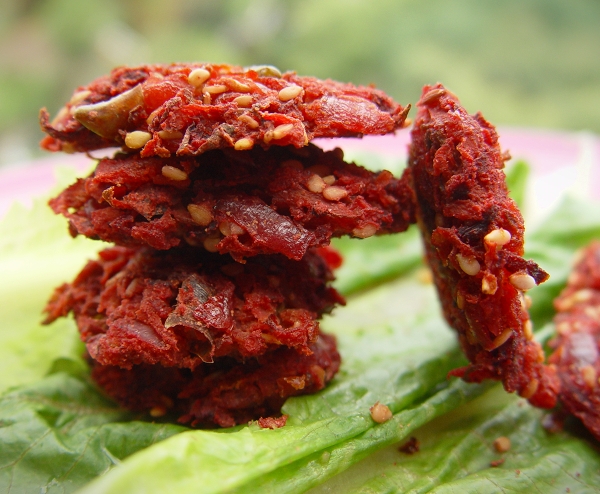
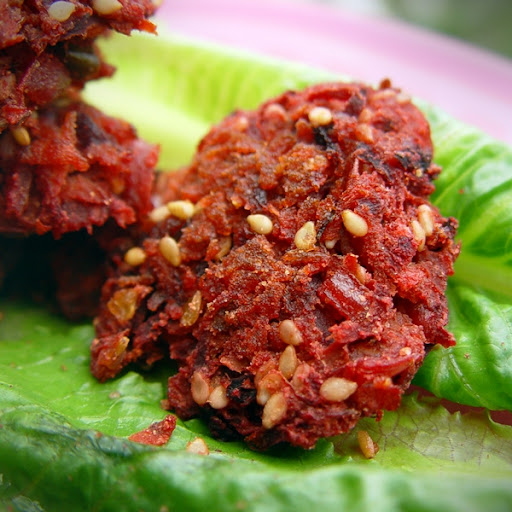
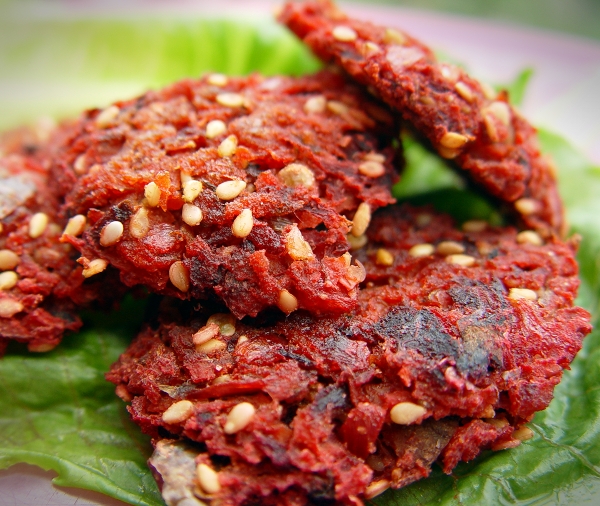
This Jamoon recipe is the closest I have ever gotten to my grandmother's Khova based Jamoons. They could be a little more soft so they absorb the sugar syrup better, but other than that, the taste and texture were really impressive. All I need to do is learn to mix the dough with a lighter touch to make the balls more fluffy and I know I'll hit the perfect Jamoons. Finally! :)
I reduced the quantities a little and added a bit of saffron for garnish, but other than that, I pretty much followed Ms.Veena Varadarangan's
original recipe. I thought I'd expand on the step by step details of the method below, so that people who would be attempting Jamoons for the first time don't make the mistakes that I've made in my previous Jamoon-making experiences. A reliable recipe is the key to making good Jamoons, but the precise method of making them is just as important.
Vegan Sweet Potato Jamoons
For the Jamoon Balls:
500 gms Sweet Potatoes (3 large sized ones)
1 C All Purpose Flour (loosely packed)
1/4 tsp Baking Soda (I think I'll try Baking Powder next time)
2 tsp Sugar
Pinch of Salt
Sesame Oil for Deep Frying.
For the Sugar Syrup:
1 C Sugar
1 C Water
2 pods Cardamom
Pinch of Saffron
Steam or boil the sweet potatoes until tender.
Peel and mash them well.
Sieve together the all purpose flour and baking soda.
Add the flour to the sweet potato and mix gently, without kneading.
Do not add any water, just mix in enough flour to form a soft dough.
Cover and keep aside for 15-20 minutes.
Pinch off bits of dough and very gently and quickly shape them into 1 inch balls (I got around 30-35 balls).
If the balls get pressed too much, they will become dense and not absorb the syrup, that's why it's important to get the balls as smooth as you can without pressing too hard.
Cover and let the balls sit for 5-10 minutes.
Heat the sugar and water together in a wide pan.
Stir until the sugar melts.
Crush the cardamom pods to coarsely powder the seeds and add.
Simmer on a low heat for a few minutes, until it becomes a thin, sticky syrup.
Turn off the heat and add a few strands of saffron.
Cover and keep the syrup warm.
If the syrup cools a lot before the balls are done, then warm it up again on a low flame, for a few minutes before adding the balls.
Heat sesame oil in a wok and deep fry the balls until they are golden brown.
The heat should be on medium-high so the balls cook well on the inside and outside.
If the flame is too low, the balls won't expand and if it is too high, then the outside will brown too quickly and the insides won't get cooked.
Place the balls on a tissue paper to drain out excess oil and let them cool for at least 5 minutes.
It's very important to let the balls cool before adding to the syrup, otherwise they'll collapse and become rubbery.
I just deep fry the whole batch of balls and then add them to the syrup together after a few minutes.
Cover and let them soak for at least 2 hours.
They taste best after sitting in the syrup overnight, in the fridge.
Jamoons taste equally delicious when served cold or hot (20 seconds in the microwave).
It's tempting to pop them in your mouth whole, but slice through them with a spoon and have each bite with some sugar syrup for the full experience.
Enjoy! :)