Salads are excellent during summer but once the colder months begin, my hand quickly loses its inclination to reach for raw vegetables. There's a need for more filling, cooked foods. This is why I love salads that include cooked ingredients in them. It's a great way to get those fresh vegetables in along with some hearty components.
If you look through my blog's Recipe Hub, you'll know that I loooooooove pulses of all kinds. There is nothing more satisfying than a big bowl of cooked beans. If I could, I'd just cook beans and eat them plain every single day. And yes, I am well aware of the consequences, as the people of Portlandia have demonstrated so tastefully in the video below. :P
Since we don't have any "designated areas" at our home, I stick to cooking with beans often but not everyday. :D
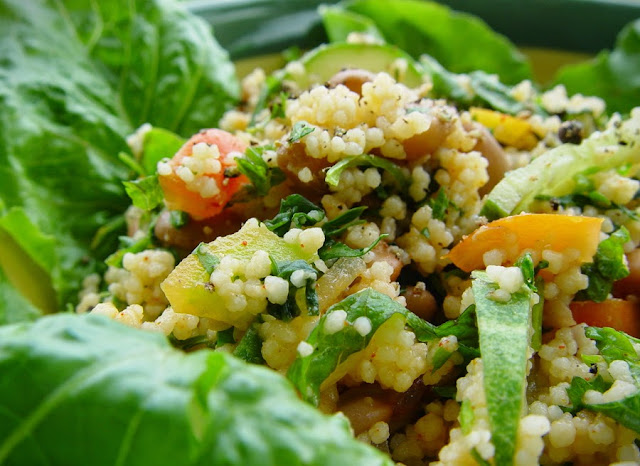
In the recipe below, I've thrown couscous into the bean and vegetables mix to turn this dish into a complete meal. Even my hubby, who doesn't consider salads a whole meal, was satisfied with this one.
I created this recipe for Global Graynz. They have put together recipe boxes which include the ingredients you will need to make this Herbed Couscous Bean Salad at home.
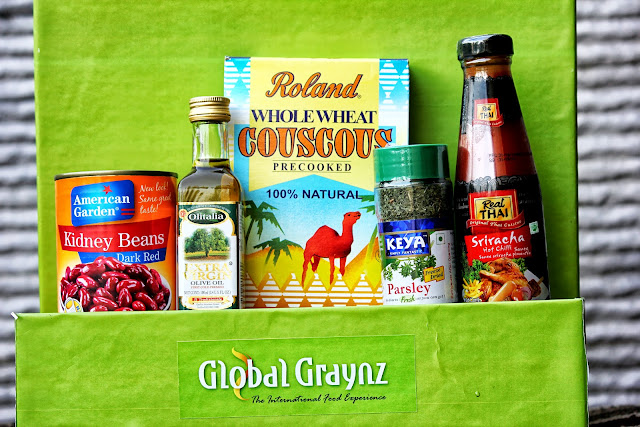

You can visit the links below to purchase the three kinds of ingredients boxes for this recipe:
1. Rare/Exotic Ingredients (home delivery to anywhere in India)
2. All Packaged Ingredients (home delivery to anywhere in India)
3. All Ingredients Including Fresh/Perishable Ones (available in Chennai only)

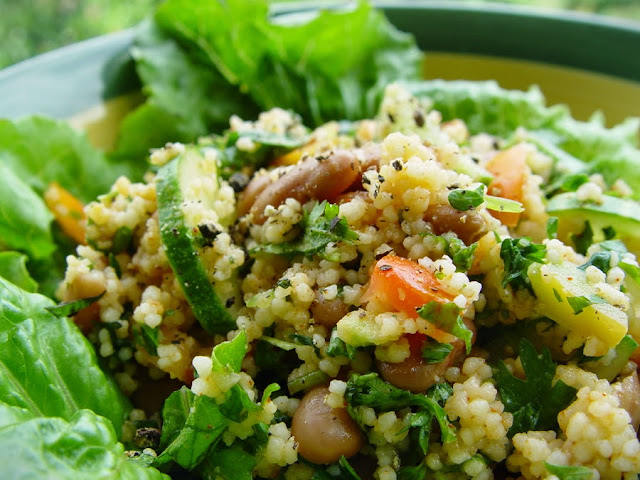
Herbed Couscous Bean Salad
1 C Instant Couscous
2 C Cooked or Canned Beans - I used Pink Rajma (Kidney Beans) but others will work too
1 C Fresh Herbs - I used Parsley, Basil, Mint and Cilantro
1 Head Romaine Lettuce
1 Cucumber (it's best to use a tender one)
3 Small Tomatoes (preferably the tart, local/naati ones)
1 Small Onion (preferably white)
2 T Sriracha Sauce
1 T Extra Virgin Olive Oil (optional)
1/4 C Lime Juice
1/4 tsp Chilli Powder
Salt - to taste
Whole Black Pepper Corns - for crushing on top
Boil 1 1/2 C of lightly salted water.
Turn off the heat, add couscous, stir, cover and keep aside for 5-6 minutes.
Fluff with a fork and allow to cool down to room temperature.
If you've freshly cooked the beans, allow them to cool down.
They need to be at room temperature or lightly chilled but not hot/warm.
If you're using canned beans, rinse them and keep aside.
Chiffonade or chop the herbs.
Tear the lettuce into pieces.
Make thin half circles of the cucumber.
Finely chop the tomatoes and onion.
Now mix all the salad ingredients together in a large bowl.
Freshly crush pepper on top and serve.
Enjoy! :)