Sunday, October 09, 2011

First Professional Food Photography Shoot - Vegan MoFo post 9


So... all my obsessive food photo shooting and posting has culminated in my first professional food photography project. :)

A few weeks ago, I attended this Art of New Age Cooking workshop by Dr. Nandita Shah of SHARAN India at In The Pink Organic Restaurant and Bazaar. While I was there, I clicked a lot of pictures of the event and the food so that I could do a write up for our Vegan Bengaluru blog.

Aparna of In The Pink saw my pictures and approached me to do a professional photo shoot for them. She wanted a handful of images of the restaurant and store, a few featuring herself and Paneesh (who co-owns the place with her) and lots of pictures of the food. I happily agreed, with one caveat that I would be shooting pictures of only vegan food. Aparna said that would be no problem at all since their menu is mostly vegan anyways and they would veganize the other items on the day I go there to click the photos.

In The Pink has a rustic, welcoming atmosphere and the staff is very friendly and helpful. I had an enjoyable time taking these pictures. :)


The grocery store section is stacked with all kinds of interesting products.


The restaurant is across the hall from the store. It is a simple and spacious setup with plenty of natural light.


Aparna and Paneesh were in quite the giggly mood when the pics were being shot.


The buffet.


And finally, the food pictures.


I will end this post with my favorite dish at In The Pink... Mysore Pak. The yummiest Indian vegan sweet I've had in a long, long time! :)

Week 1 Flashback and Some Food Porn - Vegan Mofo Post 8


After a successful and fun first week of Vegan Month of Food 2011, I've decided to take it a little easy today. So in this post I'll do a quick recap of all my posts from Vegan Mofo Week One and then share some of my vegan food photography pictures.

Day 1 - A short video clip from our local Vegan Bengaluru potluck.

Day 2 - A recipe for fluffy idlis and a pic of my awesome idli batter grinder.

Day 3 - All about ice creams and my 'method' of making them.

Day 4 - Pizza with Daiya. Ooooh yeah!


Day 5 - Dessert that I concocted out of almonds.

Day 6 - Fluffy corn bread.


Day 7 - An exotic twist on curd rice.


And now on to the random food porn...


Chocolate Cake with Raw Almond Frosting

Burger Guacamole

Chocolate Ganache Cake

Khara Avalakki Dosa

Poori Saagu

Vegan Benne Masala Dosa

Chocolate Cake with White Frosting

Chocolate Ganache Cake Inside


Wish you all a wonderful and relaxing weekend! :)

Saturday, October 08, 2011

Seasoned Peanut Yogurt Black Rice - Vegan Mofo post 7


We've come to the end of the first week of Vegan Mofo and I've successfully managed to post every single day! Woohoo!! :D

Over the past few months, I have found two great local sources of organic produce and grains. One was Pristine Nature, an online store I spoke about on my blog a few weeks ago and the other is In The Pink, a restaurant and bazaar which I will be featuring on my blog very soon.

At both these places, I have been able to obtain black rice which I have gotten addicted to. Pristine Nature sells Burmese black rice and In The Pink has a slightly different variety. But both of them taste equally delicious!

The rice cooks to a beautiful deep grape colour and a sticky texture. It's perfect to be mixed and had with liquidy stuff like sambar, rasam or dal and it works fantastically in stewy dishes like Bisi Bele Bath and Pongal. But my most favorite way to eat it is in the form of Seasoned Curd Rice made of Peanut Yogurt.

This is an exotic twist to a very traditional South Indian dish. :)


For the curd rice, mix together:

1 C Cooked and cooled Black Rice
1 C (or more if you like) Peanut Curds
1/2 t Vinegar/Lemon Juice
Salt

For the seasoning:

1/2 t Coconut Oil
1/4 t Black Mustard Seeds (Sasive)
1/4 t Cumin Seeds (Jeerige)
1 t Split Black Gram Dal (Uddina Bele)
1 t Split Bengal Gram Dal (Kadale Bele)
2 Green Chillies chopped into little circles
Asafoetida Powder (Ingu)
Curry Leaves (Karibevina Soppu)

Heat oil in a small, heavy bottomed pan for half a minute. Add mustard and cumin seeds. They will crackle so cover lightly for a few seconds. Add the dals and stir for a few seconds until they are lightly browned. Add the asafoetida, curry leaves and green chillies. Stir for a few seconds, turn off the heat and stir some more.

Add the seasoning mixture to the prepared curd rice. Mix well and serve.

Enjoy! :)


Notes:

Curd rice is traditionally eaten at the end of a spicy meal.

It tastes great after sitting around for a couple of hours because the curds will ferment and develop a light tangy taste.

You can add grated or finely chopped coconut, pomegranate, fresh grapes or raisins to this according to your taste preferences.

Friday, October 07, 2011

Maize Bread - Vegan Mofo Post 6


Maize is the term we use to refer to the locally available variety of corn in India. Ever since I tasted corn bread for the first time at Angelica Kitchen in downtown Manhattan, I knew I'd wanted to add the recipe to my baking repertoire. After returning to Bangalore, I searched in vain for corn meal here. Then one fine day I saw broken maize at the grocery store and even though it had more of the texture of corn grits as opposed to corn meal, I knew it would do the trick! :)

I adapted this recipe from the very first vegan recipe book in my collection, Very Vegetarian by Jannequin Bennett. A beautiful hard cover with recipes ranging from simple to gourmet and pictures ranging from super delicious to droolalicious! To this day, the book continues to give me guidance and inspiration.

Corn bread a very simple and quick bread with the right balance of moistness and crumbliness. Hubby and I enjoy it best with vegan chilli (as you can see in the picture). The crumbs soak up all the flavors from the chilli and combine to create a delicious burst of flavors and textures in the mouth.

Corn Bread and Chilli

1 C Broken Maize or Yellow Cornmeal
1 C Maize Flour or Corn Flour or All Purpose Flour
1 1/2 t Baking Powder
1/2 t Baking Soda
1/4 t Salt
1/4 C Maple Syrup or Sugar Syrup
1/3 C Soymylk or Almond Mylk or Cashew Mylk*
1 T Lemon Juice or Vinegar (I prefer Apple Cider Vinegar best)
3 T Warm Olive Oil or other Vegetable Oil
3/4 C Warm Water

Preheat oven to 190 C / 375 F.

Keep a 9 inch square baking pan ready.

Pour the warm water over the broken maize and keep aside.

Sift together the dry ingredients.

Beat together the wet ingredients.

Mix everything together.

Pour into the baking pan and quickly and lightly spread to make a more or less even layer.

Bake for 25 minutes.

Serve warm.

Enjoy! :)


*Note: I tried using water instead of Vegan Mylk and it really messed up the texture. I think a certain amount of protein/fat is required in the liquid for the crumbs to come out perfect.

Wednesday, October 05, 2011

Saffron Infused Almond Dessert - Vegan MoFo post 5


As this highly addictive veganmofo madness continues, I have been feeling extremely grateful for my prior procrastination! Over the last few months, I had created a bunch of stuff in my kitchen and taken pictures, but I hadn't updated my blog with all of them. So now, during vegan mofo, since blog hopping and commenting has taken over my online life, I'm able to keep my blog up with the activity because the yummy food pictures are already waiting to be linked here. Phew! See, being lazy has its benefits. :D

This is an almond cream based mousse like dessert I concocted a while ago. It's raw, except for the little bit of agar agar (which needs to be cooked to work well). Pretty simple to make too! It would also have been a super quick dessert if it weren't for the slightly painful almond skin peeling step. But hey, even that is something you get a hang of over time. I've become a lot faster at it now than I used to be during my initial attempts.

Saffron Infused Raw Almond Dessert

1 C Almonds
2 pinches Saffron Strands
Raw Agave Nectar (to taste)
2 T Agar Agar flakes

Soak almonds overnight in filtered water to start the sprouting process.

In the morning, throw out the water and rinse the almonds thoroughly. This step ensures that your body absorbs the enzymes in the almonds better.

Now the part which involves effort. Patiently peel the skin off the almonds. You can pour more water over them so they stay moist through the peeling process, making it easier and quicker.

Blend the peeled almond into a smooth, creamy paste adding a wee bit of of fresh, filtered water.

Add the saffron and agave nectar and blend again. Taste and adjust the level of agave. Keep aside in the blender jar.

Boil 1/2 C water and add the agar agar flakes. Stir and cook on medium flame until the flakes have dissolved. Let it cool for a few minutes until slightly warmer than room temperature.

Pour this agar agar mixture into the blender jar with the almond paste in it and blend for a few beats just to get everything mixed well and whipped up.

Pour the almond cream into individual dessert bowls and chill in the fridge for a few hours.

Serve cold and enjoy! :)

Tuesday, October 04, 2011

Daiya Pizza - Vegan MoFo post 4


Day 4 of Vegan MoFo. I seriously should have scheduled a lot more posts (I just had 3 lined up) well in advance. Now, instead of writing up blog posts, I've been spending all my online hours MoFo blog hopping!

It's too hard to resist. I'm discovering all these awesome blogs and with all the criss-cross interactivity happening between mofoers all over the interwebs (blogs, twitter, facebook...), I feel like I'm a part of this large, global community of warm and friendly people and I wish veganmofo would last forever!

Today's post is going to be quick and simple. But not without a back story of course. :oP

In my pre vegan days, I was never a fan of cheese. When our parents took us to Wimpy (a pretty nice UK based fast food restaurant that existed here in Bangalore before the icky US fast food chains flooded India and wiped Wimpy out), sis and I always asked them to put very less cheese on our pizzas. And that was only because they claimed they couldn't make them cheese-less because the toppings wouldn't stay on then. So when I went vegan, 8 years ago, I never even gave a second thought to cheese.

Then last year, when DH and I visited the US for a few months, we got to taste Daiya vegan cheeze for the first time at Sugar Plum Vegan Café at Sacramento. I never knew cheeze could be so delicious!!

So a couple of months ago, when my cousin's friend was visiting here from the US, we asked her to please please please bring a pack of Daiya for us (packed safely between ice bags of course) in her luggage and she very kindly did so. :)

Needless to say, I've been using it very sparingly to make it last and thankfully, a little does go a long way.

The other day I made this pizza. Looks yum, huh? :D

Daiya Pizza

I'm still working on getting a perfect pizza crust (mine's pretty yummy but it's more like bread than crust) so I won't post the recipe for that here. But here's how I made the topping:

Daiya
1 Pack Tofu - pressed gently to squeeze out water, patted dry and cubed
3 Ripe Tomatoes - quartered
3-4 cloves Garlic - chopped roughly
Nutritional Yeast
Balsamic Vinegar
Jaggery (or other sweetener)
Tabasco Sauce or Chilli Powder (or a bit of both)
Dried Oregano
Pepper
Salt

Put everything, except Daiya and Tofu, into a blender and liquefy.

Add Tofu cubes and toss.

Pour the sauce over olive oil coated, partially baked pizza base.

Sprinkle Daiya over everything and bake for about 20-25 minutes.

Slice and serve hot.

Enjoy! :)

Monday, October 03, 2011

I Scream You Scream We All Scream For Ice Cream - Vegan Mofo post 3


Today's Vegan Mofo post is a photo blog of a few vegan ice creams I've made in the recent past and my ice cream making process.

I never follow exact recipes while making anything (except in my baking) and ice creams are no exception. I just have a method that I stick to and have developed a 'feel' over time for attaining the right texture.

For the base, I usually use a combination of a nut and a creamy fruit or a vegan mylk and vegan whipped cream. To this I add any flavor that hubby and I are in a mood for - coffee powder, melted dark chocolate, pure vanilla extract, saffron, cardamom, rum (any alcohol is to be added only in the last minutes of the freezing process)...- and a sweetener of some sort - sugar, raw agave nectar, maple syrup... - et voila, the vegan ice cream mix is ready! :)

Pointers:

*Tasting and adjusting is of course a must.
*Make it a wee bit sweeter than you might like because after the freezing process the level of sweetness reduces.
*Add a tiny pinch of salt to enhance the taste.
*Chill the mix for over a day before freezing - either in an ice cream maker or by following the whipping and freezing method.

The latter involves whipping and freezing and whipping and freezing and so on once every half an hour for the first two hours of the freezing process. And then once an hour for the next two hours (or until the consistency feels about right). The way to achieve a good ice creamy texture is to use a blender (hand blender would be more convenient than transferring the ice cream into a jar each time) but you can also use a wire whisk, a spatula or a fork.

Without further ado, here are my droolalicious, creamy, scoop-able vegan ice creams. :)

Very Vanilla Cashew Mylk Ice Cream

- recipe for the vanilla cake in the background here
Very Vanilla Cashew Mylk Ice Cream

Cashew Mocha Rum Ice Cream


Cashew Mocha Ice Cream

Raw Pistachio Mango Ice Cream

- recipe here
Raw Pista Mango Ice Cream

Mango Ice Cream


Mango Ice Cream

Sunday, October 02, 2011

Idli the fluffy South Indian Rice Cake - Vegan MoFo post 2


Idlis are a staple breakfast food in South India. These fluffy rice cakes are made by soaking, grinding and fermenting a combination of a specific type of rice and urad dal (split black gram). Adding a handful of methi (fenugreek) seeds in the mix makes the Idlis extra soft and fluffy.

AWESOME KITCHEN GADGET ALERT!!! :)

Idli Grinder

I use my trusty Kailash Tilting Wet Grinder to make a super smooth Idli batter. It has a motor unit over which the grinding vessel is placed. The inner base of the vessel has a granite layer. There is also a grinding attachment made of three granite stones which is placed into the vessel where it is held in place. When the machine is turned on the vessel starts to rotate which causes the stones to rotate in the opposite direction. No grain or lentil can hold the hope of staying whole under the pressure of those awesome stones. ;)

The tilting mechanism in my grinder makes it very convenient to pour out the batter without having to carry the weight of the heavy vessel.

For those who make Idlis just occasionally, a good blender with sharp blades will do fine. You just have to remember to soak the urad dal and rice separately and make a very smooth paste of the dal before grinding the rice (the methi seeds are soaked with the rice). But for someone who is looking to be a regular Idli pro, a wet grinder is would make for a very nifty gadget. It's been a truly worthy investment for me! :)

Idlis

Ingredients:

1 C Whole or Split Black Gram
5 C Short Grained Idli Rice (I also like to use Mulleri Red Rice for my Idlis sometimes)
2 T Fenugreek Seeds
Salt

Soak everything (except salt) together in plain water overnight.

Drain the soaking water into a vessel and keep aside.

Set up the idli grinder according to instructions, pour some soaking water into it and switch it on.

With the motor running, slowly add in the rice, dal and methi mixture.

Pour in some more of the water to ensure the steady movement of the grinding stones.

Cover the vessel with the lid and get online and blog for the next 20 minutes.

Look in on the batter and add more water if required (the batter should have a fairly thick but pourable consistency) and let the grinder run for another 15 minutes or so.

Once the batter is completely smooth turn it off and pour it into a large container (batter should fill it only halfway to allow it to expand while fermenting).

Add salt and mix lightly with your hand, cover and keep aside in a warm place for about 12 hours (more if you live in a cold climate).

Once the batter has risen well and attained a slightly sour smell, it is ready for use.

Ladle the batter into Idli mold trays.

Meanwhile, bring water to boil in a steamer and once it begins to boil place the Idli trays into the steamer.

Cover and steam for 8-10 minutes on medium heat.

You should be able to smell the cooked Idlis in the steam wafting out of the steamer.

Carefully remove the Idly trays out of the steamer and let the Idlis cool for a few minutes.

Gently unmold the Idlis using a wide, flatish spoon.

Drizzle sesame oil over the Idlis and serve them hot with Sambar or Coconut Chutney.

Enjoy! :)

Saturday, October 01, 2011

My first Vegan MoFo post. A short video clip.


Thought I'd start off my very first Vegan MoFo post with a video. I didn't film it but I am featured in it. :)

Last Saturday we had our monthly Vegan Bengaluru potluck at Jaaga - Creative Common Ground. We hold these potlucks and keep them open to vegans and non-vegans alike. The idea is to have anyone who is interested in veganism come share the vegan food and clarify any questions they might have which might make it easier for them to get on the vegan path. The atmosphere of these events is very relaxed and chilled out.

Jaaga is a beautiful, airy structure and was a perfect space for our local vegan group to enjoy the delicious food and interesting conversation. The people who run the place are very friendly and welcoming. They even joined us at our potluck for some time.

While we were there, Clemence Barret (one of the founders of Jaaga) asked to shoot a video clip of our vegan event and we were more than happy to oblige. Here's the result:


And here are some drool worthy images of the food we ate that day.

Bruchetta Bread

Bruchetta Topping

Pasta Salad

Mysore Pak

Semiya Sweet

To see more goodies and snapshots of the Vegan Bengaluru potluck, visit my original post about this event on the Vegan Bengaluru blog.

Monday, September 05, 2011

Ganesha Chaturthi and Yummy Kadubus


I love a good, filling festival feast! But then, who doesn't? No matter what religious festival it is that one is celebrating, the love for the associated food is commonly shared. :)

It's probably because of a combination of the joyous childhood memories we have associated with festivals and the amount of care and hard work which always goes into making food fit for celebration.

Kadubu / Kozakottai

Being a strong believer in the power of spiritual vibrations, I feel that food when it's made with the intention of a offering to a deity as neiveidhya first before being eaten is most sublime.

Among all the festival we grew up celebrating, my fondest memories are of Gowri and Ganesha (not even Diwali with all its fire crackers matches up). For the first half of my life, I lived in a big, happy joint family. We were fourteen of us in one huge bungalow. All festivals were celebrated together, as a family.

On the first day was the Gowri pooja followed on the next day by the Ganesha pooja. The story is that Gowri comes down to Earth on that day to visit her mother and Ganesha (Gowri's youngest son) accompanies her to stay at his grandma's place. And grandma spoils him with all kinds of delicious goodies. After the festivals are done, a few days later Ganesha safely takes his mother Gowri back up to Kailasa (heaven). That's when we leave the clay idols in water as a send off until the following year.

A few days before the festival, when the adults purchased the larger Gowri and Ganesha clay idols for the ritual, they always purchased smaller ones for us kids.

Me, my little sister and our two little cousin brothers used to willingly and enthusiastically wake up at the ungodly hour of 4 am on both festival days, get dressed in traditional clothes and sit at our mini altar to do the ritual to our little Gowri and Ganesha. The girls did the Gowri ritual and the boys did the Ganesha ritual. We even had miniature silver vessels, aarthis and all the other stuff required for the ceremony. And at the end of the ritual, the feast was brought out and placed in front of the deities as an offering. This marked the end of the ceremony. After this, we could commence wolfing down the yummy goodies! :D

Those were such utterly joyful days!!

Ganesha after the pooja

Now hubby and I bring home only the Ganesha (I visit my mom's place and all my aunt's places on the day of the Gowri festival) and perform a simple, short pooja. But we do make sure to cook a whole bunch of the traditional delicacies for the neiveidhya offering so we can stuff ourselves later to our tummies' content. :D

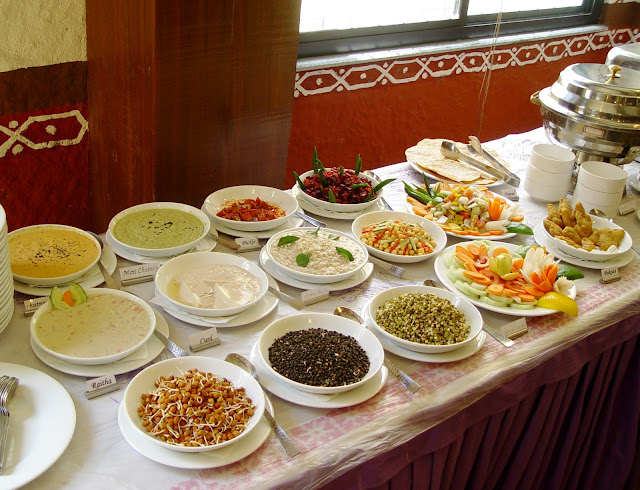
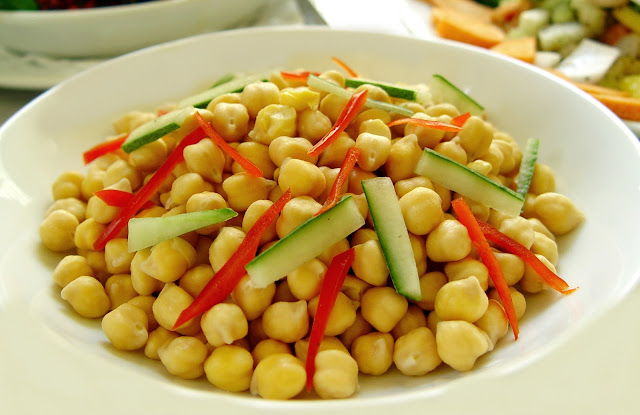
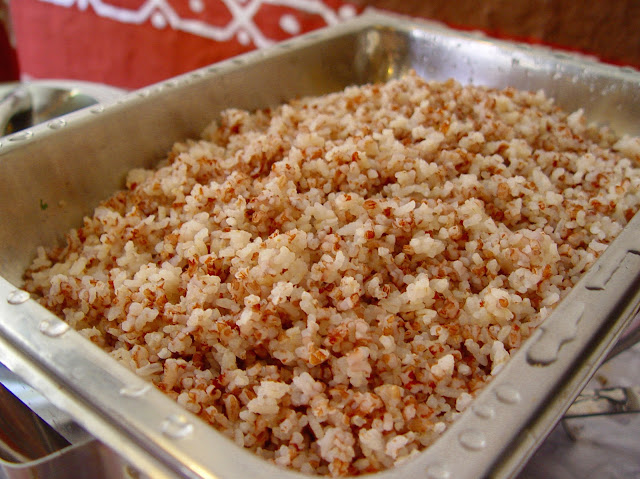
This year we made three types of kadubus/kozakottais, unfermented idli with coconut cilantro chutney, sundal out of small, brown channa and these miniature steamed snacks (don't really know what they are called).

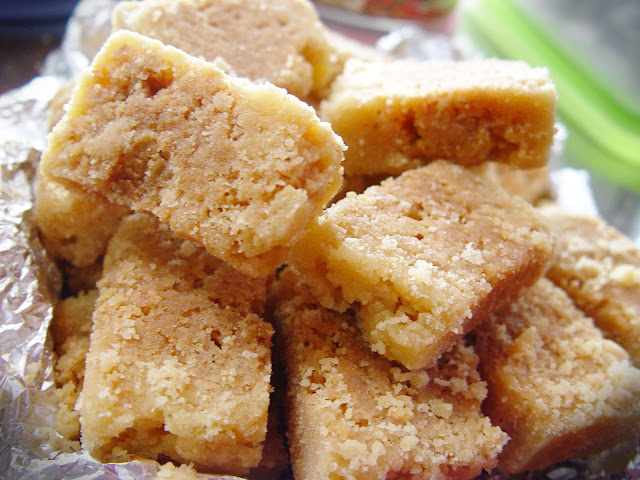
For the three kadubu fillings - coconut jaggery, sesame jaggery, savory urad dal - we followed the recipes from Subbu's Kitchen. For the outer rice dough covering we used a slightly different method.

Kadubu Dough

1 C rice flour
1 C water
2 tsp oil
a pinch of salt

Mix everything into a paste in a heavy bottomed pan and place on medium heat. Stir continuously (will take maybe 5-10 minutes) and let it cook until the paste starts coming together into a ball of dough.

Take the pan off the stove and once the dough cools a bit, dip your palm in cold water and knead the dough until it's smooth. Follow instructions to make various fillings, stuff and steam.

Kadubus / Kozakottais inside

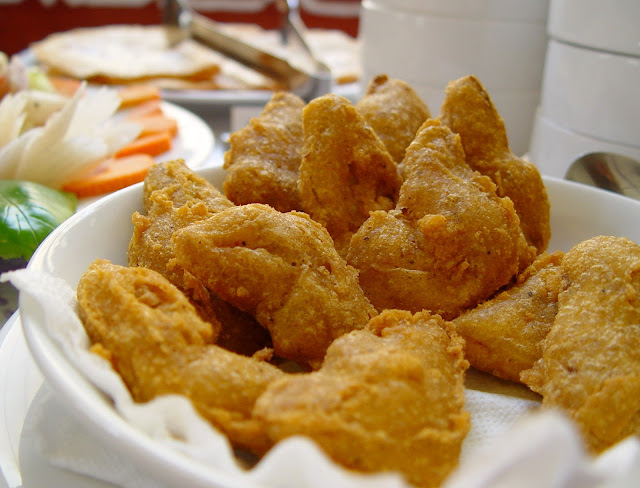
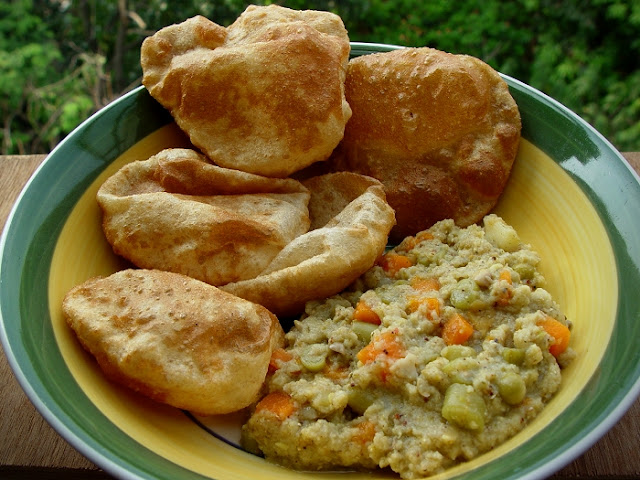
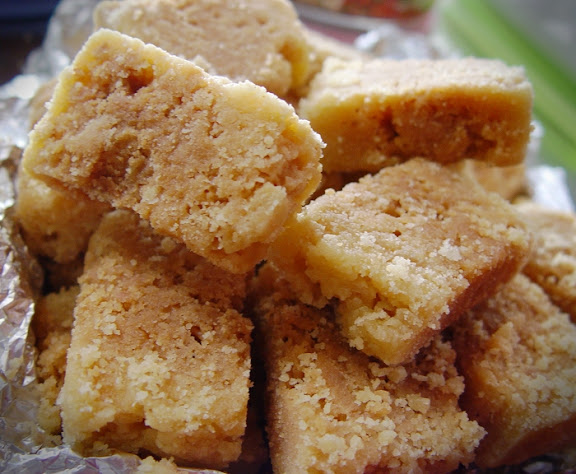
Fun Little Savory Steamed Snacks

These are usually made out of leftover kadubu dough but I like them so much that I always make extra dough just for these. :)

Kadubu dough
1 tsp moong dal and 1 tsp channa dal (soaked together for half an hour)
2 fresh green chillies, asafoetida and salt (crushed well together)
2 tsp chopped fresh cilantro

Mix everything together.
Form into fun little shapes - ball, stick, ring, disk etc...
Steam along with the kadubu for 5-8 minutes.


Another Ganesha Chaturthi dish that I truly relish is Kandundes (didn't make them this time around though). They are made of four kinds of lentils soaked together and ground to a thick paste along with spices, shaped into balls and steamed. Then they are dunked in a yogurt based gravy and served. I make these on non festival days too because then I get to add onion (a festival no no) and also a bunch of chopped veggies. I either serve those in a vegan yogurt based gravy or just plainly spiced vegan yogurt. I'll share a recipe for those the next time I make them.

What goodies do you prepare for Gowri Pooja and Ganesha Chaturthi and which ones are your favorites?

Wednesday, August 24, 2011

Featured on The Students Mag August 2011 issue.


I'm pleased to share that I have been featured in The Students Magazine in a 3 page interview by Satya Kandala (Sub Editor). She framed the questions around my creative journey, my art, my cooking and how my veganism has woven itself into all these parts of my life. I have answered them in detail.

The August issue of the magazine, in which my interview has been published, hit the stands a couple of weeks ago and is available in leading book stores in Bangalore. Since their website is not completely up and running, they don't have an online version of the magazine available yet. Satya was kind enough to send me a couple of physical copies of the mag for my collection.

I've taken digital images of the 3 pages and have posted them below if you'd like to read. :)

You can click on each image to be taken to a slightly larger version for clearer viewing if you like.

The Students Mag interview page 1

The Students Mag interview page 2

The Students Mag interview page 3

Thursday, July 21, 2011

Mediterranean Sun Dried Tomato Bread


Mediterranean Sun Dried Tomato Bread

1 1/2 C soymilk
2 T sugar
4 T olive oil
2 t active dry yeast
2 T raw flax seed powder
1 t salt
1 C all purpose flour
3-4 C whole wheat flour

sun dried tomatoes (soaked in warm water and re-hydrated)
chilli powder
herbs - oregano, rosemary etc...

Heat the soymilk until lukewarm (test the temperature with your knuckle). Pour into a large mixing bowl and whisk in the sugar, oil and yeast. Leave for 15 minutes for the yeast to dissolve. It should be all bubbly and frothy by the end of this time.

Add the salt and flax seed powder and beat a little. Slowly whisk in the 1 C all purpose flour and 2 1/2 cups of the whole wheat flour a little at a time while continuing to beat it as much as possible. Once the dough gets too thick to beat, add just a little more flour and mix with your palms to obtain a rough dough.

Form this dough into a ball and transfer it onto a flat, floured surface (I use my cleaned granite counter top). Knead well for about 10 mins at least (add a little more whole wheat flour while kneading if the dough is sticky but make sure it doesn't get too dry) until it reaches a smooth, elastic consistency.

An effective way to knead is to press the dough away from you with the base of your palms, then fold the dough over towards you and then it press again.

Form the kneaded dough into a ball. Grease the mixing bowl with a little bit of oil. Place the dough ball into the bowl and swirl it around until it's coated with the oil. Cover with a clean plastic bag and let it sit in a warm spot for about 2 hours, until doubled in volume.

Punch down the dough and give it a quick knead for a few seconds. Divide it into two balls. Roll the balls out into large rectangles about 1 centimeter (a little less than 1/2 inch) thick and place them flat. Lightly coat these rectangles with a very thin layer of olive oil and spread the sun dried tomatoes and sprinkle the chilli powder and herbs over them (you can add sliced olives too but I didn't have any when I made the bread so they're not in there). Gently roll up the sheets and form them into loaves. Place them in loaf pans, cover again with the plastic bags and let them sit for 1 1/2 hours to double in volume.

I actually made one bread with this rolling up method and the other with bits of the sun dried tomatoes and herbs and spices kneaded into the loaf. Both were nice but I personally preferred the taste of the rolled up style bread better.

Preheat the oven to 190C/375F. Bake the loaves for 50 minutes.

A great way to get a nicely browned, crusty top is to spray the bread with water every 15 minutes or so while it is baking.

Cool for some time in the loaf pans. Transfer to a cooling rack and cool completely. Slice with a serrated knife and serve.

Tastes great with Hummus!

Mediterranean Sun Dried Tomato Bread with Hummus

Mediterranean Sun Dried Tomato Bread with Hummus