Monday, September 05, 2011

Ganesha Chaturthi and Yummy Kadubus


I love a good, filling festival feast! But then, who doesn't? No matter what religious festival it is that one is celebrating, the love for the associated food is commonly shared. :)

It's probably because of a combination of the joyous childhood memories we have associated with festivals and the amount of care and hard work which always goes into making food fit for celebration.

Kadubu / Kozakottai

Being a strong believer in the power of spiritual vibrations, I feel that food when it's made with the intention of a offering to a deity as neiveidhya first before being eaten is most sublime.

Among all the festival we grew up celebrating, my fondest memories are of Gowri and Ganesha (not even Diwali with all its fire crackers matches up). For the first half of my life, I lived in a big, happy joint family. We were fourteen of us in one huge bungalow. All festivals were celebrated together, as a family.

On the first day was the Gowri pooja followed on the next day by the Ganesha pooja. The story is that Gowri comes down to Earth on that day to visit her mother and Ganesha (Gowri's youngest son) accompanies her to stay at his grandma's place. And grandma spoils him with all kinds of delicious goodies. After the festivals are done, a few days later Ganesha safely takes his mother Gowri back up to Kailasa (heaven). That's when we leave the clay idols in water as a send off until the following year.

A few days before the festival, when the adults purchased the larger Gowri and Ganesha clay idols for the ritual, they always purchased smaller ones for us kids.

Me, my little sister and our two little cousin brothers used to willingly and enthusiastically wake up at the ungodly hour of 4 am on both festival days, get dressed in traditional clothes and sit at our mini altar to do the ritual to our little Gowri and Ganesha. The girls did the Gowri ritual and the boys did the Ganesha ritual. We even had miniature silver vessels, aarthis and all the other stuff required for the ceremony. And at the end of the ritual, the feast was brought out and placed in front of the deities as an offering. This marked the end of the ceremony. After this, we could commence wolfing down the yummy goodies! :D

Those were such utterly joyful days!!

Ganesha after the pooja

Now hubby and I bring home only the Ganesha (I visit my mom's place and all my aunt's places on the day of the Gowri festival) and perform a simple, short pooja. But we do make sure to cook a whole bunch of the traditional delicacies for the neiveidhya offering so we can stuff ourselves later to our tummies' content. :D

This year we made three types of kadubus/kozakottais, unfermented idli with coconut cilantro chutney, sundal out of small, brown channa and these miniature steamed snacks (don't really know what they are called).

For the three kadubu fillings - coconut jaggery, sesame jaggery, savory urad dal - we followed the recipes from Subbu's Kitchen. For the outer rice dough covering we used a slightly different method.

Kadubu Dough

1 C rice flour
1 C water
2 tsp oil
a pinch of salt

Mix everything into a paste in a heavy bottomed pan and place on medium heat. Stir continuously (will take maybe 5-10 minutes) and let it cook until the paste starts coming together into a ball of dough.

Take the pan off the stove and once the dough cools a bit, dip your palm in cold water and knead the dough until it's smooth. Follow instructions to make various fillings, stuff and steam.

Kadubus / Kozakottais inside

Fun Little Savory Steamed Snacks

These are usually made out of leftover kadubu dough but I like them so much that I always make extra dough just for these. :)

Kadubu dough
1 tsp moong dal and 1 tsp channa dal (soaked together for half an hour)
2 fresh green chillies, asafoetida and salt (crushed well together)
2 tsp chopped fresh cilantro

Mix everything together.
Form into fun little shapes - ball, stick, ring, disk etc...
Steam along with the kadubu for 5-8 minutes.


Another Ganesha Chaturthi dish that I truly relish is Kandundes (didn't make them this time around though). They are made of four kinds of lentils soaked together and ground to a thick paste along with spices, shaped into balls and steamed. Then they are dunked in a yogurt based gravy and served. I make these on non festival days too because then I get to add onion (a festival no no) and also a bunch of chopped veggies. I either serve those in a vegan yogurt based gravy or just plainly spiced vegan yogurt. I'll share a recipe for those the next time I make them.

What goodies do you prepare for Gowri Pooja and Ganesha Chaturthi and which ones are your favorites?

Wednesday, August 24, 2011

Featured on The Students Mag August 2011 issue.


I'm pleased to share that I have been featured in The Students Magazine in a 3 page interview by Satya Kandala (Sub Editor). She framed the questions around my creative journey, my art, my cooking and how my veganism has woven itself into all these parts of my life. I have answered them in detail.

The August issue of the magazine, in which my interview has been published, hit the stands a couple of weeks ago and is available in leading book stores in Bangalore. Since their website is not completely up and running, they don't have an online version of the magazine available yet. Satya was kind enough to send me a couple of physical copies of the mag for my collection.

I've taken digital images of the 3 pages and have posted them below if you'd like to read. :)

You can click on each image to be taken to a slightly larger version for clearer viewing if you like.

The Students Mag interview page 1

The Students Mag interview page 2

The Students Mag interview page 3

Thursday, July 21, 2011

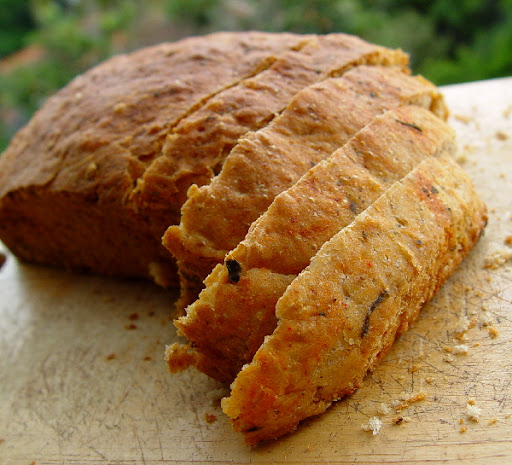
Mediterranean Sun Dried Tomato Bread


Mediterranean Sun Dried Tomato Bread

1 1/2 C soymilk
2 T sugar
4 T olive oil
2 t active dry yeast
2 T raw flax seed powder
1 t salt
1 C all purpose flour
3-4 C whole wheat flour

sun dried tomatoes (soaked in warm water and re-hydrated)
chilli powder
herbs - oregano, rosemary etc...

Heat the soymilk until lukewarm (test the temperature with your knuckle). Pour into a large mixing bowl and whisk in the sugar, oil and yeast. Leave for 15 minutes for the yeast to dissolve. It should be all bubbly and frothy by the end of this time.

Add the salt and flax seed powder and beat a little. Slowly whisk in the 1 C all purpose flour and 2 1/2 cups of the whole wheat flour a little at a time while continuing to beat it as much as possible. Once the dough gets too thick to beat, add just a little more flour and mix with your palms to obtain a rough dough.

Form this dough into a ball and transfer it onto a flat, floured surface (I use my cleaned granite counter top). Knead well for about 10 mins at least (add a little more whole wheat flour while kneading if the dough is sticky but make sure it doesn't get too dry) until it reaches a smooth, elastic consistency.

An effective way to knead is to press the dough away from you with the base of your palms, then fold the dough over towards you and then it press again.

Form the kneaded dough into a ball. Grease the mixing bowl with a little bit of oil. Place the dough ball into the bowl and swirl it around until it's coated with the oil. Cover with a clean plastic bag and let it sit in a warm spot for about 2 hours, until doubled in volume.

Punch down the dough and give it a quick knead for a few seconds. Divide it into two balls. Roll the balls out into large rectangles about 1 centimeter (a little less than 1/2 inch) thick and place them flat. Lightly coat these rectangles with a very thin layer of olive oil and spread the sun dried tomatoes and sprinkle the chilli powder and herbs over them (you can add sliced olives too but I didn't have any when I made the bread so they're not in there). Gently roll up the sheets and form them into loaves. Place them in loaf pans, cover again with the plastic bags and let them sit for 1 1/2 hours to double in volume.

I actually made one bread with this rolling up method and the other with bits of the sun dried tomatoes and herbs and spices kneaded into the loaf. Both were nice but I personally preferred the taste of the rolled up style bread better.

Preheat the oven to 190C/375F. Bake the loaves for 50 minutes.

A great way to get a nicely browned, crusty top is to spray the bread with water every 15 minutes or so while it is baking.

Cool for some time in the loaf pans. Transfer to a cooling rack and cool completely. Slice with a serrated knife and serve.

Tastes great with Hummus!

Mediterranean Sun Dried Tomato Bread with Hummus

Mediterranean Sun Dried Tomato Bread with Hummus

Wednesday, July 06, 2011

Lazy Pizza


Though I normally prefer to bake my own pizza base, sometimes I get lazy and look for the easy/quick way out. Thankfully Nilgiris carries pretty decent whole wheat flattened bread which works. Well, when commercial products say 'whole wheat', it means they have some amount of whole wheat in there along with the usual lot of maida (all purpose flour), but at least it's a little better than getting breads made blatantly of white flour! Or so claims my slothful side. :oP

I concocted a nice, thick, fairly healthy and more importantly quick pizza sauce last night so all I needed to do is slather it onto the pizza base, bake it for 15 minutes in a hot 200C oven, sprinkle on some herbs, crush some pepper et voila! A super yummy dinner done in less than half an hour. :D

Simple Pizza

Here's what went into the pizza sauce:

4 Tomatoes
1/2 C Sun Dried Tomatoes
6-7 Cloves of Garlic
1/2 C Pecans
1/4 C Balsamic Vinegar
3 T Nutritional Yeast
1/2 t Jaggery
Chilli Powder
Salt
1/4 C Olive Oil

Rehydrate the sun dried tomatoes in 1/4 C warm water. Blend everything, except olive oil, together (including sun dried tomato water) into a smooth, creamy, slightly thick sauce.

Transfer to airtight container and add the olive oil on top. Mix well. Close lid and store in fridge for up to a week and use as required.

As always, I made this instinctively by throwing in handfuls and splashes so the quantities mentioned are indicative. Taste and adjust as you blend. Follow your tongue. :)

Friday, July 01, 2011

Raw Vegan Hazelnut Cheese


Raw Vegan Hazelnut Cheese


The first time I tasted nut 'cheese' was at VegFest 2010 at Portland, Oregon. I can still remember the explosion in my tastebuds when I put that delicious cheese made of Hazelnuts by Heidi Ho Organics into my mouth! Mmmm mmm!

It's such a pity they were only giving out samples that day. DH and I wanted to buy loads to stuff our faces with. Needless to say, the next time I'm at Portland, Ima gettin' me some Heidi Ho hazelnut cheese.

Heidi Ho Organics Hazelnut Cheese at VegFest 2010

Since nut and seed cheeses are made of raw nuts and seeds which have been put through a fermentation process, they are rich in enzymes, nutrients and lactobacilli (the good kind of bacterial cultures). A most delectable way to put probiotics into your system! :)

I've been wanting to experiment with nut cheese making for a while now but I was under the impression that it is a difficult task and that it needs some 'exotic' ingredients like miso or dulse. That was until I saw this recipe by Dr. Nandita Shah on the Sharan India website. From the first step until the cheese is ready for consumption it takes a few days so it is time consuming process, but the effort which you need to put into it is hardly much. With patience, anyone can make raw, vegan cheeses right in their home. And as we already know, homemade is always the tastiest and healthiest option. :)

So couple of days ago, on a whim I decided to attempt making nut cheese. Luckily, I already had a little bit of rejuvelac on hand and it was enough for the small, experimental quantity I intended to begin with. I decided to go for hazelnuts. Firstly because I was out of cashews and almonds and secondly because hazelnut cheese is the only kind I'd ever tasted (and loved!).

I pretty much followed Dr. Nandita's recipe except that after the cheese was ready, I pressed out the water from the it by putting it into a cloth bag inside a colander and placing a weight over it overnight. I preferred the taste and texture of the pressed version more than the softer kind.

For flavoring, I used nutritional yeast, salt, oregano, a pinch of turmeric for color and a dash of chilli powder (hey, come on, I had to Indianize it at least a wee bit).

So here it is, my very first batch of Raw Vegan Hazelnut Cheese! :)

Raw Vegan Hazelnut Cheese

It's the first of many more to come. I wouldn't call it perfect but it was gosh darned scrumptious! Notice that I say 'was' (past tense)? It's because we gobbled up almost the whole batch during lunch. :D

Next time I'll be tweaking things. I plan to use a combination of nuts and seeds. I'll be blending them into a more creamy finish. And I'll be adding the spices before the fermentation process begins.

Earlier today I was reading up more about making home made raw, vegan cheeses in this amazing, highly informative post. I found the part where it speaks of cheese 'seasons' and moon cycles extremely interesting. I already try to do certain things based on the moon cycle in my day to day life and it makes complete sense to me that the behavior of the lactobacilli would be dependent upon them too.

After having read that post, I'm all riled up and really looking forward to more successful adventures in raw, vegan nut and cheese making. Can't wait to get the next batch started! :)