Wednesday, October 05, 2011

Saffron Infused Almond Dessert - Vegan MoFo post 5


As this highly addictive veganmofo madness continues, I have been feeling extremely grateful for my prior procrastination! Over the last few months, I had created a bunch of stuff in my kitchen and taken pictures, but I hadn't updated my blog with all of them. So now, during vegan mofo, since blog hopping and commenting has taken over my online life, I'm able to keep my blog up with the activity because the yummy food pictures are already waiting to be linked here. Phew! See, being lazy has its benefits. :D

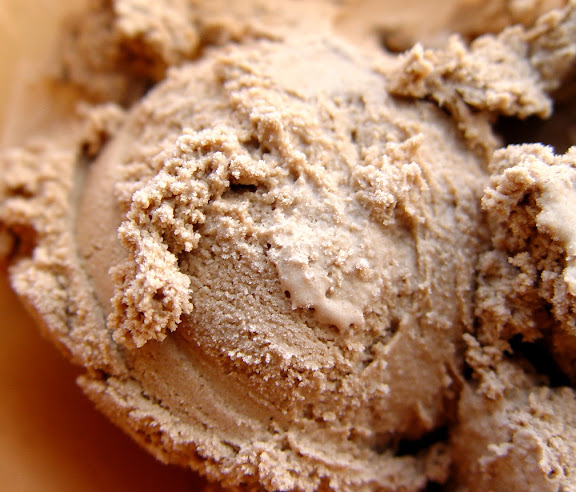
This is an almond cream based mousse like dessert I concocted a while ago. It's raw, except for the little bit of agar agar (which needs to be cooked to work well). Pretty simple to make too! It would also have been a super quick dessert if it weren't for the slightly painful almond skin peeling step. But hey, even that is something you get a hang of over time. I've become a lot faster at it now than I used to be during my initial attempts.
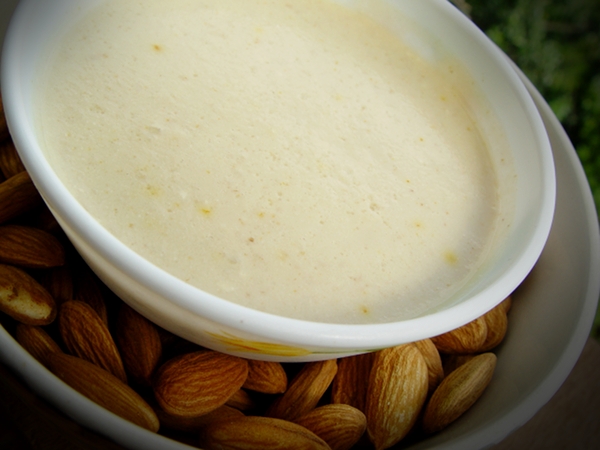
Saffron Infused Raw Almond Dessert

1 C Almonds
2 pinches Saffron Strands
Raw Agave Nectar (to taste)
2 T Agar Agar flakes

Soak almonds overnight in filtered water to start the sprouting process.

In the morning, throw out the water and rinse the almonds thoroughly. This step ensures that your body absorbs the enzymes in the almonds better.

Now the part which involves effort. Patiently peel the skin off the almonds. You can pour more water over them so they stay moist through the peeling process, making it easier and quicker.

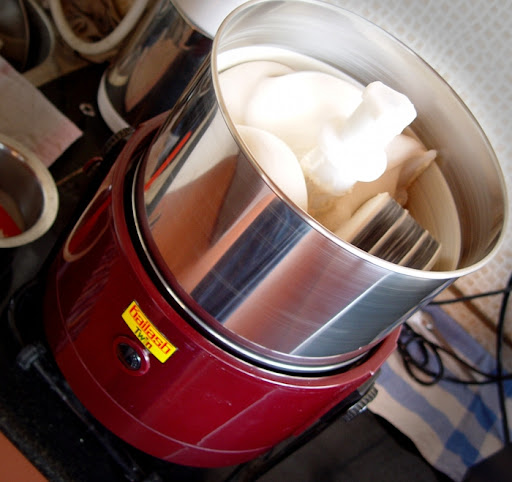
Blend the peeled almond into a smooth, creamy paste adding a wee bit of of fresh, filtered water.

Add the saffron and agave nectar and blend again. Taste and adjust the level of agave. Keep aside in the blender jar.

Boil 1/2 C water and add the agar agar flakes. Stir and cook on medium flame until the flakes have dissolved. Let it cool for a few minutes until slightly warmer than room temperature.

Pour this agar agar mixture into the blender jar with the almond paste in it and blend for a few beats just to get everything mixed well and whipped up.

Pour the almond cream into individual dessert bowls and chill in the fridge for a few hours.

Serve cold and enjoy! :)

Tuesday, October 04, 2011

Daiya Pizza - Vegan MoFo post 4


Day 4 of Vegan MoFo. I seriously should have scheduled a lot more posts (I just had 3 lined up) well in advance. Now, instead of writing up blog posts, I've been spending all my online hours MoFo blog hopping!

It's too hard to resist. I'm discovering all these awesome blogs and with all the criss-cross interactivity happening between mofoers all over the interwebs (blogs, twitter, facebook...), I feel like I'm a part of this large, global community of warm and friendly people and I wish veganmofo would last forever!

Today's post is going to be quick and simple. But not without a back story of course. :oP

In my pre vegan days, I was never a fan of cheese. When our parents took us to Wimpy (a pretty nice UK based fast food restaurant that existed here in Bangalore before the icky US fast food chains flooded India and wiped Wimpy out), sis and I always asked them to put very less cheese on our pizzas. And that was only because they claimed they couldn't make them cheese-less because the toppings wouldn't stay on then. So when I went vegan, 8 years ago, I never even gave a second thought to cheese.

Then last year, when DH and I visited the US for a few months, we got to taste Daiya vegan cheeze for the first time at Sugar Plum Vegan Café at Sacramento. I never knew cheeze could be so delicious!!

So a couple of months ago, when my cousin's friend was visiting here from the US, we asked her to please please please bring a pack of Daiya for us (packed safely between ice bags of course) in her luggage and she very kindly did so. :)

Needless to say, I've been using it very sparingly to make it last and thankfully, a little does go a long way.

The other day I made this pizza. Looks yum, huh? :D

Daiya Pizza

I'm still working on getting a perfect pizza crust (mine's pretty yummy but it's more like bread than crust) so I won't post the recipe for that here. But here's how I made the topping:

Daiya
1 Pack Tofu - pressed gently to squeeze out water, patted dry and cubed
3 Ripe Tomatoes - quartered
3-4 cloves Garlic - chopped roughly
Nutritional Yeast
Balsamic Vinegar
Jaggery (or other sweetener)
Tabasco Sauce or Chilli Powder (or a bit of both)
Dried Oregano
Pepper
Salt

Put everything, except Daiya and Tofu, into a blender and liquefy.

Add Tofu cubes and toss.

Pour the sauce over olive oil coated, partially baked pizza base.

Sprinkle Daiya over everything and bake for about 20-25 minutes.

Slice and serve hot.

Enjoy! :)

Monday, October 03, 2011

I Scream You Scream We All Scream For Ice Cream - Vegan Mofo post 3


Today's Vegan Mofo post is a photo blog of a few vegan ice creams I've made in the recent past and my ice cream making process.

I never follow exact recipes while making anything (except in my baking) and ice creams are no exception. I just have a method that I stick to and have developed a 'feel' over time for attaining the right texture.

For the base, I usually use a combination of a nut and a creamy fruit or a vegan mylk and vegan whipped cream. To this I add any flavor that hubby and I are in a mood for - coffee powder, melted dark chocolate, pure vanilla extract, saffron, cardamom, rum (any alcohol is to be added only in the last minutes of the freezing process)...- and a sweetener of some sort - sugar, raw agave nectar, maple syrup... - et voila, the vegan ice cream mix is ready! :)

Pointers:

*Tasting and adjusting is of course a must.
*Make it a wee bit sweeter than you might like because after the freezing process the level of sweetness reduces.
*Add a tiny pinch of salt to enhance the taste.
*Chill the mix for over a day before freezing - either in an ice cream maker or by following the whipping and freezing method.

The latter involves whipping and freezing and whipping and freezing and so on once every half an hour for the first two hours of the freezing process. And then once an hour for the next two hours (or until the consistency feels about right). The way to achieve a good ice creamy texture is to use a blender (hand blender would be more convenient than transferring the ice cream into a jar each time) but you can also use a wire whisk, a spatula or a fork.

Without further ado, here are my droolalicious, creamy, scoop-able vegan ice creams. :)

Very Vanilla Cashew Mylk Ice Cream

- recipe for the vanilla cake in the background here
Very Vanilla Cashew Mylk Ice Cream

Cashew Mocha Rum Ice Cream


Cashew Mocha Ice Cream

Raw Pistachio Mango Ice Cream

- recipe here
Raw Pista Mango Ice Cream

Mango Ice Cream


Mango Ice Cream

Sunday, October 02, 2011

Idli the fluffy South Indian Rice Cake - Vegan MoFo post 2


Idlis are a staple breakfast food in South India. These fluffy rice cakes are made by soaking, grinding and fermenting a combination of a specific type of rice and urad dal (split black gram). Adding a handful of methi (fenugreek) seeds in the mix makes the Idlis extra soft and fluffy.

AWESOME KITCHEN GADGET ALERT!!! :)

Idli Grinder

I use my trusty Kailash Tilting Wet Grinder to make a super smooth Idli batter. It has a motor unit over which the grinding vessel is placed. The inner base of the vessel has a granite layer. There is also a grinding attachment made of three granite stones which is placed into the vessel where it is held in place. When the machine is turned on the vessel starts to rotate which causes the stones to rotate in the opposite direction. No grain or lentil can hold the hope of staying whole under the pressure of those awesome stones. ;)

The tilting mechanism in my grinder makes it very convenient to pour out the batter without having to carry the weight of the heavy vessel.

For those who make Idlis just occasionally, a good blender with sharp blades will do fine. You just have to remember to soak the urad dal and rice separately and make a very smooth paste of the dal before grinding the rice (the methi seeds are soaked with the rice). But for someone who is looking to be a regular Idli pro, a wet grinder is would make for a very nifty gadget. It's been a truly worthy investment for me! :)

Idlis

Ingredients:

1 C Whole or Split Black Gram
5 C Short Grained Idli Rice (I also like to use Mulleri Red Rice for my Idlis sometimes)
2 T Fenugreek Seeds
Salt

Soak everything (except salt) together in plain water overnight.

Drain the soaking water into a vessel and keep aside.

Set up the idli grinder according to instructions, pour some soaking water into it and switch it on.

With the motor running, slowly add in the rice, dal and methi mixture.

Pour in some more of the water to ensure the steady movement of the grinding stones.

Cover the vessel with the lid and get online and blog for the next 20 minutes.

Look in on the batter and add more water if required (the batter should have a fairly thick but pourable consistency) and let the grinder run for another 15 minutes or so.

Once the batter is completely smooth turn it off and pour it into a large container (batter should fill it only halfway to allow it to expand while fermenting).

Add salt and mix lightly with your hand, cover and keep aside in a warm place for about 12 hours (more if you live in a cold climate).

Once the batter has risen well and attained a slightly sour smell, it is ready for use.

Ladle the batter into Idli mold trays.

Meanwhile, bring water to boil in a steamer and once it begins to boil place the Idli trays into the steamer.

Cover and steam for 8-10 minutes on medium heat.

You should be able to smell the cooked Idlis in the steam wafting out of the steamer.

Carefully remove the Idly trays out of the steamer and let the Idlis cool for a few minutes.

Gently unmold the Idlis using a wide, flatish spoon.

Drizzle sesame oil over the Idlis and serve them hot with Sambar or Coconut Chutney.

Enjoy! :)

Saturday, October 01, 2011

My first Vegan MoFo post. A short video clip.


Thought I'd start off my very first Vegan MoFo post with a video. I didn't film it but I am featured in it. :)

Last Saturday we had our monthly Vegan Bengaluru potluck at Jaaga - Creative Common Ground. We hold these potlucks and keep them open to vegans and non-vegans alike. The idea is to have anyone who is interested in veganism come share the vegan food and clarify any questions they might have which might make it easier for them to get on the vegan path. The atmosphere of these events is very relaxed and chilled out.

Jaaga is a beautiful, airy structure and was a perfect space for our local vegan group to enjoy the delicious food and interesting conversation. The people who run the place are very friendly and welcoming. They even joined us at our potluck for some time.

While we were there, Clemence Barret (one of the founders of Jaaga) asked to shoot a video clip of our vegan event and we were more than happy to oblige. Here's the result:


And here are some drool worthy images of the food we ate that day.

Bruchetta Bread

Bruchetta Topping

Pasta Salad

Mysore Pak

Semiya Sweet

To see more goodies and snapshots of the Vegan Bengaluru potluck, visit my original post about this event on the Vegan Bengaluru blog.