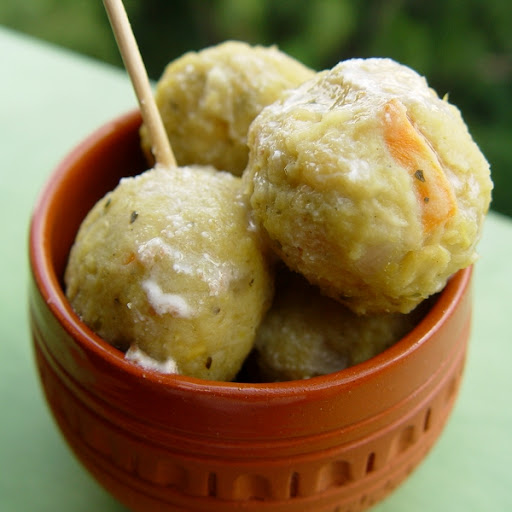
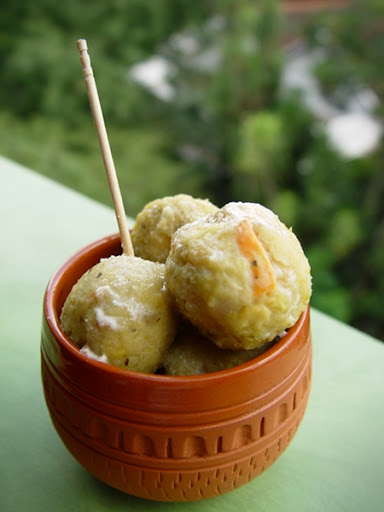
On 18th May, I was part of a vegan cooking demo and lunch event at Soul Kadhi. I had a really nice time talking about vegan food and showing people how to make a bunch of scrumptious, Indian, vegan dishes along with Chef Ajay.
The response was very good. There were about 20 participants and all of them said they found the demo interesting and the food delicious. Less than half the attendees were vegan. The rest were people who wanted to learn vegan cooking for various reasons. It was all totally worth the effort! :)
My hubby captured the demo on video and I spent some time editing and putting it together. The video explains the general outline of the recipes and also contains a few pointers about making vegan mylks and curds. I've shared all the recipes below, after the embedded video. Between the two, you will be able to clearly understand all the steps involved and easily make the recipes at home yourself.
If you were present for the demo, do drop me a line here in the comments section to let me know how you liked the experience. :)
Vegan Demo Video
I already have a blog post explaining the process of making Peanut Curds in detail.
In all the recipes below, the quantities of ingredients are approximate and certain quantities are not even mentioned. As you prepare the food, taste and adjust often to suit your preferences.
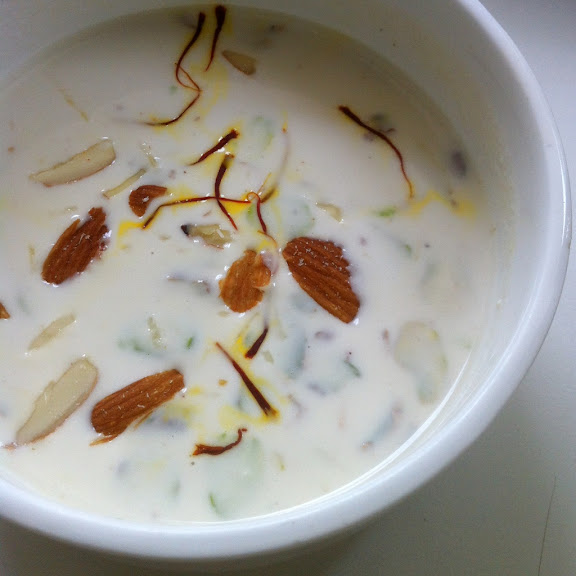
Basundi
1/2 C Cashews
2-3 tsp Sugar
Small pinch of salt
Sliced Pistachios
Crushed Saffron/Elaichi
In a dry jar, grind together the cashews and sugar into a fine powder.
Scrape down the sides and grind again until the cashew starts to release its oils and becomes slightly buttery.
Add a small pinch of salt and a splash of water and blend to a smooth paste.
Add a little more water and blend into a cream, it should have the consistency of condensed milk.
Pour into a bowl and garnish with sliced pistachios and crushed saffron and/or elaichi.
Chill for at least half an hour and serve.
Notes:
This dish doesn't need to be cooked and you can make it completely raw by using soaked dates in place of sugar.
If you like, you can heat the Basundi for a few minutes while stirring continuously and chill it. This makes it a little more creamy but is not really a necessary step.
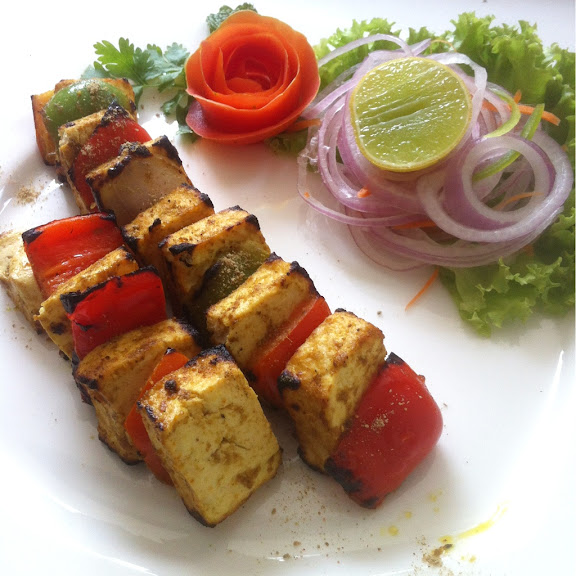
Tamarind Tofu Tikka
500 gms Firm Tofu
1 Onion
1 Capsicum (preferably red or yellow)
1 Tomato
1-2 T Thick Tamarind Paste
1/4 tsp Dhania Powder
1/4 tsp Jeera Powder
1 tsp Kasauri Methi
1 tsp Chilli Powder
Mustard Oil
Chopped Green Chillies
Chopped Cilantro
Salt
Drain and gently squeeze the tofu to remove water.
Make the tofu into 1 inch cubes.
Cube the vegetables.
Mix salt, tamarind paste, spices, herbs and mustard oil with a few spoons of water to get a creamy marinade.
Toss the cubed tofu and vegetables in the marinade.
Cover and keep aside for a minimum of 30 minutes.
If you have more time then marinate overnight in the fridge to meld the flavours very well.
Skewer and grill on high in a convection oven or tandoor for 8-10 minutes.
Serve hot.
Notes:
You can alternately roast the skewered tikkas on a hot, non stick pan that's greased with oil, turning them occasionally to ensure even grilling. In this case, don't add the chilli powder in a marinade because it will create a lot of smoke. Instead, sprinkle the chilli powder on top of the tikkas after they have been grilled.
Malai Kofta
For the Kofta Balls:
4 Potatoes - boil/steam, peel and grate
200-250 gms Tofu - drain, rinse, gently squeeze to remove water, grate
2 T Corn Starch
Elaichi Powder
Pepper Powder
Salt
Dry Fruits/Nuts - chopped finely and mixed
Gently mix the grated potatoes and grated tofu together with a fork or spoon.
Add the remaining ingredients and mix well.
Dust a clean surface or a plate with corn starch.
Rub corn starch on your palms and fingers.
Shape the potato/tofu mixture into balls and make a hole in the center with your finger.
Place some dry fruits/nuts in the hole and close the ball.
Shape into elongated balls.
Deep fry in hot oil until golden.
If you want to make them more healthy, instead of deep frying, grease the kofta balls with a little oil and bake in a preheated oven at 200 C for about 15 minutes, until the balls have browned lightly.
Drain on tissue paper and keep aside.
For the Malai Sauce:
Ginger-Garlic Paste
Green Chilli Paste or Pepper Powder
Thick Cashew Cream
Elaichi Powder
Salt
Sugar (optional)
Keora/Kewra Water (optional)
Stir fry the ginger-garlic paste in a dry pan or optionally with a spoon of hot oil.
Add the green chilli paste (if using) and stir.
Add the thick cashew cream (this could be raw or cooked cashew cream, either way is fine).
Add salt, elaichi powder and pepper powder (if using) and stir.
Optionally add sugar and keora water and mix.
Let the sauce simmer for a few minutes.
Adjust the thickness of the sauce with some water.
How to proceed:
While the sauce is simmering on low heat, the prepared kofta balls and toss gently.
Add a splash of water to the sauce to keep it in a constant simmer (so it doesn't start boiling vigorously).
Simmer the koftas for a minute and turn off the heat.
Serve hot with rotis or pulaos.
Kadhi Pakora
For the Pakoras:
Besan Flour
Ajwain
Sliced Onion
Chopped Curry Leaves
Chopped Cilantro
Chilli Powder
Salt
Oil
Mix everything with some water to make a thick batter.
Heat oil and drop spoonfuls of the batter.
Deep fry while occasionally turning over, until crispy and golden brown.
Drain on tissue paper and keep aside to cool.
For the Kadhi:
Peanut Curds
Besan Flour
Turmeric Powder
Oil
Dhania
Jeera
Finely Chopped Garlic
Thinly Sliced Onion
Amchoor Powder
Roasted Red Chillies
Salt
Make a thick batter by whisking together besan, peanut curds and turmeric powder.
Heat a spoon of oil in a pan.
Add whole jeera and dhania and stir for a few seconds, allowing them to crackle.
Add the finely chopped garlic and stir.
Add the thinly sliced onion and stir fry until the onion is translucent and lightly browned.
Pour in the peanut crud-besan batter and stir well.
Add amchoor powder and salt and mix well.
Adjust thickness of the sauce with a little water.
Add the dry roasted red chillies and simmer.
How to proceed:
While the sauce is simmering, add the deep fried pakoras.
Mix for half a minute and turn off the heat.
Optionally season with toasted mustard seeds, dhania, jeera and curry leaves.
Serve over hot, steamed rice.
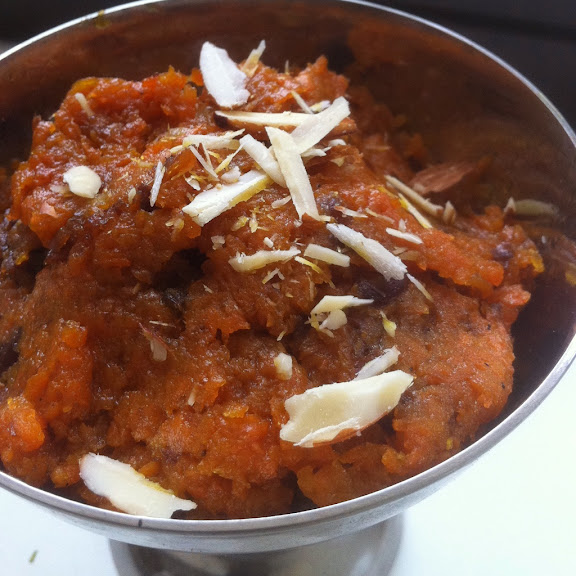
Carrot Halwa
4 Large Carrots - grated
1/2 C Thick Cashew Cream
2-3 T Sugar
1 T Oil
2 Cloves
2 Elaichis (crushed)
Raisins
Chopped Dates
Slivered Almonds
Grate the carrots.
Heat oil in a heavy bottomed pan, add the cloves and stir.
Add the grated carrots.
Stir fry until the carrots are cooked and have reduced in quantity.
Add thick cashew cream, stir and cook for a few minutes.
Add crushed elaichi and sugar and stir for a minute.
Mix in the sliced almonds, chopped dates and raisins and turn off the heat.
Notes:
You can reduce the sugar or eliminate it completely and add more dates and raisins for sweetness.
If you want to avoid oil, steam the carrots whole and grate them, that way you can completely skip the stir frying process.
You can add finely ground cashew powder instead of cashew cream.
Enjoy! :)
Showing posts with label Appetizers Starters Snacks. Show all posts
Showing posts with label Appetizers Starters Snacks. Show all posts
Monday, May 27, 2013
Friday, May 03, 2013
The Great Vegan Fix - cooking demo and lunch event at Soul Kadhi, Bangalore on Sat, 18th May 2013
My Hazelnut Chocolate Cake blog post in March was full of updates about all the awesome things happening in my vegan life. One of the things I'd mentioned was an upcoming vegan cooking demo at a local restaurant. I'd promised to tell you more about it as soon as all the details fell into place. They finally have and here's the story...
It had been a long and pleasantly tiring day. We were all winding down at the end of the first VGF, basking in the overwhelming success and fretting about how we hadn't gotten our hands on certain sinful delicacies which had sold out way too fast. That was when Aditi Shankar walked in and asked for me. She told me she had found me through my blog and wanted to speak to me about another vegan event which involved promoting vegan food.
I thought she meant an event like VGF, a fair of sorts, and having just finished one after weeks of planning and preparing, I didn't have the capacity to start thinking of another one right away. So Aditi and I decided to connect on Facebook the following week and I promised her I'd be happy to discuss further with her then.
As it turned out, this event happened to be a vegan cooking demo and lunch at a restaurant called Soul Kadhi. The concept is similar to the demo-lunches I helped organise at Vivanta by Taj last year, but with one significant difference, it's all about promoting Indian vegan food.

Soul Kadhi is a North Indian cuisine restaurant located on a cozy street just off Richmond Road, in the heart of Bangalore. It is owned and operated by Nirmala Balakrishnan, who also runs two other eateries on the same premises. Though it is not a completely vegetarian joint, they do serve a variety of vegetarian dishes. Unlike typical North Indian restaurants, they don't overly douse their food with fats and oils. Instead, they strive to serve good, simple, comfort food with a homemade feel. In fact, Nirmala says that ever since she opened the restaurant, she's not felt the need to cook at home. Her whole family eats the food served at the restaurant. :)
Now Nirmala wants to introduce vegan and veganisable options into the menu and that is where I come in. I met with Aditi and Nirmala in March and we came up with some interesting ideas for the event menu. When asked why Soul Kadhi wants to have this vegan event, Nirmala said, "Vegan food has become this trendy/fashionable concept and it is a general impression that to be vegan, one must eat fancy dishes with exotic ingredients. But what people don't realise is that in India, we just happen to eat vegan food at home on a daily basis. So the idea here is to show people that not only are they already eating vegan food as a part of their regular diet, they can also veganise everyday foods which might contain animal derived ingredients."
Everyday staples like rice, roti, dal, sambar, idli, dosa, etc... are already vegan by default. Most vegans already know how easy it is it be a vegan in India and how it takes barely any changes in day to day cooking/eating for a person to follow a cruelty-free diet. But I was *really* happy to hear a non vegan person understanding and explaining all this. It truly does show that veganism has come a long way in India and is growing each day.
We fixed an appointment for a cooking/tasting session in early April. I first spent some time in the Soul Kadhi kitchen, teaching Chef Ajay and his staff how to make basic dairy better-natives like peanut mylk/curds, cashew mylk/cream. The next day, we worked together for a couple of hours to create the tamarind tofu tikka, malai kofta, kadhi pakora, gajar ka halwa and basundi.
Chef Ajay is really nice and down to earth. He was very open to learning about vegan food and since he's an experienced chef, I ended up picking up some valuable cooking pointers from him as well. It was such a pleasure working with him!
All of us had a scrumptious food tasting session that afternoon. :)
Tamarind Tofu Tikka
Cucumber Raita

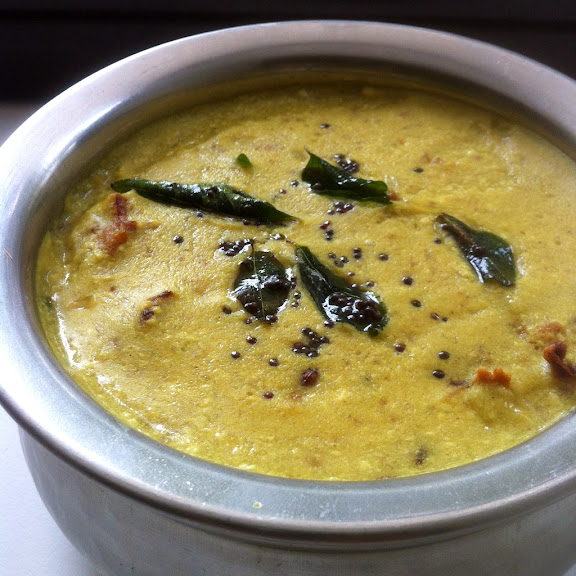
Kadhi Pakora
Malai Kofta

Gajar Ka Halwa
Basundi
Everything was delicious but the kadhi was hands down the *best* dish! Nirmala exclaimed to the chef that this vegan kadhi made of peanut curds was even better than his regular kadhi (which is supposed to be really good to begin with). :)
Event details:
Location: Soul Kadhi, #3, Laurel Lane, Richmond Town, Bangalore - 560025
Date: Saturday, 18th May 2013
Time: 12 noon
Price: Rs. 500 per person (inclusive of taxes)
At 12 noon, I will give a short introduction to vegan food. Then the chefs and I will begin the cooking demo and show you how to make the dishes pictured above. It will take about an hour to hour and half.
This will be followed by a sit down lunch where all the demo-ed dishes will be served, along with steamed rice and tandoori rotis. The lunch is not limited to single portions.
Registrations for the event begin after 12th May. You can reach Nirmala at +91 96866 01021 and book your place.
You can additionally RSVP on the Facebook Event Page.
This will be a nice event for veteran vegans to spend a relaxing afternoon indulging in some delicious fare. It will be even more useful to new vegans who want to learn some interesting vegan recipes and those people who are considering a vegan lifestyle or are curious about what completely plant-based food tastes like.
I'd love to see some of my fellow Bangalore Vegans at Soul Kadhi on the 18th. More importantly, if you have friends or family members who you've been talking to about switching to a vegan diet, this is an excellent opportunity for you to make them experience vegan food at a restaurant first hand.
Depending on the response to this event, Soul Kadhi plans to organise more vegan cooking events in the future. They also intend to introduce these and other vegan dishes into their regular menu based on the feedback of the participants.
Looking forward to seeing you there! :)
It had been a long and pleasantly tiring day. We were all winding down at the end of the first VGF, basking in the overwhelming success and fretting about how we hadn't gotten our hands on certain sinful delicacies which had sold out way too fast. That was when Aditi Shankar walked in and asked for me. She told me she had found me through my blog and wanted to speak to me about another vegan event which involved promoting vegan food.
I thought she meant an event like VGF, a fair of sorts, and having just finished one after weeks of planning and preparing, I didn't have the capacity to start thinking of another one right away. So Aditi and I decided to connect on Facebook the following week and I promised her I'd be happy to discuss further with her then.
As it turned out, this event happened to be a vegan cooking demo and lunch at a restaurant called Soul Kadhi. The concept is similar to the demo-lunches I helped organise at Vivanta by Taj last year, but with one significant difference, it's all about promoting Indian vegan food.

Soul Kadhi is a North Indian cuisine restaurant located on a cozy street just off Richmond Road, in the heart of Bangalore. It is owned and operated by Nirmala Balakrishnan, who also runs two other eateries on the same premises. Though it is not a completely vegetarian joint, they do serve a variety of vegetarian dishes. Unlike typical North Indian restaurants, they don't overly douse their food with fats and oils. Instead, they strive to serve good, simple, comfort food with a homemade feel. In fact, Nirmala says that ever since she opened the restaurant, she's not felt the need to cook at home. Her whole family eats the food served at the restaurant. :)
Now Nirmala wants to introduce vegan and veganisable options into the menu and that is where I come in. I met with Aditi and Nirmala in March and we came up with some interesting ideas for the event menu. When asked why Soul Kadhi wants to have this vegan event, Nirmala said, "Vegan food has become this trendy/fashionable concept and it is a general impression that to be vegan, one must eat fancy dishes with exotic ingredients. But what people don't realise is that in India, we just happen to eat vegan food at home on a daily basis. So the idea here is to show people that not only are they already eating vegan food as a part of their regular diet, they can also veganise everyday foods which might contain animal derived ingredients."
Everyday staples like rice, roti, dal, sambar, idli, dosa, etc... are already vegan by default. Most vegans already know how easy it is it be a vegan in India and how it takes barely any changes in day to day cooking/eating for a person to follow a cruelty-free diet. But I was *really* happy to hear a non vegan person understanding and explaining all this. It truly does show that veganism has come a long way in India and is growing each day.
We fixed an appointment for a cooking/tasting session in early April. I first spent some time in the Soul Kadhi kitchen, teaching Chef Ajay and his staff how to make basic dairy better-natives like peanut mylk/curds, cashew mylk/cream. The next day, we worked together for a couple of hours to create the tamarind tofu tikka, malai kofta, kadhi pakora, gajar ka halwa and basundi.
Chef Ajay is really nice and down to earth. He was very open to learning about vegan food and since he's an experienced chef, I ended up picking up some valuable cooking pointers from him as well. It was such a pleasure working with him!
All of us had a scrumptious food tasting session that afternoon. :)
Tamarind Tofu Tikka

Cucumber Raita

Kadhi Pakora

Malai Kofta

Gajar Ka Halwa

Basundi

Everything was delicious but the kadhi was hands down the *best* dish! Nirmala exclaimed to the chef that this vegan kadhi made of peanut curds was even better than his regular kadhi (which is supposed to be really good to begin with). :)
Event details:
Location: Soul Kadhi, #3, Laurel Lane, Richmond Town, Bangalore - 560025
Date: Saturday, 18th May 2013
Time: 12 noon
Price: Rs. 500 per person (inclusive of taxes)
At 12 noon, I will give a short introduction to vegan food. Then the chefs and I will begin the cooking demo and show you how to make the dishes pictured above. It will take about an hour to hour and half.
This will be followed by a sit down lunch where all the demo-ed dishes will be served, along with steamed rice and tandoori rotis. The lunch is not limited to single portions.
Registrations for the event begin after 12th May. You can reach Nirmala at +91 96866 01021 and book your place.
You can additionally RSVP on the Facebook Event Page.
This will be a nice event for veteran vegans to spend a relaxing afternoon indulging in some delicious fare. It will be even more useful to new vegans who want to learn some interesting vegan recipes and those people who are considering a vegan lifestyle or are curious about what completely plant-based food tastes like.
I'd love to see some of my fellow Bangalore Vegans at Soul Kadhi on the 18th. More importantly, if you have friends or family members who you've been talking to about switching to a vegan diet, this is an excellent opportunity for you to make them experience vegan food at a restaurant first hand.
Depending on the response to this event, Soul Kadhi plans to organise more vegan cooking events in the future. They also intend to introduce these and other vegan dishes into their regular menu based on the feedback of the participants.
Looking forward to seeing you there! :)
Tuesday, February 05, 2013
Potatoes Stuffed with Shiitake Foxtail Millet
I met an old friend from school a few weeks ago. Apart from reminiscing about the good old days and discussing our shared passion for creating art, we also got around to talking about food. I spoke about vegan baking and she shared some of her veggie recipes. She told me about a delicious coconut based curry with Shiitake mushrooms in it and asked if I had any recipes of my own using them. Not having cooked with them before, I was intrigued, so my next Towness order arrived with a pack of dried Shiitake mushrooms, along with the usual veggies and fruits. :)
When I looked up dried Shiitakes online, I found that a good way to use them was to rehydrate in warm water for a few minutes and proceed as one would with other kinds of mushrooms. One person in a forum had empathetically mentioned that the soaking water should be saved and used as a broth because it is full of flavour. I am so glad I took that advice!
These stuffed potatoes were the first dish I used the Shiitake and their soaking water in and ever since then, I've been using them in my cooking a LOT. :)
I use a microwave to cook the pierced, whole potatoes in 5 minutes. But you could use a regular oven or boil or steam the potatoes. No matter what, don't remove the peel because it really adds to the taste.
Potatoes Stuffed with Shiitake Foxtail Millet

1/2 C Foxtail Millet/Navane
4 Potatoes
5 Dry Shiitake Mushrooms
1/2 Red Bell Pepper
1 Leek
8-10 Garlic cloves
2 tsp Jaggery or Sugar
2 T Olive Oil
Pinch of Caraway/Omum Seeds
Pinch of Turmeric Powder
Black Salt
Freshly Crushed Black Pepper
Tabasco
Almonds
Warm 1 C of water and soak the dry shiitake mushrooms in it for 5-10 minutes, until they are soft.
Pick out the mushrooms and gently squeeze them over the soaking cup.
Keep aside on a cutting board.
Wash the foxtail millet and keep aside.
In a pan, heat all the shiitake soaking liquid with 1/4 C of water and a pinch of salt and bring to a boil.
Add the millet to the boiling water, reduce the heat to the lowest setting on your stove, cover partially with a plate and allow to cook.
The millet will take about 10-15 minutes to be cooked, keep a close eye on it to ensure that it doesn't overflow from the pan.
When all the water has evaporated, the millet is ready.
Fluff with a fork and keep aside.
Meanwhile, scrub and wash the potatoes well.
Pierce them all over with a fork.
Place in a microwave and nuke for 4-5 minutes, on high.
Remove to a plate and let them cool for a few minutes.
Cut each potato in half and scoop out 1/2 to 3/4 of the potato with a spoon, place in a bowl and mash.
Keep the scooped out potato 'cups' aside.
Finely chop the garlic and slice the leek into thin roundels.
Roughly chop the mushrooms and bell peppers.
Heat the olive oil in a large pan or wok.
Add the caraway seeds, they will crackle.
Add the garlic and leeks and stir fry for a few minutes.
Add the mushrooms and red bell peppers and stir fry for a few more minutes.
Add jaggery and stir to allow it to mix and caramelize the vegetables a bit.
Add the mashed potato and stir well.
Add the black salt, turmeric powder and crushed black pepper, mix well and turn off the heat.
Mix the cooked millet to the stir fried veggies.
Add chopped almonds and a big splash of tabasco and mix.
Form this mixture into into 8 balls.
Press a ball into the middle of each scooped out potato cup.
Preheat oven to 250 C.
Place the stuffed potatoes on a baking tray and place the tray in the centre rack of the oven.
Grill for 10 minutes.
Serve hot.
Enjoy! :)

When I looked up dried Shiitakes online, I found that a good way to use them was to rehydrate in warm water for a few minutes and proceed as one would with other kinds of mushrooms. One person in a forum had empathetically mentioned that the soaking water should be saved and used as a broth because it is full of flavour. I am so glad I took that advice!
These stuffed potatoes were the first dish I used the Shiitake and their soaking water in and ever since then, I've been using them in my cooking a LOT. :)
I use a microwave to cook the pierced, whole potatoes in 5 minutes. But you could use a regular oven or boil or steam the potatoes. No matter what, don't remove the peel because it really adds to the taste.
Potatoes Stuffed with Shiitake Foxtail Millet

1/2 C Foxtail Millet/Navane
4 Potatoes
5 Dry Shiitake Mushrooms
1/2 Red Bell Pepper
1 Leek
8-10 Garlic cloves
2 tsp Jaggery or Sugar
2 T Olive Oil
Pinch of Caraway/Omum Seeds
Pinch of Turmeric Powder
Black Salt
Freshly Crushed Black Pepper
Tabasco
Almonds
Warm 1 C of water and soak the dry shiitake mushrooms in it for 5-10 minutes, until they are soft.
Pick out the mushrooms and gently squeeze them over the soaking cup.
Keep aside on a cutting board.
Wash the foxtail millet and keep aside.
In a pan, heat all the shiitake soaking liquid with 1/4 C of water and a pinch of salt and bring to a boil.
Add the millet to the boiling water, reduce the heat to the lowest setting on your stove, cover partially with a plate and allow to cook.
The millet will take about 10-15 minutes to be cooked, keep a close eye on it to ensure that it doesn't overflow from the pan.
When all the water has evaporated, the millet is ready.
Fluff with a fork and keep aside.
Meanwhile, scrub and wash the potatoes well.
Pierce them all over with a fork.
Place in a microwave and nuke for 4-5 minutes, on high.
Remove to a plate and let them cool for a few minutes.
Cut each potato in half and scoop out 1/2 to 3/4 of the potato with a spoon, place in a bowl and mash.
Keep the scooped out potato 'cups' aside.
Finely chop the garlic and slice the leek into thin roundels.
Roughly chop the mushrooms and bell peppers.
Heat the olive oil in a large pan or wok.
Add the caraway seeds, they will crackle.
Add the garlic and leeks and stir fry for a few minutes.
Add the mushrooms and red bell peppers and stir fry for a few more minutes.
Add jaggery and stir to allow it to mix and caramelize the vegetables a bit.
Add the mashed potato and stir well.
Add the black salt, turmeric powder and crushed black pepper, mix well and turn off the heat.
Mix the cooked millet to the stir fried veggies.
Add chopped almonds and a big splash of tabasco and mix.
Form this mixture into into 8 balls.
Press a ball into the middle of each scooped out potato cup.
Preheat oven to 250 C.
Place the stuffed potatoes on a baking tray and place the tray in the centre rack of the oven.
Grill for 10 minutes.
Serve hot.
Enjoy! :)

Labels:
Appetizers Starters Snacks
Friday, October 19, 2012
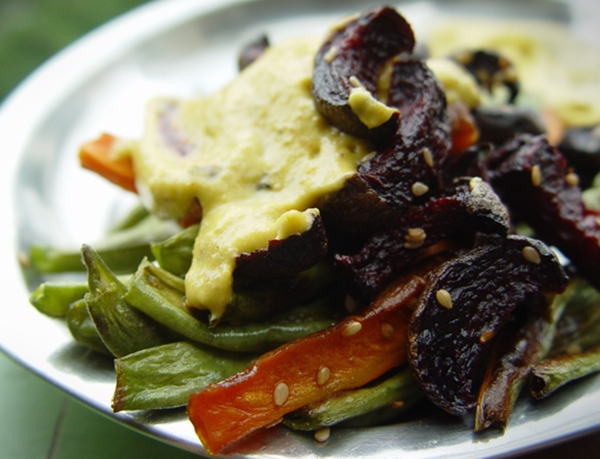
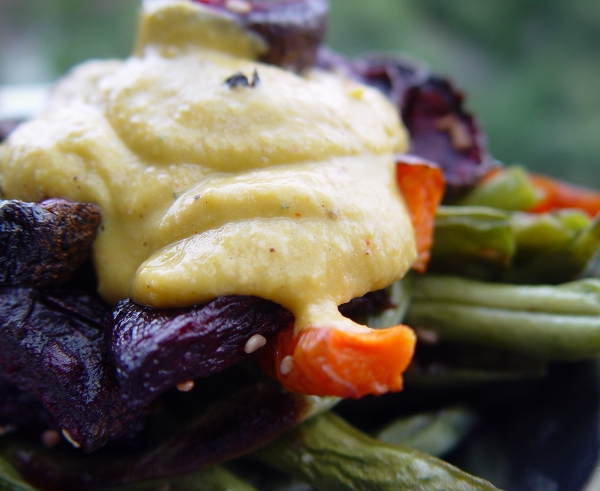
Sesame Encrusted Roasted Vegetables with Pumpkin Banana Poppy Seed Dip Vegan MoFo day 14
That title's quite a mouthful, no? Perhaps it's even long enough to let me off the hook for tomorrow's post? :oP Just kidding.
My new friend Somer of Vedgedout and I were discussing the craziness that Vegan MoFo is on our Vegan Temptivists group and there was something she said that really hit the nail on the head, "Don't know if I'm going to do it again next year, or maybe it's like childbirth and once its over you forget how painful it was". That's *exactly* what Vegan MoFo is like! LOL
Every year, right after the first 3 exciting days of the event, the stress starts to build up. We're like, "Arrrghhh too much pressure. Too. Much. Pressure!!" But the next year when Vegan MoFo is announced, it's all, "Gleee!!! Yippeeee!! This is so exciting!!"
Umm WTF happens to the memory part of our brains between November to September? NO idea! All I know is that, despite our various levels of insanity right now, next year when MoFo gets announced, we'll all be going towards it in a zombie-trance, with our arms stretched out in front of us. "Yessss master. What can we cook for you master?"
Well this is what I've cooked for you today...master. :oP
Here's a little secret. You know those veggies that have been sitting in your fridge for over a week? Those half dried up beans, or beets and carrots which have gone soft? Yep, those are what I'm talking about. Well *they* are just perfect for oven roasting!!
I don't peel my vegetables because they are just so much healthier and tastier that way. Besides, have you ever tried peeling soft carrots? Yeah, good luck with that! So just scrub your veggies clean, slice them and they're all set to be turned into crispy-on-the-outside-soft-on-the-inside goodness. Nom nom nom.
You can make these out of fresh vegetables too but these half-dry ones tend to crisp better on the outside in comparison. So next time you want to finish up an old batch of veggies, this is the way to go. I can't think of a better dish to prepare with them. :)
Also, you can roast a variety of vegetables in this manner, especially root vegetables like Yam (needs peeling), Sweet Potato, Potato. I just roasted Carrots, Beets and Beans today because that's what I had in my crisper and I wanted to finish them before my fresh batch of veggies from Towness arrived in the evening.
I roasted my vegetables in the microwave but you can do the same thing in a regular oven too. It might take a few minutes longer to get nice and crispy. Just test after 15 minutes and continue roasting if required.
Sesame Encrusted Roasted Veggies
Vegetables - beans, carrots, beets
Olive Oil
Sesame Seeds
Salt
Preheat microwave oven to 250 C.
Scrub the carrots and beets clean and cut them into thin strips.
Clean the beans and remove the ends and the fibre from the sides.
Place on a baking tray in a singe layer (I did the beets separately so their colour doesn't leech into the beans and carrots).
Drizzle with olive oil.
Sprinkle a bit of salt (little goes a long way).
Sprinkle sesame seeds generously over everything.
Toss or mix with fingers to coat well.
Bake in convection mode for 10 minutes.
Switch to Micro-Grill option and roast for 5 more minutes.
Serve hot with or without dip.
Enjoy! :)
Pumpkin Banana Poppy Seed Dip
1 large slice Pumpkin (500 gms) (cleaned well and seeds removed)
2 small (Yelakki) Bananas
2 T Poppy Seeds
1/4 C Cashews
1/8 tsp Red Chilli Powder
1/8 tsp Black Pepper Powder
1/8 tsp Turmeric
1 tsp Cilantro
5-6 cloves of Garlic
Salt
Lime Juice
Cube the pumpkin (with the peel) and place in a microwavable dish.
Sprinkle with salt, turmeric powder and drizzle 1/4 C water over it.
Nuke on high for 3 minutes, mix once and nuke for another 3-5 minutes, until the pumpkin is tender (you can optionally boil or steam it if you prefer to avoid the microwave).
Let it cool completely.
Blend all the ingredients together, adding some water if required, to form a creamy dip.
Serve in a bowl with pepper crushed on top.
Enjoy! :)
This yields about 2 C of dip. After having some with the roasted veggies, I just added a lot more water to the rest, adjusted the salt and pepper and heated it up to make Pumpkin Banana Poppy Seed Soup. That was pretty yum too. *slurp* :)
--
By the way, if you'd like to be a part of our Vegan Temptivists group on Facebook, *carefully* read through the group charter (you'll need to click on the 'see more' link above the members list to view the complete charter) and if you think you're a good fit for the group, do apply to join. We are a small, active bunch and will be happy to have a few more people in our gang. :)
Labels:
Appetizers Starters Snacks
Wednesday, October 17, 2012
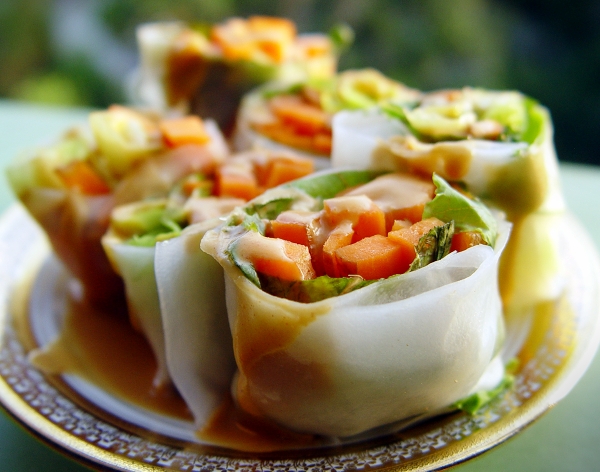
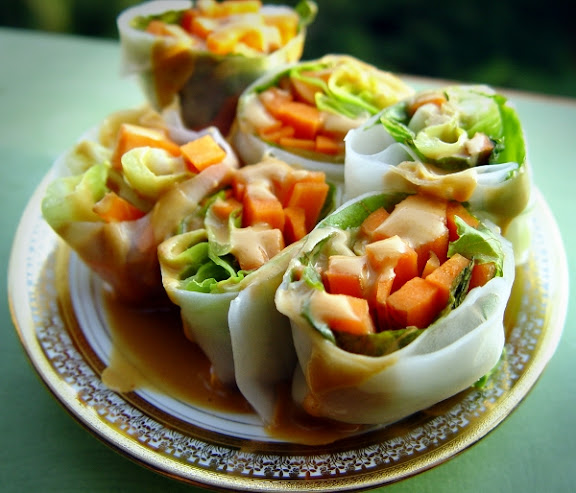
Summer Rolls with Spicy Peanut Sauce Vegan MoFo day 13
Week Three of Vegan MoFo going strong. :) I hadn't planned it this way but my Snacks and Starters theme for this week has been leaning towards healthy so far. I made Kandundes on Monday and Baked Akki Rotti Bites on Tuesday. Today is Summer Rolls with Spicy Peanut Sauce.
I remember the very first time I tasted Thai Rice Paper Rolls. It was at Red Bamboo, our favourite restaurant during the time we lived at NYC. It really *really* made an impression on me. Flash forward to many years later, I got to have them once again at Loving Hut in California. These guys had brilliantly named them Summer Rolls. Fresh with crispy, cool veggies...a perfect Summer snack or meal! Ever since then I refer to them as Summer Rolls because 'Thai Rice Paper Rolls' doesn't sound half as magical.
I have to say though that a large portion the magic was in the Spicy Peanut Dipping Sauce that came with the Summer Rolls. Spicy Peanut Dipping Sauce? It should be called Spicy Peanut *Licking* Sauce!! OMG heaven!! The ooey gooey goodness is so satisfying. *Slurp* I can just sit with a bowl full of it an and lick lick lick. No snack required. :D
Summer Rolls are very versatile and don't have any specific recipe. Just take your favourite raw vegetables, salad greens and herbs and slice them thin. Then wrap them in moistened Thai Rice Paper. You can add marinaded or baked tofu into the mix. Or crispy fruits like apples or pears. I can even picture a Summer Roll with watermelon in it! I think I'll be trying that next time.
You can toss a salad in Cashew Sour Cream and spoon that into the rolls. But remember that you must always have it with Spicy Peanut Dipping Sauce. Unless you're allergic to peanuts of course. In which case, just dip the rolls in Tamari and enjoy.
Here's what went into my simple Summer Rolls. They took all of 10 minutes to put together (including making the sauce). I usually add a larger variety of veggies, greens and herbs like basil and mint but this is all I had on hand today. But even with just two veggies the rolls were awesome!!
2 Thai Rice Paper Sheets (small, round ones) - I've found them in Bangalore at Nilgiris (Brigade Road), Food World Gourmet (MG Road) and Brown Tree (Church Street).
1 Carrot
1/2 head Romaine Lettuce
Slice the carrots into thin sticks and divide them into two bunches.
Wrap each bunch inside a few lettuce leaves and keep aside.
Dip a rice paper sheet in warm water and place on a plate.
Place a lettuce wrap in the middle of the rice paper.
Roll up the wrap half way, fold in the sides and continue rolling till you have a roll that's closed on all sides.
Repeat with the second rice paper sheet.
Chill in the freezer for a few minutes.
Remove and slice into bite sized pieces (I make each roll into 3 pieces).
Meanwhile prepare the Spicy Peanut Sauce. It's a sauce made of 100% processed ingredients. :oP
1 T Peanut Butter
Splash of Dark Soy Sauce (Tamari is a far superior choice but we don't get it here in India and I finished my stock from the US *sigh*)
Splash of Tabasco or Tamarind Paste
Pinch of Red Chilli Powder (add more if using Tamarind Paste instead of Tabasco)
Pinch of Sugar/Jaggery
2-3 T Warm Water
Mix everything and whisk well with fork.
Drizzle generously over the Summer Rolls.
Enjoy! :)
Update: 23rd June 2013
The ingredients for this recipe can now be purchased in India in the form of a recipe box from Global Graynz.
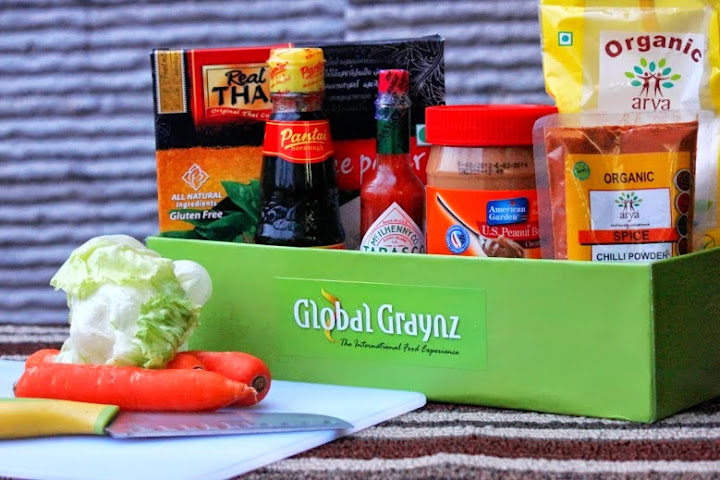
They have three kinds of boxes for this recipe, first with only the Rare Ingredients, second with All Packaged Ingredients and third with All Ingredients Including Fresh/Perishable Ones (pictured above).
Click on the Global Graynz button below to be taken to the Rare Ingredients recipe box.

I remember the very first time I tasted Thai Rice Paper Rolls. It was at Red Bamboo, our favourite restaurant during the time we lived at NYC. It really *really* made an impression on me. Flash forward to many years later, I got to have them once again at Loving Hut in California. These guys had brilliantly named them Summer Rolls. Fresh with crispy, cool veggies...a perfect Summer snack or meal! Ever since then I refer to them as Summer Rolls because 'Thai Rice Paper Rolls' doesn't sound half as magical.
I have to say though that a large portion the magic was in the Spicy Peanut Dipping Sauce that came with the Summer Rolls. Spicy Peanut Dipping Sauce? It should be called Spicy Peanut *Licking* Sauce!! OMG heaven!! The ooey gooey goodness is so satisfying. *Slurp* I can just sit with a bowl full of it an and lick lick lick. No snack required. :D
Summer Rolls are very versatile and don't have any specific recipe. Just take your favourite raw vegetables, salad greens and herbs and slice them thin. Then wrap them in moistened Thai Rice Paper. You can add marinaded or baked tofu into the mix. Or crispy fruits like apples or pears. I can even picture a Summer Roll with watermelon in it! I think I'll be trying that next time.
You can toss a salad in Cashew Sour Cream and spoon that into the rolls. But remember that you must always have it with Spicy Peanut Dipping Sauce. Unless you're allergic to peanuts of course. In which case, just dip the rolls in Tamari and enjoy.
Here's what went into my simple Summer Rolls. They took all of 10 minutes to put together (including making the sauce). I usually add a larger variety of veggies, greens and herbs like basil and mint but this is all I had on hand today. But even with just two veggies the rolls were awesome!!
2 Thai Rice Paper Sheets (small, round ones) - I've found them in Bangalore at Nilgiris (Brigade Road), Food World Gourmet (MG Road) and Brown Tree (Church Street).
1 Carrot
1/2 head Romaine Lettuce
Slice the carrots into thin sticks and divide them into two bunches.
Wrap each bunch inside a few lettuce leaves and keep aside.
Dip a rice paper sheet in warm water and place on a plate.
Place a lettuce wrap in the middle of the rice paper.
Roll up the wrap half way, fold in the sides and continue rolling till you have a roll that's closed on all sides.
Repeat with the second rice paper sheet.
Chill in the freezer for a few minutes.
Remove and slice into bite sized pieces (I make each roll into 3 pieces).
Meanwhile prepare the Spicy Peanut Sauce. It's a sauce made of 100% processed ingredients. :oP
1 T Peanut Butter
Splash of Dark Soy Sauce (Tamari is a far superior choice but we don't get it here in India and I finished my stock from the US *sigh*)
Splash of Tabasco or Tamarind Paste
Pinch of Red Chilli Powder (add more if using Tamarind Paste instead of Tabasco)
Pinch of Sugar/Jaggery
2-3 T Warm Water
Mix everything and whisk well with fork.
Drizzle generously over the Summer Rolls.
Enjoy! :)
Update: 23rd June 2013
The ingredients for this recipe can now be purchased in India in the form of a recipe box from Global Graynz.

They have three kinds of boxes for this recipe, first with only the Rare Ingredients, second with All Packaged Ingredients and third with All Ingredients Including Fresh/Perishable Ones (pictured above).
Click on the Global Graynz button below to be taken to the Rare Ingredients recipe box.

Labels:
Appetizers Starters Snacks,
Wraps
Tuesday, October 16, 2012
Baked Akki Rotti Bites Vegan MoFo day 12
Akki Rottis are a staple breakfast or evening tiffin dish in Karnataka. They are made of a pasty dough of rice flour mixed with green chilli paste, salt, onions, cilantro and optionally grated vegetables. The paste is then made into balls, placed on special iron pans and tapped into thin crepes using fingers and palms. They are then drizzled with oil, covered and toasted on a medium flame to a crispy finish.
My mom makes the thinnest, tastiest Akki Rottis in existence and I looove eating them, dipped in Peanut Mylk Yogurt and Kothmiri Thokku (pickle made of cilantro that's been cooked in a spicy tamarind paste). She also makes super delicious Rottis out of other flours like Ragi (Finger Millet) and Jowar (Sorghum).

I make Rottis but not as often as mom does because firstly, they take a lot of time and effort to tap out onto the pans and secondly, they need to be generously drizzled with oil while they're being roasted. Besides, hubby (who didn't eat them while growing up, like I did) considers them to be more of a snack because he doesn't find them filling enough for a meal.
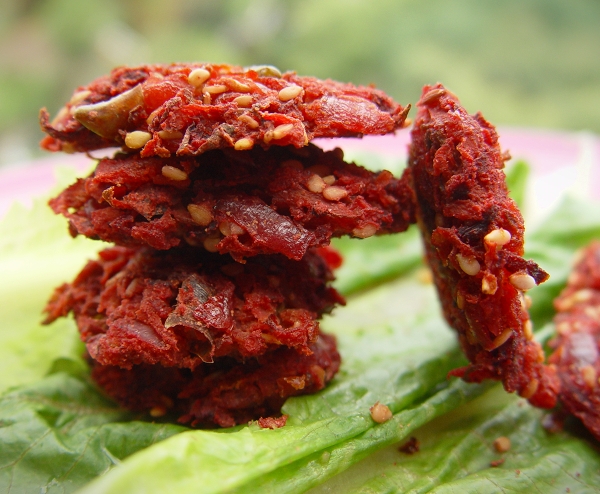
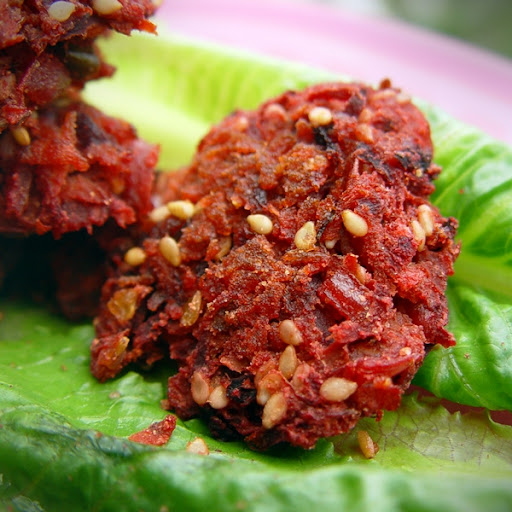
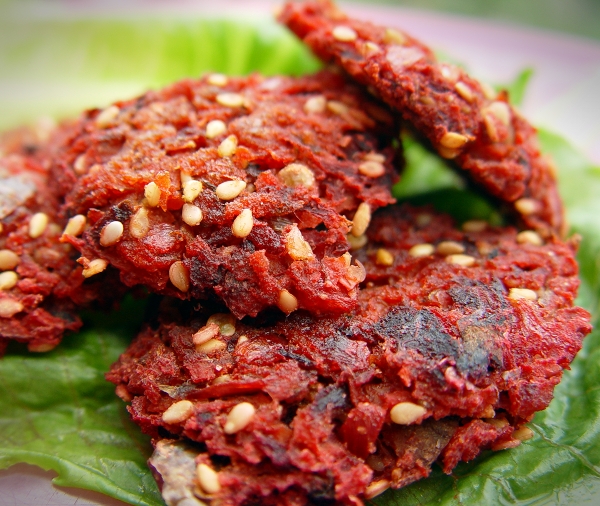
That's why I used the same ingredients to make bite sized snacks which take way less effort and nearly zero oil. My Baked Akki Rotti Bites contain a lot more vegetables with only a teeny amount of flour, just to hold things together.
They can be made with any combination of healthy, gluten free flours - Chickpea, Bajra, Ragi, Rice, Jowar, Teff, Quinoa... it's totally up to you. I don't recommend Wheat Flour because the gluten content will change the taste and texture. I've used a combination of Rice and Sorghum flours in my recipe.
And most grate-able veggies can be used - Carrot, Beetroot, Radish, Turnip, Zucchini, Jicama... I used whatever I had on hand. There's just one beet in there, but you know how beets are, the colour just seeps into everything. Not that I'm complaining, I think beets make everything pretty (including pee *sniggers*).
You'll be happy to know that these goodies require no pre-planning and barely take 20 minutes to make. I used the grill option in my microwave but they can also be baked in a regular oven. They are perfect as a starter to a meal and look beautiful when simply served on a bed of lettuce. The spices and the moist centre ensure that no additional dips are required. And thanks to the toasty onions, roasted sesame seeds and the lightly crunchy edges, they really hit the spot when you're craving for a deep fried, rainy evening kind of snack. What a super way to trick yourself into eating healthy! :D
Baked Akki Rotti Bites
4 Carrots - grated
1 Radish - grated
1 Beet - grated
1 Onion - finely chopped
3 Green Chillies - crushed well
1 T Cilantro - finely chopped
1 T Rice Flour
1 T Jowar (Sorghum) Flour
2 T Sesame Seeds
1/4 t Cumin Seeds
1/8 t Asafoetida
1/8 t Turmeric Powder
Salt
Oil for greasing
Preheat microwave to 250 C.
Grease a non-stick or foil lined baking tray.
Mix all ingredients without using any water.
Take a spoonful for the mixture and form a rough ball.
It will be crumbly, don't worry.
Flatten tightly between your palms, till it holds its shape.
Gently place on the baking sheet.
Repeat until you've filled the baking tray with the patties.
Optionally dab a teeny bit of oil on top of the patties (not necessary though).
Grill at 250 C for 5 minutes.
Flip them over.
Continue grilling for 2 more minutes.
Cool slightly.
Serve hot.
Enjoy! :)
My mom makes the thinnest, tastiest Akki Rottis in existence and I looove eating them, dipped in Peanut Mylk Yogurt and Kothmiri Thokku (pickle made of cilantro that's been cooked in a spicy tamarind paste). She also makes super delicious Rottis out of other flours like Ragi (Finger Millet) and Jowar (Sorghum).

I make Rottis but not as often as mom does because firstly, they take a lot of time and effort to tap out onto the pans and secondly, they need to be generously drizzled with oil while they're being roasted. Besides, hubby (who didn't eat them while growing up, like I did) considers them to be more of a snack because he doesn't find them filling enough for a meal.
That's why I used the same ingredients to make bite sized snacks which take way less effort and nearly zero oil. My Baked Akki Rotti Bites contain a lot more vegetables with only a teeny amount of flour, just to hold things together.
They can be made with any combination of healthy, gluten free flours - Chickpea, Bajra, Ragi, Rice, Jowar, Teff, Quinoa... it's totally up to you. I don't recommend Wheat Flour because the gluten content will change the taste and texture. I've used a combination of Rice and Sorghum flours in my recipe.
And most grate-able veggies can be used - Carrot, Beetroot, Radish, Turnip, Zucchini, Jicama... I used whatever I had on hand. There's just one beet in there, but you know how beets are, the colour just seeps into everything. Not that I'm complaining, I think beets make everything pretty (including pee *sniggers*).
You'll be happy to know that these goodies require no pre-planning and barely take 20 minutes to make. I used the grill option in my microwave but they can also be baked in a regular oven. They are perfect as a starter to a meal and look beautiful when simply served on a bed of lettuce. The spices and the moist centre ensure that no additional dips are required. And thanks to the toasty onions, roasted sesame seeds and the lightly crunchy edges, they really hit the spot when you're craving for a deep fried, rainy evening kind of snack. What a super way to trick yourself into eating healthy! :D
Baked Akki Rotti Bites
4 Carrots - grated
1 Radish - grated
1 Beet - grated
1 Onion - finely chopped
3 Green Chillies - crushed well
1 T Cilantro - finely chopped
1 T Rice Flour
1 T Jowar (Sorghum) Flour
2 T Sesame Seeds
1/4 t Cumin Seeds
1/8 t Asafoetida
1/8 t Turmeric Powder
Salt
Oil for greasing
Preheat microwave to 250 C.
Grease a non-stick or foil lined baking tray.
Mix all ingredients without using any water.
Take a spoonful for the mixture and form a rough ball.
It will be crumbly, don't worry.
Flatten tightly between your palms, till it holds its shape.
Gently place on the baking sheet.
Repeat until you've filled the baking tray with the patties.
Optionally dab a teeny bit of oil on top of the patties (not necessary though).
Grill at 250 C for 5 minutes.
Flip them over.
Continue grilling for 2 more minutes.
Cool slightly.
Serve hot.
Enjoy! :)
Labels:
Appetizers Starters Snacks
Kandu Unde Vegan MoFo day 11
Two weeks down, two more to go. Yeah baby! Vegan MoFo seems to be going too fast and too slow, all at the same time. I know that sounds nutty, but as everyone knows, MoFo is all about turning people into kooks (cook/kook get it?). hehehe There's no other event which can be SO MUCH fun for me and at the same time drive me up the wall!!
With or without yooouuuuu,
With or wiiiTHOUt you oh oh,
I can't liiiivee,
With ooor withouuuut youuuu,
Oh Vegan MohhhFohhh
While you curse me and say, "now I'm going to have that song stuck in my head all day!", let me pacify you with today's yummy appetizer recipe. :D
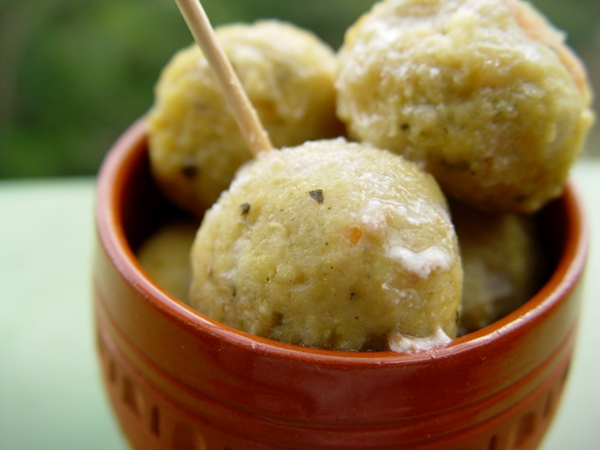
Kandu Undes (translation: Pigeon Pea Balls) are South Indian, lentil based, steamed dumplings made mainly in Karnataka during Ganesha Chaturthi. Traditionally they don't contain veggies but I like adding some in mine. When these are made on the day of the festival, onions are not added since onions are considered non-spiritual and cannot be used in foods which are prepared as offerings to Ganesha (or any other Hindu Gods/Goddesses). So I like making them on other days because they taste much yummier with onions in them. :)
Kandu Unde aka Kandunde
1 C Toor Dal (split pigeon peas)
1 C Channa Dal (split chickpeas)
1/2 C Moong Dal (split mung beans)
1/4 C Urad Dal (split black gram)
10-12 Spicy Green Chillies
1 inch Fresh Ginger
1/4 tsp Asafoetida
Salt
3 Onions - finely chopped
1 Carrot - finely chopped
5-7 Green Beans - finely chopped
2 T Cilantro - finely chopped
1 T Curry Leaves - finely chopped
In a small bowl soak Urad Dal for 5-6 hours.
In a larger bowl soak Toor Dal, Channa Dal and Moong Dal together for 5-6 hours.
Drain all the dals well.
Grind the urad dal along with the green chillies, ginger, asafoetida and salt into a thick, smooth paste.
Add the other dals and grind to a coarse mixture without adding any water (it shouldn't become smooth).
Mix the chopped veggies and herbs and form a sticky yet shape-able dough.
Heat water in a steamer.
Grease the steamer tray(s) lightly with oil.
Form 1 inch balls of the dough and place them in the tray(s), about 1/2 inch apart.
Steam for 5 minutes.
Let them sit in the steamer for 2-3 more minutes.
Place the steamed balls in a bowl and drizzle with peanut yogurt.
Serve hot.
Or, they can also be soaked in any vegan yogurt that has been spiced with chilli powder, salt and asafoetida for a few hours, chilled and served.
Enjoy! :)
Friday, August 17, 2012
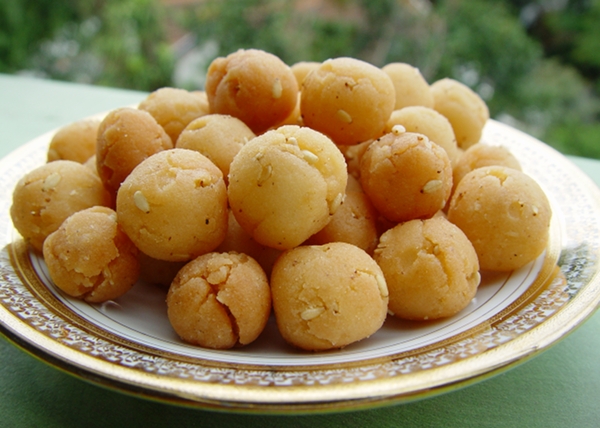
Vegan Gokulashtami: Uppu Seedais and Vella Seedais
While I was growing up, Gokulashtami was a small festival, with a couple of very simple dishes for naivedhyam. It was only after I married my Iyer boy that I discoverd these crunchy, delicious, deep friend snacks called Seedais.
Hubs and I are not very religious and our poojas are always very quick, but we do enjoy the cultural aspects of our traditional Hindu festivals. And of course the food! :)
On our first Gokulashtami back home in Bangalore, hubby insisted that we make Uppu Seedais and Vella Seedais together and make baby Krishna footsteps kolam too. It was so much fun that it became a yearly tradition for us. Now, as long as we're here in Bangalore during Gokulashtami, we don't miss out on celebrating it in our small way.

Now after so many years, I've become fairly good at making the Seedais and a pro at shaping the footsteps out of rice flour paste.

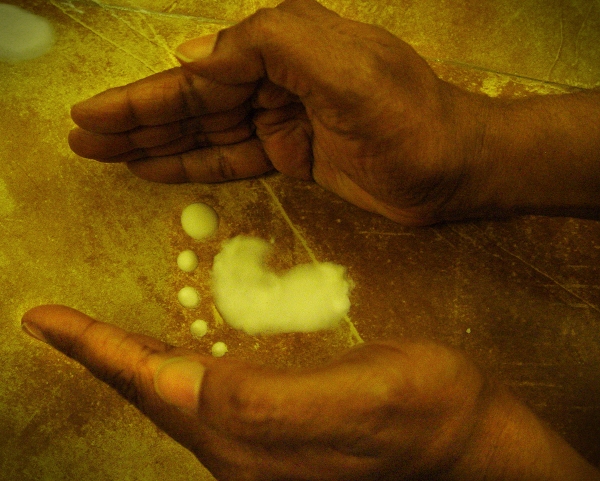
People often take the easy way out with the kolam by just drawing an 8 with a flattened top and quickly putting dots for the toes, but we always insist on using the more traditional, side-fist method. Takes a bit more patience but it's worth the effort. Clench palms into tight fists, dip them in rice flour paste and press them onto the floor, right fist for the right foot and left fist for the left foot, then finally dot the toes on top with the index finger. If there are real little babies at home, then their wee feet are used as the tools for making the footsteps. :oP

For those who have no clue about what I'm talking about, Gokulashtami aka Krishna Janmashtami is a festival in celebration of Krishna's birthday. The little footsteps on are drawn from the main door of the house, all the way up to the pooja chamber/altar. They represent baby Krishna running into our home happily and jumping up onto his place in the altar in front of the yummy food offerings. The idol on the altar is of an adorable baby Krishna in a little cradle.

All Hindu festivals basically involve these steps: prepare the favorite foods of the God or Goddess who is being celebrated and place said food on the pooja altar, in front of the idols/symbols/pictures which represent the deity. Light Lamps of sesame oil and incense sticks with a pleasant, calming fragrance. Chant ancient prayers (this part of the ritual could be long or short and would involve ringing a brass or silver bell and lighting a few pieces of camphor on fire to purify and cleanse the house). Next, express gratitude for our many blessings. Offer the naivedhyam food to the God or Goddess in question. And finally proceed to gleefully stuff our faces with the delicious festival goodies.
Little Krishna is known for his love of butter and curds, but we believe that if he lived on Earth today, he would definitely be vegan because he loved cows with all his heart and would never put up with the cruelties inflicted upon these gentle creatures by humans to satisfy our greedy desires. So of course all the goodies we prepare are completely vegan.
This year I made Tapioca Payasam, Vella Appam, Uppu Seedai and Vella Seedai.

For the Vella Appams, I followed the recipe from Subbu's Kitchen. Instead of deep frying them however, I shallow fried them in my Paddu/Paniyaram Pan. This helped them hold their shape well.
For the Uppu Seedais and Vella Seedais, I followed the recipes from Chefinyou, with a few modifications.
Uppu Seedais
Uppu Seedais are known to be tricky little buggers. I've heard that they often turn into little bombs while being fried and splatter oil all over the kitchen. But thankfully, my little Uppu Seedais have always been very well behaved. It's possibly because I use coconut oil instead of butter and dry coconut instead of fresh coconut, which reduces the moisture content in the balls, hence drastically reducing the risk of air pockets being formed inside. Or perhaps it's simply vegan karma at play here. :oP

1 C rice flour
2 T urad dal flour - I followed this recipe to make it and sieved through a cheesecloth to get a very fine powder
1/4 C white sesame seeds
1/4 C dry/desiccated coconut powder
2 T coconut oil
1 tsp asafoetida powder
Salt to taste
Additional coconut oil for deep frying
Mix all the ingredients together.
Add a little water at a time and form a stiff dough.
Shape the dough into small, about 10mm thick, balls.
Heat the coconut oil for a couple of minutes and drop the balls into it in batches.
Fry them on a medium flame and stir once in a while to ensure even cooking.
After a couple of minutes, the balls will turn to a light, golden colour.
Remove them with a slotted spoon and place them on tissue paper to absorb excess oil.
Enjoy! :)
Vella Seedais

1 C rice flour
2 tsp urad dal flour - I followed this recipe to make it and sieved through a cheesecloth to get a very fine powder
1 T dry/desiccated coconut powder
1/4 C white sesame seeds
1 cup jaggery - dissolved in 1/2 C of hot water and strained
1 cardamom pod's worth of crushed seeds
Small pinch of salt
Coconut oil for deep frying
In a dry, heavy bottomed pan, roast the rice flour on a low flame for a minute or so, being careful not to burn it and set aside.
Lightly toast the sesame seeds and coconut powder.
Mix everything, except the jaggery syrup, in a large bowl.
Slowly knead in the jaggery syrup and form a stiff dough, using only as much jaggery syrup as required.
Cover the bowl with a plate and set aside for half an hour.
Shape the dough into 1 inch balls and keep aside.
Heat the coconut oil for a couple of minutes and drop the balls into it in batches.
Fry them for a few minutes on a medium flame and stir once in a while to ensure even cooking. If the balls brown too quickly, reduce the heat a little more.
They are done when they turn to a dark golden brown colour.
Remove them with a slotted spoon and place them on tissue paper to drain away any excess oil.
Enjoy! :)

Hubs and I are not very religious and our poojas are always very quick, but we do enjoy the cultural aspects of our traditional Hindu festivals. And of course the food! :)
On our first Gokulashtami back home in Bangalore, hubby insisted that we make Uppu Seedais and Vella Seedais together and make baby Krishna footsteps kolam too. It was so much fun that it became a yearly tradition for us. Now, as long as we're here in Bangalore during Gokulashtami, we don't miss out on celebrating it in our small way.

Now after so many years, I've become fairly good at making the Seedais and a pro at shaping the footsteps out of rice flour paste.


People often take the easy way out with the kolam by just drawing an 8 with a flattened top and quickly putting dots for the toes, but we always insist on using the more traditional, side-fist method. Takes a bit more patience but it's worth the effort. Clench palms into tight fists, dip them in rice flour paste and press them onto the floor, right fist for the right foot and left fist for the left foot, then finally dot the toes on top with the index finger. If there are real little babies at home, then their wee feet are used as the tools for making the footsteps. :oP

For those who have no clue about what I'm talking about, Gokulashtami aka Krishna Janmashtami is a festival in celebration of Krishna's birthday. The little footsteps on are drawn from the main door of the house, all the way up to the pooja chamber/altar. They represent baby Krishna running into our home happily and jumping up onto his place in the altar in front of the yummy food offerings. The idol on the altar is of an adorable baby Krishna in a little cradle.

All Hindu festivals basically involve these steps: prepare the favorite foods of the God or Goddess who is being celebrated and place said food on the pooja altar, in front of the idols/symbols/pictures which represent the deity. Light Lamps of sesame oil and incense sticks with a pleasant, calming fragrance. Chant ancient prayers (this part of the ritual could be long or short and would involve ringing a brass or silver bell and lighting a few pieces of camphor on fire to purify and cleanse the house). Next, express gratitude for our many blessings. Offer the naivedhyam food to the God or Goddess in question. And finally proceed to gleefully stuff our faces with the delicious festival goodies.
Little Krishna is known for his love of butter and curds, but we believe that if he lived on Earth today, he would definitely be vegan because he loved cows with all his heart and would never put up with the cruelties inflicted upon these gentle creatures by humans to satisfy our greedy desires. So of course all the goodies we prepare are completely vegan.
This year I made Tapioca Payasam, Vella Appam, Uppu Seedai and Vella Seedai.

For the Vella Appams, I followed the recipe from Subbu's Kitchen. Instead of deep frying them however, I shallow fried them in my Paddu/Paniyaram Pan. This helped them hold their shape well.
For the Uppu Seedais and Vella Seedais, I followed the recipes from Chefinyou, with a few modifications.
Uppu Seedais
Uppu Seedais are known to be tricky little buggers. I've heard that they often turn into little bombs while being fried and splatter oil all over the kitchen. But thankfully, my little Uppu Seedais have always been very well behaved. It's possibly because I use coconut oil instead of butter and dry coconut instead of fresh coconut, which reduces the moisture content in the balls, hence drastically reducing the risk of air pockets being formed inside. Or perhaps it's simply vegan karma at play here. :oP

1 C rice flour
2 T urad dal flour - I followed this recipe to make it and sieved through a cheesecloth to get a very fine powder
1/4 C white sesame seeds
1/4 C dry/desiccated coconut powder
2 T coconut oil
1 tsp asafoetida powder
Salt to taste
Additional coconut oil for deep frying
Mix all the ingredients together.
Add a little water at a time and form a stiff dough.
Shape the dough into small, about 10mm thick, balls.
Heat the coconut oil for a couple of minutes and drop the balls into it in batches.
Fry them on a medium flame and stir once in a while to ensure even cooking.
After a couple of minutes, the balls will turn to a light, golden colour.
Remove them with a slotted spoon and place them on tissue paper to absorb excess oil.
Enjoy! :)
Vella Seedais

1 C rice flour
2 tsp urad dal flour - I followed this recipe to make it and sieved through a cheesecloth to get a very fine powder
1 T dry/desiccated coconut powder
1/4 C white sesame seeds
1 cup jaggery - dissolved in 1/2 C of hot water and strained
1 cardamom pod's worth of crushed seeds
Small pinch of salt
Coconut oil for deep frying
In a dry, heavy bottomed pan, roast the rice flour on a low flame for a minute or so, being careful not to burn it and set aside.
Lightly toast the sesame seeds and coconut powder.
Mix everything, except the jaggery syrup, in a large bowl.
Slowly knead in the jaggery syrup and form a stiff dough, using only as much jaggery syrup as required.
Cover the bowl with a plate and set aside for half an hour.
Shape the dough into 1 inch balls and keep aside.
Heat the coconut oil for a couple of minutes and drop the balls into it in batches.
Fry them for a few minutes on a medium flame and stir once in a while to ensure even cooking. If the balls brown too quickly, reduce the heat a little more.
They are done when they turn to a dark golden brown colour.
Remove them with a slotted spoon and place them on tissue paper to drain away any excess oil.
Enjoy! :)
Monday, February 20, 2012
Vegan Tofu Scramble Salad Rice Paper Wraps.
I disliked eggs (aka hen periods) even during my pre vegan days. I only ate them when they were hidden in cakes and mousses and such desserts. If by mistake I put anything with the slightest eggy smell into my mouth, I immediately gagged and discarded it. So it's no surprise that after I turned vegan, I never really went out of my way to try out savory vegan egg-style dishes. The only time I had one was the Tofu Akuri made by Dr.Nandita Shah of SHARAN at the Reversing Diabetes with Dr.Neal Barnard seminar a few years ago. I liked it but not enough to inspire me try making it myself.
But last month, my friend Heather of Worceatsveg wrote a post about Vegan Eggless Salad and it got me curious enough to attempt a version of my own. I decided to turn it into rice paper rolls along with a few fresh veggies and the result was simply delicious!!

For the tofu filling:
2 200gm packs Tofu (rinsed, drained and patted dry)
1 Small Onion (finely chopped)
1 Medium Tomato (finely chopped)
3 T Nutritional Yeast
Turmeric (a pinch)
1/4 tsp Chilli Powder
1/4 tsp Pepper Powder
1 T Lemon Juice
1 tsp Apple Cider Vinegar
Agave (small splash)
Salt (Black Salt works best but I didn't have any so I used regular salt)
In a large bowl, crumble the tofu.
Add the rest of the ingredients and mix well.
Taste and adjust the seasonings.

To proceed:
Sliced Vegetables - carrot, capsicum, cucumber.
Tapioca Sheets
Dip a tapioca sheet in warm water and place it carefully on a flat surface.
Place some tofu mixture in the middle of the sheet.
Top with sliced veggies.
Carefully roll up the tapioca sheet by folding the bottom half over the filling, then the sides and then the top half.
Enjoy immediately!
But last month, my friend Heather of Worceatsveg wrote a post about Vegan Eggless Salad and it got me curious enough to attempt a version of my own. I decided to turn it into rice paper rolls along with a few fresh veggies and the result was simply delicious!!

For the tofu filling:
2 200gm packs Tofu (rinsed, drained and patted dry)
1 Small Onion (finely chopped)
1 Medium Tomato (finely chopped)
3 T Nutritional Yeast
Turmeric (a pinch)
1/4 tsp Chilli Powder
1/4 tsp Pepper Powder
1 T Lemon Juice
1 tsp Apple Cider Vinegar
Agave (small splash)
Salt (Black Salt works best but I didn't have any so I used regular salt)
In a large bowl, crumble the tofu.
Add the rest of the ingredients and mix well.
Taste and adjust the seasonings.

To proceed:
Sliced Vegetables - carrot, capsicum, cucumber.
Tapioca Sheets
Dip a tapioca sheet in warm water and place it carefully on a flat surface.
Place some tofu mixture in the middle of the sheet.
Top with sliced veggies.
Carefully roll up the tapioca sheet by folding the bottom half over the filling, then the sides and then the top half.
Enjoy immediately!
Labels:
Appetizers Starters Snacks,
Wraps
Tuesday, January 17, 2012
Baked Bread Bonda
Bondas are balls of spiced mashed potatoes dipped in a gram flour batter and deep fried. Bread Bondas are essentially the same thing, except, the potato mixture is wrapped in moistened bread instead and deep fried. Main theme? Potato. Deep fried.
I made a baked version of the Bread Bondas instead. It's not that I'm overly health conscious and scoff at deep friend deliciousness. It's simply because deep frying can be quite a tedious process and what with the boiling, mashing, spicing and wrapping involved, I just felt like skipping the deep frying part. Lining them up on a baking sheet and popping them into an oven was soooo much easier.
So how did I keep them crispy? Just when I began to wonder if brushing oil onto the outer layer would be the next move, my oh so sprightly mind came up with a fairly healthy solution... Coconut Mylk!
Heck, I wasn't gonna deep fry anyways, so might as well keep the oil at bay right?
Read on...

BAKED BREAD BONDA
8-10 slices Vegan Whole Wheat Bread (crusts removed)
1/4 C thick Coconut Mylk
5-6 medium sized Potatoes (steamed/boiled in salted water, peeled and mashed)
1 Carrot (finely chopped and nuked/steamed for a few minutes)
Small handful Green Peas (nuked/steamed for a few minutes)
1 tsp Coconut Oil + a few drops for greasing
1 Green Chilli (very finely chopped)
6-10 cloves of Garlic (crushed)
1/2 tsp Ginger Paste
1/4 tsp Pav Bhaji Masala Powder
1/4 tsp Garam Masala Powder
1/8 tsp Asafoetida Powder
1/8 tsp Turmeric Powder
Curry Leaves (finely chopped)
Salt
Heat the oil in a heavy bottomed pan and add the garlic, ginger, curry leaves and chillies.
Stir on medium flame for half a minute.
Add the carrot and peas and stir fry for another half a minute.
Add the rest of the spices and salt and mix for a few seconds.
Add the mashed potatoes and mix well.
Turn off flame and keep aside.
Once the mixture has cooled a bit, shape into elongated balls.
Lightly grease a baking tray.
Preheat the oven to 250 C (475 F)
Pour the coconut mylk into a wide, flat pan and dilute with 1/8 C of water.
Quickly dip a slice of bread into the coconut mylk to moisten it completely, very gently squeeze between your palms to remove any excess coconut mylk and place it on a flat surface.
Place a ball of the potato mixture in the middle and fold the bread over it.
If the bread tends to break, don't worry, just take the whole thing in your palms and gently squeeze the bread onto the potato filling till it's covered on all sides. With a little bit of practice, you'll get the hang of this.
Place the prepared Bondas on the baking tray 1 inch apart.
Once the tray is full pop into the oven and grill for 10 minutes.
Carefully turn the Bondas over and continue grilling for another 10 minutes (until the bread is all toasty and golden brown).
Serve hot but be careful when you bite into it because the inside will be piping hot.
I like mine with ketchup but Tabasco would work too if you like it to be spicier than it is.
Enjoy! :)
I made a baked version of the Bread Bondas instead. It's not that I'm overly health conscious and scoff at deep friend deliciousness. It's simply because deep frying can be quite a tedious process and what with the boiling, mashing, spicing and wrapping involved, I just felt like skipping the deep frying part. Lining them up on a baking sheet and popping them into an oven was soooo much easier.
So how did I keep them crispy? Just when I began to wonder if brushing oil onto the outer layer would be the next move, my oh so sprightly mind came up with a fairly healthy solution... Coconut Mylk!
Heck, I wasn't gonna deep fry anyways, so might as well keep the oil at bay right?
Read on...

BAKED BREAD BONDA
8-10 slices Vegan Whole Wheat Bread (crusts removed)
1/4 C thick Coconut Mylk
5-6 medium sized Potatoes (steamed/boiled in salted water, peeled and mashed)
1 Carrot (finely chopped and nuked/steamed for a few minutes)
Small handful Green Peas (nuked/steamed for a few minutes)
1 tsp Coconut Oil + a few drops for greasing
1 Green Chilli (very finely chopped)
6-10 cloves of Garlic (crushed)
1/2 tsp Ginger Paste
1/4 tsp Pav Bhaji Masala Powder
1/4 tsp Garam Masala Powder
1/8 tsp Asafoetida Powder
1/8 tsp Turmeric Powder
Curry Leaves (finely chopped)
Salt
Heat the oil in a heavy bottomed pan and add the garlic, ginger, curry leaves and chillies.
Stir on medium flame for half a minute.
Add the carrot and peas and stir fry for another half a minute.
Add the rest of the spices and salt and mix for a few seconds.
Add the mashed potatoes and mix well.
Turn off flame and keep aside.
Once the mixture has cooled a bit, shape into elongated balls.
Lightly grease a baking tray.
Preheat the oven to 250 C (475 F)
Pour the coconut mylk into a wide, flat pan and dilute with 1/8 C of water.
Quickly dip a slice of bread into the coconut mylk to moisten it completely, very gently squeeze between your palms to remove any excess coconut mylk and place it on a flat surface.
Place a ball of the potato mixture in the middle and fold the bread over it.
If the bread tends to break, don't worry, just take the whole thing in your palms and gently squeeze the bread onto the potato filling till it's covered on all sides. With a little bit of practice, you'll get the hang of this.
Place the prepared Bondas on the baking tray 1 inch apart.
Once the tray is full pop into the oven and grill for 10 minutes.
Carefully turn the Bondas over and continue grilling for another 10 minutes (until the bread is all toasty and golden brown).
Serve hot but be careful when you bite into it because the inside will be piping hot.
I like mine with ketchup but Tabasco would work too if you like it to be spicier than it is.
Enjoy! :)
Labels:
Appetizers Starters Snacks
Friday, December 16, 2011
Stuffed Potatoes.
One of the first things I looked at in my inbox this morning was the VegNewsletter. The Holiday Recipes edition! I eagerly scrolled down to the list of recipes and the first one that struck me was Super Stuffed Potato Skins!
I love stuffed veggies but I've never made stuffed potatoes before for some reason. This simple recipe inspired me so much that I had to take action immediately! Upon entering my kitchen for the day, the first thing I did was to grab the two potatoes in the basket and began working.
As always, I modified the recipe to make it my own. While watering my plants in the morning, I noticed a bunch of rainforest sized mustard leaves so I was very tempted to harvest and incorporate them into the recipe. I also continued my trend of throwing in some sesame seeds to increase the calcium content of the dish
It's one of those easily changeable recipes, so if you don't have or like any of the ingredients, don't feel shy to switch things around. :)
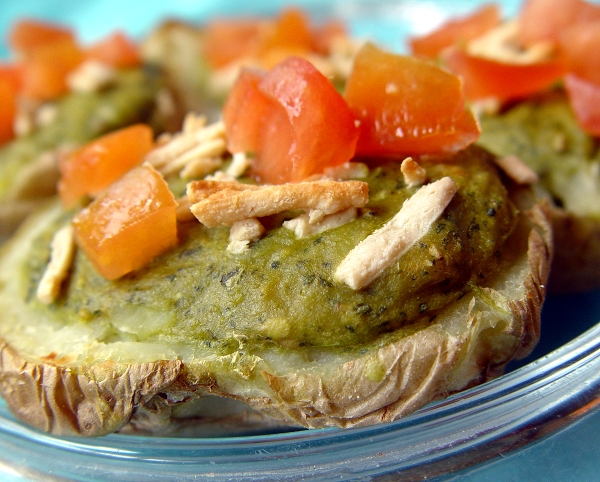
2 Potatoes - scrubbed clean and de-eyed.
10-12 large Mustard Leaves
1 tsp Sesame Seeds
2 T Nutritional Yeast
Big splosh of plain Tabasco Sauce
Small dash of Tomato Ketchup
Large pinch of Rock Salt
Daiya Mozzarella Shreds
Sunflower Seeds (the roasted, unsalted kind)
Tomato - chopped
Poke holes all over the potato and nuke it int he microwave for 5 minutes.
Slice in half lengthwise and scoop out about 3/4 of the insides.
Arrange, scooped side up, on a microwave safe baking dish.
Place a few shreds of daiya into the center of each potato half and top with a few sunflower seeds each.
Pop the scooped out potato insides with the mustard leaves, sesame seeds, nutritional yeast, tabasco, ketchup and rock salt into a grinder jar and process into a thick, mostly creamy mixture (using a tiny bit of water if required).
Stuff the potatoes with this mixture and top with a few shreds of daiya.
Bake in a preheated microwave using the convection option at 250 C (or you can use a regular oven too) for 6-7 minutes. Then use the grill option and grill the potatoes for another 4-5 minutes (the daiya will slightly browned).
Let them cool for a few minutes, top with the chopped tomatoes and serve.
Enjoy! :)
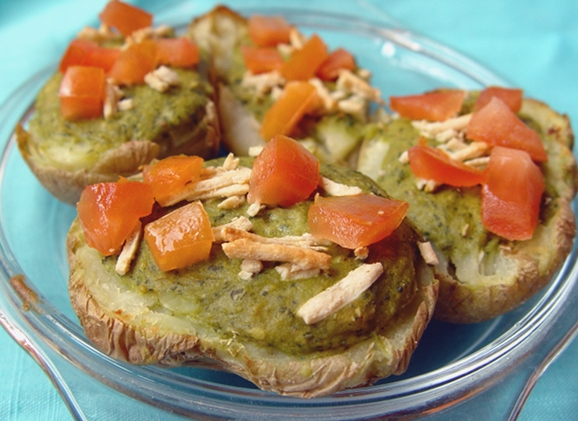
To the leftover stuffing, I mixed chopped onions, carrots and tomatoes, wrapped them in cabbage and baked and grilled them in a similar way. Those were pretty yummy too!

I love stuffed veggies but I've never made stuffed potatoes before for some reason. This simple recipe inspired me so much that I had to take action immediately! Upon entering my kitchen for the day, the first thing I did was to grab the two potatoes in the basket and began working.
As always, I modified the recipe to make it my own. While watering my plants in the morning, I noticed a bunch of rainforest sized mustard leaves so I was very tempted to harvest and incorporate them into the recipe. I also continued my trend of throwing in some sesame seeds to increase the calcium content of the dish
It's one of those easily changeable recipes, so if you don't have or like any of the ingredients, don't feel shy to switch things around. :)

2 Potatoes - scrubbed clean and de-eyed.
10-12 large Mustard Leaves
1 tsp Sesame Seeds
2 T Nutritional Yeast
Big splosh of plain Tabasco Sauce
Small dash of Tomato Ketchup
Large pinch of Rock Salt
Daiya Mozzarella Shreds
Sunflower Seeds (the roasted, unsalted kind)
Tomato - chopped
Poke holes all over the potato and nuke it int he microwave for 5 minutes.
Slice in half lengthwise and scoop out about 3/4 of the insides.
Arrange, scooped side up, on a microwave safe baking dish.
Place a few shreds of daiya into the center of each potato half and top with a few sunflower seeds each.
Pop the scooped out potato insides with the mustard leaves, sesame seeds, nutritional yeast, tabasco, ketchup and rock salt into a grinder jar and process into a thick, mostly creamy mixture (using a tiny bit of water if required).
Stuff the potatoes with this mixture and top with a few shreds of daiya.
Bake in a preheated microwave using the convection option at 250 C (or you can use a regular oven too) for 6-7 minutes. Then use the grill option and grill the potatoes for another 4-5 minutes (the daiya will slightly browned).
Let them cool for a few minutes, top with the chopped tomatoes and serve.
Enjoy! :)

To the leftover stuffing, I mixed chopped onions, carrots and tomatoes, wrapped them in cabbage and baked and grilled them in a similar way. Those were pretty yummy too!

Labels:
Appetizers Starters Snacks
Monday, October 10, 2011
Sundal and Payasam - Vegan Mofo Post 10
Last week we had a series of festivals called Dussera (also known as Navarathri). Traditionally we have ten days of celebration and this means lots of sweets and snacks. The most important of these festivals for us is Ayudha Pooja. It's a special occasion reserved to give thanks to all the tools, machines and vehicles we are blessed with.
On the day of Ayudha Pooja this year, hubby and I made a simple sweet and snack combination for Naiveidhyam (offering to the Gods and Goddesses). Something quick and delicious which we could eat and share.
Whatever is cooked with the intention of being placed at the altar as a food offering should only be eaten by us after the ritual is over. So while we prepare the food, we don't have the luxury of tasting and adjusting. But for some reason, every time we make Naiveidhyam food, it turns out perfect! This always reminds me that the taste of a dish is largely dependent on the energy and intention of love that goes into preparing it. Positive vibrations always yield beautiful results. :)
Sundal is a savory dish made of Garbanzo Beans/Chickpeas. We can use any kind of chick peas to make these but this time we had Kabuli Channa (the larger ones) on hand so we used them. I normally follow the quick soak method to soak pulses but this time I soaked them overnight.
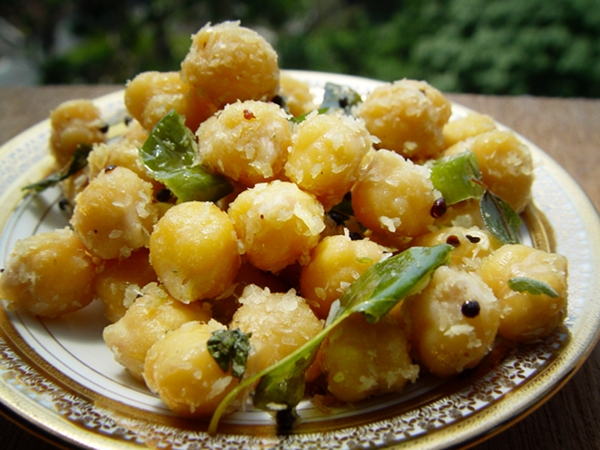
1 C Dry Chickpeas
2 Chopped Green Chillies
2 tsp Coconut Oil
Mustard Seeds
Curry Leaves
Asafoetida Powder (a pinch)
Dessicated Coconut
Chopped Cilantro
Lime Juice
Salt
Wash and soak the chickpeas over night (about 8 hours). Throw out the water, add fresh water and steam for 45 minutes or pressure cook for about 15 minutes until the chickpeas are soft.
In a wide, heavy bottomed pan heat the oil. Add the mustard seeds and let them crackle. Add the chopped green chillies, asafoetida powder and curry leaves and stir for a half a minute.
Now add the cooked chickpeas and salt and a wee bit of the cooking liquid and cook on medium high heat while stir frying continuously. After about 5 mintues of this, once the water has evaporated, add the dessicated coconut and toss well and turn off the heat.
Mix in the lime juice and garnish with the chopped cilantro and serve hot.
--
Payasam is a liquidy dessert which is best eaten hot. It is served at the beginning of traditional South Indian meals.
Payasam can be made with many things - Rice, Dals, Tapioca, Semiya (fine semolina noodles), Broken Wheat etc... This time we made Channa Dal (Split Bengal Gram) Payasam.

1 C Channa Dal
1/4 C Dessicated Coconut
1/4 C Grated Jaggery
6 tsp Sugar
1 T Chopped Cashews
1 t Raisins
2 Cardamom Pods (crushed well with a stone/hammer/mortar and pestle)
Soak the channa dal for an hour. Add dessicated coconut and steam (in the soaking water) for half an hour.
Meanwhile, dry roast the cashews to a golden color, add the raisins and stir for a few seconds, until they brown slightly. Keep aside.
Once the channa is ready, add jaggery and sugar and mix well. Bring to a simmer on medium heat and stir till the sugar and jaggery have dissolved. Add the crushed cardamom, lower the heat and simmer for a few minutes.
Turn off the heat and serve hot.
On the day of Ayudha Pooja this year, hubby and I made a simple sweet and snack combination for Naiveidhyam (offering to the Gods and Goddesses). Something quick and delicious which we could eat and share.
Whatever is cooked with the intention of being placed at the altar as a food offering should only be eaten by us after the ritual is over. So while we prepare the food, we don't have the luxury of tasting and adjusting. But for some reason, every time we make Naiveidhyam food, it turns out perfect! This always reminds me that the taste of a dish is largely dependent on the energy and intention of love that goes into preparing it. Positive vibrations always yield beautiful results. :)
Sundal is a savory dish made of Garbanzo Beans/Chickpeas. We can use any kind of chick peas to make these but this time we had Kabuli Channa (the larger ones) on hand so we used them. I normally follow the quick soak method to soak pulses but this time I soaked them overnight.

1 C Dry Chickpeas
2 Chopped Green Chillies
2 tsp Coconut Oil
Mustard Seeds
Curry Leaves
Asafoetida Powder (a pinch)
Dessicated Coconut
Chopped Cilantro
Lime Juice
Salt
Wash and soak the chickpeas over night (about 8 hours). Throw out the water, add fresh water and steam for 45 minutes or pressure cook for about 15 minutes until the chickpeas are soft.
In a wide, heavy bottomed pan heat the oil. Add the mustard seeds and let them crackle. Add the chopped green chillies, asafoetida powder and curry leaves and stir for a half a minute.
Now add the cooked chickpeas and salt and a wee bit of the cooking liquid and cook on medium high heat while stir frying continuously. After about 5 mintues of this, once the water has evaporated, add the dessicated coconut and toss well and turn off the heat.
Mix in the lime juice and garnish with the chopped cilantro and serve hot.
--
Payasam is a liquidy dessert which is best eaten hot. It is served at the beginning of traditional South Indian meals.
Payasam can be made with many things - Rice, Dals, Tapioca, Semiya (fine semolina noodles), Broken Wheat etc... This time we made Channa Dal (Split Bengal Gram) Payasam.

1 C Channa Dal
1/4 C Dessicated Coconut
1/4 C Grated Jaggery
6 tsp Sugar
1 T Chopped Cashews
1 t Raisins
2 Cardamom Pods (crushed well with a stone/hammer/mortar and pestle)
Soak the channa dal for an hour. Add dessicated coconut and steam (in the soaking water) for half an hour.
Meanwhile, dry roast the cashews to a golden color, add the raisins and stir for a few seconds, until they brown slightly. Keep aside.
Once the channa is ready, add jaggery and sugar and mix well. Bring to a simmer on medium heat and stir till the sugar and jaggery have dissolved. Add the crushed cardamom, lower the heat and simmer for a few minutes.
Turn off the heat and serve hot.
Monday, September 05, 2011
Ganesha Chaturthi and Yummy Kadubus
I love a good, filling festival feast! But then, who doesn't? No matter what religious festival it is that one is celebrating, the love for the associated food is commonly shared. :)
It's probably because of a combination of the joyous childhood memories we have associated with festivals and the amount of care and hard work which always goes into making food fit for celebration.

Being a strong believer in the power of spiritual vibrations, I feel that food when it's made with the intention of a offering to a deity as neiveidhya first before being eaten is most sublime.
Among all the festival we grew up celebrating, my fondest memories are of Gowri and Ganesha (not even Diwali with all its fire crackers matches up). For the first half of my life, I lived in a big, happy joint family. We were fourteen of us in one huge bungalow. All festivals were celebrated together, as a family.
On the first day was the Gowri pooja followed on the next day by the Ganesha pooja. The story is that Gowri comes down to Earth on that day to visit her mother and Ganesha (Gowri's youngest son) accompanies her to stay at his grandma's place. And grandma spoils him with all kinds of delicious goodies. After the festivals are done, a few days later Ganesha safely takes his mother Gowri back up to Kailasa (heaven). That's when we leave the clay idols in water as a send off until the following year.
A few days before the festival, when the adults purchased the larger Gowri and Ganesha clay idols for the ritual, they always purchased smaller ones for us kids.
Me, my little sister and our two little cousin brothers used to willingly and enthusiastically wake up at the ungodly hour of 4 am on both festival days, get dressed in traditional clothes and sit at our mini altar to do the ritual to our little Gowri and Ganesha. The girls did the Gowri ritual and the boys did the Ganesha ritual. We even had miniature silver vessels, aarthis and all the other stuff required for the ceremony. And at the end of the ritual, the feast was brought out and placed in front of the deities as an offering. This marked the end of the ceremony. After this, we could commence wolfing down the yummy goodies! :D
Those were such utterly joyful days!!

Now hubby and I bring home only the Ganesha (I visit my mom's place and all my aunt's places on the day of the Gowri festival) and perform a simple, short pooja. But we do make sure to cook a whole bunch of the traditional delicacies for the neiveidhya offering so we can stuff ourselves later to our tummies' content. :D
This year we made three types of kadubus/kozakottais, unfermented idli with coconut cilantro chutney, sundal out of small, brown channa and these miniature steamed snacks (don't really know what they are called).
For the three kadubu fillings - coconut jaggery, sesame jaggery, savory urad dal - we followed the recipes from Subbu's Kitchen. For the outer rice dough covering we used a slightly different method.
Kadubu Dough
1 C rice flour
1 C water
2 tsp oil
a pinch of salt
Mix everything into a paste in a heavy bottomed pan and place on medium heat. Stir continuously (will take maybe 5-10 minutes) and let it cook until the paste starts coming together into a ball of dough.
Take the pan off the stove and once the dough cools a bit, dip your palm in cold water and knead the dough until it's smooth. Follow instructions to make various fillings, stuff and steam.

Fun Little Savory Steamed Snacks
These are usually made out of leftover kadubu dough but I like them so much that I always make extra dough just for these. :)
Kadubu dough
1 tsp moong dal and 1 tsp channa dal (soaked together for half an hour)
2 fresh green chillies, asafoetida and salt (crushed well together)
2 tsp chopped fresh cilantro
Mix everything together.
Form into fun little shapes - ball, stick, ring, disk etc...
Steam along with the kadubu for 5-8 minutes.
Another Ganesha Chaturthi dish that I truly relish is Kandundes (didn't make them this time around though). They are made of four kinds of lentils soaked together and ground to a thick paste along with spices, shaped into balls and steamed. Then they are dunked in a yogurt based gravy and served. I make these on non festival days too because then I get to add onion (a festival no no) and also a bunch of chopped veggies. I either serve those in a vegan yogurt based gravy or just plainly spiced vegan yogurt. I'll share a recipe for those the next time I make them.
What goodies do you prepare for Gowri Pooja and Ganesha Chaturthi and which ones are your favorites?
It's probably because of a combination of the joyous childhood memories we have associated with festivals and the amount of care and hard work which always goes into making food fit for celebration.

Being a strong believer in the power of spiritual vibrations, I feel that food when it's made with the intention of a offering to a deity as neiveidhya first before being eaten is most sublime.
Among all the festival we grew up celebrating, my fondest memories are of Gowri and Ganesha (not even Diwali with all its fire crackers matches up). For the first half of my life, I lived in a big, happy joint family. We were fourteen of us in one huge bungalow. All festivals were celebrated together, as a family.
On the first day was the Gowri pooja followed on the next day by the Ganesha pooja. The story is that Gowri comes down to Earth on that day to visit her mother and Ganesha (Gowri's youngest son) accompanies her to stay at his grandma's place. And grandma spoils him with all kinds of delicious goodies. After the festivals are done, a few days later Ganesha safely takes his mother Gowri back up to Kailasa (heaven). That's when we leave the clay idols in water as a send off until the following year.
A few days before the festival, when the adults purchased the larger Gowri and Ganesha clay idols for the ritual, they always purchased smaller ones for us kids.
Me, my little sister and our two little cousin brothers used to willingly and enthusiastically wake up at the ungodly hour of 4 am on both festival days, get dressed in traditional clothes and sit at our mini altar to do the ritual to our little Gowri and Ganesha. The girls did the Gowri ritual and the boys did the Ganesha ritual. We even had miniature silver vessels, aarthis and all the other stuff required for the ceremony. And at the end of the ritual, the feast was brought out and placed in front of the deities as an offering. This marked the end of the ceremony. After this, we could commence wolfing down the yummy goodies! :D
Those were such utterly joyful days!!

Now hubby and I bring home only the Ganesha (I visit my mom's place and all my aunt's places on the day of the Gowri festival) and perform a simple, short pooja. But we do make sure to cook a whole bunch of the traditional delicacies for the neiveidhya offering so we can stuff ourselves later to our tummies' content. :D
This year we made three types of kadubus/kozakottais, unfermented idli with coconut cilantro chutney, sundal out of small, brown channa and these miniature steamed snacks (don't really know what they are called).
For the three kadubu fillings - coconut jaggery, sesame jaggery, savory urad dal - we followed the recipes from Subbu's Kitchen. For the outer rice dough covering we used a slightly different method.
Kadubu Dough
1 C rice flour
1 C water
2 tsp oil
a pinch of salt
Mix everything into a paste in a heavy bottomed pan and place on medium heat. Stir continuously (will take maybe 5-10 minutes) and let it cook until the paste starts coming together into a ball of dough.
Take the pan off the stove and once the dough cools a bit, dip your palm in cold water and knead the dough until it's smooth. Follow instructions to make various fillings, stuff and steam.

Fun Little Savory Steamed Snacks
These are usually made out of leftover kadubu dough but I like them so much that I always make extra dough just for these. :)
Kadubu dough
1 tsp moong dal and 1 tsp channa dal (soaked together for half an hour)
2 fresh green chillies, asafoetida and salt (crushed well together)
2 tsp chopped fresh cilantro
Mix everything together.
Form into fun little shapes - ball, stick, ring, disk etc...
Steam along with the kadubu for 5-8 minutes.
Another Ganesha Chaturthi dish that I truly relish is Kandundes (didn't make them this time around though). They are made of four kinds of lentils soaked together and ground to a thick paste along with spices, shaped into balls and steamed. Then they are dunked in a yogurt based gravy and served. I make these on non festival days too because then I get to add onion (a festival no no) and also a bunch of chopped veggies. I either serve those in a vegan yogurt based gravy or just plainly spiced vegan yogurt. I'll share a recipe for those the next time I make them.
What goodies do you prepare for Gowri Pooja and Ganesha Chaturthi and which ones are your favorites?
Wednesday, December 01, 2010
Marinated Herbed Baked Potatoes, Beets and Carrots
Baked potatoes are yum of course, but I love the taste of carrots and beets in the mix! They add a special sweet flavor. You won't even need ketchup on the side! :oP
I made this for dinner last night and by the time I clicked a photo of it in the daylight this morning, we'd finished the carrots. That's why you only see potatoes and beets in the pic below.

5-6 medium sized Potatoes
3-4 Carrots
2 small Beets
Scrub and clean the carrots and potatoes under running water. Do not peel them. Cut them into chunks. Wash and peel the beets and cut them into chunks too.
Bring water to a rolling boil in a large pot. Pop only the potatoes into the water. Let them cook for 5-10 minutes, until slightly tender. Switch off the flame and drain.
Place all the veggies in a wide dish/container.
For the Marinade, whisk together with a fork/spoon the following ingredients in a bowl (quantities according to your taste) until well blended and creamy:
Freshly crushed Green Chilli and Garlic paste (crush them together with crystal salt and a pinch of asafoetida)
Olive oil
Tamari
Balsamic Vinegar
Nutritional Yeast
Freshly crushed Pepper
Dried Rosemary
Dried Chives
Note: I just switch things around with the marinade depending on my mood. You can feel free to do the same too. :)
Pour the marinade over the veggies and toss well. Cover and keep aside for a few hours. The longer they sit, the better. I had everything mixed in the morning so by dinner time they were soaked well and ready to be baked.
Pre heat the oven to 250 C.
Pick the veggies out of the marinade liquid and spread them on a cookie sheet and bake them for about half an hour.
After the oven goes off, let them sit inside for 5-10 minutes.
Serve hot.
Enjoy! :)
I made this for dinner last night and by the time I clicked a photo of it in the daylight this morning, we'd finished the carrots. That's why you only see potatoes and beets in the pic below.

5-6 medium sized Potatoes
3-4 Carrots
2 small Beets
Scrub and clean the carrots and potatoes under running water. Do not peel them. Cut them into chunks. Wash and peel the beets and cut them into chunks too.
Bring water to a rolling boil in a large pot. Pop only the potatoes into the water. Let them cook for 5-10 minutes, until slightly tender. Switch off the flame and drain.
Place all the veggies in a wide dish/container.
For the Marinade, whisk together with a fork/spoon the following ingredients in a bowl (quantities according to your taste) until well blended and creamy:
Freshly crushed Green Chilli and Garlic paste (crush them together with crystal salt and a pinch of asafoetida)
Olive oil
Tamari
Balsamic Vinegar
Nutritional Yeast
Freshly crushed Pepper
Dried Rosemary
Dried Chives
Note: I just switch things around with the marinade depending on my mood. You can feel free to do the same too. :)
Pour the marinade over the veggies and toss well. Cover and keep aside for a few hours. The longer they sit, the better. I had everything mixed in the morning so by dinner time they were soaked well and ready to be baked.
Pre heat the oven to 250 C.
Pick the veggies out of the marinade liquid and spread them on a cookie sheet and bake them for about half an hour.
After the oven goes off, let them sit inside for 5-10 minutes.
Serve hot.
Enjoy! :)
Labels:
Appetizers Starters Snacks
Friday, January 15, 2010
Baked Potatoes, a post eclipse feast. :)
We had a long annular solar eclipse today. From start to finish it lasted for about 4 hours. Here in Bangalore, the eclipse started around quarter past 11 am and ended at a little past 3 pm. It hit its peak of approximately 84% at 1:23 pm.
Traditionally we believe that during an eclipse, the stomach should be completely empty. And after the eclipse is entirely done, we bathe and then cook something fresh to eat. Any previously cooked food that's been lying around during an eclipse is chucked away, never to meet a mouth or a tummy.
This practice stems from a mythological story about the Demon-God, Rahu, swallowing the Sun (or the Moon, depending on his mood), making any eclipse a very inauspicious period of time. Hmm so why doesn't the Sun (or the Moon) stay swallowed beyond a few hours, you ask? Well that's because Rahu is a severed head (his body being considered a whole other Demon-God, Ketu, the history of which I might narrate to you on another day) with a large gaping hole at the end of his neck, through which the chosen celestial body escapes.
The scientific explanation given to us is slightly simpler. Something to do with the rays of the sun and bacteria. Well whatever the reason, I believe that some traditions are meant to be followed. Even if it's simply because I've grown up with these practices as part of my culture. And by me following them, no one's getting harmed in any way.
So I had my breakfast a little before 9 am hoping that it would be digested (well most of it at least) by the time the eclipse started and peaked. Now normally, I go without eating for hours in the afternoon without even realizing it. But today of course, since I couldn't eat, that was pretty much all I did want to do!
I was fine for the first couple of hours. I even meditated a bit during the peak eclipse time and it felt awesome! Then at a little past 2 pm, the thought of chocolates floated into my head, immediately followed by a sudden craving for potatoes. One of my friends on Facebook had mentioned earlier that he ate masala dosa, crepes stuffed with a savory potato mixture, for breakfast. My oatmeal, though I had it with mom's scrumptious mixed veggie Sankranthi sambar from yesterday, had paled in comparison. So those potatoes from the dosa must've stayed somewhere at the back of my head all along and then suddenly popped out shouting, "look at me! look at me!" with all their might when my tummy awoke from its calm reverie at the word "chocolate".
You might agree that the thought of potatoes is a hard thing to get off the brain. Especially if every time you nearly shake it off, your tummy ominously rumbles it right back into place! I'd soon forgotten all about the chocolate and was holding on to one single image... delicious baked potatoes. I tried to distract myself for the remaining hour of the eclipse (thank goodness there was only an hour left!) by watching the latest episode of House MD. It was a mostly successful attempt... except for that one moment where I could've sworn that Eric Foreman's whole head morphed into a potato and said, "the phrase 'Who's Your Daddy?' comes to mind".
At 3:11 pm, I shot out of bed like hot coals had stung my rear end and zipped to the bathroom. In such a hurry was I to get done with that bath that I considered not conditioning my hair *gasp* but I overcame that temptation.
Then I ate a yelakki banana to soothe my tummy and finally got down to my cooking! :)
Et Voila! Here is the result...

Whole wheat and flax chapatis, piled with herbed baked potatoes, topped with fresh tomato salad. I still can't believe I mustered up the will power to actually take pictures of the feast before wolfing it down!
Herbed Baked Potatoes
Small to medium sized potatoes
Sea Salt
Pepper
Turmeric Powder
Sambar Powder (or Red Chilli Powder if that's more accessible to you)
Dried Herbs - Thyme, Dill, Chives
Dry dessicated coconut powder
Coconut oil
Nutritional Yeast Flakes
Lime Juice
Wash and scrub the potatoes along with the peel.
Boil water in a large pot and add a little sea salt.
Toss in the potatoes whole and boil for about 15 minutes.
Take the potatoes out with a slotted spoon, cut them in half and place in a microwave safe baking dish.
Add the rest of the ingredients (except nutritional yeast and lime juice) adjusting quantities according to your taste and toss until all the potatoes are coated.
Place in the microwave oven and bake covered under the micro option for 5 minutes. Uncover and bake with the micro-grill combination option for 5 minutes.
Sprinkle on the nutritional yeast and lime juice and toss again.
Finally bake in the grill option for 5 more minutes.
(You could also just bake in a regular oven for about half an hour instead of using the microwave).
Taste to make sure that the top layer is slightly crunchy and the insides are soft and well cooked. Bake a little more if required.
Serve hot.
Fresh Tomato Salad
Diced fresh tomatoes
Chopped fresh basil and mint
Lime juice
Green chilli paste or crushed green chillies
Black salt
Balsamic vinegar
Parma! - vegan Parmesan
Put everything into a bowl and mix with your hand, gently squeezing the tomatoes to merge the flavors together.
Enjoy with a satisfied smile! :)

Traditionally we believe that during an eclipse, the stomach should be completely empty. And after the eclipse is entirely done, we bathe and then cook something fresh to eat. Any previously cooked food that's been lying around during an eclipse is chucked away, never to meet a mouth or a tummy.
This practice stems from a mythological story about the Demon-God, Rahu, swallowing the Sun (or the Moon, depending on his mood), making any eclipse a very inauspicious period of time. Hmm so why doesn't the Sun (or the Moon) stay swallowed beyond a few hours, you ask? Well that's because Rahu is a severed head (his body being considered a whole other Demon-God, Ketu, the history of which I might narrate to you on another day) with a large gaping hole at the end of his neck, through which the chosen celestial body escapes.
The scientific explanation given to us is slightly simpler. Something to do with the rays of the sun and bacteria. Well whatever the reason, I believe that some traditions are meant to be followed. Even if it's simply because I've grown up with these practices as part of my culture. And by me following them, no one's getting harmed in any way.
So I had my breakfast a little before 9 am hoping that it would be digested (well most of it at least) by the time the eclipse started and peaked. Now normally, I go without eating for hours in the afternoon without even realizing it. But today of course, since I couldn't eat, that was pretty much all I did want to do!
I was fine for the first couple of hours. I even meditated a bit during the peak eclipse time and it felt awesome! Then at a little past 2 pm, the thought of chocolates floated into my head, immediately followed by a sudden craving for potatoes. One of my friends on Facebook had mentioned earlier that he ate masala dosa, crepes stuffed with a savory potato mixture, for breakfast. My oatmeal, though I had it with mom's scrumptious mixed veggie Sankranthi sambar from yesterday, had paled in comparison. So those potatoes from the dosa must've stayed somewhere at the back of my head all along and then suddenly popped out shouting, "look at me! look at me!" with all their might when my tummy awoke from its calm reverie at the word "chocolate".
You might agree that the thought of potatoes is a hard thing to get off the brain. Especially if every time you nearly shake it off, your tummy ominously rumbles it right back into place! I'd soon forgotten all about the chocolate and was holding on to one single image... delicious baked potatoes. I tried to distract myself for the remaining hour of the eclipse (thank goodness there was only an hour left!) by watching the latest episode of House MD. It was a mostly successful attempt... except for that one moment where I could've sworn that Eric Foreman's whole head morphed into a potato and said, "the phrase 'Who's Your Daddy?' comes to mind".
At 3:11 pm, I shot out of bed like hot coals had stung my rear end and zipped to the bathroom. In such a hurry was I to get done with that bath that I considered not conditioning my hair *gasp* but I overcame that temptation.
Then I ate a yelakki banana to soothe my tummy and finally got down to my cooking! :)
Et Voila! Here is the result...

Whole wheat and flax chapatis, piled with herbed baked potatoes, topped with fresh tomato salad. I still can't believe I mustered up the will power to actually take pictures of the feast before wolfing it down!
Herbed Baked Potatoes
Small to medium sized potatoes
Sea Salt
Pepper
Turmeric Powder
Sambar Powder (or Red Chilli Powder if that's more accessible to you)
Dried Herbs - Thyme, Dill, Chives
Dry dessicated coconut powder
Coconut oil
Nutritional Yeast Flakes
Lime Juice
Wash and scrub the potatoes along with the peel.
Boil water in a large pot and add a little sea salt.
Toss in the potatoes whole and boil for about 15 minutes.
Take the potatoes out with a slotted spoon, cut them in half and place in a microwave safe baking dish.
Add the rest of the ingredients (except nutritional yeast and lime juice) adjusting quantities according to your taste and toss until all the potatoes are coated.
Place in the microwave oven and bake covered under the micro option for 5 minutes. Uncover and bake with the micro-grill combination option for 5 minutes.
Sprinkle on the nutritional yeast and lime juice and toss again.
Finally bake in the grill option for 5 more minutes.
(You could also just bake in a regular oven for about half an hour instead of using the microwave).
Taste to make sure that the top layer is slightly crunchy and the insides are soft and well cooked. Bake a little more if required.
Serve hot.
Fresh Tomato Salad
Diced fresh tomatoes
Chopped fresh basil and mint
Lime juice
Green chilli paste or crushed green chillies
Black salt
Balsamic vinegar
Parma! - vegan Parmesan
Put everything into a bowl and mix with your hand, gently squeezing the tomatoes to merge the flavors together.
Enjoy with a satisfied smile! :)

Labels:
Appetizers Starters Snacks
Thursday, December 31, 2009
Vegan Southern-style Tofu Fry (Super-Quick Party Snack)
This recipe recently got published in a local mag Time Out Bengaluru.
They wanted a Vegan recipe that was quick and easy to make with easily available ingredients. Something to serve along with cocktails. And most importantly, something original. So this is what I came up with...
 Vegan Southern-style Tofu Fry.
Ingredients
2 Tbsp Olive Oil
1 packet of Firm Tofu
¼- ½ tsp Sambar Powder
Salt to taste
Method
Gently press the block of tofu to squeeze out any excess water. Cube the tofu into bite-sized pieces. Heat oil in a pan and add the tofu. Gently stir till the cubes are lightly browned. Sprinkle on the salt and sambar powder. Alternatively, pepper or red chilli powder can be used instead (but then it won't be very Southern :oP). Stir fry for another minute. Pierce the cubes with toothpicks and serve.

P.S: The best Sambar Powder is the homemade kind but if you're feeling lazy or don't know how to make any, it's easily available at Indian Stores. A well known brand is MTR.
They wanted a Vegan recipe that was quick and easy to make with easily available ingredients. Something to serve along with cocktails. And most importantly, something original. So this is what I came up with...
 Vegan Southern-style Tofu Fry.
Ingredients
2 Tbsp Olive Oil
1 packet of Firm Tofu
¼- ½ tsp Sambar Powder
Salt to taste
Method
Gently press the block of tofu to squeeze out any excess water. Cube the tofu into bite-sized pieces. Heat oil in a pan and add the tofu. Gently stir till the cubes are lightly browned. Sprinkle on the salt and sambar powder. Alternatively, pepper or red chilli powder can be used instead (but then it won't be very Southern :oP). Stir fry for another minute. Pierce the cubes with toothpicks and serve.

P.S: The best Sambar Powder is the homemade kind but if you're feeling lazy or don't know how to make any, it's easily available at Indian Stores. A well known brand is MTR.
Labels:
Appetizers Starters Snacks
Subscribe to:
Posts (Atom)

