Showing posts with label Desserts. Show all posts

Sunday, October 14, 2012

Mid-MoFo Flashback and Roundup Vegan MoFo day 10


Previously on Veganosaurus at Vegan MoFo...

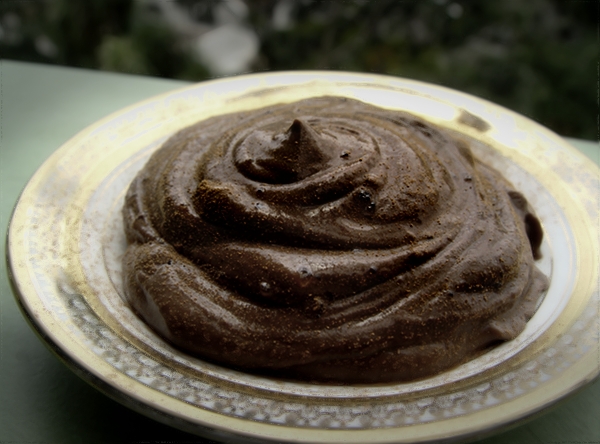
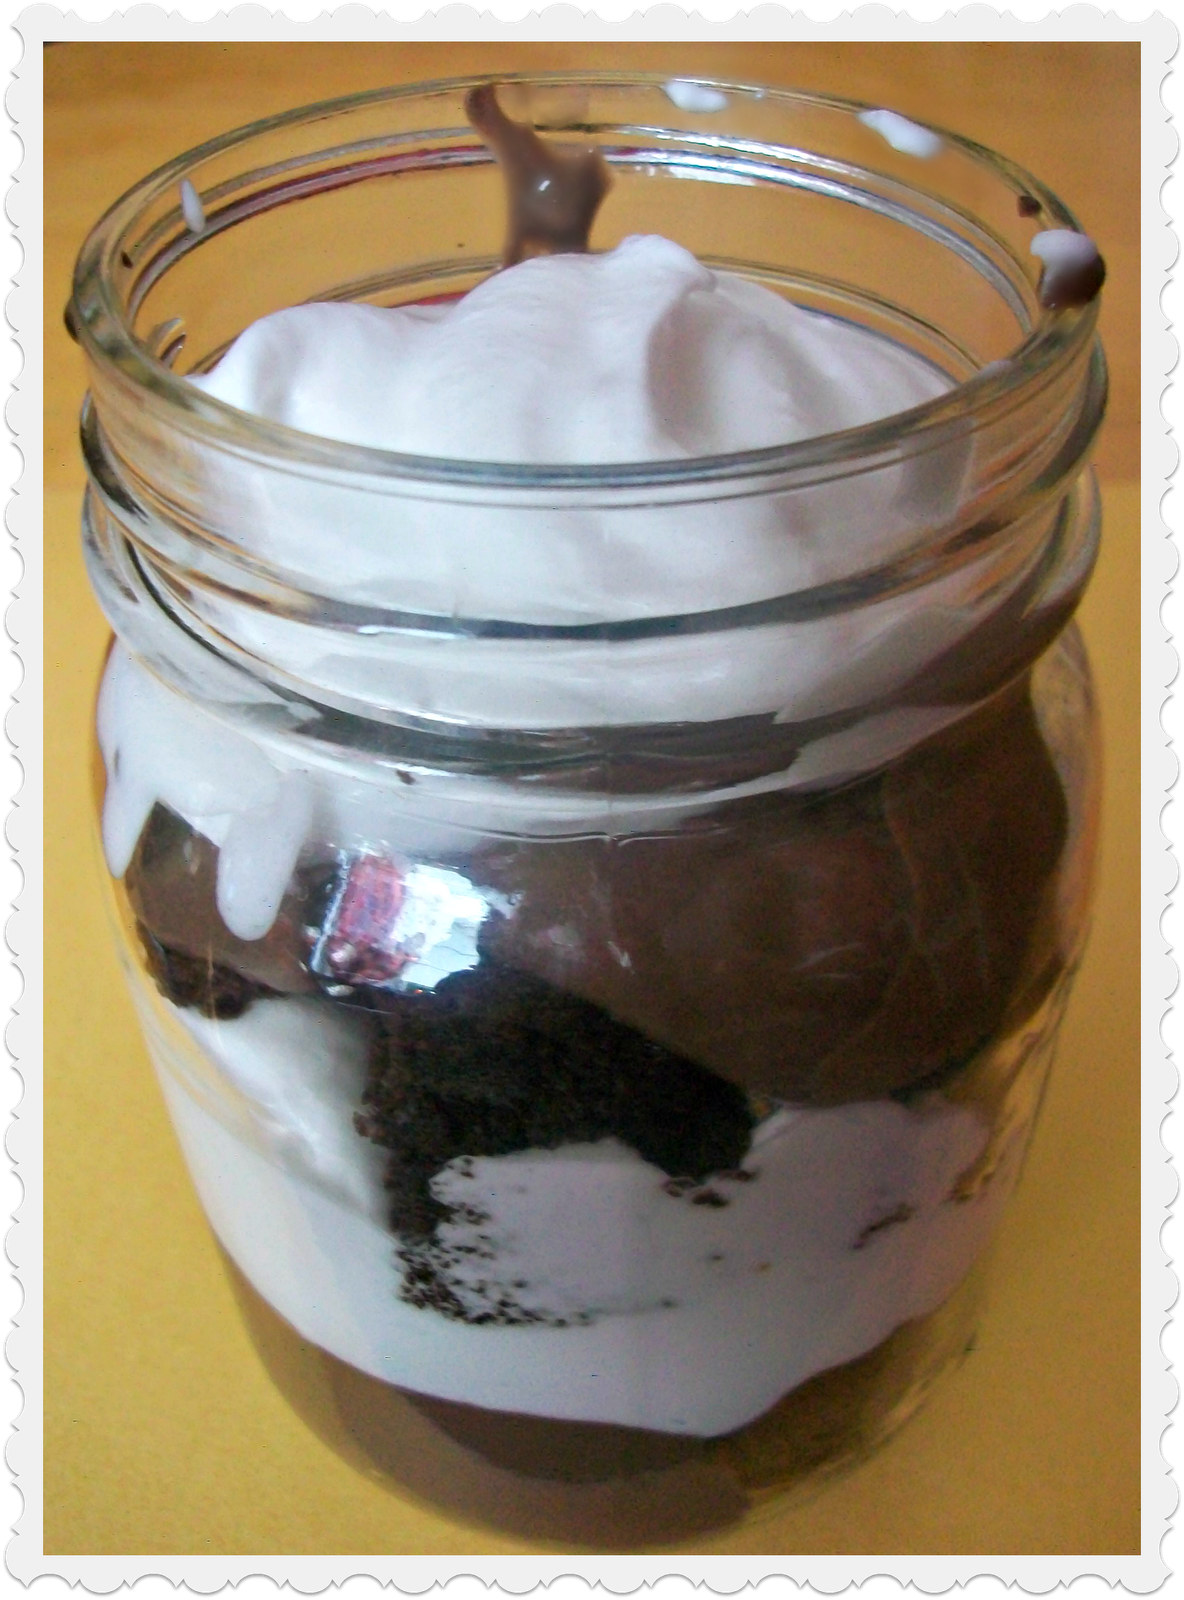
Avo-Orange Chocolate Mousse started out Desserts Week with all the joy and hope of Vegan MoFo in her eyes. Bursting with smug chocolatey goodness, she knew in her heart this would be the year when all blog posts would fall into place beautifully.

Mostly Raw Avocado Orange Chocolate Mousse

Her siblings, who were also raw/mostly raw like her, followed suit...

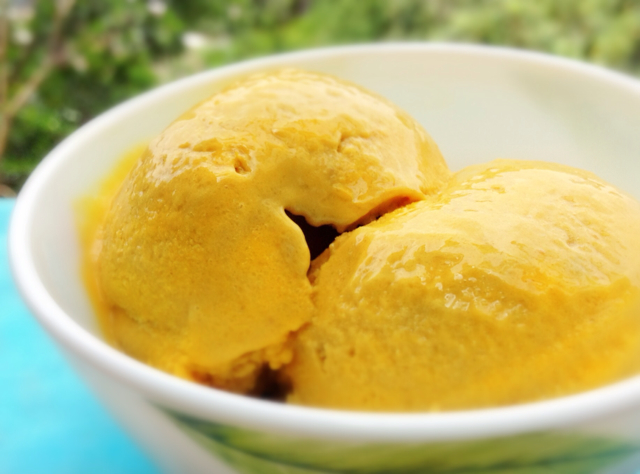
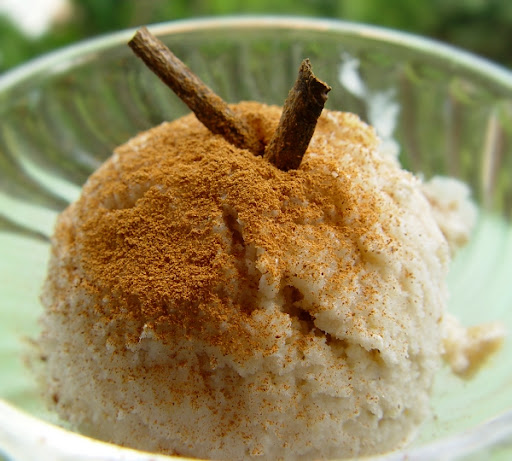
Fig and Cinnamon Ice cream was well loved by all, causing a fair share of drool with her cinnamon-y curves.

Raw Fig and Cinnamon Ice cream made of Almond and Coconut Mylks

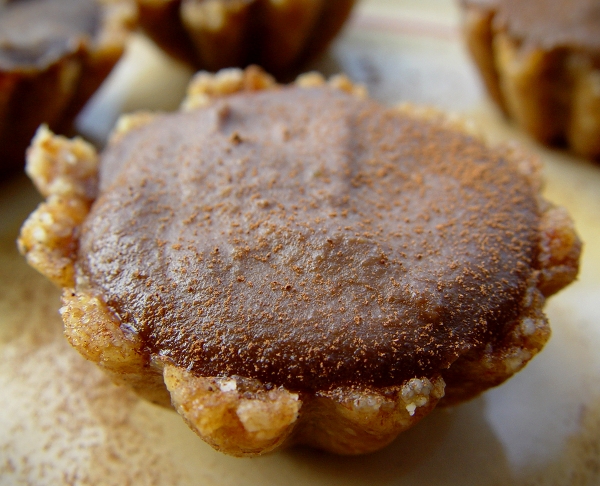
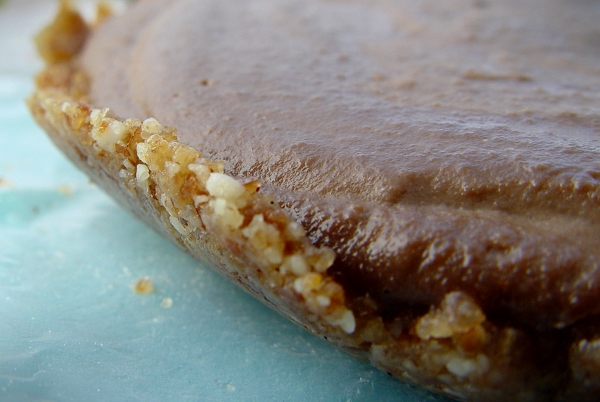
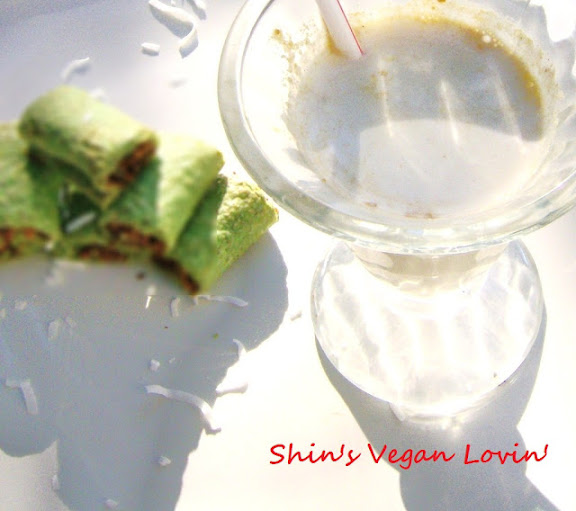
Hazelnut Mocha Cheezecake was the king of the party with his wow factor and his sexy mocha-ness.

Mostly Raw Hazelnut Mocha Cheezecake

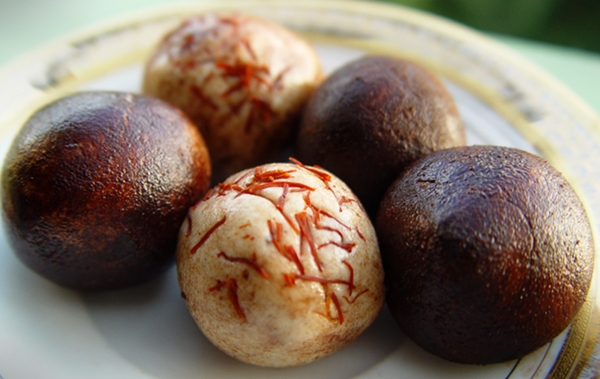
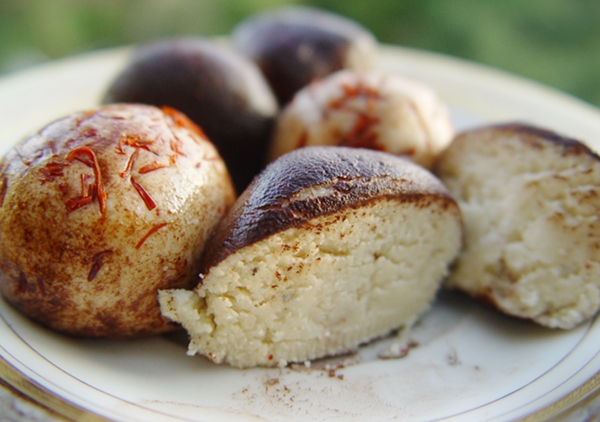
The Cashew Barfi Truffles came next. Quintuplets of three cocoa boys and two saffron girls with their gooey cardamom-y sweetness. The highly intense saffron burst of the girls elicited a lot of gasps.

Mostly Raw Cashew Barfi Truffles

The smooth and elegant Banana Walnut Cinnamon Vanilla Crème was a soothing end to Week One with her gentle, healthy touch.

Banana Walnut Cinnamon Vanilla Crème

Desserts aren't an easy act to follow but the Soup and Salad family of Week Two were confident they could live up to the bar that had been set. Or so they thought...

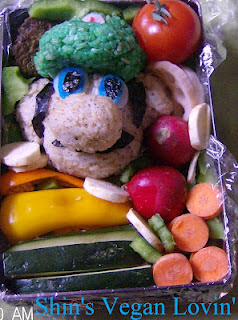
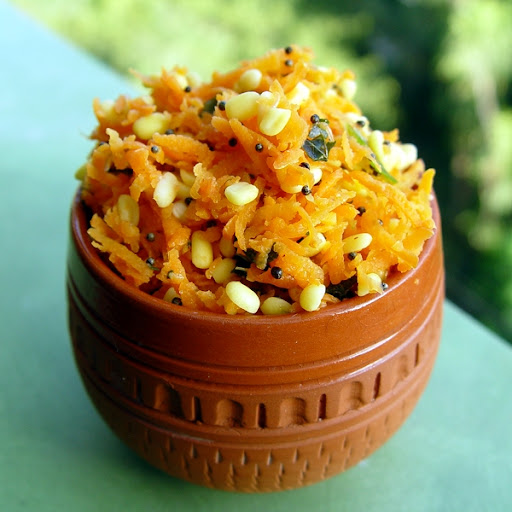
It started well enough when Carrot Hesarubele Kosumbari kicked the week off with her vivacious, happy colours and South Indian personality.

Carrot Hesarubele Kosumbari

And Nalli Kai Salad piqued everyone's curiosity with her exotic aura and tangy undertones.

Nalli Kai Salad

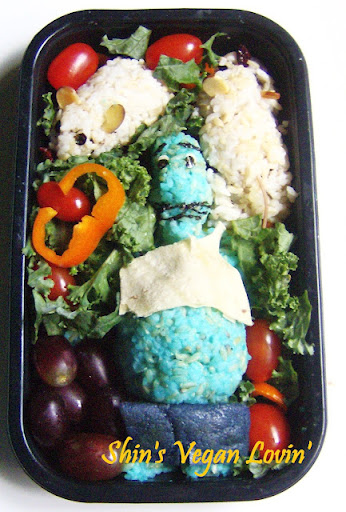
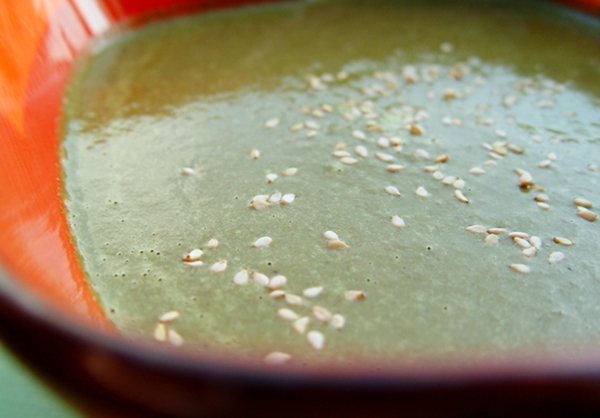
Spinach Coconut Mylk Soup attracted interest with his muted, down to earth iron richness and easy going nature.

Spinach Coconut Mylk Soup

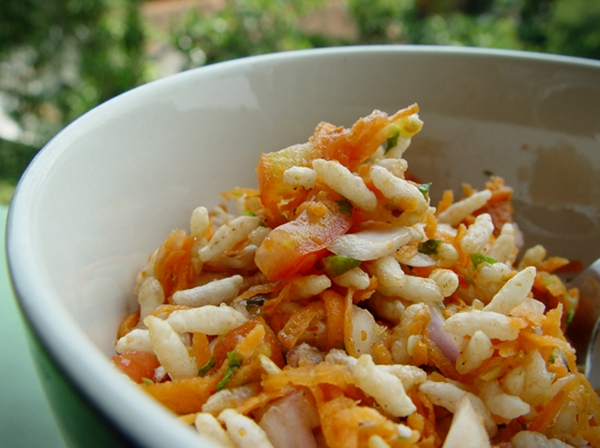
Masala Mandakki aka Churmuri made all the girls giggle and blush with his spicy, street side drawl. "Hey baby. Yeeeahhhh, that's what I'm talking about." *whistles*

Masale Mandakki Churmuri

But alas *dun dun dun* Friday's Soup failed to make an appearance owing to the recipe creator slacking off and hoping that no one would notice.

In her defence, Ms Veganosaurus was very tired and stuck in bed. She had to depend on sweet Mr Veganosaurus to cook for her. He made a delicious Peas Pulao but since that wasn't a part of the theme, the Soup and Salad family graciously thanked and refused Peas Pulao's offer to appear on Friday's blog post.

The audience of course was very forgiving, since it was after all not a Dessert post that had been denied them.

Meanwhile, in MoFo-land...

Psychedelic chutneys at Vegan on the Prowl.

Vegan on the Prowl

Innovative Pizzas at Vegan Richa.

Vegan Richa

Traditional and Contemporary Indian recipes from Tongue Ticklers.


Peanut Mylky delicacies from An Unrefined Vegan.


Meeting cool vegans and a whole variety of delicious themes at Veganville.

Veganville

Some more cool vegans and yummy goodness at Fellowship of the Vegetable (awesomest blog name eva!).

Fellowship of the Vegetable

Super happy, adorable dishes and the yumminess that's served in them at Kittee Kake - Cake Maker to the Stars.


Awesome desserts and more from someone who claims that desserts are not her thing (teehee), From Kirsten's Kitchen to Yours.

From Kirsten's Kitchen to Yours

And finally cute bunnies and unexplored ingredients from A-Z at Flicking the Vs.

From Kirsten's Kitchen to Yours

Next time on the drama series Veganosaurus at Vegan MoFo...

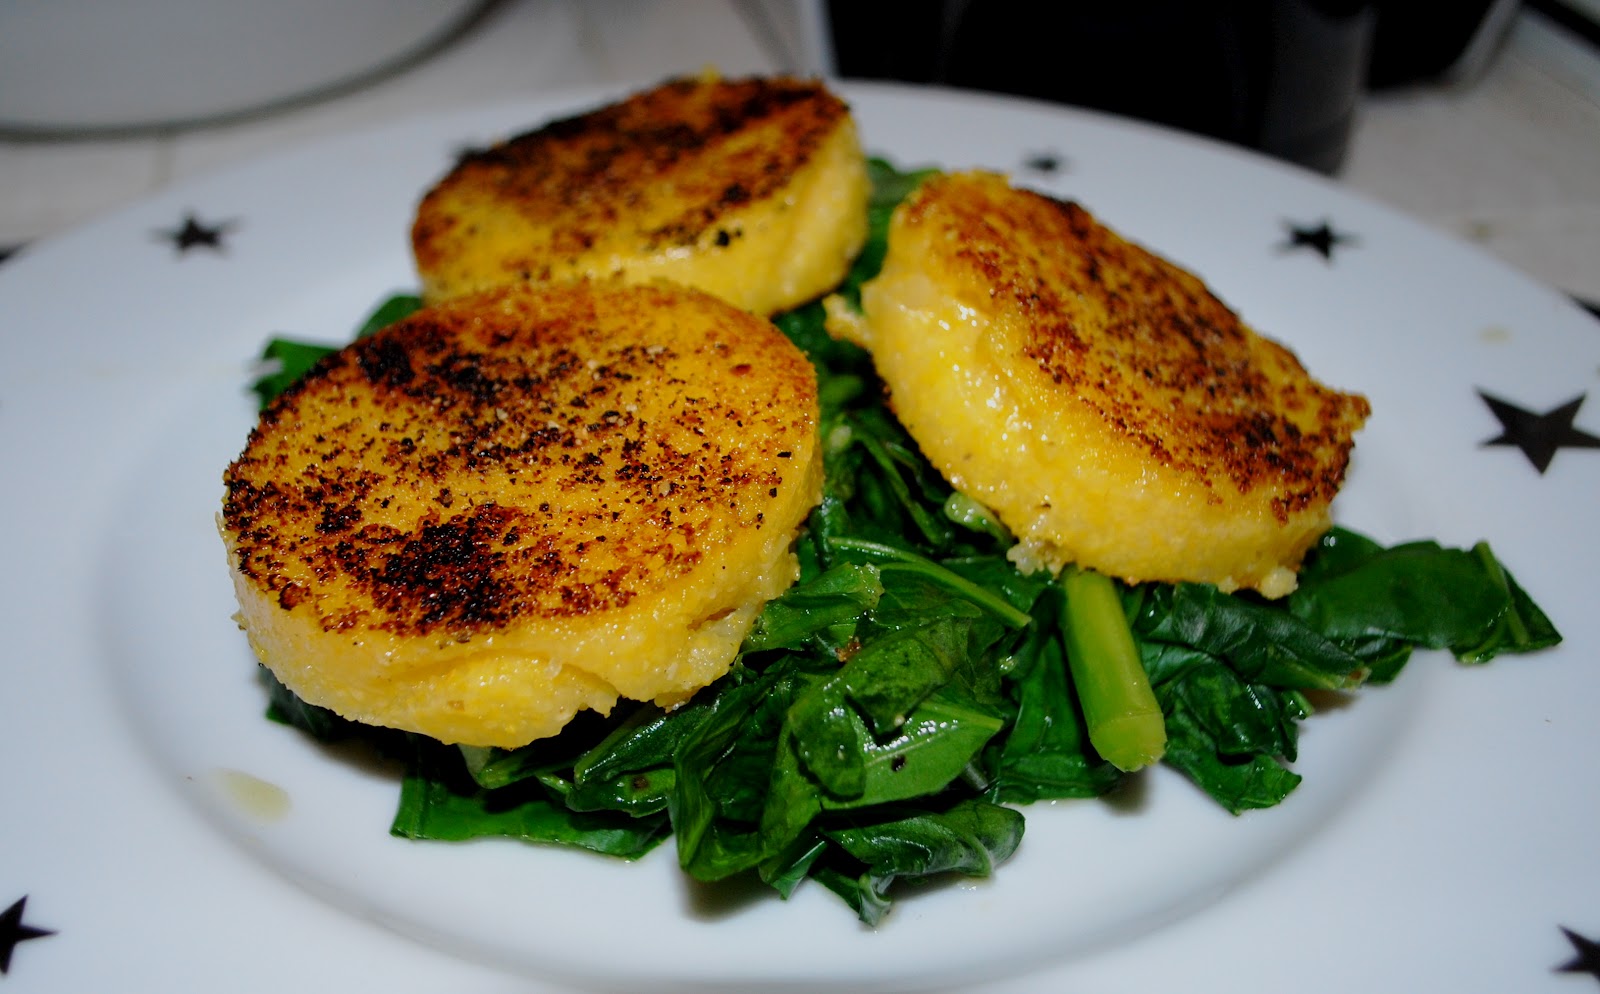
The Main Dishes are all lined up and ready for Week Four with Mashed Potato Sweet Potato Bake at the head.

Mashed Potato Sweet Potato Bake

But even though it's Sunday evening, the Snacks and Starters ideas for Week Three have not even begun to pop into Ms Veganosaurus' head yet. *gasp*

Will Vegan MoFo Week Three successfully take place on the blog that's loved by all? Or will you be met with disappointing tumbleweeds when you eagerly arrive here on Monday night? Will Mr Veganosaurus survive the crazed killer that Ms Veganosaurus is to become? How many fistfuls of hair will be lost by the end of the week?

Your narrator couldn't answer any of those questions now because she doesn't want to spoil the suspense (and also because she really has no clue).

To find out, come back here Weekdays (or Week-nights, depending on your timezone) and enjoy the drama of Veganosaurus at Vegan MoFo.

Until then, have a wonderful Sunday! :)

Friday, October 05, 2012

Banana Walnut Cinnamon Vanilla Crème Vegan MoFo day 5


Yay first week of Vegan MoFo successfully completed! :) This week's theme was Desserts and the mystery sub-theme was Mostly Raw. I hadn't initially planned on focusing on raw desserts, but after my first two Vegan MoFo recipes, Avocado Orange Chocolate Mousse and Fig and Cinnamon Ice Cream turned out to be mostly raw, I decided to keep going with the rawsomeness.

'Restricting' myself to making the desserts as raw as possible with the ingredients I already had in my pantry was a challenge and it pushed me to use my imagination and come up with creative ideas. The response to them has been great so it has been totally worth the effort. After four days of sharing mostly raw recipes, today I present a completely raw dessert.

This recipe came together in a very unplanned, organic method. I started out by putting the bananas, vanilla and a pinch of salt into the blender, thinking I could attempt a raw custard of sorts, but as the blending process continued, the other ingredients asked to be included and I couldn't help but oblige. The end result was a creamy, versatile fruit dip of sorts. A very grown up kind of dessert. The cinnamon and vanilla begged for a fancy name, hence Banana Walnut Cinnamon Vanilla Crème. :oP

Banana Walnut Cinnamon Vanilla Crème

I've served it with guava but I think it'll go very well with a variety of fruits like apples, pears, green grapes, moosambi or perhaps even pineapple. It can also be used as a fruit salad dressing, in a parfait, as a topping on pie or cheezecake...there are so many possibilities! And the best one of course is to just chill it and eat it by the spoonfuls. :)

A quick note to my fellow Mofo-ers before I move on to the recipe - if you have word verification/CAPTCHA text enabled for comments, please do consider disabling it. Those CAPTCHAs are very discouraging to visitors who are potential commenters. Especially during Vegan MoFo when people blog hop like crazy, the easier you make it for them to leave comments, the more comments you will get. If you're worried about those darned spammers, just put your comments on moderation. That way, you can just publish the genuine comments and report the spam ones.

Banana Walnut Cinnamon Vanilla Crème

Banana Walnut Cinnamon Vanilla Crème

2 large Bananas (pachbalé hannu)
2 inch Vanilla Pod
1/4 tsp Cinnamon Powder
8-10 Walnut Halves (handful)
2 Pitted Dates
Pinch of Salt

Blend everything together, adding up to 1/4 C water, until you get a creamy mixture.
Pour into glass bowl and place in the freezer for about 15 minutes.
Whip vigorously with a wire whisk.
Serve over fruit.
Enjoy! :)

Banana Walnut Cinnamon Vanilla Crème

Thursday, October 04, 2012

Cashew Barfi Truffles and a Video Vegan MoFo day 4


Just when I had the Vegan MoFo blogs all organized, I discovered Rando and he created chaos in my life!! Randomofo.com is a brilliant tool created by the people of Vegan MoFo. What it does is that every time you visit the link, a random Vegan MoFo blog post gets loaded. The surprise factor makes it so much more fun that I've blog hopped on it all day yesterday and my Newsify app pretty much got ignored. :oP

Raw Cashew Barfi Truffles

Cashew Barfi is a very common Indian sweet. It's made by grinding cashews into a paste and cooking it with cardamom powder and sugar. The paste is then spread onto a plate in a thin layer and scored in a criss-cross pattern. Once the paste cools, the Barfis harden and can be removed and served as individual diamond shaped pieces.

This sweet is vegan by default, except when some idiot decides the plate needs to be greased with ghee (yuck!). Cashews have plenty of oils on their own and the plates really don't require any greasing to begin with. And if a person wants to make things easier, they could just line the plate with a sheet of plastic or foil and it becomes super simple to pop off the set pieces of Barfi.

I started out making a mostly raw version of Cashew Barfis but I soon learnt that the cooked paste sets to a firm consistency, whereas the raw paste remains sticky and soft, even after being chilled in the fridge for a few hours. That's why I decided to shape the paste into balls and make truffles out of it. The texture turned out to be perfect for truffles!

I rolled some of my truffles in cocoa powder and the others in saffron strands, just for variety (and because I really hadn't intended to do yet another chocolate based post today). One could also use coconut powder, toasted sesame seeds or a variety of other things to coat the Barfi Balls.

I had mentioned in September that my theme for Vegan MoFo would be dishes for a four course meal with each week featuring recipes for one course. My first week's theme is Desserts. But if you've been following my posts all week, you might notice that there's a sub-theme going on. Can you guess what it is? :)

Raw Cashew Barfi Truffles

Cashew Barfi Truffles - vegan, gluten free, mostly raw

1 C Cashews
2 T Sugar (the only non-raw ingredient)
2 Cardomon Pods (use only the seeds, the skins can go into your tea powder to add a mild flavour)
1/8 tsp Saffron Strands
Pinch of Salt

Cocoa Powder
Saffron Strands

Grind everything in a food processor for a few minutes.
Scrape down the sides of the grinding jar once in a while through the grinding process.
Continue processing until the cashews start releasing their oil and you get a smooth, buttery paste.
Transfer the paste into a bowl and chill for half an hour.
Shape the paste into balls and roll onto cocoa powder and saffron strands.
Chill in the fridge for a little more time.
Enjoy! :)

Raw Cashew Barfi Truffles

And now for the video I promised (in the title of this post). You might all be familiar with my dear friend GiGi of Veganville, who did a guest post on my blog earlier this year. She's doing a series of video interviews called "Who Dat Vegan" on Thursdays through Vegan MoFo this year. I'm stoked to be the first person to be interviewed. :)

Here's the question video she sent me:


And here's my long, rambling reply:


Visit GiGi's blog, Veganville to read more about her Thursday program, Who Dat Vegan and also read her other hilarious recipe posts for Vegan MoFo. You'll thoroughly enjoy her write ups and laugh your head off at the videos. Check out her MoFo intro video along with her hubby, Crazy Boy aka Psycho Boy aka Larry. They're even all dressed up for it! haha

Also, if you live in the USA, then order some delicious Veganville Voppee Pies made by GiGi herself.

Wednesday, October 03, 2012

Mostly Raw Hazelnut Mocha Mini Cheezecakes Vegan MoFo day 3


Day 3 of Vegan MoFo already. I've been having a blast hopping through other MoFo-ers blogs and the Newsify app has been a real blessing to help me do this efficiently. I've been gawking at so much amazingly delicious food that it's driving my drool glands on overdrive!! :oP Here, see for yourself on the Vegan MoFo 2012 Blogroll, a the list of 600+ participating blogs from all over the globe .

Continuing on my Desserts theme this week, I present to you Mostly Raw Hazelnut Mocha Mini Cheezecakes. This turned out to be the most popular photograph yet in my Vegan MoFo Sneak Peek album, with many people asking for the recipe. And I'm very happy to be sharing it today! :)

Vegan Hazelnut Mocha Mini Cheezecakes

These blissful desserts are little bites of heavenly goodness!! Mine are only 'mostly raw' because I used regular coconut oil since I didn't have virgin coconut oil on hand. Also, I've used some sugar for additional sweetening and I have no idea where to get raw instant coffee or raw cacao powders from.

I'm happy with 80-90% raw desserts because it means using ingredients which are usually readily available in my kitchen. But if you are particular about making these cheezecakes completely raw, then use agave nectar, virgin coconut oil, raw cacao powder and cold pressed espresso.

The coconut and walnuts make it really heavy so it's advisable to have only one small piece at a time. Even though the main flavors are supposed to be hazelnut and mocha, the coconut flavor tends to shine through. So this is a dessert for coconut fans.

Vegan Hazelnut Mocha Mini Cheezecakes

Mostly Raw Hazelnut Mocha Mini Cheezecakes

For the crust:

1/2 C Walnuts
1/2 C Almonds
1/2 C Pitted Dates (tightly packed)
1/4 tsp Salt
1 inch Vanilla Pod

Grind the nuts, salt and vanilla pod to a coarse powder.
Add the dates and grind until you get a sticky, crumbly mixture.
Line the insides of mini tart pans with cling wrap.
Make 1 inch balls of the crust mixture and press into the bottom and the sides of the tart pans to form shells.
If you run out of patience after lining and pressing the crust mixture into about 6 or 7 tart pans (I did!), just line a plate (the kind with walls) with wax paper and press the remaining crust mixture into it.
Keep all crusts in the fridge to chill.

Meanwhile...

For the cheeze filling:

1 C Hazelnuts - soaked for two hours, drained and rinsed
1/2 C Raisins - soaked in 3/4 C filtered water
3/4 C Almond or Cashew Mylk
1 T Instant Coffee Powder (I use Bru Gold)
2 T Cocoa Powder
2 T Sugar
A pinch of Salt
1/2 C Coconut Oil (at room temperature)
1/8 tsp Soy Lecithin Granules (optional emulsifier)

Blend together the drained hazelnuts, raisins (along with the soaking water), cocoa powder, coffee powder, sugar and salt.
Add a little almond/cashew mylk at a time and process till you get a smooth, creamy mixture.
Add the coconut oil and soy lecithin (if using) and blend well until the oil has been incorporated into the mixture.

How to proceed...

Pour the cheezecake filling into the prepared shells and freeze for half an hour (just to speed up the setting process) or chill for 2 hours in the fridge.
Remove the mini cheezecakes from the tart pans by gently lifting out the cling wrap.
Peel off the cling wrap and place the mini cheezecakes on a plate and store in the fridge until ready to serve.
The mini cheezecakes can be served as individual dessert pieces and the larger one in the plate can be sliced carefully and served.

These cheezecakes taste *best* after sitting in the fridge for a couple of days because the coconut flavour mellows and melds with the other flavours well.

Enjoy! :)

Vegan Hazelnut Mocha Mini Cheezecakes

This recipe has also been submitted to 'The Green Foodie Recipe Challenge' conducted by The Alternative, an online publication on sustainable living, for Nature On My Plate, connecting consumers to organic food at BioFach India 2012.

natureonmyplate

Tuesday, October 02, 2012

Raw Fig and Cinnamon Ice Cream Vegan MoFo day 2


Continuing in this week's desserts theme for Vegan MoFo 2012, I have a raw Fig and Cinnamon ice cream that I made with home made Almond-Coconut Mylk. I found the sweetness of the figs to be enough but if you like, you could add a bit of sugar to make it more sweet. It won't be completely raw in that case, but hey, mostly raw is great too.

Raw Vegan Fig and Cinnamon Ice Cream made with Almond-Coconut Mylk

Dessicated coconut powder is made out of dried coconut but it might have been exposed to a some heat in the grinding process. So if you're particular about keeping it a 100% raw, then just start with whole dry coconut/copra and grate it at home. You can also use fresh, grated coconut to make coconut mylk but that will change the taste and texture a bit.

Since the ice cream has no added oils and also because it isn't cooked, the texture is slightly icy, as opposed to smooth. I really like it that way because it has a more natural feel to it. Needless to say, it's also very healthy and you can indulge in multiple scoops and feel good about it too. :)

Raw Fig and Cinnamon Ice Cream


1 1/2 C Dry Figs
1 C Almonds
1 C Dessicated Coconut Powder
1 T Cinnamon Powder
2-3 T Sugar (optional)
A pinch of Salt
4 C Filtered Water + 2 C to soak Figs

Wash and soak the figs overnight in 2 C of clean, filtered water.

Wash and soak the almonds over night. In the morning drain them and rise well (throw away the soaking water).

Place soaked almonds and coconut powder with a pinch of salt in a blender jar and grind for a few minutes.

Add 4 C of filtered water (a little at a time) and blend well.

Keep aside for 10-15 minutes.

Place a thin cloth over a large vessel and strain the almond-coconut mylk through it. Squeeze out as much liquid as possible.

Save the pulp in the fridge. It can be mixed into bread or chapathi dough. I will also be posting another recipe later during MoFo to show you what I made with my almond-coconut pulp, so watch out for it. ;)

Keep a few figs aside and slice them.

Put the rest of the figs, along with the soaking water and the cinnamon powder in the blender jar and blend to a smooth paste. It's okay if the fig seeds remain grainy.

Stir the fig pulp into the strained almond-coconut mylk. Taste and optionally add sugar at this point.

Whisk this mixture for a few minutes. Cover and chill in the fridge (not freezer) for a day.

If you have an ice cream maker, follow the directions and freeze in it. Toss in the sliced figs during the last few minutes of the freezing process.

If you don't have an ice cream maker, pour the ice cream mixture into an airtight container, stir in the sliced figs and freeze for half an hour. Whip vigorously with a wire whisk for a few minutes. Cover and freeze again for another half hour. Use a spatula and whip again. Freeze for an hour this time and whip once more. Do this 5-6 times until you reach the desired consistency.

Scoop into serving bowls, dust with cinnamon and enjoy! :)

Raw Vegan Fig and Cinnamon Ice Cream made with Almond-Coconut Mylk

Wanna know what else I have coming up on my blog this month? Take a look at my Vegan MoFo 2012 Sneak Peek Album.

Monday, October 01, 2012

Avocado Orange Chocolate Mousse Vegan Mofo day 1


Since I'm a huge huge fan of vegan mousse, I thought it was apt to kick start Vegan MoFo 2012 with this mostly raw Avo-Orange Chocolate Mousse. As I mentioned in an earlier post, my theme for MoFo this year is Super Scrumptious Four Course Meal. Recipes for one course of a meal each week and my first week's course is Desserts! :)

Avocado Orange Chocolate Mousse

Because of the chocolate, the mousse is only about 70% raw. If you'd like to make it completely raw then use raw cacao powder and eliminate the alcohol and orange essence/extract, but be warned that it will compromise the taste and texture quite a bit. Also, I find the sweetness from the chocolate bar to be sufficient but if you like it sweeter, then you could add 2 or 3 soaked, pitted dates or a few spoons of sugar (I would not recommend jaggery as its flavour will overpower the others). You could use raw agave nectar but even though it's raw it's a highly processed product so you're better off using a small amount of sugar instead.

I found this delicious 74% Dark Chocolate with Orange Peel at Brown Tree and love to use that in my avo-orange-choclate mousse. Rs.120 is a fairly good price for a bar of 100 gms (3.5 oz).

Trumpf Vegan Dark Chocolate from Brown Tree on Church Street, Bangalore

Even though I usually prefer actual dark chocolate, with a *minimum* of 74% cocoa content, I have to admit that this mousse tastes pretty delicious even when it's made with the cheaper, more commonly available Morde 45% "Dark" Chocolate. I've seen those at Nilgiris, MK Retail and Metro, among other places. But watch out for the Morde Dark Compound (different from Morde Dark Chocolate) and DO NOT even consider touching it with a ten foot pole because it is pumped with all kinds of disgusting processed crap and hydrogenated fats which are horrid for health (even if they are technically vegan). Not that I never have processed foods, but the compound is worse than most processed foods and it doesn't taste good either (yep, I tried it once long ago, before I knew how bad for health it was).

Morde 45% Chocolate

If you have ripe avocados at home, this mousse can be whipped up very quickly. It's almost as if a genie said, "yes master" *poof* and there it is, your delicious vegan mousse! :oP

I prefer to melt my chocolate using the double boiler method because somehow the texture seems better that way. But you can further reduce the preparation time by melting the chocolate in a microwave. Just place the chocolate in a micro safe glass dish, heat for 30 seconds, stir, heat for another 30 seconds and stir again and repeat until the chocolate is completely melted.

Avocado Orange Chocolate Mousse


150 gms (1 1/2 Bars) Vegan Dark Chocolate with Orange Peel
1 large, ripe Avocado
1/4 - 1/2 C Raw Cashew or Almond Mylk
1/8 tsp Orange Extract/Essence or 1/4 tsp Dried and Powdered Orange Peel
Pinch of Salt
Sugar or Soaked Pitted Dates (optional)
A great, big splash of Scotch or Rum
Cocoa or Cinnamon Powder for dusting

To melt the chocolate using the double boiler method:

Break the chocolate into chunks and place in a medium sized, heat proof glass or ceramic bowl (steel is fine too but I find glass/ceramic easier to clean).

In a small pan, heat a cup of water and place the ceramic bowl on the pan (it should cover the mouth of the pan completely so no steam escapes).

Keep the heat on low so as not to allow the water at the bottom to boil and stir the chocolate with a spoon or small whisk.

When the chocolate is half melted, turn off the heat and keep stirring until completely melted.

Take the ceramic bowl off the pan and keep aside to cool for a few minutes.

For the mousse:

Scoop out the avocado flesh into a blender jar, add the melted chocolate and salt and blend to a creamy consistency, using a little almond or cashew mylk at a time.

Add the rum/scotch and the orange extract/essence/peel powder and blend well.

Taste and add the sugar or dates if required.

Blend again and transfer to a glass dish (I use the same bowl that I melted the chocolate in).

Whip for a couple of minutes with a wire whisk.

Tastes good at this point, tastes great after chilling in the fridge for at least half an hour and tastes amazingly awesome after sitting in the fridge for a day because the flavours ripen nicely.

Serve with cocoa powder or cinnamon dusted over it.

Enjoy! :)

Sunday, September 02, 2012

Marbled Green Smoothie Banana Bread


Why is banana bread called banana bread? Fruit, flour, sugar, soda, oil...one could say that banana cake would be a more appropriate name. Perhaps calling it bread is just our way of cheating. You know, you could polish off half a loaf of bread and feel pretty smug about it, but imagine eating half a cake. Egad! Guilt trip galore!! :oP

DH and I spent a long weekend at Chennai having a super duper fun time playing with our nephew and nieces. There were run off the mill games like hide and seek, chinese whispers, running and catching, lego connect four and there were crazy ass made up games like evil robot, mind reading and pretending to be asleep because we were so freaking tired by the end. Well that last bit was just hubby and me. Try keeping up with a pack of highly active kids and you'll know exactly what I mean.

Anyways, we came back home from these three days away to find some verrrrrry ripe bananas on the counter. When we'd left on Friday night, they were raw, but three days is plenty of time to ripen and ripen some more. I love eating bananas in this state but there are only so many I can have. Hence, I decided to make banana bread.

Marbled Spinach Banana Bread

I found a nice marbled chocolate-banana bread recipe on the PPK and used that as the base recipe. But as much as I luuuurrrrve chocolate, I wanted to make something non chocolatey. So I thought about the things that go well with banana, and spinach suddenly popped into my head. If spinach and bananas can be a great duo in green smoothies, why not in bread, right?

And while I was at it, I adjusted the ingredients a bit and made it even more healthy by substituting a portion of the white flour with pearl millet flour. So here is my Marbled Green Smoothie Banana Bread. I feel comfortable calling it bread now. :)

Marbled Spinach Banana Bread

Dry ingredients:

3/4 C Pearl Millet Flour (Bajra/Sajje Hittu)
3/4 C + 3 T All Purpose Flour (Maida Hittu)
3/4 tsp Salt
3/4 tsp Baking Soda

Wet ingredients:

1 C Mashed Very Ripe Bananas - about 3 large bananas (Pachbale Hannu)
3/4 C Sugar
2 T Coconut Oil - at room temperature
1/3 C Vegan Mylk - soy, almond or cashew
1 tsp Pure Vanilla Extract

Additional ingredients:

1/4 C (tightly packed) Blanched Spinach
5 T Boiling Water

Preheat the oven to 170C/340F.

Line a loaf pan with aluminum foil.

Place the dry ingredients in a large mixing bowl and whisk a few times to mix well and incorporate air. Transfer 3/4 C of this flour mixture to another large mixing bowl. 1 C of the flour mixture will remain in the first mixing bowl.

Beat together all the wet ingredients (not the spinach and water). It should come to about 2 C.

Bring 1 C of water to a rolling boil.

Meanwhile, blend the blanched spinach with 3/4 C of the banana mixture to form a smooth, creamy liquid.

Pour the spinach mixture into the mixing bowl with the 3/4 C of flour and mix lightly. Add 2 T boiling water to this and mix well with a fork to get a smooth paste.

Pour the remaining 1 1/4 C of banana mixture into the bowl with the 1 C of flour and gently mix. It's okay if some flour can be seen but DO NOT OVER MIX. Add 3 T boiling water and mix quickly with a fork until fairly smooth.

Now pour about 1/2 C of the plain banana bread batter into the prepared loaf pan. Top this with about 1/2 C of the green banana bread batter. Keep alternating them until you've finished transferring all the batter into the pan.

To form a pretty, marbled pattern, take a butter knife and swirl it through the batter in circles for a few seconds.

Bake in the preheated oven at 170 C / 340 F for 60 minutes. Increase the temperature to 180 C / 350 F and bake for 20 minutes.

About 10 minutes into the 180 C baking, test with a butter knife poked into the center for doneness.

Remove the pan from the oven and let it rest for a few minutes.

Lift the bread along with the foil and transfer to a cooling rack. Let it cool completely before slicing.

Enjoy! :)

Marbled Spinach Banana Bread

Wednesday, August 29, 2012

Vegan Vanilla Sugar Cookies: guest post by Harini of Tongue Ticklers


Today I have a very special guest on my blog - Harini of Tongue Ticklers. I have mentioned her beautiful vegan blog here many times before and I also guest blogged for her early last year.

I 'met' Harini on a Facebook group (way back when her blog was called Tum Yum Treats) and we became friends because of our shared passion for vegan food photography and blogging. I should thank Preethi of Krya for connecting us, otherwise I might not have seen Harini's blog when I did.

I have since then had the pleasure of meeting Harini in person. And today I am really happy to finally have her here with a recipe for delicious Vegan Vanilla Sugar Cookies. I am especially thrilled to have Harini's GLORIOUS photographs of the cookies here on my blog.

Harini's Vegan Vanilla Sugar Cookies

In the pic above, I want to have my mouth open at the end of the white slab so the cookie comes rolling right into my mouth. :oP

Harini, thank you so much for taking the time to do this blog post on Veganosaurus and for all the love and effort you have put into the photographs. :)

Now on to Harini's post...

--

Susmitha and I are very well acquainted but I am not sure whether you know me. Since I believe in forging bonds over food, I won’t take up much of your time. Let’s proceed quickly over to the introduction to what I think are the best vanilla sugar cookies I have ever baked. Does that make you curious?

Harini's Vegan Vanilla Sugar Cookies

Calling these ‘my vanilla cookies’ is not entirely correct. I made them mine but they originally belonged to Maggie Beer. I don’t think she will be able to tell that because they have taken quite a turn from the original recipe. So much that I do not recall the original recipe anymore. I first came to know Maggie Beer through MasterChef Australia, and most of her recipes introduced in the show sounded well. You know what I mean, don’t you? I do not try recipes that do not ‘sound’ good, by which I mean that reading the recipe should make my mouth water, must look good and look technically sound. Most of Maggie Beer’s recipes are just that, except that they are not vegan. They are, however, easily adaptable.

Harini's Vegan Vanilla Sugar Cookies

You do not need any special or hard-to-find ingredients for making these cookies. All ingredients, save the olive oil, are usually available in any pantry.

Harini's Vegan Vanilla Sugar Cookies

Recipe: Vegan Vanilla Sugar Cookies
(Inspired and modified from a Maggie Beer recipe)
Yield: 24 cookies, about 1.5inches in diameter

Ingredients:
Refined flour – 2 cups | 288g
Soaked and ground cashewnut paste – 2 tbsp | 32g
Pink salt – 2 generous pinches | 1g
Baking powder – about ½ tsp. | 3g
Vanilla seeds from 2 vanilla sticks
Olive oil – ½ cup | 80g
Caster sugar – ½ cup | 88g
Soy milk / Water / Coconut milk – 1-2 tbsp.

Method:

Place flour, cashew paste, salt, baking powder and vanilla seeds in a blender and blend till even. Remove the blended dry flour into a mixing bowl.

Blend olive oil, caster sugar and 1 tbsp. of soy/coconut milk/water lightly and add this to the dry mixture to form a soft dough. Do not knead. Make the dough by mixing with your finger tips, gather and press with your palm. The resultant dough should be soft but break when pressed. Add more milk only if needed. Adjust consistency by sprinkling a teaspoon of flour if too soft. You should not feel the liquid on your finger tips while gathering.

Divide the dough into two thick discs. Wrap them in separate cling films and refrigerate for at least an hour, or till needed. I usually prepare the dough in the night and bake the cookies the next morning.

When ready to bake, remove the dough and let thaw till it softens slightly and you can handle it. Pre-heat oven to 160 deg. C.

Sprinkle your platform with a little flour; place the disc with the cling film on it. Open the cling film and fold it back a little loose. Dust the rolling pin with flour and roll the disc to desired thickness, preferably 3-4mm. The cling film may break as you roll but that should not be a bother. When rolled, peel away the cling film.

Using a 1.5 inch circular cookie cutter, cut several circles. Place them on a baking tray lined with foil/baking sheet. Gather the remnants into a ball, flatten into a disc, place inside the cling film and roll again. Cut and continue making cookies as before.

These do not spread much after baking; hence they can be placed close, separated by just an inch. Place the baking tray in the center rack of the pre-heated oven and bake for about 15-20 minutes or till the cookies start turning golden around the edges.

Remove and using a flat spatula, carefully transfer the cookies onto a wire rack and cool completely.

Store in air-tight containers till needed. If you are traveling, stack ten cookies and roll them in cling film, and again with foil. Fold the ends. They will travel well this way without breaking.

Harini's Vegan Vanilla Sugar Cookies

Monday, August 20, 2012

Healthy Steamed Chocolate Cake - my guest post on Shinsveganlovin


Ooooo what do we have here? It's a ridiculously healthy and incredibly tasty vegan chocolate cake. It has no oil, no white flour and here's the kicker... it's not baked, it's STEAMED! *gasp*

Wanna know what went into it and how my friend Arun (one of the awesome guys behind Samabhava) is responsible for it? Of course you do! :D

Well, you can find all the details in my guest post on my friend Bou Shin's blog - Shin's Vegan Lovin'.

You won't be able to resist trying it out. When you do, come back here and let me know how you like it. I'm sure Arun will be very happy to hear the results.

Arun got the original recipe from another of our vegan friends, Sneha. She is also a great vegan chef and comes up with all kinds of yummy concoctions while experimenting in her kitchen.


The recipe on Bou's blog is a modified version by me with ingredients I had on hand. If you'd like the original recipe that Arun sent me, here it is, directly copy/pasted:

Dry Ingredients:
Whole Wheat Flour: 1.5 cups,
Sugar: 1 cup, (I use white)
Cocoa Powder: 1/3 cup,
Baking Soda: 1 teaspoon (tsp)
Salt: 1/2 tsp

Wet Ingredients:
Apple Sauce: 1/3 cup
Apple Cider Vinegar/Lime Juice: 3 tsp,
Vanilla Flavour/Essence: 1 tsp
Water: 0.8 cup

Put some water in a cooker and allow it to come to a boil.
Grease a container for the cake.
Mix dry and wet ingredients separately well, and then combine them and quickly transfer to the greased container.
Immerse a plate inside the boiling water in the cooker, place the container containing cake mixture inside the cooker, cover it, and allow it to get cooked like idly (don't put weight).
After 30-45 mins, check for done-ness of the cake by inserting a toothpick at the center, and checking if it comes out clean.

Notes:
- We can keep the cooker open after 30 mins or so, if we feel that the mixture is still wet. Opening the cooker will let the steam go, and can reduce the moisture of the cooking environment (but keep cooking).
- Original recipe for oven calls for 1 cup of water, but since there will be a lot of moisture inside cooker, I added less water (convection mode blows dry air; steam is wet and hot).
- Apple sauce: Peel apple (eat skin), chop into fine pieces, add 1/4 volume water, and blend it. If we are using it just for cake, we can use just this juice. If we want sauce, we need to heat the juice in low flame for 10 mins.

Monday, July 02, 2012

Healthy Date Almond Bakery Style Biscuits


Quick to make and just as quick to be polished off, these cookies are a hundred percent healthy. That means no cane sugar, no processed oil, no white flour.

They taste a lot like the salt benne biscuits we get at small, local bakeries here. You could add pepper and spices to turn them into masala biscuits or more dry fruits to make them sweeter. They are really versatile.

Healthy Date Almond Bakery Style Biscuits

1 C Almonds
1 T Sesame Seeds
1 T Flax Seed Powder
8 Pitted Dates
1/8 tsp Salt
1 tsp Pure Vanilla Extract
1/2 C Bajra Flour
1 T Water

Preheat oven to 250 C
Grind the almonds, sesame seeds, flax seed powder and salt together to a fine meal.
Add the pitted dates and grind again until it turns into a slightly sticky mixture.
Mix with the rest of the ingredients to form a slightly crumbly dough.
Shape into cookies by making balls and flattening between your palms.
Line on cookie sheet and bake for about 5 minutes, until browned.
Transfer to cooling rack and allow to cool completely.
Enjoy guilt free goodness! :)

Healthy Date Almond Bakery Style Biscuits

Wednesday, June 27, 2012

Ooey Gooey Chocolate Chunk Walnut Cookies


My baby sis, who is not a vegan *yet*, loooooves my chocolate chip walnut cookies. It's one of her favourite desserts ever and if she had her way, I'd be making it every week! A few weeks ago, she went out with our dad to shop for nuts at this speciality store called Manak Mewa which stocks a huge variety of high quality dry fruits and nuts and sells them at reasonable prices. Ever since my parents attended the Reversing Diabetes seminar by Dr. Nandita Shah last November and turned vegan, my dad started to munch on a few nuts and raisins with salad for his mid morning snack instead of the crappy processed biscuits and stuff that he used to eat before. It's turning out to be healthier and cheaper but it calls for a regular visit to Chickpet to shop at Manak Mewa.

But I digress. I was telling you about my sis at the store. She called me with great excitement in her voice and said in one breath, "Akka, you said your stock of walnuts was over no? There's plenty here. I'll bring some, you make me choco chip cookies." She wanted a whole batch to herself this time, as opposed to the one batch I make and share with her, so she asked me to make two batches, "one for you, one for me". I agreed to spoil the brat this time.

Ooey Gooey Chocolate Chunk Walnut Cookies

The vegan chocolate chips I'd brought back from the US was long over so I told her to pick up some vegan chocolate bars on her way here. Since chocolate bars are a tad overly sweet in my opinion, I halved the quantity of sugar and the cookies were perfect!

I also wanted to make the cookies slightly healthier so I tweaked the recipe around a bit. So these turned out quite different and much much more scrumptious than the already delicious basic chocolate chip cookies I have been making all these years. These have a softer crumb and a texture that's in between a chewy cookie and a cake. It's just amazing what flax seed powder and Bajra can do to baked goods!!

Ooey Gooey Chocolate Chunk Walnut Cookies

Dry ingredients:
2 C All Purpose Flour (Maida)
2 C Pearl Millet Flour (Bajra)
1 1/2 T Baking Powder
2 T Cocoa Powder
Pinch of Salt

Wet ingredients:
1 C Sugar
1/2 C Olive Oil
2 tsp Pure Vanilla Extract
3 T Flax Seed Powder
2 1/4 C Water

Additions:
1 C Broken Walnuts
4 Bars Dark Chocolate Cut into Chunks

Preheat oven to 180C/350F.
Line a baking sheet with aluminium foil.
Sieve together dry ingredients.
Whisk together wet ingredients for a few minutes.
Mix the wet and dry ingredients together.
Stir in the walnuts and chocolate chunks.
Drop onto cookie sheets by spoonfuls.
Bake for 20-25 minutes.
Let cool on the cookie sheet for a few minutes.
Transfer to wire rack and cool some more.
Serve warm.
Bite into the soft, gooeyness and be transformed into a state of bliss.

Ooey Gooey Chocolate Chunk Walnut Cookies

While the cookies were baking, a strange phenomenon occurred. I had negligently left one unbroken walnut half lying around on my kitchen counter (apparently on white paper to get the perfect lighting :oP). I heard a soft shuffling sound and when I looked, I beheld three little zombie veganosaurus monsters walking towards the walnut half with a greedy gleam in their eyes. "Brains, brains, brains", they said. But suddenly...


Tuesday, June 19, 2012

Mango Ginger Ice Cream - vegan, almost raw


This gingerlicious mango ice cream is not for the faint of heart. Last year, when I made mango ice cream, I thought I'd add a small piece of ginger into the concoction while grinding and loved how the flavors melded. But once I froze it, the ginger got overpowered by the mango.

So ever since this year's mango season started, I'd been really wanting to make a mango ice cream with a super strong ginger kick. When the time came to add ginger into the mixie jar, I did not hold myself back. And boy oh boy did it turn out amazing!!

Mango Ginger Vegan Ice Cream

I ran out of raw agave nectar so I used sugar. If it hadn't been for the sugar, this ice cream would've been categorized under "raw food".

I was feeling lazy and didn't want to wash the ice cream maker, so I decided to use the freeze/whip/freeze method to make this ice cream. I wanted it to have a slightly icy texture for an added crunch, so I didn't let it get too creamy during the freezing process.

Almost Raw, Vegan Mango Ginger Ice Cream


3 Ripe Mangoes - peeled and diced
2 inches Ginger - sliced
1 T Sesame Seeds
1/2 C Cashews
1/2 C Sugar
1 T Flax Seed Powder
A pinch of Salt
2 C Filtered Water

Grind the cashews and sesame seeds together in a dry jar until they start to release oil and begin to turn slightly buttery.

Add the ginger, sugar, salt and flax seed powder and process.

Add the mango and process till smooth and creamy.

Add the water and blend well.

Let this mixture sit in the fridge (not freezer) for a day to chill thoroughly.

Transfer to an airtight container and whip well with a whisk.

Pop in the freezer for half an hour.

Whip again.

Freeze again for an hour.

Whip again.

Let the mixture freeze for 6-8 hours.

Transfer this icy mixture into a blender jar in batches and process for a few minutes.

Transfer back into the airtight container and freeze for two hours.

To get beautiful scoops, let the container thaw inside the fridge for five minutes before you serve each time.

Scoop and serve.

Enjoy! :)

Friday, June 08, 2012

Dadar Gulung Newtons with Golden Mylk: Guest post by Bou Shin of Shin's Vegan Lovin


Today I'm happy to welcome Bou Shin of Shin's Vegan Lovin' to my blog for a delicious guest post. I clearly remember the first post I ever read on Bou's blog, it was for Oatmilk Yogurt. But I soon discovered her bentos and learnt that they are the prime attraction of her blog.

These adorable bentos are Shin's forte. One can clearly see the whole lot of love, care and creativity that goes into each one. And the themes she generally chooses totally appeal to the geek in me! Can you guess who these three guys are? :D

Luigi Bento (Mario) Mr. Bobinsky Bento (Coraline)
Dexter's Laboratory Bento

Once you're done guessing, click on each bento image to be taken to its original post on her blog where you can learn how to make it yourself.

Today's guest post by Shin is a delicious dessert recipe. Well two recipes actually - Dadar Gulung Newtons and Golden Mylk. She has used something called Pandan extract which comes from the leaves of a specific plant which is used in East Asian cooking. This was the first time I was hearing about this ingredient and I was pretty sure it wouldn't be all that easily available to most of my blog readers. So I asked Bou if it can be replaced by something that's more globally accessible to people. She replied that it can be substituted with Vanilla extract, but it should only be half of the amount of the Pandan.

Now on to Shin's post.

--

Dadar Gulung Newtons and Golden Mylk

When I was a little girl my favorite cookie to eat was always a Fig Newton (actually, the whole pack...) but as I slowly became more health conscious I lost touch with these soft pillows of tasty goodness. I don't believe that either Newtons can be considered "healthy", but when I decided to take a spin on two of my favorite treats (Fig Newtons and Dadar Gulung, a pandan crepe stuffed with coconut) I was instantly happy. There are two ways to make these treats and to gobble them down with, I've provided some delicious and silky, smooth golden milk.

Dadar Gulung Newton Filling:

4 large Dates, minced (or Date Paste)

1/4 cup of Unsweetened, Toasted Coconut

1 tsp of Raw Sugar

A mix of Cinnamon, Nutmeg, Cardamom and Allspice

1/2 tsp of Virgin Coconut Oil

Toast all of your dry ingredients together, let them cool partially and then add in your coconut oil. Set aside and make the dough.

Dadar Gulung Pastry Recipe:

1 cup of Oat Flour

1/2 cup of White Whole Wheat

4 tbl of All-Purpose Flour

2 tsp of Raw Sugar

1/4 tsp of Baking Powder (omit if you want them crunchy)

2 tbl of Virgin Coconut Oil (semi-solid)

About 3 tsp of Pandan Extract

Enough Coconut Cream to Mix

Mix your dry ingredients together first, then fork in your coconut oil. Dribble in your pandan extract and coconut cream, then knead your dough until it becomes a smooth ball. Refrigerate for 15 minutes and reminisce about your childhood in the meantime. Roll out to your preferred thinness, taking mind that this will puff up only slightly, and then put your coconut filling in the middle. Pinch your sides up and moisten lightly with the leftover coconut cream, then roll onto the newly formed seam and cut even pieces from your dough log (which should be a rectangle by now). Bake at 350 for about 30 minutes or until cooked to your liking and serve with golden milk

Dadar Gulung Newtons

They look like mini-burritos, don't they? If you have any extra dough you can roll it in some chocolate chips and bake for the same amount of time, or you can make a fantastic and pretty healthy pie crust. Even better, you can use them as breakfast cereals and (un-filled) cereal straws as they don't get soggy quickly. It's all up to your imagination!

Golden Milk Recipe:

1 cup of Non-Dairy Milk

1/2 tsp of Turmeric

1 tbl of Raw Sugar or Agave Nectar

Cinnamon, Nutmeg, Cardamom, Allspice and Cloves (to taste)

Warm all of your ingredients together and strain, let cool and strain if necessary.

Golden Mylk

Thanks for visiting my post and many thanks to Susmitha for hosting me! I hope that you all have enjoyed this short experience as much as I have!