Wednesday, May 12, 2010

Whole Grain and Seed Khara Bread


I've been meaning to post this recipe here for a while now but every time I've made the bread, it's been finished so quickly that I never had a chance to catch a picture! I figured I might as well share the recipe and the picture can be added the next time I bake it. It's one of the most delicious breads I've tasted till date (even if I say so myself)!! It would be a crime to delay sharing the recipe any longer.

(Update: Baked it again on 16th May and clicked pics which got added here on 17th May.)

Whole Grain and Seed Khara BreadWhole Grain and Seed Khara (Spicy) Bread


2 1/2 C whole wheat flour
1 C okara (optional)
1 1/2 t active dry yeast
3 t organic jaggery (you can use sugar instead but it won't be as great)
1 - 1 1/2 t salt
1/4 C olive oil

1 medium onion (chopped finely)
handful of fresh cilantro (chopped)

Crushed Together:
3-5 spicy green chillies
5-7 small cloves of garlic
1/8 t asafoetida

Further ingredients: (add whichever of these you have on hand)
2-3 T wheat berries (soaked overnight, drained and chopped roughly)
1 T sesame seeds
1 T flax seeds
1-2 T pumpkin/sunflower/melon seeds
2-3 t mixed dried herbs - chives, thyme, oregano, parsley...

Heat a cup of water and add salt and jaggery to it. Let them dissolve and then strain the water (to remove fine sand particles from the jaggery). Let the water cool a little until it's slightly hotter than lukewarm.

Place the whole wheat flour in a large bowl and make a deep well in the center. Add the water and sprinkle the yeast over it. Let this sit for 10-15 minutes. The yeast should froth well.

Pour in the oil, add the okara (helps make the dough extra soft) and form a rough ball of dough, adding warm water as required. Add the rest of the ingredients and do some preliminary kneading. Then transfer the dough to a flat, floured surface (I use my cleaned counter top) and knead well for about 10 minutes, until the dough is soft and flexible in texture. The kneading is the most important part of bread making and a wetter dough is always preferable to a drier one.

Coat the mixing bowl with olive oil and swirl the ball of dough in it so it's coated with oil on all sides. Cover with a wet cloth and let it sit in a warm/sunny spot for 2 hours. The dough should have at least doubled in volume after sitting like this.

Punch down the dough, gently shape it into a loaf and place it in a loaf pan. Cover with wet cloth and let it rise again for another hour.

Preheat the oven to 390 F/ 200 C. Place the loaf pan in the oven and let it bake for 45-50 minutes. Once the oven goes off, let it sit in the oven for 5 minutes. Then take the pan out of the oven and let it the bread cool in the pan for about 20 mins. Turn the bread over onto a wire rack and let it cool completely before cutting it with a serrated knife.

This is a soft, thick and moist bread and tastes absolutely heavenly dipped in herbed extra virgin olive oil or lathered with Earth Balance buttery spread. I also like to cut it into thick cubes and serve it with a hearty stew.

Whole Grain and Seed Khara Bread

Friday, April 09, 2010

Beet Hummus


When they invented the words "manna from heaven", THIS is what they must've taken a lick of. Beets take Hummus to a whole new level of orgasmic delight! I normally reserve the term "orgasmic" for only chocolate based foods, so you can see how serious I am about Beet Hummus.

It's just as simple to make as regular Hummus, so try it out for yourself and you'll know what I mean.

I want to shower a thousand blessings upon Julia for sharing the link of the original recipe with all of us at the EtsyVeg group. Until that moment, I had not fathomed the addition of Beets into Hummus. And now, my Hummus making days have changed forever!

As always, I tweaked the recipe a bit to suit my tastes. I've served it over organic red rice and topped it with a herb chutney (the green of the chutney looked so pretty with the deep pink of the hummus, I couldn't resist placing them together for the picture hehe). All of them tasted yummy together, but believe me when I say, the hummus tasted quite heavenly by itself too! You can just keep eating it in spoonfuls, straight from the container (like ice cream). So just be warned before you make some. :)

Beet Hummus

2 Medium Sized Beets - peeled, diced and cooked
2 Cups Cooked Chickpeas (I recommend starting with dry chick peas, soaking them using the Quick Soak Method* and then cooking them)
5-10 small cloves of garlic (depends on how garlicky you like it)
2-3 Shallots (Sambar Onions)
1 t Tahini (or dry roasted sesame seeds)
1/4 C Extra Virgin Olive Oil
1 T Nutritional Yeast (optional)
To taste - red chilli flakes, coriander powder, salt, freshly squeezed lemon juice

Grind/Process everything together (except the olive oil). Use enough of the cooking liquid from the beets/chickpeas and blend everything to a smooth paste. With the food processor running, drizzle in the Olive Oil and continue to blend until it gets incorporated completely. Taste and adjust the seasonings. Use more of the cooking liquid and blend until desired consistency is reached. Put into an airtight container and store in the fridge.

Hummus tastes delicious soon after it's made but it tastes best after a day of sitting in the fridge because the flavors develop well by then.

Beet Hummus

*Quick Soak Method (can be used for all beans) - Bring a pot of water to boil. Wash beans and put into the boiling water. Turn off the heat and cover the pot. Let it sit for 1-4 hours. Drain and throw out the soaking water completely and wash the beans. This removes 80-90 % of the flatulence causing properties inherent in most beans, hence making them even more healthier. The beans are now ready to be cooked, either in a pressure cooker (much quicker) or in a pot of boiling water (takes a couple of hours depending on the type of bean involved).

Wednesday, March 31, 2010

Vegan Craft Samples - Earth Day 2010


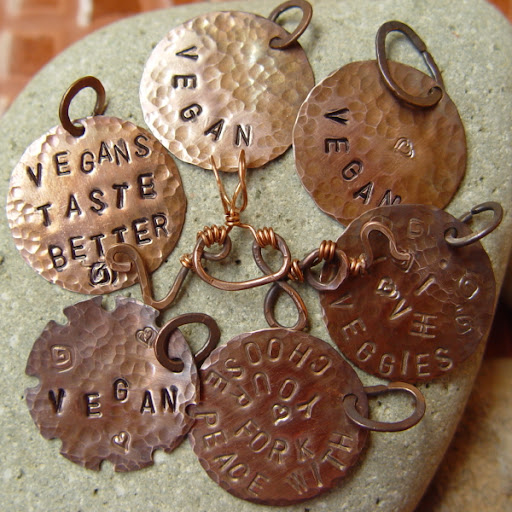
Vegan themed pendantsMy friend from the Vegan Etsy and Etsy Veg teams Heather Snogles started up Vegan Craft Samples a while ago and it's been a huge success ever since! Each year has about 4 Vegan Craft Samples Bags getting released to which various artists and crafters contribute their wonderful creations. When you purchase a bag, not only do you get a mix of beautiful stuff made by various talented people, you also help out an animal charity to which all profits from the bags go.

EarringsWhile there are many sample bags of this sort being run, Heather is the only one who runs an all Vegan bag and also donates 100% of the profits to an animal sanctuary.

The next bag is the one for Earth Day 2010 and they go on sale on the 4th of April 2010 (only a few days away!!). The chosen animal charity for this time is Carolina Pet Rescue.

Wire BookmarksThe bags will be available in 3 sizes - small (8-10 items), regular (17-20 items) and large (22+ items). They will be up for sale at the Vegan Craft Samples Website and Etsy Store.

Once these babies come out, they sell like hotcakes so make sure you grab them quickly! :)

MonstersCurrently, the Etsy Store also has a yearly subscription for all 2010 bags up for sale. If you buy this, you'll receive all the 3 remaining bags for 2010 without having to worry about remembering to grab them in time.

MonstersAbout 2 weeks ago, I sent in my goodies for the bags from both my stores - Art by Susmitha and Veganosaurus. This morning, I logged in to find an e-mail from Heather, saying that my box has reached. :)

My packaging for the Vegan Samples BagsWhile I had been making my creations to send in, I had been hunting for a fun packaging idea, particularly for the monsters. I really wanted it to be whimsical yet different. Then one day, while I was doing my normal chores and basically feeling thoughtless, the idea just hit me... Comic Strips! :)

Monsters peeking out of the packagesSo I spent a couple of days, snipping comics from the daily newspaper and used them to wrap the monsters and a few of the other goodies. It took a bit of effort but it was totally worth it!

EarringsKeep an eye out for the Veganosaurus Monsters or the Art by Susmitha Jewelry and Wire Book Marks in your Vegan Samples Bag. And if you find one, I'd love to hear from you about it! Please drop a comment right here to let me know what you think. :)

Necklaces

Pendants

Monsters

Thursday, February 25, 2010

A Carnival of Vegan Decadence - Namma Bengaluru


Call Carnival Bakery and a lady with a sweet voice is the one who's likely to answer the phone. After you ask her if their baked goods have eggs or dairy, she calmly assures you that she knows what Vegan means and politely waits while you first gasp and then recover from this delightful news. Then she proceeds to spring upon you the information that they have a separate special Vegan menu!! I'm guessing that by now she's well enough trained to immediately move the receiver away from her to protect her ear drums from the high pitched screech which emanates from your mouth.

It was K, my sister in Veganism, who stumbled upon this rare pearl (let me clarify that I'm referring to a Vegan Swarovski glass pearl here) while on a hunt for the perfect bagels. When she called me to share this news, I nearly did the Nakka Mukka. I vaguely recall registering the life-changingness of this information while my head swam with innumerable possibilities.

Sure, I'm quite capable of whipping up some fabulous Vegan desserts of my own at anytime. But now, when the craving hits me and I'm feeling lazy, the delicious treats are just a phone call away. And the BEST part is that I don't have to bake my own Birthday cake ever again! :D

My first order with them was a Black Forest Cake. No surprises there because that was my favorite gateau from my evil pre-Vegan days. It had been 7 years since I'd had a bite of the perfect Black Forest. Well I must admit that this wasn't the perfect Black Forest, but it sure was a delightful sight and pretty yummy too! Particularly after soaking in the fridge for a day (I've seen that cakes always need ripening time of at least 24 hours, ideally 48, before they reach their peak). The sponge didn't seem to have any cocoa so I did ask them why the weren't doing the traditional chocolate cake base. They said that they do use cocoa powder but in a limited quantity and that's why the chocolate cake wasn't of a chocolate color. Plus they claim that other bakeries use brown food coloring to enhance the look of the chocolate cake but they don't. That is definitely a good thing!

Then last week I succumbed to temptation once again and ordered a Rum Ganache Cake and some Doughnuts with various frostings (sorry no pics of the doughnuts). OMG the Rum Ganache was amazing!!! I was totally blown away by the presentation as well as the pure decadent taste! And the middle layer was soaked and moist to perfection!


THIS is what I recommend as your very first order from Carnival Bakery! Then you can follow it up by ordering the delightfully soft, moist and creamy 7 Fruit Cake (the birthday cake featured above which K ordered for her DH).

Carnival Bakery offers home delivery. Within a 2 kilometer radius of their premises the minimum order is Rs. 200 and the delivery is free. But hey, it's likely that you, like me, live no where near Sarjapur Road. And so for kindly traveling through the horrible Bangalore traffic in the sweltering heat, it is only fair that your order makes it worth their while. The minimum order in this case starts at Rs. 1000 and the delivery charges would depend on your order. Rs. 50, Rs. 100 and so on.

I must mention here that the person who delivers is a polite, professional guy called Karthik. And judging by my last order, where he was really nice after I made him wait for about 10 minutes, he seems to be quite patient too.

So here are the details of Carnival Bakery for you. Enjoy! :)

Carnival Cakes
Manager: Mr Sadhish Kumar
No.65/3, Nr Shoba Onyx,
Agara Post, Sarjapur Main Rd,
Sarjapur Road,
Bangalore – 560034
Tel. (80)-25723148 / 9916754689
Email: cakecarnival@gmail.com

They will e-mail you their Vegan Menu or if you'd like to see it online you can find it on the Vegan Bengaluru Blog.


Apple Crumble Pie (a tad sweet for my liking but nice enough).

Friday, February 05, 2010

Spicy Hummus Whole Wheat Ravioli in Mint Coconut Milk Sauce


One of those things I invented as I cooked and OMG were the results amazing! It has Italian, Mediterranean, East Asian and Indian flairs all mixed in. I think I outfusioned myself with this one. :D

Spicy Hummus Ravioli in Mint Coconut Milk Sauce

For the Spicy Hummus:

Quick-soaked, drained and cooked Chickpeas
Toasted Sesame Seeds
Smoked Chipotle Tabasco Sauce
Asian Super Spicy Chilli Paste
Olive Oil
Coriander Powder
Raw Garlic
Lime Juice
Nutritional Yeast (if available)
Salt

Blend everything together adding a little water at a time until it reaches a creamy consistency. I determine ingredient quantities by the "taste and add and taste and add" method.

For the Whole Wheat Ravioli:

2 C Whole Wheat Flour
1/2 t Salt
3 t Oil
Water

Mix the flour and salt together. Rub the oil into the flour. Add a little water at a time and knead well into an elastic-y dough. Cover and keep aside.

Bring a large pot of water to boil, add salt and let it continue to boil. Start preparing the ravioli on the side.

Pinch off large balls of dough and roll them out thin like tortillas/chapatis. Use a circular cookie cutter (or the edge of a steel tumbler) and cut out rounds. Take one circle and spoon a bit of the hummus into the centre, cover with a second circle. Carefully seal the edges. You can make little twists all around the side for extra safety.

Prepare all the ravioli and then put them into the boiling water gently. Cook for about 20 minutes on a medium flame. About 5 minutes into the cooking, stir carefully so that they don't stick together or break. Do this a few more times through the cooking process. And start preparing the sauce on the side as the Ravioli boils.

If a couple of the Ravioli's break during the boiling process try not to fret. I used the cooking water as a stock to make soup the next day. :)

For the Sauce:

Big bunch fresh Mint Leaves
Thick Coconut Milk (about 1 Cup)
Green Chillies
Pepper
Salt

Blend everything together into a creamy sauce consistency.

How to proceed:

Pour a bit of the sauce into a glass baking dish. Place the ravioli in layers and pour the sauce between each layer. And top it off with the rest of the sauce.

Bake in a regular oven at 200 C/ 400 F for about 40 minutes or in a microwave in the convection+micro mode for 20 minutes.

Serve hot, garnished with grated carrot.

Enjoy! :)