Happy New Year, everyone! I'm back with a long post for the new year with all of December's news squeezed in. :)
December was a nice month. DH and I had planned to spend our year end holidays in the way we always want to - relax at home, be couch potatoes, indulge in junk food, watch movies, play video games... We did do a fair amount of all that but we also ended up making a short impromptu trip to Ooty along with hubby's brother's family. My main motivation to go on the trip was getting to spend time with my adorable nephew and niece.
Ooty aka Udagamandalam, is a town situated on top of a mountain. It's touristy and nippy but it's also full of gorgeous, green tea plantations, calm water bodies and beautiful, old eucalyptus trees.
We spent half our time at quiet, off-the-grid places but we did do a few touristy things too. My favourite activity was the train ride up the hill from Conoor to Ooty and the subsequent time spent hanging out at the fairly empty railway station. On the ride, my nephew and I blew soap bubbles out the train window and a bunch of kids at the back of our compartment leaned out their windows to catch the bubbles. It was loads of fun playing with strange kids and laughing so much! The Ooty railway station connects to Conoor and nowhere else. There's just one train making the rounds. So between each visit of the train, the tracks are empty for hours together. The platform is low and there are no gates to stop people from hopping onto the tracks. It's the one railway station I've been to where it's absolutely safe to walk on them. So hubby and I did. :D
The other very interesting part of our trip was going to a tea factory. I've been to tea factories before but I still enjoyed my visit there because I'm a big fan of tea. All those freshly harvested tea leaves being dried and rolled and roasted...the place smelled niiiice! *deep sniffff*
When we came back home after our trip, hubby and I were welcomed by this delightful 24 Letter Mantra gift basket filled with all kinds of organic goodies!
It was sent to me by the people of The Alternative. In November, I had submitted my Hazelnut Mocha Cheezecake recipe into their Green Foodie Recipe Challenge and early in December, it was announced that my recipe won the Editor's Pick title. The 24 Letter Mantra organic goodie basket is my prize. :) I am especially proud that my vegan dessert was chosen in a contest that wasn't all vegan.
The Alternative also sent me this handmade paper, elephant photo frame. Isn't he cute? :)
On December 1st, I also participated in The Alternative's Nature on My Plate event at BioFach India 2012. Hubby and I were a part of their Food Tasting section. We made Seasoned Vegan Curd Rice with Peanut Yogurt and gave samples to lots and lots of people. Everyone found the idea of making mylk and curds out of peanuts highly intriguing.
We spoke to each person about being vegan and distributed all the vegan information material in our possession. We had informative leaflets/booklets from Kranti and Samabhava/FIAPO and we also wrote out our own Veganosaurus url along with that of SHARAN-India, mentioning that they could be used as references for vegan recipes. It was great to have hubby there by my side. He did a lot of the talking and explaining. There was a large crowd and in about an hour's time, every last grain of our Peanut Mylk Curd Rice had been devoured.
We also got to taste some delicious vegan goodies by other participants: Chaitali - Taantraa's cupcakes, Mahalakshmi Lakshminarayan's peanut flax seed laddoos and Aparna Ramachandran's podi idli bites. Sadly, we missed Chinmayie's chocolate brownies because by the time she arrived we had started to wander around the various organic counters at BioFach. I did get to listen to her very interesting talk about switching to organic on the previous evening though, so that made up for it. :)
I posted regular updates about my participation at Nature on My Plate on my Facebook Page during the event but I'd been waiting to receive my prize before posting about it here on my blog. This post wouldn't have been complete without a photo of my gift basket.
Talking about prizes, I received another one in my mail in the early part of December. An awesome Virtual Vegan Potluck T-Shirt. If you remember, I participated in VVP on November 1st. There was a vote held over the next couple of weeks and one recipe was chosen as a winner in each course of the potluck. My Hot Spiced Cashew-Sesame Mylk Chai won under the Beverages category. :)
With a super fun trip and some awesome prizes, I couldn't help but end 2012 with a huge smile on my face and a feeling of hope and excitement about all the wonderful gifts 2013 will bring.
On New Year's Eve, when it was time to make dinner, I had to make something special (though I hadn't planned to). I'll leave you with the two recipes I concocted that night. I had to click quickie Instagram pics with my phone before we polished off the meal. :oP
Zucchini/Carrot 'Noodles' with Tofu in a Tomato Based Spicy-Sweet-Sour Sauce
Note: Zucchini makes for excellent gluten free noodles. Fantastic texture!
1/2 Zucchini
2 Carrots
250 gms Tofu
2 Tomatoes
1/4 Onion
5-6 cloves of Garlic
1 Chilli (I used this bomb of a spicy red chilli called Cherry Pepper)
Soy Sauce
White Wine Vinegar
Palm Sugar
Thinly slice the zucchini and carrots with a vegetable peeler to form flat noodles out of them.
Added cubed tofu.
Blend the remaining ingredients into a smooth sauce using upto 1/4 C of water.
Taste and adjust the flavours.
Toss the veggie noodles and tofu in the sauce and transfer to a glass baking dish. Bake for 15 minutes at 230 C and another 15 minutes at 200 C.
Serve hot.
Enjoy! :)
Foxtail Millet Tabbouleh
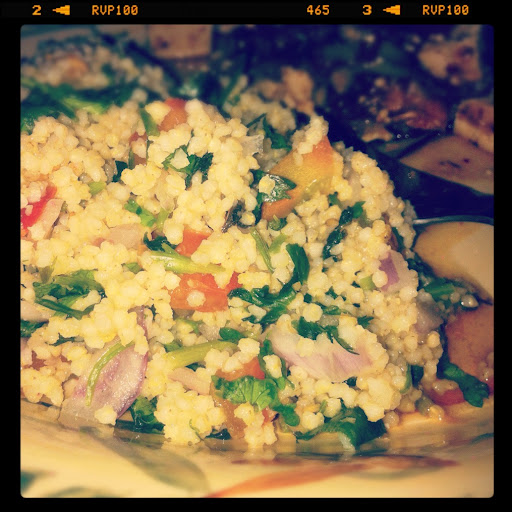
No quantities for this one. Just cooked Foxtail Millet/Navane and cool it to room temperature. Add finely chopped Tomato, Onion, Mint, Cilantro, Crushed Green Chilli, Black Salt and LOTS of Lime Juice. Mix. Enjoy! :)
Wish you all a wonderfully vegan 2013! *hugs*
Thursday, January 03, 2013
Sunday, December 23, 2012
Homemade Vegan Xmas Goodies - guest post for The Alternative
Want to know how to make the three delectable goodies in the picture below? The Alternative, an online social change publication, asked me to do a kitchen experiment piece for them with recipes, pictures and a comparison between homemade vs. store-bought. Visit my article on their website to read about why I think it's a great idea to make vegan treats at home instead of buying them off the shelves this festive season. And learn to make Vegan Gingerbread Cookies, Vegan Chocolate Brandy Balls and Vegan Spiced Fig and Persimmon Chutney.
Click on the picture below.

Labels:
Chocolates & Truffles,
Condiments,
Desserts
Wednesday, December 05, 2012
Vegan Boursin Style Cheeze
Boursin is a soft herbed cheese that originates from France. It is extremely easy to make a vegan version at home that's equally rich and creamy but absolutely guilt-free. Vegan cheezes just don't have the kind of bad fats that animal secretion cheeses do. Add to that the zero cholesterol factor and you have something that you can keep on eating and feel really good about. :)
There are vegan Boursins which take a few days of time and patience so the cultures can develop. There are also those which require the cashews to be soaked overnight. My friend Isabel of India Outside My Window had made Boursin like that a few months ago and it was sooooooo delicious! But today I'm sharing a super-quick recipe with you. It doesn't contain the beneficial lactobacilli that fermented nut cheezes have but it sure hits the spot. Takes just ten minutes to put together. That's including the several tasting breaks while blending where you can't help but keep licking your fingers. And of course you have to wash them thoroughly before getting back to blending again and then you lick once more and wash and lick and wash and lick and wash... So that bit basically takes five minutes of the ten. :oP
Boursin cheeze is filled with herbs which make it amazingly flavourful. I used the herbs I had at home and you too can use what you have on hand. The consistency of Boursin is usually like a spread but I've made mine slightly more runny. It wasn't intentional, I added a bit more water than I should've but that didn't make it any less delicious. Also, I clicked the pics immediately after blending so the cheeze hasn't set yet. After a couple of hours in the fridge, now when I spread it on bread, it actually stays in place instead of dribbling down the side so temptingly. haha
The quantity of the tofu and cashew can be adjusted to your liking. Some people make Boursin completely with cashews (or other nuts) with no tofu in it. I need to replenish my stock of sesame seeds but if I had any at home, I'd definitely have put a handful into the mix for an added calcium boost. Also, I haven't mentioned quantities for any of the herbs and flavours because again, those can be added according to your taste.
Vegan Boursin Cheeze
1 C Cashews
250 gms Tofu (1 block from Towness)
Nutritional Yeast
Lime Juice
Whit Wine Vinegar (Apple Cider or Synthetic Vinegar are fine too)
Onion (small piece)
Garlic
Black Salt (regular salt is fine too)
Pinch of Black Pepper Powder
Herbs - Celery (just leaves, no stalk), Thyme, Mint, Cilantro
Grind the cashews into a fine powder in a dry blender jar.
Add everything, except the herbs, into the jar and blend into a smooth, creamy paste using a little water if required.
Taste and adjust the quantity of the salt and lime juice.
Roughly chop the herbs and add them into the blender jar.
Pulse 2 or 3 times.
The herbs should get incorporated but not blended completely.
Place in a glass bowl, cover and keep in the fridge for at least one to two hours.
Slather onto slices of good artisan bread and serve.
Enjoy! :)
This keeps in the fridge for a week to ten days.
This is what I had for lunch today - Whole Wheat Sourdough Bread (I made that yesterday) with Vegan Boursin and Arugula Salad on the side. It was a great, filling and satisfying meal which my tummy with a soothed feeling. :)
Labels:
Vegan Dairy Substitutes
Tuesday, December 04, 2012
Whole Wheat Buttermylk Biscuits and Tofu Gravy
For a long time I'd only heard about Biscuits and Gravy, the American comfort food from my friends in the US. I finally got to taste them in 2010 as a part of the all you can eat Sunday brunch plate at the Sugar Plum Vegan Café in Sacremento. It was everything I'd expected it to be and more.
This evening, while I was going through an old baking book looking for a Sourdough Bread recipe, I chanced upon a recipe for biscuits and the memory of that breakfast came flooding back. I was overcome by a craving for Biscuits and Gravy and I decided right at that moment that I'd be having it for dinner, no matter how long it took me to prepare it.
As it turned out, it took me barely 30-35 minutes to make this from start to finish. It's hard to believe that deeply satisfying, hit-the-spot kind of food like this is so simple to whip up.
Biscuits
Biscuits are commonly made with all purpose flour but I made mine with whole wheat and they turned out deliciously flakey and crunchy on the outside. A perfect combination with thick, creamy gravy. This also made them healthier than traditional biscuits.
Healthier but not completely healthy. There's an insane amount of baking soda and baking powder used in biscuit recipes. And a lot of fat/oil too. This leaves one with a bloated tummy effect that raising agents usually cause. Nothing that a small swig of Oman Water can't fix, but now I do understand why this is traditionally a breakfast dish and not a dinner dish. haha
I am going to figure out a way to drastically reduce or eliminate the baking powder and soda the next time I make it though. But for now, the biscuit recipe below is totally worth trying! So yum!!!
1 1/2 C Whole Wheat Flour
1 tsp Baking Powder
1/2 tsp Baking Soda
1 tsp Salt
1 tsp Sugar
2-3 T Thick Coconut Oil (or vegan margarine)
1/4 C Cashew Mylk (or other vegan mylk)
1 tsp Vinegar
1/2 C Peanut Mylk Curds (or other vegan yogurt)*
Preheat oven to 220 C / 425 F
Line a baking sheet with foil.
Sieve together the dry ingredients.
Add the coconut oil and rub well to form crumbs.
Whisk the vinegar into the cashew mylk.
Pour the cashew mylk into the dry ingredients and mix.
Slowly add enough of the peanut mylk yogurt to form a soft, slightly sticky dough.
Make a ball and place on a floured surface.
With a floured rolling pin, roll it out into a 1/2 inch thick sheet.
Cut out rounds using a cookie cutter or the edge of a cup/tumbler.
Place on prepared baking sheet and bake for 15 minutes.
*If you don't have any vegan yogurt at home then just whisk the vinegar into 3/4 C of vegan mylk instead of 1/4 C and use that.
Gravy
I looked up gravy recipes and realized that a gravy consists of three main elements. A creamy sauce that's been thickened with the use of a roux. Chunks of something soft/chewy for texture. And interesting spices/flavours. As long as these three are in place, the gravy can be made of any combination of things. So I just used what I had at home and concocted my own version of gravy. I wasn't sure how it would taste but it turned out so delicious that I had to immediately record the recipe so I wouldn't forget it.
2-3 T Olive Oil
1 tsp Garlic - roughly chopped
1/2 tsp Celery (leaves, not stalk) - finely chopped
2 Cherry Peppers (or any other spicy chillies) - chopped
Pinch of Freshly Crushed Black Pepper
1/4 tsp Cinnamon
1 small block Tofu - cubed
1 1/2 C + 1/4 C Cashew Mylk (or other plant based mylk)
1 T Soy Sauce
1 tsp Sugar
1 T Corn Starch
1/4 tsp Tamarind Paste (or something else to add a wee bit of tang)
Salt (if required)
Heat olive oil in a heavy bottomed pan/wok.
Add the chopped garlic, celery and chillies and stir fry for a minute on low heat.
Add the crushed black pepper and cinnamon and mix.
Add the tofu cubes and stir fry for a couple of minutes.
Pour in 1 1/2 C cashew mylk, soy sauce and sugar, mix well and allow to simmer.
Meanwhile, whisk together the corn starch and the remaining 1/4 C cashew mylk.
Pour into the sauce slowly and stir continuously until the mixture thickens.
Turn off the heat.
Add tamarind paste and mix well.
Taste and add a bit of salt if required.
Slice biscuits in half and ladle the gravy over them.
Enjoy hot! :)
Labels:
Main Course Dishes
Friday, November 23, 2012
Creamy Coconut Pumpkin Vegetable Stew
Coconut Mylk Vegetable Stew is a hearty dish that hails from the state of Kerala, in South India. It is usually served as a combination with Appam Dosa, a kind of pancake made in a special, concave pan. The batter is poured into the hot pan, swirled around, drizzled with oil, covered and roasted for half a minute. This results in a soft, fluffy center and crispy sides. A piece of Appam, dipped in stew does all kinds of yummy things inside your mouth before melting away. :)
My mom usually makes Appam batter and gives it to me, so when I make the batter myself I'll share the recipe here on my blog. For now, here's a coconut mylk based veggie stew with an interesting twist and an added boost of health.
The veggies that are usually stewed in the coconut mylk are carrot, beans, peas and potatoes. But this time when I made the stew, I wanted to use up some week-old vegetables - a large slice of sweet pumpkin, a couple of half-dried radishes, one partially wilted chow chow (chayote) and a sweet potato that was in perfectly good condition. I diced the sweet potato with the carrots, beans and potatoes but the chow chow, radish and pumpkin, I decided to put into the sauce. It ended up making the stew extra creamy and absolutely delicious!
I liked it so much that from now on, whenever I make Coconut Mylk Stew for Appams, I'll be blending some cooked pumpkin into the sauce and maybe some radish too. :D
If you don't use a microwave, the vegetables can be steamed or boiled instead. It'll take a little longer and the texture will be slightly different, but other than that, I'm sure it'll taste just as yummy. :)
2 Carrots
10 Beans
1 Potato
1 Sweet Potato
1/2 C Frozen Peas
1 large slice Red Pumpkin (500 gms)
2 Radishes
1 Chow Chow
1/2 C Thick Coconut Cream/Mylk
2 tsp Coconut Oil
2 Green Chillies
1 inch Cinnamon
4 Cloves
Salt
Scrub and wash all the vegetables well (do not peel them).
Cut the pumpkin, radish and chow chow into chunks and place them in a microwave safe dish.
Sprinkle some salt over them, add half a cup of water and nuke for about 10 minutes (until tender).
Transfer to a wide bowl or plate and keep aside to cool.
Meanwhile, slice the carrots, beans, potato and sweet potato into 1 inch pieces and place them in the micro dish, along with the frozen peas.
Sprinkle salt and water over them and nuke for 5-7 minutes (they should be cooked but crunchy).
Now blend the cooled pumpkin, chow chow and radish into a creamy sauce, adding the coconut cream/mylk and about a cup of water (a little at a time).
Heat the coconut oil in a heavy bottomed pan or wok.
Add the cinnamon, cloves and sliced green chillies and stir fry.
Add the vegetables and stir fry for a couple of minutes.
Add the prepared pumpkin-coconut sauce and mix well.
Bring the sauce to a boil, reduce the heat to medium-low and simmer for 5-10 minutes (to save time, I usually start making the Appams at this point, while the sauce is simmering).
Serve hot with Appams or Stemed Rice or Toasted Bread.
Enjoy! :)
Labels:
Stews
Subscribe to:
Posts (Atom)