Thursday, March 03, 2022

Bite Sized Okara Patties – What's Okara, and how to use it?


"What do you do with your Okara?"
“Wait, did you mean Okra?”
“No, no. I meant Okara only.”
“What’s that now?” 🀨

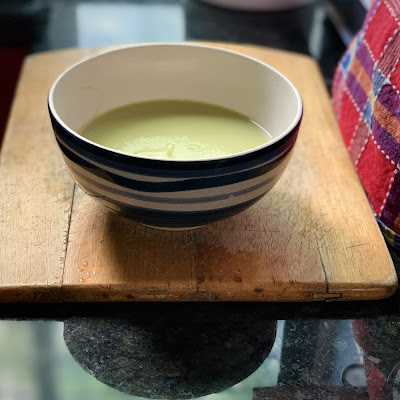
When you make plant mylks, some of them need straining right? The leftover paste is Okara. It refers to soy pulp, but the term can loosely be used for other mylk pulps too.

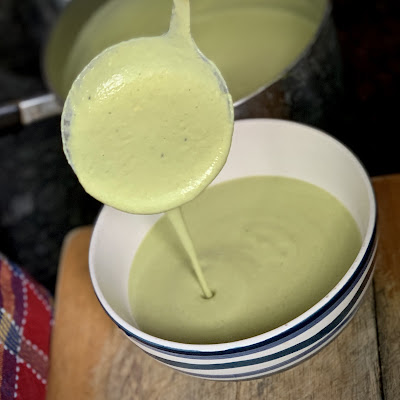
When I make peanut curds, I don’t strain the mylk. I feel the pulp gives the curd a more thick and creamy texture. Plus the fibre is a good prebiotic. (Also I’m too lazy to strain it).

But the designated peanut curd maker in our house is way too particular about the texture. He claims that the pulp makes the curd pasty and insists on straining the mylk every single time. πŸ™„ And since peanut curd is made at home at least once a month (curd rice is a staple at our monthly Bengaluru Vegans Potluck), there's a constant supply of Okara at home.

A bit of the pulp can be mixed into chapathi/bread dough, gravies, sambar, etc. But there’s always more pulp than can be used this way. So more often than not, it sits in the fridge getting old and then we have to compost it.

Dry and tasteless as it is, Okara's still full of healthy fibre and easily digestible proteins. I always feel guilty about wasting it.

In my pursuit of using it up creatively, I made Okara Choco Chip Cookies last year. The recipe was a combination of this one from The Okara Project, and my signature Chocolate Chip/Chunk Cookies. They were daaaammmmmnnn yum! 🀀

But my tummy flab quavers in dread at the thought of cookies appearing every time we have Okara at home. πŸ˜‚

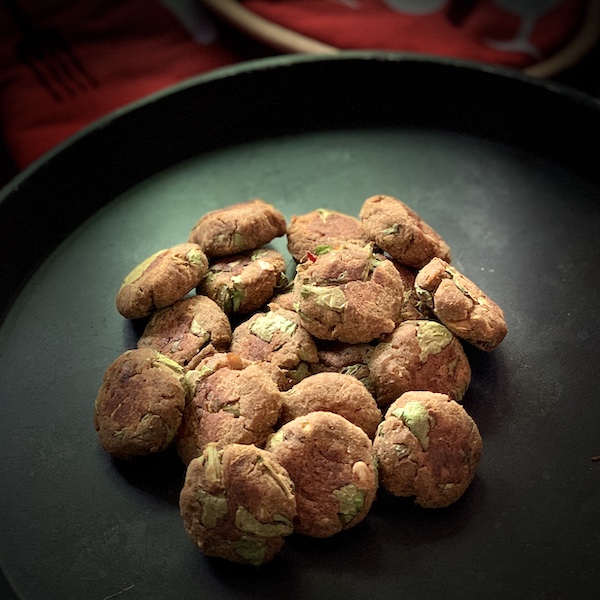
So lately I’ve been making savoury snacks with it instead – patties, cutlets, neat balls…

You mix a bunch of stuff into the paste, shape and bake. Once you get the hang of it, it’s quite flexible to experiment with.

The three key things to keep in mind are – textures, flavours and binding.

🌺 Since Okara is bland (all the tasty stuff goes into the mylk), it needs super strong flavouring. Be verrrry generous with the spices and seasonings you put in!

🌺 Good binders are important to counter the moisture. I’ve tried random combinations of corn starch, arrowroot powder, psyllium husk, flaxseed powder, Banamin's gota/vada mix*, etc.

🌺 The Okara by itself doesn’t have an enjoyable mouthfeel, so mix in some crunchy/chewy ingredients for texture. I’ve done chopped mushrooms, seeds/nuts, crumbled tofu, leafy greens…

Then it’s just a matter of shaping and baking. I usually do 200-220°C for 15 mins, gently flip them and then bake for another 15 mins. The temperature and baking time depends on the size of the patties/balls, and how wet your mixture is. So adjust accordingly.

Here's a recipe for you. Use it as a guideline and do your own thing. There's plenty of potential for variety. :)


Dark background, black tray with small, bite sized patties on it.

Monday, February 07, 2022

Creamy Broccoli Hazelnut Soup


Angled view of striped blue and white bowl with creamy broccoli hazelnut soup in it. It's on a wooden cutting board placed on a granite kitchen counter top. Reflection of the bowl on the counter top at the bottom of the photograph.


Have you ever tried soup with boondi sprinkled on it? Here's how that stroke of genius came about today...

I'd finished licking up my big serving of soup and was congratulating myself on a particularly healthy, nutritious lunch. ☺️ Soooo much broccoli in my tummy!

I rinsed the bowl and was just about to walk out of the kitchen, when I spied the khara boondi pack on the counter looking at me with its smug little face. 😏

Its voice in my head sounded like a bunch of tiny squeaky imps in chorus, "healthy lunch, you say? Muhuhahaha." 😈

I'd like to claim that my willpower was strong, but traitor that it is, it went, "the lunch was healthy, so what harm could a bit of boondi do, really?"

I succumbed. 🀷🏻‍♀️

As I was guiltily munching on the boondi, I was struck by a thought... "boondi on soup". Wait, what?! I had to try it right away.


Spoonful of hazelnut broccoli soup held up to the camera with boondi sprinkled on it. Silly imp faces digitally drawn on to the boondis.

I was too full, so I only tasted a spoonful of soup with some boondi sprinkled on. What an awesome combination it was! The creaminess and crunch complimented each other perfectly.

Soup's a rare event in our house. I don't know why, because it's such a healthy, deeply satisfying meal. But I have a feeling that the next time I buy boondi (which is also rare), I'm totally going to be making soup to have with it.

Aha! Take that evil boondi! You're only going to inspire more healthy choices in me.πŸ˜›

Anyway, on to the recipe. As always, feel free to switch flavours around to suit your tastebuds and ingredient availability.

Creamy vegan soup being ladled into a bowl. Top view, close up.

Creamy Broccoli Hazelnut Soup


To blend:
500 gms Broccoli (florets and stems)
3 T Hazelnuts
1 T Nutritional Yeast (optional)
3 small cloves of Garlic
1/4 tsp Jaggery
Salt (I used a mix of regular and pink)
Water

To stir in later:
Freshly crushed Black Pepper
Dried Orange Peel Powder
Lemon Juice

  • Steam the broccoli for 20-25 mins and allow to cool slightly
  • Grind hazelnuts, nooch, garlic, and salt into a powder*
  • Add the steamed broccoli and a bit of water and blend into a creamy paste
  • Pour in more water as required and blend into desired thickness of soup
  • Transfer to a vessel, crush pepper on top and sprinkle dried orange peel powder
  • Warm up the soup for a few minutes on medium heat while stirring
  • Take it off the heat and stir lemon juice into it
  • Serve warm (possibly with boondi sprinkled on top hehe) and enjoy! :)


*This powder makes for a damn yum Parmesan alternative!

Note: All khara boondis are not created equal. The one I had today happened to be from Adukale (very tasty), but Maiyas and MTR boondis are super delicious too. Only thing, make sure to check the ingredients every single time! Stupid ghee gets added to boondi sometimes. Grr. 😑

Thursday, January 20, 2022

Gluten Free Banana Flour Chocolate Hazelnut Cake


generally don’t venture too much into gluten free baking. My fortΓ© is vegan baking, and I tend to stick to it.

But recently I scored some highly nutritious allergy friendly flours from Banamin Health Care and I wanted to see if I could come up with a completely GF cake with the Green Banana Flour. I was totally surprised by the results!

 
The texture is on the crumbly side and also more fudgy than cakey. But overall a very yummy thing.


GF Banana Flour Chocolate Hazelnut Cake

Dry Ingredients:

1 C Banamin Green Banana Flour

3 Tbsp Cocoa Powder

1/2 tsp Baking Sada

1/2 tsp Baking Powder

1 tsp Arrowroot Powder

1/2 tsp Salt


Wet Ingredients:

1 Cup Brown Sugar

2 Tbsp Jus’Amazin Crunchy Hazelnut Spread

2 Tbsp Coconut Oil

1 Tbsp Apple Cider Vinegar

1/4 tsp Pure Vanilla Extract

1 tsp Psyllium Husk

1 C Warm Water


  • Whisk together wet ingredients & allow to cool completely in fridge
  • Preheat oven to 180 c/350 F
  • Lightly grease a cake pan and line it with baking paper
  • Mix together dry ingredients
  • Quickly mix wet & dry mixtures (don’t overmix)
  • Pour into cake pan
  • Bake for 35 mins and test with a toothpick for doneness (bake for 5-10 mins longer if required)
  • First cool the cake in the pan for 15 mins, then gently transfer to a wire rack along with the paper and cool completely before slicing


For the Icing:


  • Whisk Jus’Amazin Crunchy Hazelnut Spread in a few spoons of Warm Water 
  • Pour over the cake 
  • Optionally layer with Strawberry Compote (made by cooking down chopped strawberries with sugar)


If you'd like some sweet discounts:


Use my referral* code "VEGANOSAURUS10" on Jus'Amazin or Banamin websites to get 10% off on all your orders, every time.


Jus'Amazin has free pan India shipping on all orders.

* I receive an affiliate commission when you use my code at no additional cost to you. Read my disclosure page for more details.

Monday, August 02, 2021

Chocolate Brown Rice Roasted Almond Mylk


Slightly angled top view, close up of chocolate brown rice almond mylk with ice

“Good lord! This tastes freaking delicious!!!” I said, as I slurped the smooth, light liquid delightedly. πŸ₯›πŸ€€


It was the first time I tasted rice mylk. I’d purchased it at a grocery store in the US. 


Initially I’d been skeptical to pick it up because the tetra packed almond mylk from the same brand had been an overwhelming disappointment.


But my curiosity won, and here I was, sipping on this incredibly soothing, vanilla flavoured beverage.


After that, I glugged down tumblers and tumblers of rice mylk on a daily basis while I could get my hands on it.


As soon as I got back to Bangalore, I wanted to try making it at home.


I did some research, cooked white rice, and blended it with water.


❗️What emerged was a thick, starchy, undrinkable mess! πŸ˜‚πŸ€£


It was nothing like the heavenly tetra packed goodness I’d fallen in love with. But I don’t give up easily. Certainly not after the first try.


It took a couple more experiments, but eventually I zeroed in on the perfect home made rice mylk recipe. πŸ‘πŸ½


🍚 Use a variety of rice that doesn’t have all its fibre polished off – brown or red (Rajmudi) work great

πŸ’¦ Contrary to what you’d expect, the volume of water has to be higher in rice mylk than in nut mylks (like 1/2 C cooked rice to approximately 1 L water)


That’s it. That’s the big secret. πŸ˜‚


Blend well. Strain. Get ready to *glug glug slurp*.


Some bonus tips:


πŸ“ Cook the rice very well, and cool it completely before blending.

πŸ“ You can add any sweetener (dates, jaggery, maple syrup) and flavour (pure vanilla extract, cocoa powder, cinnamon) while blending and then strain the mylk.

πŸ“ If you have a high powered blender, you might not have much stuff left to strain. But strain it anyway. This mylk is best enjoyed smooth and light!


If you enjoy these hacks that go beyond just recipes, join one of my Demystifying Vegan Cooking small group training sessions.


Rice mylk is very enjoyable when you drink it by itself (lightly sweetened if you like). But it also works well in:


🌼 Cereal

🌼 Payasam/Pudding

🌼 Smoothie

🌼 Fermented into Spicy Buttermylk

🌼 In baking Cookies, Cakes and Bread

🌼 Light, cold beverages


Chocolate Brown Rice Roasted Almond Mylk

2 T Well Cooked Brown Rice

3-4 Roasted Almonds

3 tsp Cocoa Powder

Date Syrup to taste (alternatives: Jaggery, Maple Syrup)

Dash of Pure Vanilla Extract (skip if you don’t have pure extract)

Pinch of Salt

2 Cups of Water


  • Add all ingredients (except water) into a blender jar
  • Pour in a little water and blend into a creamy paste
  • Add the rest of the water and blend until smooth
  • You could optionally strain this
  • Pour over ice and enjoy your refreshing beverage! ☺️


Tuesday, July 13, 2021

Beet Avocado Wasabi Salad


Close up of Avocado Steamed Beetroot Wasabi Salad in a stoneware bowl. Chapathi and Cutlets blurred in the background in the same bowl.

 πŸ₯‘ I wanted to make guacamole today to have with chapathi. But when I halved the avocado, it was so firm, I just didn’t have the heart to mash it!

So I peeled and cubed it, and stared at it lovingly, waiting for inspiration to flow.


The image of a fabulous salad rose up in my mind. It would be slightly on the sweet side, and carry a complex flavour profile that was worthy of this perfect avocado.


I didn’t know what flavours yet, but I knew without a doubt that steamed beetroot had to be in there! πŸ˜„


So I scrubbed, cubed and put the beets for steaming. They were organic, so I didn’t even need to peel them.


Then the dressing ingredients dropped into my head. Tak. Tak. Tak.


Balsamic Vinegar

Wasabi

Miso Paste


Oh my! πŸ€€♥️


I carefully mixed them with the avocados. And as soon as the beets were nice and soft, I put them in and quickly tossed everything together one last time.


The avos held their shape well for the most part. Some of the edges got mashed, but that worked out well, adding a creamy coating to the beets.


I tasted it.


😲🀀


It was everything I imagined it would be.


So of course I had to tell you all about it! πŸ˜„ Try it.


Here are the approximate ingredient quantities:

1 medium sized Avocado

2 small Beets

1 heaping tsp Miso Paste

1/2 tsp Wasabi

2 tsp Balsamic Vinegar


Notes:

πŸ“ Instead of Miso, you can use some Soy Sauce if you like.

πŸ“ And Balsamic Vinegar can be replaced with a combination of Apple Cider Vinegar and a bit of Jaggery/Date Syrup.

πŸ“  But there’s absolutely nothing that can replace the nose watering goodness of Wasabi!