Showing posts with label Desserts. Show all posts

Tuesday, September 17, 2013

A Recap and a Giveaway - Vegan MoFo 2013 Day 11


Wow, we've just crossed the halfway point of Vegan MoFo! I started out intending to do at least 20 posts this month and hoping to do a few more than that if possible. So completing half the posts in the first few weeks, despite the daily distractions I've been having, what with blog hopping and drooling over the delicious goodies created by other MoFo bloggers, is something I'm really happy about. :)

For today's post, it seems apt to do a recap of all the recipes I've shared so far. Enjoy! :)

My theme for Vegan MoFo 2013 is Raw Vegan Foods.

Day 1 - Raw Almond Mylk

Raw Almond Mylk


Day 2 - Healthy Green Smoothie

Healthy Green Smoothie


Day 3 - Fruit Sweetened Almond Mylk Ice Cream

Fruit Sweetened Almond Mylk Ice Cream


Day 4 - Making Sprouts and Green Cilantro-Mint Chutney(chutney recipe by Dr.Nandita Shah)

Green Moong Sprouts


Day 5 - Raw Almond Mylk Pulp Vadai/Cracker Sandwiches

Raw Almond Mylk Vadai/Cracker Sandwiches


Day 6 - Stuffed Bajji Menasinakayi (Banana Peppers) with Walnut Cilantro Pesto

Stuffed Bajji Menasinakayi (Banana Peppers) with Walnut Cilantro Pesto


Day 7 - Creamy Tomato Basil Soup(guest post by Manasa)

Creamy Tomato Basil Soup


Day 8 - Raw Zucchini Fettuccine and Sun Dried Tomatoes in Cashew Sour Cream Sauce

Raw Zucchini Fettuccine and Sun Dried Tomatoes in Cashew Sour Cream Sauce


Day 9 - Raw Cinnamon Apple Crumble with Date Almond Sauce

Raw Cinnamon Apple Crumble with Date Almond Sauce


Day 10 - Melon Mustard Gazpacho

Melon Mustard Gazpacho


*Phew!*

And now, to celebrate the success of the first half of Vegan MoFo, I'm giving away something special that I handmade just for this occassion. :D

I present to you, the Kitchen Ninja Necklace!

Kitchen Ninja Handmade Copper Pendant

For those of you who don't know, I create vegan art jewellery under the brand name Art by Susmitha. My favourite materials to work with are polymer clay, copper, silver, brass, gemstones and vegan crystal pearls (made by Swarovski). I've been making and selling my jewellery online for about ten years now.

My long time global store is on Etsy - http://artbysusmitha.etsy.com
And I've had an India specific store on ItsHandmade for a little over a year - http://art-by-susmitha.itshandmade.in

Art by Susmitha has its own pages on Facebook and Twitter. And shares a profile with Veganosaurus on Instagram and Flickr.

Kitchen Ninja Handmade Copper Pendant

I made the focal pendant of this Kitchen Ninja necklace with copper. I hand stamped and textured it with special fonts and texturing hammers. Then I fired it to obtain a beautiful rainbow patina, highlighted the letters and finally hand polished it to bring out all the details.

I added the pendant to a long hemp chord and finished it with copper components. You slip the necklace around your neck and adjust the length by sliding the polymer clay bead at the back up and down.

Since I know many girl Kitchen Ninjas and boy Kitchen Ninjas, I designed this necklace to be worn by men as well as women. :)

If you'd like a chance to win this necklace for yourself or for the Kitchen Ninja in your life, visit this link on my Facebook Page and follow the instructions.

Enjoy! :)


Friday, September 13, 2013

Raw Cinnamon Apple Crumble with Date Almond Sauce - Vegan MoFo 2013 Day 9


Raw Cinnamon Apple Crumble with Date Almond Sauce

I thought I'd save this recipe for tomorrow, but then I realised that we're almost half way through Vegan MoFo and I've only shared one measly dessert recipe with you so far! *gasp* That is just not an acceptable way for me to treat my precious blog readers.

Raw Cinnamon Apple Crumble with Date Almond Sauce

There's another reason why I felt like doing a dessert post today. Spirits are at an all time high at Veganosaurus Headquarters. And here's why...


Yes, we got a brand spanking new power adapter for the laptop today. Woohoo!!! :D :D :D

When you look at the way everyone's partying now, you would never believe the kind of drama that happened here just one week ago.

This kind of mood definitely calls for dessert, don't you think? :) Here you go...


Raw Cinnamon Apple Crumble with Date Almond Sauce

Raw Cinnamon Apple Crumble with Date Almond Sauce

2 Apples - chopped into small pieces
1/2 tsp Cinnamon Powder
Pinch of Salt

* Toss everything together in glass dish
* Cover with a glass lid
* Keep in a sunny spot for sun baking for 3-4 hours

6 Seedless Dates

* Soak them in fresh, clean water for 3-4 hours

1/2 C Almonds
2 T Sesame Seeds

* Grind coarsely in a dry jar

How to proceed:

* To 1/4th of the almond-sesame powder, add the dates and their soaking water and grind to a smooth paste
* Add a few spoons of water and blend into a sauce
* Toss the apples with the remaining 3/4th of the almond-sesame powder to form the apple crumble, and place into individual serving bowls
* Spoon the sauce over the apple crumble
* Serve at room temperature or after chilling for a while
* Enjoy! :)

Raw Cinnamon Apple Crumble with Date Almond Sauce

Tuesday, September 03, 2013

Fruit Sweetened Almond Mylk Ice Cream - Vegan MoFo 2013 Day 3


Into the third day of Vegan MoFo. For the past two days, I've been suspended in a state of perpetual hunger. Oh how the grumbling in my tummy competed with the rumbling in the skies! Yeah, the weather we've had here for the past two evenings has been matching the exact parallel I wanted to draw for you to describe my tummy sounds. :oP

For the first two days I made the terrible mistake of visiting fellow MoFo bloggers' spaces first thing in the morning, before breakfast. Today I've become smarter. My blog hopping has begun right after a heavy, filling brunch. And I've additionally equipped myself with cherry tomatoes and bourbon biscuits to pop into my mouth at the very first signs of any cravings.

So phooo, you evil Buffalo Tempeh Wraps and Sourdough Gingerbread, you don't have any power over me! Ain't no Vegan Mac and Cheese or Apple and Blackberry Pie gonna give me the munchies. Humph!

*Pops a tomato into mouth* *munch* *munch* *munch*

Fruit Sweetened Almond Mylk Ice Cream

Today I have my *first* raw dessert recipe for the month. Yes, of course there will be more desserts! Whose blog do you think you're visiting? :D

This is an ice cream made with a base of thick almond mylk and soaked dry fruits. Raw ice creams tend to be lighter and therefore a tiny bit on the icy side rather than smooth and creamy like their cooked counterparts. But they are super delicious, not to mention easy to make and bursting with all the nutrients of the nuts and fruits. So you can have the whole batch of ice cream in one sitting with absolutely no guilt. :)

To make thick almond mylk, follow the steps in this Almond Mylk tutorial. Except, start with 1 C of dry almonds and after they've been soaked and rinsed, blend them with only 3 cups of clean, filtered water (usually the almond to water ratio is 1:6 to make regular almond mylk).

Fruit Sweetened Almond Mylk Ice Cream

4 C Thick Almond Mylk
25-30 Seedless Dates
1/4 C Raisins
Pinch of Salt

* Soak the dates and raisins in clean, filtered water overnight.
* Blend the soaked dates and raisins with their soaking water.
* Pour in the thick almond mylk, add a pinch of salt and blend well.
* Cover and chill in the fridge for a day.

* If you have an ice cream maker, follow the instructions provided in the manual and freeze the chilled almond mixture in it.
* Then pour into an airtight jar and freeze for two more hours before serving.

* If you don't have an ice cream maker, then freeze the chilled almond mixture in an airtight jar for an hour.
* Transfer to a blender and blend well.
* Freeze for another hour.
* Blend once again.
* Follow this freeze-blend-freeze procedure four to five times.
* After the final blend, freeze for two hours and serve.

* You can drizzle agave nectar or jaggery syrup (not raw but soooo yummy) over the ice cream if you like.
* Enjoy! :)

--

By the way, Happy First Annual International Day of Kale! If I had access to Kale, I'd have definitely created a recipe with it for today but since I don't (yet), here's a photo of the first baby kale plant that's sprouted in my kitchen garden right now. Isn't she a cutie pie? :) I can't wait to have fresh, organic kale leaves to harvest soon!

Kale Seedling

Have a wonderful day! :) I'm off to visit more Vegan MoFo blogs now.

Friday, August 02, 2013

Creamy Coconut Mocha Couscous Mousse


As many of you know, I really love tofu. I enjoy it in all kinds of forms - marinated and baked, grilled, scrambled, stir fried, seared...the possibilities are endless with this versatile ingredient.

Tofu was one of the first new (to me) foods that I started to experiment with in my early years of vegan cooking. Though I mainly enjoy it in flavourful, savoury dishes now, in those days, tofu usually got turned into some form of dessert. I have made puddings, mousses, ice creams and cake toppings with it. I have even tried (unsuccessfully) to make jamoon and rasgulla with tofu.

Creamy Coconut Mocha Couscous Mousse

Today I've found other, sometimes better, alternatives for many of the desserts, but when it comes to vegan mousse, nothing comes close to tofu, and silken tofu at that. No other kind of tofu can match up to the creaminess and flavour of the silken kind. Believe me, I've tried with all the local tofus available and though I enjoy many, if not all, of them in other dishes, silken tofu is the only one which hits the spot with mousse.

In India, the only brand of silken tofu I've seen is Mori-Nu. Though I would not normally trust soy products that come from USA, this one I'm more than happy to use because it's clearly labelled as Non-GMO. Plus, they also claim that they don't use any preservatives so that's a bonus.

If it isn't Mori-Nu Silken Tofu, then the only other tofu I would prefer to use in my vegan mousse is tofu that I've made at home from scratch. But I haven't done that in a while now because it's a lot of work. :p

Creamy Coconut Mocha Couscous Mousse

I personally truly enjoy eating good old dark chocolate mousse all by itself, but sometimes I make variations on it when I have visitors over. I mean, one can't keep serving the same dessert to guests over and over again no matter how much they love it. :D

This Coconut Mocha Couscous Mousse is delicious way to wind up a dinner party. It's fairly easy to make and it has a fancy look and texture to it because of the layers. When I've served it to my friends and family, it has definitely made an impression.

Creamy Coconut Mocha Couscous Mousse

Coconut Mocha Couscous Mousse

For the Couscous Base Layer:
1/2 C Couscous
1 T Cocoa Powder
1-2 tsp Instant Coffee Powder
1/4 C Sugar (adjust quantity to taste)
1 T Coconut Oil
1/2 tsp Pure Vanilla Extract or Seeds Scraped out from half a Vanilla Bean
Splash of Malibu or other Rum
Pinch of Salt

* Bring 1/2 C water to boil in a heavy bottomed pan.
* Add couscous, stir and turn off the heat.
* Cover and keep aside for 5 minutes.
* Add all other ingredients, except rum and vanilla extract, and 1/4 C of water.
* Stir continuously and heat for a few minutes until the water is absorbed.
* Take the pan off the stove, add rum and vanilla and mix well.
* Allow to cool to room temperature.
* Place in fridge.

For the Mousse Layer:
1 block Mori-Nu Silken Tofu
1/2 C Cashews
1 T Cocoa Powder
1 tsp Instant Coffee Powder
3 T Coconut Oil
1/4 C Sugar (adjust quantity to taste)
1/2 tsp Pure Vanilla Extract or Seeds Scraped out from half a Vanilla Bean
Generous splash of Malibu or other Rum
Pinch of Salt

* Blend all the ingredients together.
* Add a little water and blend into a thick cream.
* Taste and adjust sugar and flavourings as desired.
* Whip for a few minutes.

To assemble:
* Place some of the mocha couscous in a few serving cups/glasses and press.
* Spoon mousse layer over the couscous.
* Chill in the fridge for 1-2 hours.
* Serve cold.
* Enjoy! :)

Notes:
* Malibu is the best rum to use in the mousse to enhance the coconut flavour but plain rum can be substituted.
* Alcohol can be skipped entirely but mousse tastes best with at least some amount of alcohol in it.
* The cocoa powder has to be of excellent quality.
* I like using Bru Gold instant coffee powder in my recipes but any other high quality, 100% pure, instant coffee powder can be used too.

Creamy Coconut Mocha Couscous Mousse

If you live in India and would like to make this recipe at home, you can source the special ingredients easily by purchasing the Creamy Coconut Mocha Couscous Mousse Rare Ingredients Chef's Box that's been put together by Global Graynz.

Wednesday, July 31, 2013

Vegan Baking Demo at Carrots on Saturday, 20th July 2013


Coconut Almond Sugar Cookie

About ten days ago, I had a vegan baking demo at Carrots, The Healthy Kitchen and Store. I've mentioned Carrots, the first vegan restaurant in Bangalore, in my blog posts many times this year.

Carrots Board

A few weeks ago, Krishna, the co-founder of Carrots, invited me to teach baking/cooking classes to his staff. Many people who follow my blog and facebook page have asked me to conduct vegan baking classes, so I figured that since I was going to teach some recipes to Chef Ram (Carrots' new Bakery Chef), we could extend that into an interesting demo event. We decided on a Monsoon Afternoon Chai and Baked Goodies theme.

Carrots Demo Poster

About 11 people signed up to attend the event but we had a bunch of walk-ins and ended up with a total of 15 participants. A couple of them were my good friends who attended to support me but most others were people I met for the first time. I was very happy that I got to meet and speak with all these new, interesting people. It was also nice to hear that some of them have been following my blog and trying out the recipes here for a while now. :)

The event went well for the most part and despite certain imperfections, many participants said that they enjoyed the demo and would be trying out the recipes at home once I posted them here.

My darling hubby, Milesh, patiently recorded the demo. It has taken me some time to edit the videos. I wanted to do this last week but I was travelling. As soon as I got back this week, I started working on the videos so I could share them here along with the recipes. I've divided them into multiple parts for the purpose of organisation.

I apologize in advance for the annoying background noises in the videos. The screaming toddler, creaking buffet vessels, clanking cutlery, the buzz of customers and staff talking in the background - we hadn't anticipated any of these disturbances. The expectation was that the buffet would be closed and the crowd cleared out by 3:30 or so, leaving us with a fairly silent space to do the demo. The participants themselves were watching the demo with rapt attention and were NOT the ones responsible for the ruckus. :p

Now without further ado, let's move on to the recipes you've all been waiting for.

Vegan Baked Goodies

--

Basic Vegan Chocolate Cake


Dry Ingredients:
1 1/2 C Whole Wheat Flour or Maida
3 T Good Quality Cocoa
1/2 tsp Salt
1 tsp Baking Powder (or 1/2 tsp Baking Powder and 1/2 tsp Baking Soda)

Wet Ingredients:
3/4 to 1 C White or Brown Sugar
5 T Coconut or Olive Oil
1 T White or Apple Cider Vinegar
1 tsp Coffee Powder - or Vanilla/Orange/Almond/Mint Extracts
1 C Cool or Cold Water

* Preheat oven to 180°C / 350°F.
* Lightly grease an 8 or 9 inch, round or square cake pan (no greasing required if using a non-stick pan).

* Sieve the dry ingredients together a few times.
* Whisk all the wet ingredients (except oil) together until at least half the sugar has dissolved.
* Add the oil and whisk some more.

* To make the cake batter, pour the wet ingredients over the dry ingredients and quickly mix until there are no large lumps.
* Pour the cake batter into the prepared pan and immediately pop it into the preheated oven.
* Bake for 40-45 minutes, until a few cracks have formed on the cake's surface.
* Cool completely in the pan.
* Slice and Serve.
* Enjoy! :)

--

Whole Wheat Buns


For the yeast proofing:
1/2 C Warm Water
2 tsp Active Dry Yeast
2 T Sugar

Dry ingredients for the dough:
3-4 C Whole Wheat Flour
1/4 C Sugar - can be less
2 tsp Salt
2 T Flax Seed Powder

Wet ingredients for the dough:
1 C Vegan Mylk or Water
3 T Coconut Oil or Olive Oil

* Add 2 T sugar and yeast to 1/2 C warm water.
* Stir and keep aside for 10-15 minutes, until the yeast has dissolved and is frothing a bit.

* Mix 3 C of the whole wheat flour with the remaining dry ingredients in a large bowl.
* Add the oil and mix.
* Add the yeast mixture and 1 C vegan mylk or water and whisk.

* Gradually add whole wheat flour and mix until the dough comes together into a rough ball.
* Transfer to a floured surface and knead very well until you get a soft, elastic ball of dough.
* Pour some oil in the large mixing bowl, place the ball of dough in it and twirl to coat with oil.
* Cover and allow to rise in a warm spot for 2 hours, until doubled in volume.

* Press down on the risen dough and shape into buns.
* Optionally stuff the buns with your favourite vegetable mixture (a potato palya filling tastes yum).
* Place the buns on a tray, cover and keep aside for 1 hour, until the buns have risen well.

* Preheat oven to 190°C / 375°F.
* Bake the buns for about 40 minutes.
* Cool in the tray for 10 minutes.
* Transfer to cooling rack and cool well.
* Enjoy! :)

--

Quick and Easy, Gluten Free Almond Coconut Cookies


1 C Almond-Sesame Flour (grind almonds and sesame seeds in a ratio of 3:1 to get this flour)
1 C Desiccated Coconut Powder
1/2 C Bajra (Pearl Millet) Flour
1/2 C Sugar
1/4 tsp Salt
Water

* Preheat oven to 250°C / 480°F.
* Lightly grease a baking tray or line it with aluminium foil.

* Mix all the dry ingredients.
* Add a little water at a time to form a stiff dough.
* Pinch off small balls of the dough and flatten into 1 1/2 inch cookies that are about 1/4 inch thick.

* Bake for 10 minutes.
* Allow to cool slightly and transfer to wire rack.
* You can have it warm or at room temperature.
* Enjoy! :)

--

Vegan Mylk and Masala Chai


For the Nut and Seed Mylk:
1/4 C Cashews
1/4 C Sesame Seeds
1/4 C Flax Seeds
Water

* Grind the nuts and seeds together into a fine powder.
* Add a little water at a time and blend to get a smooth, creamy paste.
* Add more water and blend until you reach the desired consistency.

For the Masala Chai:
3/4 C Water
3 Cloves
1 Cardamom Pod
1/2 inch Cinnamon Stick
1/2 inch Fresh Ginger - crushed
5 Black Pepper Corns - crushed
1/2 to 1 tsp Sugar (optional)
1/2 tsp Tea Powder
1/2 to 3/4 C Nut and Seed Mylk (should not be too thick)

* Boil the spices in the water for a couple of minutes.
* Add sugar at this point and boil.
* Add the tea powder and boil for a few seconds.
* Reduce the heat to low, quickly pour in the mylk and stir.
* Bring to a short boil and turn off the heat.
* Strain and serve hot.
* Enjoy! :)

--

If you attended the demo, I'd love to hear your thoughts about how you liked it and how we can make future events a better experience for you.

Thanks for reading and watching all the videos. When you try out the recipes, do leave a comment here letting me know how you like them. :)

Monday, June 17, 2013

Spiced Pumpkin Mousse - guest post by Rithika of Vegan on the Prowl


Today's special guest blogger, Rithika, is baker extrodinaire at The Green Stove, a vegan bakery in Mumbai, India and blogger at Vegan on the Prowl where she shares her innovative, healthy recipes and stories about her adventures around the world in quest of vegan food. :)

To my knowledge, The Green Stove was the first vegan bakery in India when it was launched. Rithika makes some amazingly drool worthy everyday baked goodies and desserts as well as gorgeous ones for special occasions like weddings, birthdays, anniversaries, etc. You can visit The Green Stove's Facebook Page to get updates about the vegan goodies that are baked.

Rithika and I have been online friends for a few years now. It's hard to believe that we have met in person just one time, on her visit to Bangalore a couple of years ago. She gave me this beautiful dragonfly glass jar that she hand painted with love and I still keep it in my home and cherish it. :)

Hand painted glass jar by Rithika

Now without further ado, let's move to Rithika's recipe for a delicious, innovative and healthy...dessert (but of course)! :) Thanks Rithika! It's a pleasure having you over on Veganosaurus.

--

This guest post is very, very long overdue. Imagine being late on a submission deadline and multiply that by ten, that is how long ago Susmitha asked me to write a guest post for her. She was nice enough (multiplied by ten again) to politely remind me that my deadline was long gone and that last push was enough for me to get my act together. I have only met Susmitha once over a lovely vegan buffet lunch in Bengaluru but I feel like we've been somehow connected from a previous life. She is the most kindhearted, proactive person I know and I love all the work she is doing in Bengaluru to promote compassionate eating and living. I only wish we lived closer so it would push me to do more.

With so many of the recipes on her blog being sweet, I thought it was only apt to come up with something that would go with her persona and her blog. So here is my recipe for a Spiced Pumpkin Mousse.

Spiced Pumpkin Mousse

Spiced Pumpkin Mousse

Ingredients:
3 cups freshly pressed, light Coconut Milk
1 cup peeled and cubed Yellow Pumpkin
1/2 tsp Cinnamon
1/4 tsp All Spice Powder
1/4 tsp Nutmeg Powder
3 tbsp Raw Organic Sugar*
2 tbsp Arrowroot Starch
1/2 tsp Turmeric

*Use a sweetener of your choice and also as much as you like. I find 3 tbsp to be more than enough but you can increase the quantity depending on when it hits your sweet spot!

Steam the cubed Pumpkin for about 15 minutes and purée it until no lumps remain.

In a small bowl, mix the arrowroot starch with a little bit of the coconut milk and stir well until it has dissolved.

In a thick bottomed vessel, add the coconut milk, spices, pumpkin purée and turmeric and heat it over a low flame. After about ten minutes, add the starch mixture and keep stirring continuously. The mixture will eventually start to thicken. When it reaches a thick soup consistency (should take less than 10 minutes) take it off the flame and pour it into individual bowls. Refrigerate for an hour or till it sets into a mousse.

Serve cold.

Spiced Pumpkin Mousse

Monday, May 27, 2013

Video and Recipes from my Vegan Demo at Soul Kadhi


On 18th May, I was part of a vegan cooking demo and lunch event at Soul Kadhi. I had a really nice time talking about vegan food and showing people how to make a bunch of scrumptious, Indian, vegan dishes along with Chef Ajay.

The response was very good. There were about 20 participants and all of them said they found the demo interesting and the food delicious. Less than half the attendees were vegan. The rest were people who wanted to learn vegan cooking for various reasons. It was all totally worth the effort! :)

My hubby captured the demo on video and I spent some time editing and putting it together. The video explains the general outline of the recipes and also contains a few pointers about making vegan mylks and curds. I've shared all the recipes below, after the embedded video. Between the two, you will be able to clearly understand all the steps involved and easily make the recipes at home yourself.

If you were present for the demo, do drop me a line here in the comments section to let me know how you liked the experience. :)

Vegan Demo Video


I already have a blog post explaining the process of making Peanut Curds in detail.

In all the recipes below, the quantities of ingredients are approximate and certain quantities are not even mentioned. As you prepare the food, taste and adjust often to suit your preferences.
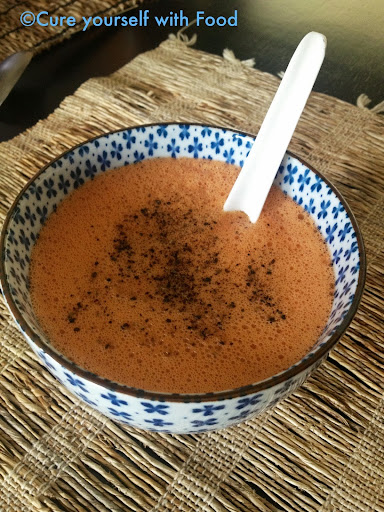
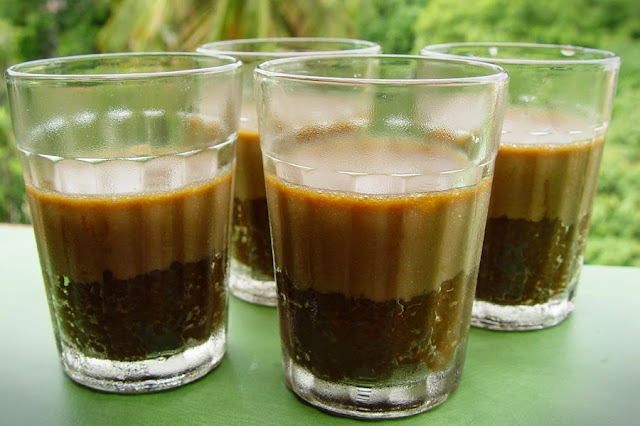
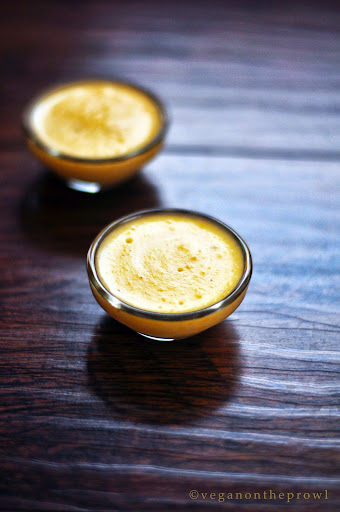
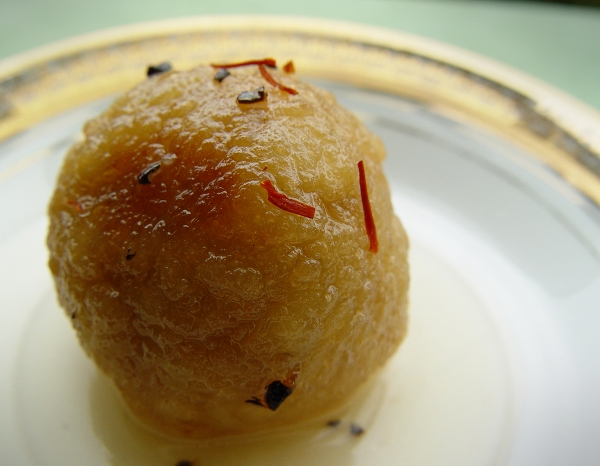
Basundi

1/2 C Cashews
2-3 tsp Sugar
Small pinch of salt
Sliced Pistachios
Crushed Saffron/Elaichi

In a dry jar, grind together the cashews and sugar into a fine powder.
Scrape down the sides and grind again until the cashew starts to release its oils and becomes slightly buttery.
Add a small pinch of salt and a splash of water and blend to a smooth paste.
Add a little more water and blend into a cream, it should have the consistency of condensed milk.
Pour into a bowl and garnish with sliced pistachios and crushed saffron and/or elaichi.
Chill for at least half an hour and serve.

Notes:
This dish doesn't need to be cooked and you can make it completely raw by using soaked dates in place of sugar.
If you like, you can heat the Basundi for a few minutes while stirring continuously and chill it. This makes it a little more creamy but is not really a necessary step.
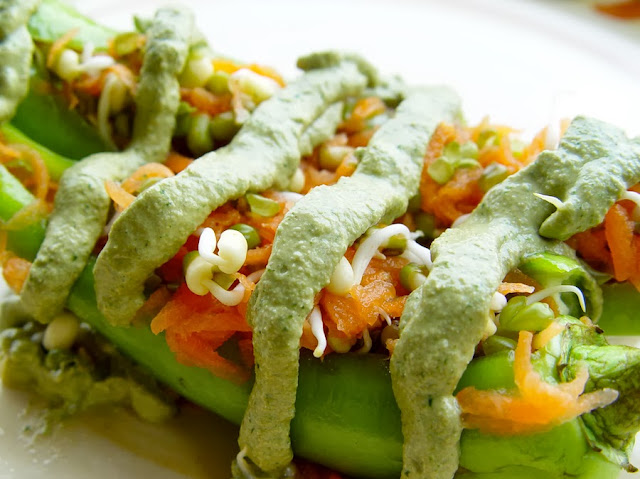
Tamarind Tofu Tikka

500 gms Firm Tofu
1 Onion
1 Capsicum (preferably red or yellow)
1 Tomato
1-2 T Thick Tamarind Paste
1/4 tsp Dhania Powder
1/4 tsp Jeera Powder
1 tsp Kasauri Methi
1 tsp Chilli Powder
Mustard Oil
Chopped Green Chillies
Chopped Cilantro
Salt

Drain and gently squeeze the tofu to remove water.
Make the tofu into 1 inch cubes.
Cube the vegetables.
Mix salt, tamarind paste, spices, herbs and mustard oil with a few spoons of water to get a creamy marinade.
Toss the cubed tofu and vegetables in the marinade.
Cover and keep aside for a minimum of 30 minutes.
If you have more time then marinate overnight in the fridge to meld the flavours very well.
Skewer and grill on high in a convection oven or tandoor for 8-10 minutes.
Serve hot.

Notes:
You can alternately roast the skewered tikkas on a hot, non stick pan that's greased with oil, turning them occasionally to ensure even grilling. In this case, don't add the chilli powder in a marinade because it will create a lot of smoke. Instead, sprinkle the chilli powder on top of the tikkas after they have been grilled.
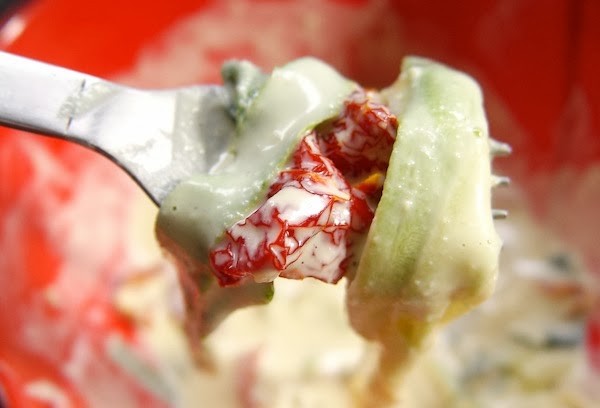
Malai Kofta

For the Kofta Balls:
4 Potatoes - boil/steam, peel and grate
200-250 gms Tofu - drain, rinse, gently squeeze to remove water, grate
2 T Corn Starch
Elaichi Powder
Pepper Powder
Salt
Dry Fruits/Nuts - chopped finely and mixed

Gently mix the grated potatoes and grated tofu together with a fork or spoon.
Add the remaining ingredients and mix well.
Dust a clean surface or a plate with corn starch.
Rub corn starch on your palms and fingers.
Shape the potato/tofu mixture into balls and make a hole in the center with your finger.
Place some dry fruits/nuts in the hole and close the ball.
Shape into elongated balls.
Deep fry in hot oil until golden.
If you want to make them more healthy, instead of deep frying, grease the kofta balls with a little oil and bake in a preheated oven at 200 C for about 15 minutes, until the balls have browned lightly.
Drain on tissue paper and keep aside.

For the Malai Sauce:
Ginger-Garlic Paste
Green Chilli Paste or Pepper Powder
Thick Cashew Cream
Elaichi Powder
Salt
Sugar (optional)
Keora/Kewra Water (optional)

Stir fry the ginger-garlic paste in a dry pan or optionally with a spoon of hot oil.
Add the green chilli paste (if using) and stir.
Add the thick cashew cream (this could be raw or cooked cashew cream, either way is fine).
Add salt, elaichi powder and pepper powder (if using) and stir.
Optionally add sugar and keora water and mix.
Let the sauce simmer for a few minutes.
Adjust the thickness of the sauce with some water.

How to proceed:
While the sauce is simmering on low heat, the prepared kofta balls and toss gently.
Add a splash of water to the sauce to keep it in a constant simmer (so it doesn't start boiling vigorously).
Simmer the koftas for a minute and turn off the heat.
Serve hot with rotis or pulaos.
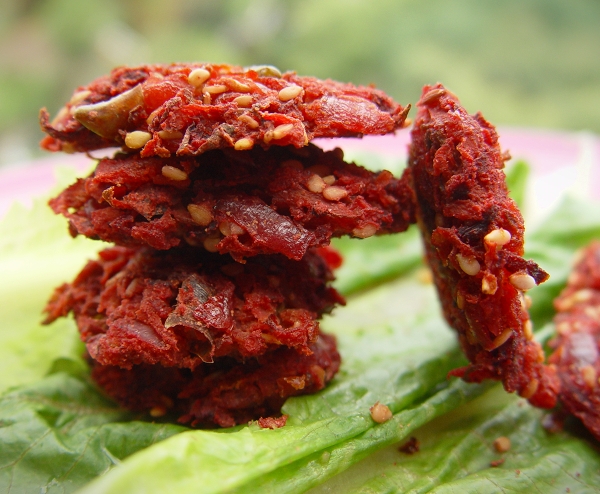
Kadhi Pakora

For the Pakoras:
Besan Flour
Ajwain
Sliced Onion
Chopped Curry Leaves
Chopped Cilantro
Chilli Powder
Salt
Oil

Mix everything with some water to make a thick batter.
Heat oil and drop spoonfuls of the batter.
Deep fry while occasionally turning over, until crispy and golden brown.
Drain on tissue paper and keep aside to cool.

For the Kadhi:
Peanut Curds
Besan Flour
Turmeric Powder
Oil
Dhania
Jeera
Finely Chopped Garlic
Thinly Sliced Onion
Amchoor Powder
Roasted Red Chillies
Salt

Make a thick batter by whisking together besan, peanut curds and turmeric powder.
Heat a spoon of oil in a pan.
Add whole jeera and dhania and stir for a few seconds, allowing them to crackle.
Add the finely chopped garlic and stir.
Add the thinly sliced onion and stir fry until the onion is translucent and lightly browned.
Pour in the peanut crud-besan batter and stir well.
Add amchoor powder and salt and mix well.
Adjust thickness of the sauce with a little water.
Add the dry roasted red chillies and simmer.

How to proceed:
While the sauce is simmering, add the deep fried pakoras.
Mix for half a minute and turn off the heat.
Optionally season with toasted mustard seeds, dhania, jeera and curry leaves.
Serve over hot, steamed rice.
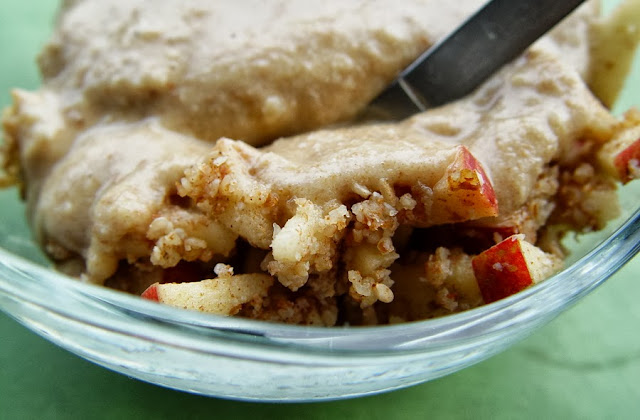
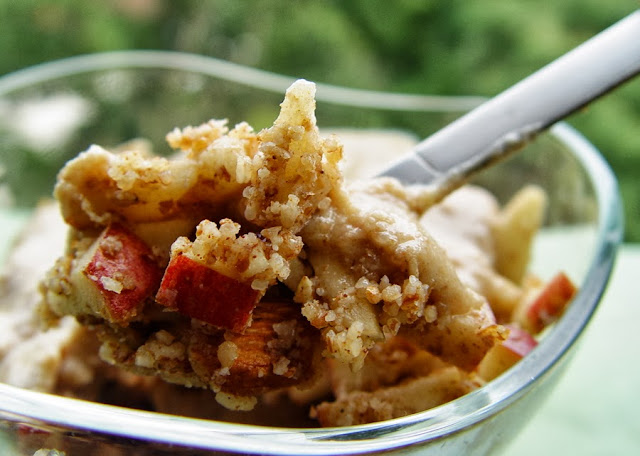
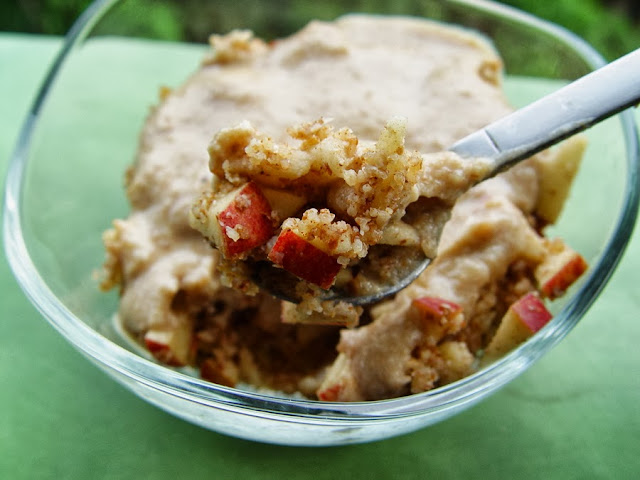
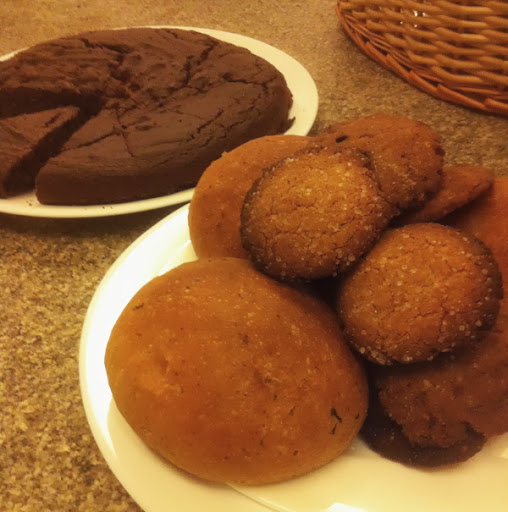
Carrot Halwa

4 Large Carrots - grated
1/2 C Thick Cashew Cream
2-3 T Sugar
1 T Oil
2 Cloves
2 Elaichis (crushed)
Raisins
Chopped Dates
Slivered Almonds

Grate the carrots.
Heat oil in a heavy bottomed pan, add the cloves and stir.
Add the grated carrots.
Stir fry until the carrots are cooked and have reduced in quantity.
Add thick cashew cream, stir and cook for a few minutes.
Add crushed elaichi and sugar and stir for a minute.
Mix in the sliced almonds, chopped dates and raisins and turn off the heat.

Notes:
You can reduce the sugar or eliminate it completely and add more dates and raisins for sweetness.
If you want to avoid oil, steam the carrots whole and grate them, that way you can completely skip the stir frying process.
You can add finely ground cashew powder instead of cashew cream.

Enjoy! :)

Thursday, April 04, 2013

Spicy Tamarind Brandy Sorbet


Summer's here. A wretchedly hot one at that! All cold things are a welcome bliss. So it's no wonder that when my beloved grocery store, Towness announced a recipe contest for their customers, my brain cogs turned towards icy ideas.

The theme for the contest was tamarind. Though puliyogare is at the top of my favourite tamarind based dishes, I wanted to be creative with my recipe submission. And I mean a little more creative than my usual navane puliyogare (made with foxtail millet instead of the traditional rice) which many of you tasted at VGF in Feb.

So I thought of making a tamarind based ice cream. But that idea flew right out the window the moment I started picturing how any kind of mylk would coagulate as soon as I started stirring the tamarind in. So I decided on a sorbet.

Spicy Tamarind Brandy Sorbet

It started out being a goody goody sorbet, but somewhere in the process of putting random ingredients together, I felt the urge to slosh some brandy into it. *slurp* It added a kick and enhanced all the flavours. I tested it out on a couple of willing 'guinea pigs' (no animal testing here folks, only human testing). Two out of the three people who tried it said it was really good. And since I also enjoyed it thoroughly, I declared it tried, tested and contest worthy.

And guess what, it won me a dinner voucher to Imli!!! Yay! :D

I've heard many people speak well about this place so I'm really looking forward to going. I'm getting super hungry just looking at their menu. Yum!

There were 30+ recipes submitted and 15 of those were shortlisted by the judges for trial. They picked the prepared food from the 15 peoples' homes this last Sunday and after tasting everything for themselves, the winners were announced yesterday.

Towness Tamarind Recipe Contest Winners

Here's the recipe if you want to try this out yourself. If you don't consume alcohol, don't worry, just skip the brandy and add a little more chilli powder. It'll still be yummy. :)

Spicy Tamarind Brandy Sorbet

2 T tamarind paste
2 T date syrup or jaggery syrup
1/4 tsp chaat masala
1/4 tsp red chilli powder
2 C water
Big splash of brandy *hic*

Blend everything together.
Transfer to an airtight container and freeze for 2 hours.
Whip vigorously and freeze again for 5-6 hours.
Transfer to a grinder jar and blend for a minute.
Put back into the airtight container and freeze for two to three more hours.
Serve in small scoops.
Enjoy! :) *hic*

This is this the point where I usually end my blog posts, but I realized that while I was talking about prizes, I had to tell you about the one I won in Feb. Heheh yep, apparently I'm on a prize winning streak since I won that Green Foodie Recipe Challenge by The Alternative as well as the VVP T-Shirt in December. :D

Towness had a Food Photography contest for Valentines month and my Baked Akki Rotti Bites photo got the 2nd Prize. :)

Baked Akki Rotti Bites Photo

Towness Food Photography Contest Winners

When I was asked which restaurant I'd like to have a romantic dinner at, I opted to get vouchers to my favourite grocery store instead. So for the last month, I've been having many romantic dinners. Thank you Towness! :)

Tuesday, March 19, 2013

Vegan Hazelnut Chocolate Cake and oh so many updates!


I made this deliciously hazelnutty chocolate dessert for my dad's birthday. Thought it would be a great come back recipe to share here after a long hiatus from blogging.

Vegan Hazelnut Chocolate Cake

Before the recipe though, I thought I'd give you a few updates about what's happening with me.

It's been nearly a month since my last blog post and longer than that since my last recipe post. I feel bad to have ignored my blog all these weeks, however, the reason for this is that there are so many interesting things happening in my *real* life that I haven't had much time to be online. :)

VGF

The last I wrote here, I was talking about the VGF event that hubby and I were in the process of organising (with help from my parents and sis) for 24th February 2013. The vegan fair was overwhelmingly successful! :) The response was just wonderfully heartening! People, vegans and non vegans alike, turned up in droves even before we were ready to begin the event.

I had made double dark chocolate chunk walnut orange cookies, cinnamon rolls, pizzas with a chunky herbed tomato sauce and foxtail millet puliyogare to sell at my table. VGF started at 12 noon and by 2:15 pm, my stall had been cleaned out. Haha

It worked out perfectly too because I was scheduled to do a demo on extracting mylk out of peanuts and turning it into curds at 2 pm, so as soon as I ran out of food to sell, I was able to rush to the demo area without having to worry about my stall.

By 4 pm, most tables had sold out their goodies. Even though we'd scheduled the event to be from noon to 7 pm, by 5:30, we'd all started to pack up. :)

It was nice to see have so much support and interest from everyone. Many people even hung around for a few hours just eating and chatting, without being in any rush to leave.

Our friend Sharath captured some beautiful photographs at the event.

VGF - photo by Sharath Ramanna

VGF - photo by Sharath Ramanna

VGF - photo by Sharath Ramanna

VGF - photo by Sharath Ramanna

You can view the whole VGF album on his Facebook page Sharath Ramanna Photography.

The whole VGF experience was so encouraging that we've decided to make it a regular vegan event. Something to have 3-4 times a year. We're also full of ideas to make the next event even *more* interesting and fun for everyone.

Vegan cooking demo

A couple of weeks ago, I was contacted by a person about doing a vegan cooking demo at a local restaurant. I've been in talks with the people involved and planning out the menu and recipes. We're going to have a tasting session later this week and then I'll announce all the details of the event here. :)

More on the Vegan front

Apart from VGF and this demo, I have been busy with one more project that is going to take veganism in Bangalore to a whole new level. Something awesome is going to happen within the next few weeks. I'm not going to give anything away since things are still at the planning stage right now, but I will say that I'm *really* excited about this! You'll just have to wait and see what the big deal is all about. :D

Stuffing my face

Other than being busy hatching plots to turn the world vegan, I've also been getting plump eating at the very first all vegan restaurant that has opened up here in Bangalore. WOOHOO!

Carrots launched a little over a month ago. Even before they were officially open for business, Krishna (whose baby Carrots is), invited us over for a series of food tasting sessions. The chef, Anantha, isn't vegan but he does cook some really delicious plant based fare. It was nice to be involved with the menu creation process, give inputs and share vegan recipes and tips with him.

Now every time I want to eat out with friends, the first place that comes to mind is Carrots. Ah the joys of being spoilt for choice!

I'll do a full feature on the restaurant here on my blog at some point in the near future, but until then, I wanted to mention the place here so I could tell those of you who live in and around Bangalore to definitely visit and enjoy a meal at Carrots. And those who aren't close by, Carrots is a great reason to plan your next holiday at Bangalore. :)

Here are a few pics I clicked of the dishes at Carrots to entice you.

Carrots Vegan Restaurant

Carrots Vegan Restaurant

Carrots Vegan Restaurant

My virtual life

Even though I haven't been updating my blog as regularly as I used to, I have been sharing food related posts via two of my favourite phone apps - Instagram and HowDo.

If you're on Instagram, you can find me @veganosaurus. If you're not, or you're getting over your Instagram app addition, you can still view all my photos on your computer's browser at my online Instagram profile page - Veganosaurus without any need to login.

I'm really enjoying clicking photos on my phone and applying the filters on the app to them. I also regularly share my Instagram pics with my related Facebook pages. The food photos go onto Veganosaurus and the jewellery photos go on to Art by Susmitha.

I have been addicted to HowDo for a while now but ever since they enabled the feature to embed HowDo clips onto websites and blogs, my obsession with the app has reached a whole new level! It's not easy clicking step by step pictures during the process of cooking/baking. For one thing the phone can get quite messy, what with being handled with ingredient covered hands. Regardless, these days, I often have the phone next to me on the kitchen counter so that I can grab pics as I prepare food.

Once the food is ready and I have the final pic, I sit down and record the voice clips (often with additional sounds like the blender running or microwave beeping) and put the HowDo together. I then upload my HowDo tutorial and watch it at least two times with deep satisfaction. I really seem to like the sound of my own voice. Narcissistic much? :P

I recently created a dedicated HowDo section on my blog where you can see all my tutorials in one place. I'm hoping I will update it with more discipline than I do my blog's recipe index. :D

Vegan Hazelnut Chocolate Cake

Now that I've made you read all my updates, I'll finally get to today's recipe. I've created a HowDo tutorial for it. It's a lot more fun to click pics and record instructions by talking rather than typing it all out. I'm sure you'll have more fun watching the clip than reading the recipe.

I'll list out the ingredients for your benefit though.

For the cake:
150 gms hazelnuts
3/4 C cocoa powder
1 C whole wheat flour
3/4 C brown sugar
2 T flax seed powder
1/2 tsp baking soda
1/2 tsp baking powder
1/2 tsp salt
1 T apple cider vinegar
1 C water

For the cream:
100 gms hazelnuts
1 T cocoa powder
2-3 T sugar
pinch of salt
1/4 C water

Procedure:


Enjoy! :)

Wednesday, February 13, 2013

Pepita Oatmeal Raisin Raisin Cookie Bars - guest post by Somer of Vedgedout


This month's guest post is from my friend Somer of Vedgedout. She has shared the recipe for a delicious Valentine's themed treat. It looks super yummy and easy to make so I'll be giving this recipe a try very soon.

Pepita Oatmeal Raisin Cookie Bars

We had a vegan food swap recently and a few days ago, I received a package filled with all kinds of delicious vegan goodies from Somer. So the timing for this post is perfect because I wanted to share a photo of my stash with all of you.

Somer: Goodie Bag

There's Chia Peanut Butter (I'm saving this so haven't opened the jar yet), Hazelnut Chocolate Butter (orgasmic!), Probiotic 'Cheesy' Almonds (yummers!), Textured Soy Protein Curls (nom!), Wild Orange Essential Oil (*deep, content sigh*), a bar of Handmade Soap (smells amazing!), the Winter 2012-13 issue of Vegan Health and Fitness Magazine...

...and the best one of all, Cocoa Grounds which can be *brewed* like coffee!!! :O

Thanks to Somer, hubby and I have been starting our mornings with this awesomeness!

Somer: Brewable Chocolate

Thank you so so so much Somer for spoiling me with all these goodies. *Super Hugs* You are awesome and I'm going to rig all future vegan swaps to have you as my partner. :oP

Before we move on to Somer's post today, you should read her remarkable Vegan Journey. I also urge you to check out the fantastic Green Smoothie Challenge which she has designed after putting in a lot of time and effort. Even if you don't follow the challenge completely, all the delicious recipes in it will surely inspire you to eat at least a few super healthy meals.

And now, without further ado, on to Somer's post. :)

--

In the Pan

Sweets for the Sweet


Hey, I'm Somer from Vedged Out. I'm totally excited to be guest posting here at Veganosaurus. Especially so close to Valentines Day! Thanks Susmitha for inviting me! :)

My husband isn't really into desserts, cookies or cakes. So I don't bake as often as I'd like because I'm usually the one who ends up polishing off the goods or trying to pawn them on some poor unsuspecting neighbor. Like any of us though, he does have a few weaknesses in his very slight sweet tooth AND since it's a special holiday, I thought I'd make a treat that he does actually love. I'm sure you'll love it too.

Pepita Oatmeal Raisin Raisin Cookie Bars

  • 2 C. whole wheat pastry flour
  • 1 C. rolled oats
  • 1 C. organic sugar
  • 1 C. raisins
  • 1 C. pepita seeds (pumpkin seeds)
  • 1 t. salt
  • 1 t. baking powder
  • 2 t. ground cinnamon
  • 1 T. flax seed powder
  • 1/2 C. plant milk of choice
  • 1/3 C. melted coconut oil
  • 2 t. Mexican vanilla
  • 3 T. water

Method: Preheat oven to 350°, In a large mixing bowl combine the first 9 ingredients (all the dry stuff). Then stir in the last 4 ingredients (the wet stuff). Press dough into a 9x13 inch baking dish. Cook for 30-35 minutes on a lower rack in the oven so that the top doesn't get overly browned. Let cool for a few minutes before slicing into bars and serving.

If your Valentine prefers dark chocolate chips and chopped pecans to raisins and pepita seeds, go ahead and swap em out. I won't tell. ;)
xoxo & Happy Valentines,
Love, Somer

Sunday, December 23, 2012

Homemade Vegan Xmas Goodies - guest post for The Alternative


Want to know how to make the three delectable goodies in the picture below? The Alternative, an online social change publication, asked me to do a kitchen experiment piece for them with recipes, pictures and a comparison between homemade vs. store-bought. Visit my article on their website to read about why I think it's a great idea to make vegan treats at home instead of buying them off the shelves this festive season. And learn to make Vegan Gingerbread Cookies, Vegan Chocolate Brandy Balls and Vegan Spiced Fig and Persimmon Chutney.

Click on the picture below.

Homemade Vegan Christmas Goodies

Monday, October 22, 2012

Sweet Potato Jamoon Vegan MoFo day 15


Umm remember how I didn't do a blog post on Friday? Well, today's post is going to totally make up for it, plenty and more. It's a super awesome Vegan Jamoon recipe!!! Yeah!

Yes, yes, I do know it's not a part of this week's Main Courses theme, nor last week's Snacks and Starters theme for that matter, but who cares? It's Dessert! And *everything* moves aside for Dessert. :D

Vegan Gulab Jamoon

Many of you might already know about my lengthy quest for the perfect Vegan Gulab Jamoon. I even spoke about it on a video two weeks ago when GiGi interviewed me for her weekly program, Who Dat Vegan on her blog Veganville.

It started way back when hubby and I lived in Bloomington, IL. I had made a *large* quantity of Vegan Therattu Paal (Khova) out of soymilk. It's a traditional dessert made by boiling milk while stirring continuously until it turns into a thick cream, then adding jaggery (or sugar) and cardamom and cooking it to a very thick, shape-able consistency. I think I'd made it for some festival and after hubby and I had eaten plenty, the rest had been sitting in the fridge for a couple of days.

One evening, I decided to attempt making Jamoon out of it. I vaguely remembered how my grandma used to make them out of Khova when we were living in a big, happy joint family. My grandpa used to bring these pre made packages of Khova and grandma, my mom and my aunts used to mix it with maida (white flour), shape balls, deep fry them and soak them in sugar syrup.

So I mixed a random quantity of flour and a pinch of baking soda (or was it baking powder?) with the Khova and made Jamoons. I was thrilled with the results! The Jamoons seemed especially delicious since it had been over a year since I'd become vegan and I hadn't even eaten non-vegan Jamoons for a long time before that. But alas, I never wrote down the quantities or exact method I followed to make the Jamoons and to this day I regret it!

Vegan Gulab Jamun

After that, my next attempt at Jamoons was only after returning to Bangalore. The result was a huge disappointment! The balls were thick skinned and rubbery and did not absorb any sugar syrup. :( This was especially painful since I'd spent over an hour in front of the stove, stirring soymilk to turn it into the Khova that went into the Jamoons. And that was only the first of my frustrating Jamoon attempts.

I unsuccessfully tried making Jamoons with a soymilk powder and tofu a few times over the years. With each attempt that was a flop, I used to get disheartened and swear I'd never bother making Jamoons again. Then again on a day I was in a particularly adventurous mode, I'd give it another go and end up feeling disappointed all over again.

Then last year during Vegan MoFo I made Jamoons again, following Richa's recipe from her blog Vegan Richa. They were made of almonds and oats and were delicious, but their texture pretty different from the Jamoons I had eaten while growing up.

My next attempt was a few months later, when I suddenly had a light bulb moment of deep frying cupcake batter and soaking that in sugar syrup. The result was yummy! Slightly more close to 'real' Jamoons. But I had made the mistake of frying the Jamoons in coconut oil, so upon refrigeration, they became hard and more like Baadushas than Jamoons. I figured I'd make them again with oil that doesn't harden upon chilling and then share the recipe here but I guess I must've finally gotten bored of trying to make Jamoons, so I never got around to doing it.

I finally remembered Jammons again last week, after all this time, when someone on our Vegan Bangalore facebook group asked for a vegan Jamoon recipe. That's when Dr.Varadarangan shared a link to his wife's fantastic Sweet Potato Jamoon recipe on their website, Prevanka. The moment I read the recipe, I just knew I had to try it out. And the next thing I knew, I was ordering sweet potatoes.

This Jamoon recipe is the closest I have ever gotten to my grandmother's Khova based Jamoons. They could be a little more soft so they absorb the sugar syrup better, but other than that, the taste and texture were really impressive. All I need to do is learn to mix the dough with a lighter touch to make the balls more fluffy and I know I'll hit the perfect Jamoons. Finally! :)

I reduced the quantities a little and added a bit of saffron for garnish, but other than that, I pretty much followed Ms.Veena Varadarangan's original recipe. I thought I'd expand on the step by step details of the method below, so that people who would be attempting Jamoons for the first time don't make the mistakes that I've made in my previous Jamoon-making experiences. A reliable recipe is the key to making good Jamoons, but the precise method of making them is just as important.

Vegan Gulab Jamoon

Vegan Sweet Potato Jamoons

For the Jamoon Balls:

500 gms Sweet Potatoes (3 large sized ones)
1 C All Purpose Flour (loosely packed)
1/4 tsp Baking Soda (I think I'll try Baking Powder next time)
2 tsp Sugar
Pinch of Salt
Sesame Oil for Deep Frying.

For the Sugar Syrup:

1 C Sugar
1 C Water
2 pods Cardamom
Pinch of Saffron

Steam or boil the sweet potatoes until tender.
Peel and mash them well.
Sieve together the all purpose flour and baking soda.
Add the flour to the sweet potato and mix gently, without kneading.
Do not add any water, just mix in enough flour to form a soft dough.
Cover and keep aside for 15-20 minutes.
Pinch off bits of dough and very gently and quickly shape them into 1 inch balls (I got around 30-35 balls).
If the balls get pressed too much, they will become dense and not absorb the syrup, that's why it's important to get the balls as smooth as you can without pressing too hard.
Cover and let the balls sit for 5-10 minutes.

Heat the sugar and water together in a wide pan.
Stir until the sugar melts.
Crush the cardamom pods to coarsely powder the seeds and add.
Simmer on a low heat for a few minutes, until it becomes a thin, sticky syrup.
Turn off the heat and add a few strands of saffron.
Cover and keep the syrup warm.
If the syrup cools a lot before the balls are done, then warm it up again on a low flame, for a few minutes before adding the balls.

Heat sesame oil in a wok and deep fry the balls until they are golden brown.
The heat should be on medium-high so the balls cook well on the inside and outside.
If the flame is too low, the balls won't expand and if it is too high, then the outside will brown too quickly and the insides won't get cooked.
Place the balls on a tissue paper to drain out excess oil and let them cool for at least 5 minutes.
It's very important to let the balls cool before adding to the syrup, otherwise they'll collapse and become rubbery.
I just deep fry the whole batch of balls and then add them to the syrup together after a few minutes.

Cover and let them soak for at least 2 hours.
They taste best after sitting in the syrup overnight, in the fridge.
Jamoons taste equally delicious when served cold or hot (20 seconds in the microwave).

It's tempting to pop them in your mouth whole, but slice through them with a spoon and have each bite with some sugar syrup for the full experience.

Enjoy! :)

Vegan Gulab Jamoon