We've come to the end of the first week of Vegan Mofo and I've successfully managed to post every single day! Woohoo!! :D
Over the past few months, I have found two great local sources of organic produce and grains. One was Pristine Nature, an online store I spoke about on my blog a few weeks ago and the other is In The Pink, a restaurant and bazaar which I will be featuring on my blog very soon.
At both these places, I have been able to obtain black rice which I have gotten addicted to. Pristine Nature sells Burmese black rice and In The Pink has a slightly different variety. But both of them taste equally delicious!
The rice cooks to a beautiful deep grape colour and a sticky texture. It's perfect to be mixed and had with liquidy stuff like sambar, rasam or dal and it works fantastically in stewy dishes like Bisi Bele Bath and Pongal. But my most favorite way to eat it is in the form of Seasoned Curd Rice made of Peanut Yogurt.
This is an exotic twist to a very traditional South Indian dish. :)
For the curd rice, mix together:
1 C Cooked and cooled Black Rice
1 C (or more if you like) Peanut Curds
1/2 t Vinegar/Lemon Juice
Salt
For the seasoning:
1/2 t Coconut Oil
1/4 t Black Mustard Seeds (Sasive)
1/4 t Cumin Seeds (Jeerige)
1 t Split Black Gram Dal (Uddina Bele)
1 t Split Bengal Gram Dal (Kadale Bele)
2 Green Chillies chopped into little circles
Asafoetida Powder (Ingu)
Curry Leaves (Karibevina Soppu)
Heat oil in a small, heavy bottomed pan for half a minute. Add mustard and cumin seeds. They will crackle so cover lightly for a few seconds. Add the dals and stir for a few seconds until they are lightly browned. Add the asafoetida, curry leaves and green chillies. Stir for a few seconds, turn off the heat and stir some more.
Add the seasoning mixture to the prepared curd rice. Mix well and serve.
Enjoy! :)
Notes:
Curd rice is traditionally eaten at the end of a spicy meal.
It tastes great after sitting around for a couple of hours because the curds will ferment and develop a light tangy taste.
You can add grated or finely chopped coconut, pomegranate, fresh grapes or raisins to this according to your taste preferences.
Showing posts with label Main Course Dishes. Show all posts
Saturday, October 08, 2011
Sunday, October 02, 2011
Idli the fluffy South Indian Rice Cake - Vegan MoFo post 2
Idlis are a staple breakfast food in South India. These fluffy rice cakes are made by soaking, grinding and fermenting a combination of a specific type of rice and urad dal (split black gram). Adding a handful of methi (fenugreek) seeds in the mix makes the Idlis extra soft and fluffy.
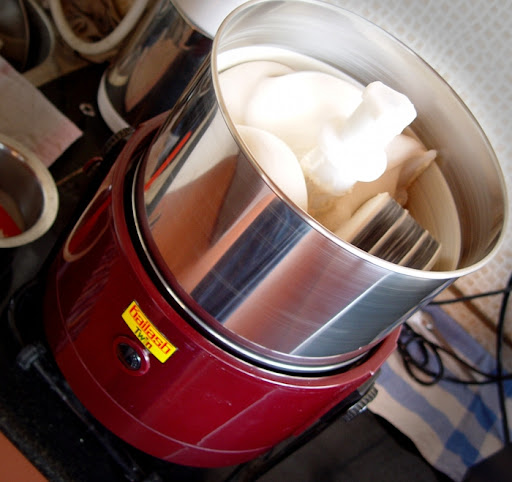
AWESOME KITCHEN GADGET ALERT!!! :)
I use my trusty Kailash Tilting Wet Grinder to make a super smooth Idli batter. It has a motor unit over which the grinding vessel is placed. The inner base of the vessel has a granite layer. There is also a grinding attachment made of three granite stones which is placed into the vessel where it is held in place. When the machine is turned on the vessel starts to rotate which causes the stones to rotate in the opposite direction. No grain or lentil can hold the hope of staying whole under the pressure of those awesome stones. ;)
The tilting mechanism in my grinder makes it very convenient to pour out the batter without having to carry the weight of the heavy vessel.
For those who make Idlis just occasionally, a good blender with sharp blades will do fine. You just have to remember to soak the urad dal and rice separately and make a very smooth paste of the dal before grinding the rice (the methi seeds are soaked with the rice). But for someone who is looking to be a regular Idli pro, a wet grinder is would make for a very nifty gadget. It's been a truly worthy investment for me! :)
Ingredients:
1 C Whole or Split Black Gram
5 C Short Grained Idli Rice (I also like to use Mulleri Red Rice for my Idlis sometimes)
2 T Fenugreek Seeds
Salt
Soak everything (except salt) together in plain water overnight.
Drain the soaking water into a vessel and keep aside.
Set up the idli grinder according to instructions, pour some soaking water into it and switch it on.
With the motor running, slowly add in the rice, dal and methi mixture.
Pour in some more of the water to ensure the steady movement of the grinding stones.
Cover the vessel with the lid and get online and blog for the next 20 minutes.
Look in on the batter and add more water if required (the batter should have a fairly thick but pourable consistency) and let the grinder run for another 15 minutes or so.
Once the batter is completely smooth turn it off and pour it into a large container (batter should fill it only halfway to allow it to expand while fermenting).
Add salt and mix lightly with your hand, cover and keep aside in a warm place for about 12 hours (more if you live in a cold climate).
Once the batter has risen well and attained a slightly sour smell, it is ready for use.
Ladle the batter into Idli mold trays.
Meanwhile, bring water to boil in a steamer and once it begins to boil place the Idli trays into the steamer.
Cover and steam for 8-10 minutes on medium heat.
You should be able to smell the cooked Idlis in the steam wafting out of the steamer.
Carefully remove the Idly trays out of the steamer and let the Idlis cool for a few minutes.
Gently unmold the Idlis using a wide, flatish spoon.
Drizzle sesame oil over the Idlis and serve them hot with Sambar or Coconut Chutney.
Enjoy! :)
Labels:
Main Course Dishes,
South Indian Cuisine
Wednesday, June 29, 2011
Pristine Nature and Lettuce Tomato Pecan Salad with Pudina Red Rice
My friend K recommended an online site called Pristine-Nature when I was looking for fresh, organic vegetables. They source a good variety of organic produce, grains, beans, lentils, spices and oils from mainly local (in and around Bengaluru) farms and offer a once a week home delivery service.
Inspired by the founders of Adi Naturals (a community service organisation aiming at connecting the farmer directly with the consumer to lower costs), this is what they have to say about themselves...
"Pristine-Nature does not offer any goods or services of its own, and neither do we buy or sell any products. We only provide an online presence and voluntary service at no-charge, to like-minded community service organizations who work for no profit or minimal profit for covering their expenses. These organizations purchase from marginal organic farmers and retail their wares. Our idea is to enable such organizations to reach wider audience / customer-base over the internet and enable them with IT services with the help of volunteers, to streamline their operations."
In less than half an hour of me registering at the site, I got a call from their customer service representative (a very nice, polite lady) who patiently explained all about Adi Naturals and Pristine Nature to me. The call really encouraged me to go ahead and avail of their services without feeling hounded in any way.
DH and I decided to place an order with them over the weekend. We ordered a variety of red rices along with a few vegetables, some yelakki bananas and turmeric powder. After much excited waiting, today the stuff arrived! :)
I was very happy to note that they didn't use unnecessary plastic bags to pack the things. Except for the red rices, all items were without packaging. The young man who was delivering my order carried everything into my kitchen in a crate and transferred them onto the counter. The produce was very fresh and healthy looking. The rice seemed clean and in very good condition. He informed me that the chou chou (chayote) I'd ordered was in a slightly poor condition so he voluntarily asked me to subtract the amount for it from the payment even before I could take a closer look at the vegetables and he left the single chou chou behind anyways. I found that to be very professional.
The prices of the products are slightly on the higher side compared to inorganic products (which is to be expected) but compared to the prices of organic products at some other stores, Pristine Nature seems fairly competitive. They used to be a lot more expensive last year but according to what they told me, the prices are lower now in comparison because they've stabilized more. I believe that as more and more people switch to organic food, the prices will come down further.
The only issue I have with Pristine-Nature is that they charge 20% of the total bill as the delivery fee (with a capping meter of Rs.150). That in my opinion is a tad high. It discourages one from buying too many things because each time the total increases, so does the delivery fee. In fact, I had originally added a few more items to my shopping cart but ended up removing them simply because they were high priced items and would run up the delivery fee too much. Gingelly (sesame) oil for example is around Rs. 165, which by itself is a pretty good price for organic gingelly oil, but the thought of the price going up another 20% discouraged us from buying it. I think if they had fixed delivery charges of Rs.50 to Rs.100, depending on the distance of the house from their place, it would surely encourage people to add more items to their cart.
Overall though, I was very happy with the transaction and very much intend to continue ordering from them on a regular basis. All this time I had not made the change to organic simple because I didn't have an organic store close enough to me to walk to but now with everything coming right to my door, I have no excuses.
I recommend Pristine-Nature to everyone in Bengaluru who is looking to switch to a partial or full organic diet.
***
Now lets come to my lunch...
There is nothing more inspiring to a cook than a fresh batch of produce spread out on the kitchen counter. Greens, herbs, vegetables... my mind was whirring on high speed with all kinds of ideas! Do I make quinoa tabbouleh with the fresh mint, coriander and country tomatoes or do I make capsicum stuffed with rice and beans with a pasta salad on the side? Or better yet, a hummus and pita bread sandwich stuffed with loads of cruncy, munchy lettuce?
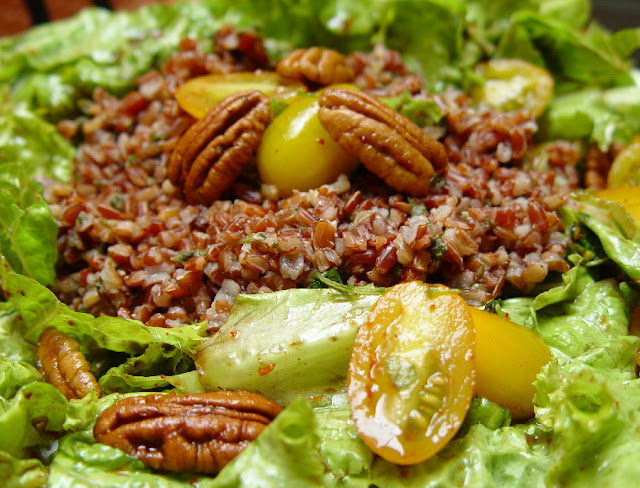
I finally settled on making a simple lettuce salad with red rice on the side. That would meet my objective of making a large portion of our meal raw and yet have a cooked dish in the mix to make it more filling.
For the Lettuce Tomato Pecan Salad with Balsamic Sambar Powder Dressing:
Lightly Shredded Organic Lettuce
Halved Organic Yellow Cherry Tomatoes
Pecan Halves
Splash of Tamari
Splash of Balsamic Vinegar
Sprinkle of Sambar Powder
Mix the lettuce, tomatoes and pecans together and keep aside. Just before serving, add the remaining ingredients, toss well and serve.
Note: If you mix the dressing ingredients to the salad in advance then the lettuce will lose its texture and taste lousy.
For the Pudina Red Rice:
1 C Organic Red Rice
2 C Organic Pudina (Spearmint Leaves)
2 Spicy Green Chillies
Allspice Powder
Salt
Lemon Juice
Nutritional Yeast
Freshly Crushed Pepper
Small Splash of Agave
Wash the red rice well. Bring 4 C of water to a rolling boil and add the rice. Reduce the flame to the lowest, cover and cook.
Meanwhile, chop the mint leaves and the green chillies and add them to the boiling rice along with the allspice powder. Cover and continue to cook for about 40 minutes. Check once after 30 minutes and add salt at this point. Cook till all the water is absorbed and the rice has split.
Turn off the flame and take the pot off the stove. Add the lemon juice, nutritional yeast, agave and mix well. Crush pepper on top.
How to proceed:
In a plate, spread the salad all around the sides and leave a small space in the center. Place the rice in this space. Top with a few pieces of pecans and tomatoes. Enjoy! :)
This was a very satisfying, delicious and filling meal. The tomatoes were the best part. Bursting with flavor and so juicy! If you place a order with Pristine Nature Organics, be sure to get some of them.
Labels:
Main Course Dishes
Tuesday, May 03, 2011
Pecan Pesto Cabbage Patty Wraps
It's always fun to walk into the kitchen clueless as to what I'm going to cook for dinner, just grab a few ingredients and then invent a dish as I go along. As I've mentioned before, I'm a huge fan of stuffed/wrapped meals. Multiple layers and textures are a great way to make any dish interesting.
It all started with a cabbage. I first thought I'd be making stuffed cabbage rolls but because it was raining, I had a hankering for deep fried goodies. So I decided to make cabbage patties and then make them healthier (I say 'ier' because deep fried or not, veggies are healthy to begin with) by turning them into whole wheat wraps with raw veggies and a nice pesto.
Pecan Pesto Cabbage Patty Wraps
For the Cabbage Patties:
1 Small Cabbage chopped finely
1 Large Onion chopped finely
1/4 c Rice Flour
1/2 c Besan Flour (aka Gram Flour)
1 t Red Chilli Powder
1/2 t Cumin Powder
1 1/2 t Coriander Powder
Salt to taste
Pinch of Baking Soda
Sesame Oil for deep frying (Canola or Sunflower Oils are fine too)
Heat the oil in a wide pan or wok.
Place the rest of the ingredients together in a large bowl. Add a little bit of water and mix to form into a rough ball of dough. It should hold its shape (add a little more fried gram flour if required) Pinch off little bits, form them into balls and flatten them into a patty shape.
Deep fry them, a couple at a time, on medium flame until golden brown and keep aside on a plate layered with tissue paper so any oil can get absorbed.
For the Pesto:
Spinach
Baby Mustard Greens (I grow them at home in a little pot and pick them while they're tender)
Cilantro
Pecans
Salt
Green chillies
Nutritional Yeast (optional)
Extra Virgin Olive Oil
Blend everything, except for the olive oil, together into a smooth paste using a little bit of filtered water. After it's smooth, keep the blender running and drizzle in the olive oil so it gets incorporated well. Transfer to an airtight container and keep aside.
This pesto will keep well in the fridge for at least a week when stored properly.
Other ingredients:
Whole Wheat Chapathies (any other thin flat breads like Pita or Tortillas would work too)
Tomatoes sliced into rounds
Capsicums (Green Bell Peppers) sliced into strips
Carrots grated
Black Pepper freshly crushed
How to proceed:
Place a chapathi on a flat surface and spread the pesto on it evenly in a thin layer. In the center, place three slices of tomatoes in a vertical line. Place the cabbage patties on the tomato slices. Top with green bell pepper strips and grated carrot. Crush pepper over everything and roll up the chapati snugly to form a wrap.
Bite into it and enjoy the burst of flavors in your mouth. :)
Labels:
Main Course Dishes,
Wraps
Wednesday, March 30, 2011
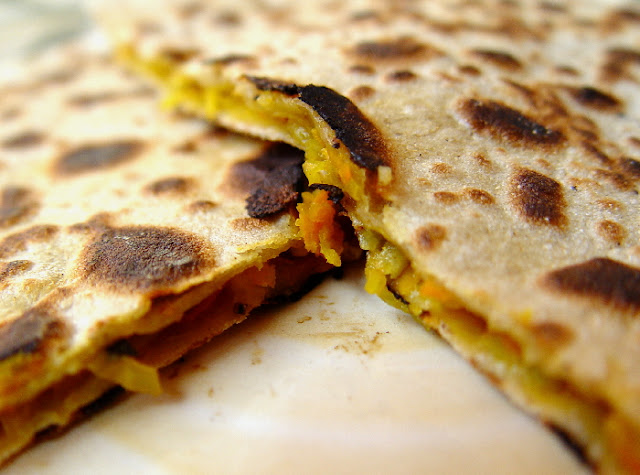
Carrot and Radish Stuffed Chapathis
Simple enough to make but OMG are these babies deeeelicious. Serve with a splosh of ketchup and a dash of Tabasco on the side and it's pure heaven! :)
For the stuffing:
Grated Carrots
Grated Radish
Finely Chopped Onion
Crushed Green Chillies
Chopped Cilantro
Salt
Mix everything together and keep aside.
For the chapathi:
2 C whole wheat flour
2 tsp vegetable oil
salt
Mix everything together with a little water to form a ball. Knead till it reaches an elastic consistency. Pinch off equal sized balls and roll out into circles.
Place one rolled out chapathi on a flat surface and spread some of the stuffing mixture on it leaving a little bit of space around the edges. Place a second chapathi over it and seal the edges by pressing together gently.
Roast both sides of the chapathi on a pan over medium flame until golden brown.
Serve hot and enjoy! :)
Well actually, I love these at room temperate too after they've sat around for a few hours because the layers soak up the flavors and get a little soggy. So these make a great lunch box dish!
Labels:
Main Course Dishes,
South Indian Cuisine
Friday, January 28, 2011
Vegan Wholewheat Lasagna Type Thingies
I use the word 'thingies' here because these aren't exactly traditional Lasagnas, but rather a bunch of dishes I invented based on the same basic principle - sheets of pasta layered with an ensemble of sauces and fillings and then baked.
2 C Whole Wheat Flour
1 t Oil (olive oil or coconut oil work best but any other plant based oil should be fine too)
Salt to taste
Mix together the above. Add a little water at a time and knead into a soft, pliable dough. Keep aside.
When the fillings are ready, pinch off large balls of this dough and roll into thin sheets. Cut to roughly fit the baking tray that you're using.
The sheets are the only common factor between these Lasagna dishes. All the other components are flexible. You can use the recipes below for the fillings and sauces or use your imagination and create your own combination. :)
Wash and chop as much spinach as you like (I do about 3/4 C).
Blanch and slice 8-10 babycorns into thin circles.
Finely chop 2-3 cloves of garlic (can use more or less depending on your taste).
Lightly toast 1/4 C wheat flour in a dry pan until very slightly browned. Keep aside.
Place 2 C plain, unsweetened soymilk (or other vegan milk) in a pan and heat it on a low flame.
Add a few spoons of soymilk, a little at a time, to the toasted wheat flour and make a smooth paste. (You can optionally mix a dash of olive oil into this paste for an extra creamy end result).
Pour the paste into the soymilk slowly and keep stirring constantly. Continue to stir and heat on a low flame (sauce should not boil) until it thickens. The continuous stirring is very important to keep it smooth and distribute the heat evenly.
Add the chopped spinach, sliced babycorn, chopped garlic, freshly crushed pepper and salt and mix. Heat for another minute or so (still stirring) and turn off the flame.
Your creamy, vegan béchamel sauce is ready! :) (I love to eat spoonfuls of this thing just on its own!)
Note: If you're using this sauce for pastas or any other dish where it's not baked, then cook the baby corn well rather than blanching and lightly fry the garlic in a little olive oil before mixing them into the sauce.
PS: I found out much later that coconut mylk is an even better thing to use in this same sauce in place of soymylk.
3 large, ripe Tomatoes diced
1 C chopped Spearmint leaves
3-4 cloves of Garlic
1/2 C raw cashews
2-3 spicy Green Chillies
1 T Nutritional Yeast
Salt to taste
Blend everything, except the tomatoes, together into a paste. Add the tomatoes and blend again to reach a saucy consistency.
Pour into a pan, bring to a boil, reduce the flame and simmer for about 3 minutes while stirring continuously.
1 1/2 C White Butter Beans - washed, quick soaked, cooked, drained (water kept aside) and cooled
2 large, ripe Tomatoes
2 cloves of Garlic
Red Chilli Powder/Flakes
1 t Olive Oil
Spicy Green Chillies chopped
Whole Spices - Cinnamon, Cloves, Bay Leaf
Tamarind Paste
Nutritional Yeast
Salt to taste
Ketchup
Place half the cooked beans, tomatoes, garlic, tamarind paste, red chilli powder/flakes and salt in a blender and blend into a smooth paste using some of the beans cooking water as required.
Heat the olive oil in a skillet, add the whole spices and green chillies and stir fry for about 30 seconds. Add the remaining cooked beans and stir fry.
Add the tomato/bean paste and mix well (adding more of the beans cooking water if required). Stir and simmer this sauce on medium heat for a few minutes.
Turn off the heat. Add a splosh of ketchup and the nutritional yeast and stir.
5 medium sized Potatoes - boiled and peeled
Olive Oil
Marinade Liquid leftover from the Marinated Tofu/Veggie Topping
Coconut Milk (small splash)
2 T Nutritional Yeast
Dried Herbs - Thyme, Chives, Rosemary etc...
Salt to taste
Mash the potatoes, add the remaining ingredients and mix well.
Layer your home made whole wheat lasagna sheets with your choice of sauces and fillings - crumbled tofu, grated carrots, grated beets, sliced tomatoes, sliced bell peppers, sweet corn, marinated tofu/veggie mixture, coconut milk, cooked small chick peas etc...
Bake at 400F/250C for 45-50 minutes. Let it cool for half an hour. Serve and enjoy! :)
(Tastes even better on the next day because all the flavors get incorporated really well!)
Homemade Whole Wheat Pasta Sheets layered with Spinach Babycorn Béchamel Sauce, Spicy Tomato Mint Sauce, Grated Carrots, Sliced Green Bell Peppers and topped with Sesame Seeds and Rosemary
For the Homemade Whole Wheat Pasta Sheets:
2 C Whole Wheat Flour
1 t Oil (olive oil or coconut oil work best but any other plant based oil should be fine too)
Salt to taste
Mix together the above. Add a little water at a time and knead into a soft, pliable dough. Keep aside.
When the fillings are ready, pinch off large balls of this dough and roll into thin sheets. Cut to roughly fit the baking tray that you're using.
The sheets are the only common factor between these Lasagna dishes. All the other components are flexible. You can use the recipes below for the fillings and sauces or use your imagination and create your own combination. :)
Whole Wheat Homemade Pasta Sheets layered with Basmati Rice, Mint Béchamel Sauce, Grated Beets and topped with Sliced Tomatoes with Nutritional Yeast sprinkled on
For the Vegan Spinach Babycorn Béchamel Sauce:
Wash and chop as much spinach as you like (I do about 3/4 C).
Blanch and slice 8-10 babycorns into thin circles.
Finely chop 2-3 cloves of garlic (can use more or less depending on your taste).
Lightly toast 1/4 C wheat flour in a dry pan until very slightly browned. Keep aside.
Place 2 C plain, unsweetened soymilk (or other vegan milk) in a pan and heat it on a low flame.
Add a few spoons of soymilk, a little at a time, to the toasted wheat flour and make a smooth paste. (You can optionally mix a dash of olive oil into this paste for an extra creamy end result).
Pour the paste into the soymilk slowly and keep stirring constantly. Continue to stir and heat on a low flame (sauce should not boil) until it thickens. The continuous stirring is very important to keep it smooth and distribute the heat evenly.
Add the chopped spinach, sliced babycorn, chopped garlic, freshly crushed pepper and salt and mix. Heat for another minute or so (still stirring) and turn off the flame.
Your creamy, vegan béchamel sauce is ready! :) (I love to eat spoonfuls of this thing just on its own!)
Note: If you're using this sauce for pastas or any other dish where it's not baked, then cook the baby corn well rather than blanching and lightly fry the garlic in a little olive oil before mixing them into the sauce.
PS: I found out much later that coconut mylk is an even better thing to use in this same sauce in place of soymylk.
Homemade Whole Wheat Pasta Sheets layered with a mix and match of Plain Béchamel Sauce, Special Mashed Potatoes, Small Chick Peas, Coconut Milk and Marinated - Tofu, Tomatoes, Broccoli, Zucchini, Green Bell Peppers
For the Spicy Tomato Mint Sauce:
3 large, ripe Tomatoes diced
1 C chopped Spearmint leaves
3-4 cloves of Garlic
1/2 C raw cashews
2-3 spicy Green Chillies
1 T Nutritional Yeast
Salt to taste
Blend everything, except the tomatoes, together into a paste. Add the tomatoes and blend again to reach a saucy consistency.
Pour into a pan, bring to a boil, reduce the flame and simmer for about 3 minutes while stirring continuously.
For the Baked Beans Sauce:
1 1/2 C White Butter Beans - washed, quick soaked, cooked, drained (water kept aside) and cooled
2 large, ripe Tomatoes
2 cloves of Garlic
Red Chilli Powder/Flakes
1 t Olive Oil
Spicy Green Chillies chopped
Whole Spices - Cinnamon, Cloves, Bay Leaf
Tamarind Paste
Nutritional Yeast
Salt to taste
Ketchup
Place half the cooked beans, tomatoes, garlic, tamarind paste, red chilli powder/flakes and salt in a blender and blend into a smooth paste using some of the beans cooking water as required.
Heat the olive oil in a skillet, add the whole spices and green chillies and stir fry for about 30 seconds. Add the remaining cooked beans and stir fry.
Add the tomato/bean paste and mix well (adding more of the beans cooking water if required). Stir and simmer this sauce on medium heat for a few minutes.
Turn off the heat. Add a splosh of ketchup and the nutritional yeast and stir.
Homemade Whole Wheat Pasta Sheets layered with Mint Béchamel Sauce, Baked Beans Sauce, Sweet Corn, Sliced Green Bell Peppers and topped with Sliced Tomatoes with Nutritional Yeast sprinkled on
For the Special Mashed Potatoes:
5 medium sized Potatoes - boiled and peeled
Olive Oil
Marinade Liquid leftover from the Marinated Tofu/Veggie Topping
Coconut Milk (small splash)
2 T Nutritional Yeast
Dried Herbs - Thyme, Chives, Rosemary etc...
Salt to taste
Mash the potatoes, add the remaining ingredients and mix well.
Building the Lasagna:
Layer your home made whole wheat lasagna sheets with your choice of sauces and fillings - crumbled tofu, grated carrots, grated beets, sliced tomatoes, sliced bell peppers, sweet corn, marinated tofu/veggie mixture, coconut milk, cooked small chick peas etc...
Bake at 400F/250C for 45-50 minutes. Let it cool for half an hour. Serve and enjoy! :)
(Tastes even better on the next day because all the flavors get incorporated really well!)
Labels:
Main Course Dishes,
Pastas & Noodles
Wednesday, July 28, 2010
Red Quinoa Pilaf
I just tasted red quinoa for the first time and I must say that it is a gazillion times more delicious than regular quinoa, in terms of flavor AND texture! I fell in love with it at first crunch! When they coined the term "manna from heaven", I have no doubts that this delectable, nutrient-rich South American seed-grain is precisely what they were talking about.
I've put together this dish with red quinoa and vegetables and for the lack of a better term I'm referring to it as Pilaf (apparently the most commonly prepared quinoa dish by people all over the net world).
1 C Red Quinoa
2-3 C Mixed veggies - Edamame, Zucchini, Broccoli florets, chopped Carrots (an exotic grain such as this is deserving of only the finest vegetables)
2 Serrano Peppers (or Green Chillies) halved lengthwise
2 T Peanut oil (preferable the unrefined, expeller pressed variety if available)
1/2 t Garlic paste
Mixed spices - Turmeric powder, ground Coriander, ground Cumin, crushed Pepper
Salt
Freshly squeezed lime juice from half a large lime or one small lime.
Rinse the quinoa well through a finely meshed sieve or a cheesecloth.
Bring 2 C of water to boil in a wide pan, add a large pinch of salt and the washed quinoa.
Reduce heat to its lowest, cover the pan and cook for about 15 minutes, until the quinoa has absorbed all the water (lift the lid and check only after the 15 minutes, otherwise precious steam will escape and slow down the cooking process).
Turn off flame, fluff the quinoa with a fork and let it sit covered for a few more minutes.
Meanwhile, place all the vegetables (including the chillies) in a microwave safe glass dish.
Splash in the peanut oil and toss well.
Cook uncovered in the microwave for 5 minutes on high.
Add the spices, garlic paste and salt and mix well.
Cook uncovered for 3 minutes on high.
Transfer the cooked quinoa over the veggies and mix together with a fork.
Cook covered for 2 minutes.
Uncover and cook for 1 more minute.
Squeeze the lime juice over everything and mix well with a fork.
Serve this crunchy and delicious Red Quinoa Pilaf hot.
Labels:
Main Course Dishes
Wednesday, May 19, 2010
Bille Kadubu - South Indian Steamed Delicacy
I have a nice book in Kannada called Paakadarshi which is filled with recipes of wonderful traditional dishes from Karnataka. My mom took it out of her collection and gave it to me soon after I got married and was about to move away from Bangalore for a long time. As a new cook it acted like the Gita to me in the kitchen. :)
I later bloomed into an experimental cook who rarely follows recipes to a tee. But even after all these years, when it comes to the very traditional recipes, the kind of wonderful stuff that my mom makes, I still fall back on my Paakadarshi. And it has always caused great results!
Here's a quick and easy recipe for this delicious dish called Bille (pronounced Bil-lay) Kadubu.
2 C Rice Semolina (sold as Idli Rava at Indian stores)
3/4 C fresh coconut (I use half grated and half cut into tiny pieces)
2 t Channa Dal (soaked)
1 t Jaggery
Salt
For the seasoning:
Black mustard seeds, Curry leaves, Oil (canola, coconut... anything)
Heat a few spoons of oil in a wok/pan. Add mustard seeds and let them crackle. Turn off the stove and add curry leaves. Add 5 cups of water, jaggery and salt and turn on the heat once again. Bring the water to a boil. Lower the heat and gently pour in the rice semolina while continuously stirring. Once the water has been absorbed completely, take the pan off the stove and stir in the coconut. Mix well.
Let the mixture cool slightly (but not too much). Lightly oil your palms and make little balls out of the dough. Steam them for 8-10 minutes.
Serve hot with Coconut Cilantro Chutney. (Just posting this recipe here is making me want to eat some right now! :oP)
Labels:
Main Course Dishes,
South Indian Cuisine
Friday, February 05, 2010
Spicy Hummus Whole Wheat Ravioli in Mint Coconut Milk Sauce
One of those things I invented as I cooked and OMG were the results amazing! It has Italian, Mediterranean, East Asian and Indian flairs all mixed in. I think I outfusioned myself with this one. :D
Spicy Hummus Ravioli in Mint Coconut Milk Sauce
For the Spicy Hummus:
Quick-soaked, drained and cooked Chickpeas
Toasted Sesame Seeds
Smoked Chipotle Tabasco Sauce
Asian Super Spicy Chilli Paste
Olive Oil
Coriander Powder
Raw Garlic
Lime Juice
Nutritional Yeast (if available)
Salt
Blend everything together adding a little water at a time until it reaches a creamy consistency. I determine ingredient quantities by the "taste and add and taste and add" method.
For the Whole Wheat Ravioli:
2 C Whole Wheat Flour
1/2 t Salt
3 t Oil
Water
Mix the flour and salt together. Rub the oil into the flour. Add a little water at a time and knead well into an elastic-y dough. Cover and keep aside.
Bring a large pot of water to boil, add salt and let it continue to boil. Start preparing the ravioli on the side.
Pinch off large balls of dough and roll them out thin like tortillas/chapatis. Use a circular cookie cutter (or the edge of a steel tumbler) and cut out rounds. Take one circle and spoon a bit of the hummus into the centre, cover with a second circle. Carefully seal the edges. You can make little twists all around the side for extra safety.
Prepare all the ravioli and then put them into the boiling water gently. Cook for about 20 minutes on a medium flame. About 5 minutes into the cooking, stir carefully so that they don't stick together or break. Do this a few more times through the cooking process. And start preparing the sauce on the side as the Ravioli boils.
If a couple of the Ravioli's break during the boiling process try not to fret. I used the cooking water as a stock to make soup the next day. :)
For the Sauce:
Big bunch fresh Mint Leaves
Thick Coconut Milk (about 1 Cup)
Green Chillies
Pepper
Salt
Blend everything together into a creamy sauce consistency.
How to proceed:
Pour a bit of the sauce into a glass baking dish. Place the ravioli in layers and pour the sauce between each layer. And top it off with the rest of the sauce.
Bake in a regular oven at 200 C/ 400 F for about 40 minutes or in a microwave in the convection+micro mode for 20 minutes.
Serve hot, garnished with grated carrot.
Enjoy! :)
Labels:
Hummus,
Main Course Dishes,
Pastas & Noodles
Friday, June 26, 2009
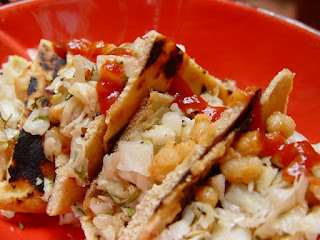
Stovetop Pitas Stuffed With Baked Beans and Cabbage
Whenever I've made baked beans for bread at home from scratch, I've used rajma. But I've always liked the kind of beans they use in the canned version but didn't know what they were called. A few weeks ago I found these dried, small, white beans called butter beans at Nilgiris and they looked quite yum. So I picked them up and last week I decided to cook them. Well it turns out they were the exact beans I'd been looking for! It pays to experiment :)
My poor oven's sick :( Whenever I turn it on the power trips at home. The poor thing held on till I'd finished baking that big batch of walnut chocolate chip cookies (2 weekends ago) and then went *phut*. Need to get her fixed. So until then for my bread I'm making do with stovetop pitas. Fortunately they turn out just as yum :)
The procedure is pretty much the same as regular pita bread. You mix the dough using the Basic Bun Recipe But after the dough has risen and been punched down, you pinch off balls and tap or roll them flat, like pizza. Then you have to heat your skillet oh a high flame, place the pitas and cover and cook on both sides. Covering the skillet will make the pockets form better.
The filling is simple....
For the beans...
Quick soak the beans and pressure cook them.
Add salt and spices (your choice, I just added my Asian Super Spicy Chilli Paste) and boil for a few minutes.
Scoop a ladle full of the cooked beans and grind into a smooth paste adding a little water if required.
Put the paste back in with the cooked beans and boil for a couple more minutes.
Turn off the heat and add a big splash of ketchup.
Mix and keep aside.
For the cabbage...
Chop cabbage and microwave for 7-10 minutes.
Heat wok/frying pan and add a couple of spoons of oil.
Add mustard seeds and let them crackle.
Add sliced green chillies and curry leaves and stir for a few seconds.
Put in the cabbage and stir fry on medium flame for a few minutes.
Add salt and stir fry for a minute more.
Turn off flame.
Squeeze fresh lime juice and mix.
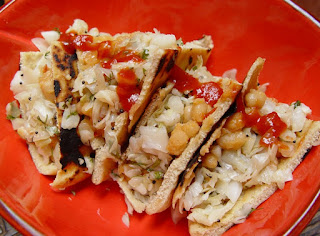
Now all you have to do is quarter the pitas. Gently open out the pockets (use a knife to slice and form a pocket of required). Fill a bit of the bean mixture, top with the cabbage. Enjoy! :)
Hmm these pictures have turned out a tad too nice! I feel like having munching onsome sort of stuffed pitas again tonight :D
*runs off to go mix the dough*
Labels:
Breads,
Main Course Dishes,
Wraps
Friday, May 22, 2009
Beet, Mung and Coconut Milk Stew with Dill Chapathi
Beets mmmmm. I've always loved beets as far back as I can remember. That sweet, wholesome flavor never fails to satisfy me. Last night I was about to make the usual Beet Sambar and Rice but then decided to concoct something new since I was craving Chapathis. It's a very simple recipe and I avoided using any extra spices because the slightly sweet flavors of the beets and coconut milk are delicious as they are.
Beet, Mung and Coconut Milk Stew
1/2 C Whole Mung Beans
2 Beets (cubed)
1 Package (200 ml) Coconut Milk (I like the Dabur Hommade brand)
1 t Oil
a pinch of Turmeric
Sambar Powder or Chilli Powder
Salt
1/4 t Tamarind Paste (optional)
Heat 2 C of water with the oil and turmeric added in. Bring it to a boil and add the mung beans, beets and a pinch of salt. Cook till the mung beans are soft (pressure cooking them together works best).
Mix in salt and sambar/chilli powder to taste and boil for a minute or so. Empty the whole pack of coconut milk in and stir, bring to boil and turn off flame. Stir in the tamarind paste if using and mix well.
This tastes delicious eaten by itself or with Chapathis.
Note: For the Dill Chapathi I used my regular Chapathi recipe with a few extras mixed into the dough - a pinch of turmeric, chilli powder and dried dill herb.
Labels:
Main Course Dishes,
Stews
Wednesday, May 20, 2009
Spaghetti in Cilantro Tofu Pesto
Spaghetti is not my favorite kind of pasta. Well it's okay I guess but not as yum as Fusilli or Farfalle. The thing is, it doesn't have little hiding places which scoop up the sauce making each shell burst with flavor. But then a good Pesto can make even plain ol' Spaghetti taste delicious. And my motto is a simple one..."Cilantro makes everything taste yum!" It really does! :)
Spaghetti in Cilantro Tofu Pesto
Organic Wholewheat Spaghetti
Cilantro
Garlic
Green Chillies
Tofu
Oregano Seeds
Oil (I used Coconut Oil and it tasted good but Olive Oil would be even more yum)
Salt
Pepper
Note: All quantities can be adjusted according to taste.
Cook the Spaghetti in salted boiling water for about 7 minutes, switch off flame, cover and let it sit for another 10 minutes. Drain and rinse with cold water. Keep aside.
In a blender put 1/4 block of tofu (crumbled), a large handful of cilantro, a few cloves of garlic, green chillies and salt. Grind into a smooth paste adding a little water if required.
Chop some more garlic and cut the remaining block of tofu into cubes. Heat a few spoons of oil and add a dash of oregano seeds (omum). Add the chopped garlic and fry for a few seconds, add the tofu and toss gently till it's lightly browned on all sides. Add the blended cilantro paste, stir gently and cook for a few minutes.
Switch off the flame, add the cooked Spaghetti and mix well.
Serve hot with freshly crushed pepper on top.
Labels:
Main Course Dishes,
Pastas & Noodles
Thursday, May 14, 2009
Vegan Fusion Wrap
Chapaathi is an Indian whole wheat flatbread similar to Tortilla. Hummus is a Mediterranean dish made of Chickpeas. The Herbs used in the Brown Rice were an Italian mix. The Green Bell Peppers (Capsicum) were stir fried with Onion, Garlic and crushed Black Pepper East Asian style. The wrap itself is layered like a Burrito, Mexican style. And finally the splash of Ketchup adds a dash of America ;)
Why the seemingly unnecessary details? Just to show that when someone says Fusion Food, this is the kind of stuff they're referring to :)
Anyone can create delicious Fusion Food. As long as the flavors and textures involved compliment each other well. Take a bunch of traditional dishes from any cuisine, feel free to add your own twists ( when it comes to fusion, no one's looking for authentic anyways), put all of them together... et voila! You have perfectly nom nom Fusion Food.
Here's what my wrap contains...
Chapathi
2 C whole wheat flour
1 C okara (the remaining bean paste after soymilk has been made)
3 t coconut oil
salt
Put everything in a large mixing bowl and mix well.
Add a little water if required and knead into a soft, elastic dough.
Make little balls.
Roll with a rolling pin as flat as you can (dip in a plate of flour a few times in between rolling to avoid the dough from sticking to the rolling pin of board).
Cook on a pan on both sides.
Hummus - with a few twists
1 C dry chickpeas and red kidney beans
2 dry red chillies
2 t sesame oil
2 t coriander powder
3 cloves garlic
salt
freshly squeezed juice of 1 lime
Wash and soak the beans using the quick soak method*.
Drain the water completely, wash and add some more water.
Pressure cook with a teeny pinch of salt for 7-8 whistles and drain again.
Lightly toast the dry red chillies.
Add everything (except lime) in a blender.
Blend well into a smooth paste using as much water as required (be careful not to make it liquidy).
Squeeze lime juice and blend once more.
Stir Fried Capsicum
2 capsicums sliced
1 large onion sliced
3-4 cloves garlic minced
2 T coconut oil
freshly crushed whole black pepper
salt
Heat oil, add garlic and fry for a few seconds. Add the onion and stir fry on a high flame till translucent. Toss in the green bell pepper (sprinkle a pinch of sugar) and continue stir frying for a few minutes till soft. Add salt, stir once and switch off the flame. Cover and let it sit for a few minutes. Crush pepper over everything with a pepper mill and mix well.
Herbed Brown Rice
1 C brown rice
2 t coconut oil
1 T Italian dried herb mix (parsley, rosemary, oregano, thyme, basil)
salt
Wash rice well, place in a large pot with 3 cups of water and the rest of the ingredients.
Cook according to instruction on package.
Mix in the Stir Fried Capsicum with the Herbed Brown Rice.
THE WRAP
Place one Chapaathi on a plate.
Spoon Hummus over it and spread lightly in the center of the Chapathi.
Scoop some of the Brown Rice Capsicum mixture onto the Hummus.
Add a small splash of Ketchup.
Wrap.
Enjoy! :)
(I also put in a few small pieces of my Pickled Orange Peels in some of the wraps for added tang).
If you try your own Vegan Fusion Wraps I'd love it if you left me a comment here on how they turn out. Feel free to share your recipes too :)
Labels:
Main Course Dishes,
Wraps
Thursday, April 23, 2009
Herbed Brown Rice with Veggies in Spicy Tomato Yogurt Sauce
When we were in college Bangalore used to be very different. And that was barely 10 years ago! Those were the good old days before multiplexes and malls f#*@ed up our beautiful city. All hangouts used to be cozy, uncrowded and comfortable. We knew the true meaning of chilling out. Yes, the choices were comparatively limited, but we still loved them. When we wanted to watch movies we went to Rex, Galaxy and other such nice, old, single theaters. When we wanted to shop we visited the Commercial Street side lanes. When we wanted to window shop we dropped in to Shoppers Stop or Lifestyle. And when we wanted to grab a nice lunch Casa Picola was THE place to go to.
There was this one dish at Casas that I really loved. It involved large chunks of capsicum, mushroom and cottage cheese in a yogurt based tomato sauce served with some kind of rice and garlic bread on the side (I hadn't turned vegan yet). It was one delectable meal! It's been years since I last tasted it and I always wondered what went into that sauce.
Last year I was at my now absolute favorite hang out Infinitea with a few friends and we decided to take lunch instead of the usual herbal tea and Momos (best Momos eva!). That's when I discovered this dish which was very similar to my old Casas favorite. I was more than thrilled to discover that their sauce did not contain yogurt and that they could easily replace the cottage cheese with some extra veggies (I usually ditch the mushrooms too and get broccoli and extra bell peppers instead).
I'd been meaning to try a similar dish at home for the longest time and tonight finally happened to be the night that I did. Well it didn't taste the same of course but it did turn out delicious and I was extremely pleased with the result :)
Herbed Brown Rice with Veggies in a Spicy Tomato Yogurt Sauce
For the Rice:
1 C Long Grained Brown Rice
3 C Water
1 t Vinegar
2 T Oil
2-3 t Mixed Dried Herbs (basil, thyme, chives etc...)
Sea Salt
Pepper
Put the first five ingredients and a wee bit of salt in a microwave safe glass dish and cook on high for about 18-20 minutes. Let it stand for a few minutes. Fluff with a fork. Sprinkle more salt as desired and crush pepper with a pepper mill directly over the rice. Mix gently with fork and keep aside covered.
Veggies:
2 Carrots
7-8 Baby Corns
1 small Capsicum (Green Bell Pepper)
Chop the veggies. Sprinkle a tiny pinch of sugar over them and mix. Cook in a microwave safe glass dish on high for 5-7 minutes, mixing in between.
Sauce:
6-7 Tomatoes
7-10 cloves of Garlic
1 inch piece Ginger
3-4 Dry Red Chillies
Salt
Grind everything in a blender adding some water if required.
How to proceed:
Pour blended liquid over the veggies in the glass dish. Mix well and cook on high for 3 let it sit for 1 minute. Stir and cook again for 2 minutes.
Add 1/2 C Soy Yogurt (optional) and stir well.
Serve hot. Enjoy! :)
Labels:
Main Course Dishes
Thursday, April 02, 2009
Bisi Bele Bath
A delicious mixture of rice, lentils, vegetables and spices. The perfect hearty, wholesome one dish meal! Here's a picture of my Bisi Bele Bhath (literal translation: Hot Lentil Rice Dish). It's served with a dollop of fresh, homemade soy yogurt.
We (meaning my mom) make the masalapowder for this at home from scratch and nothing can beat that taste but making it is a long, drawn out process and you need access to various 'exotic' spices. So instead I suggest you get your hands on a packet of the Bisi Bele Bhath Masala powder which will make do to begin with. They'll be easily available at Indian stores. The MTR brand is the most well known. If you can't find the Bisi Bele Bath Masala powder then the Vanghibath Masala Powder will do just fine as an alternative.
There are various styles of making this dish, our method follows... The recipe may look long but it's really a very easy dish to make.
1 C Rice
3/4 C Toor Dal (split yellow peas)
2 C or more mixed, diced veggies - Potato, Carrots, Beans, Broccoli, Capsicum (Green Bell Peppers), Peas...
1 Onion sliced
5-6 cloves Garlic (optional)
3-4 Tomatoes Cut into medium chunks
1 T Tamarind Paste
2 t Bisi Bele Bhath or Vangibhath Masala Powder
3-4 T Oil (coconut oil makes it extra yum!)
2 Dried Red Chillies (broken into half)
Juice of 1 Lemon
Mustard seeds
Asafotedia powder
Curry Leaves
Turmeric
Salt
Cook the rice and toor dal together with plenty of water till very soft (a pressure cooker would make things easy).
Meanwhile chop and slice all the mixed vegetables and cook them separately (I like baking and grilling them for about 7 minutes with salt and oil sprinkled on in the microwave using the combi option but boiling them in salted water is fine too).
Slice the onion and dice the tomatoes and keep them aside separately.
Heat oil in a large saucepan or wok for about 30 seconds or so till it's hot (but don't overheat). Add a dash of mustard seeds, they will immediately crackle so be careful and cover the pan with a lid till the crackling is done. Quickly add a pinch of turmeric and a pinch of asafotedia. Then add the curry leaves. Finally add the red chillies and immediately add the garlic and the onions. Fry till the onions are transparent and slightly browned.
Sprinkle the masala powder and stir. Add 1-2 C water, the tamarind paste and salt to taste. Mix well, cover and simmer the veggies in the masala on a medium flame for a couple of minutes.
Pour in the cooked rice and dal and mix well. Add more water if required. Let everything simmer together for a few minutes.
Finally mix in the chopped tomatoes and mix. Turn off the flame.
After about a minute, squeeze the lemon juice over the Bisi Bele Bhath and mix well.
Serve hot by itself or with soy yogurt (plain, unsweetened) and a few potato chips for the crunch.
We (meaning my mom) make the masalapowder for this at home from scratch and nothing can beat that taste but making it is a long, drawn out process and you need access to various 'exotic' spices. So instead I suggest you get your hands on a packet of the Bisi Bele Bhath Masala powder which will make do to begin with. They'll be easily available at Indian stores. The MTR brand is the most well known. If you can't find the Bisi Bele Bath Masala powder then the Vanghibath Masala Powder will do just fine as an alternative.
There are various styles of making this dish, our method follows... The recipe may look long but it's really a very easy dish to make.
Bisi Bele Bhath
1 C Rice
3/4 C Toor Dal (split yellow peas)
2 C or more mixed, diced veggies - Potato, Carrots, Beans, Broccoli, Capsicum (Green Bell Peppers), Peas...
1 Onion sliced
5-6 cloves Garlic (optional)
3-4 Tomatoes Cut into medium chunks
1 T Tamarind Paste
2 t Bisi Bele Bhath or Vangibhath Masala Powder
3-4 T Oil (coconut oil makes it extra yum!)
2 Dried Red Chillies (broken into half)
Juice of 1 Lemon
Mustard seeds
Asafotedia powder
Curry Leaves
Turmeric
Salt
Cook the rice and toor dal together with plenty of water till very soft (a pressure cooker would make things easy).
Meanwhile chop and slice all the mixed vegetables and cook them separately (I like baking and grilling them for about 7 minutes with salt and oil sprinkled on in the microwave using the combi option but boiling them in salted water is fine too).
Slice the onion and dice the tomatoes and keep them aside separately.
Heat oil in a large saucepan or wok for about 30 seconds or so till it's hot (but don't overheat). Add a dash of mustard seeds, they will immediately crackle so be careful and cover the pan with a lid till the crackling is done. Quickly add a pinch of turmeric and a pinch of asafotedia. Then add the curry leaves. Finally add the red chillies and immediately add the garlic and the onions. Fry till the onions are transparent and slightly browned.
Sprinkle the masala powder and stir. Add 1-2 C water, the tamarind paste and salt to taste. Mix well, cover and simmer the veggies in the masala on a medium flame for a couple of minutes.
Pour in the cooked rice and dal and mix well. Add more water if required. Let everything simmer together for a few minutes.
Finally mix in the chopped tomatoes and mix. Turn off the flame.
After about a minute, squeeze the lemon juice over the Bisi Bele Bhath and mix well.
Serve hot by itself or with soy yogurt (plain, unsweetened) and a few potato chips for the crunch.
Labels:
Main Course Dishes,
South Indian Cuisine
Monday, February 02, 2009
Herb Chutney Capsicum Rice
Sitting on my derrière twittering and playing scramble on facebook is a sure fire way to ensure that dinner hasn't even begun to be cooked by dinner time. Past 9 pm, husband hasn't been fed and the poor darling hasn't said a peep about it, it's time to dream up a meal which gets cooked up as well as tucked away in a snap.
Lately I've let out the goddess of concocting from within more often than not. And what I've realized is that the most scrumptious meals are the ones prepared in a jiffy huff huff.
I apologize in advance for the less than agreeable photography. But when I'm really hungry, I cannot offer more than a camera phone click and post. It doesn't help that the lighting theme in the house leans towards cozy/romantic rather than "spotlight! watch me while I eat!"
Basically what I'm trying to say is that the rice is not a jarring florescent like that picture portrays it to be. It's actually a rather pleasant shade of green. And the red and yellow bell peppers make the dish quite attractive.
Herb Chutney Capsicum (Bell Pepper) Rice
For the rice:
3/4 C Rice
1/2 Yellow Capsicum sliced into strips
1/2 Red Capsicum sliced into strips
1 Small While Onion cut into rings
3 t Olive Oil
Seasonings (quantity of each according to preference):
Turmeric
Cinnamon
Pepper
Salt
For the chutney:
1/2 C Cilantro
1/4 C Spearmint Leaves
1 Green Chilli
Handful Cashews
Cook the rice in the microwave with 3 cups of water for 20 minutes.
Toss the white onion and the red and yellow capsicums with the olive oil and cook in the microwave (using the grill+micro mode if available) for 3-5 minutes till they are just done.
Mix the rice, veggies and seasoning ingredients together.
Taste. Hmm not bad but something's missing... Chutney!
Grind the cilantro, spearmint, cashew and green cilli into a paste using a wee bit of water.
Pour over rice and mix. Done!
Re-heat in microwave for half a minute and serve hubby. Say "attractive to look at and yummy to eat". He'll nod happily at start chowing down :)
Return to twitter and facebook.
The End.
Labels:
Main Course Dishes
Wednesday, January 14, 2009
A delicious Sankranthi vegan brunch
Sankranthi (aka Pongal) is an important Hindu festival which marks the beginning of the Sun's 'climb' into the Northern Hemisphere. In South India, we also celebrate Sankranthi as the beginning of the harvest season. Like most other Hindu festivals, we celebrate this one by having a bath (hair wash too) and then cooking the customary sweet and savory dishes meant for the festival. Then we place the food in front of the holy altar carrying pictures and idols of various Gods and Goddesses and light two oil lamps. We pray, offer thanks and request blessings. Then we offer the food to the Gods who get to 'taste' everything first (we don't taste them while cooking) and then... we dig right in! :)
In Karnataka and Andhra Pradesh States, women also exchange Vayanas with the relatives or neighbors. These contain various items representing a good harvest like Sugarcane, Sweet Potato, Pumpkin, Peanuts, Elachikai (a kind of sour berry) and also other traditional things like Turmeric Sticks, Kumkum Powder (the red dot we put on our forehead), Coconut, Fruits, Beetle Leaves and Beetle Nuts.
In the South the main traditional delicacy for the Sankranthi breakfast is Pongal. Two types of Pongal to be precise - the Sweet Pongal and the Savory Pongal. The main ingredients in these are rice and split mung beans (yep, my favorite moong dal :)). Today, along with the Pongals, we also made Vadas (deep fried black gram fritters) and a Tamarind Gojju (sauce) to have on the side with the Savory Pongal. The Vadas are normally doughnut shaped but we weren't able to shape them so instead we dropped little spoonfuls of the batter into the oil. So what came out was something which could be termed Vada Holes (like doughnut holes) :D
Sankranthi or not these are delicious, easy to prepare dishes. If you try these out, please do leave a comment here on how they turned out.
**********
Vegan Savory Pongal
1 C Moong Dal
1 C Rice
8 C Water (more if required)
2 t Olive Oil
1/4 t Turmeric
For the seasoning:
3 T any Vegetable Oil
1/2 t Mustard Seeds
1/2 t Cumin Seeds
1/4 t Asafoteida Powder
1/2 t Whole Black Pepper
10-12 Curry Leaves
1 t Ginger chopped into tiny pieces
Sea Salt
Lightly toast the moong dal in a dry pan for a few minutes, stirring continuously till it's slightly deepened in color.
Put the rice, moong dal, turmeric, olive oil and water with a pinch of sea salt in a pressure cooker and cook for 6 whistles. If you don't have a pressure cooker then you can cook them in a large pot on the stovetop on medium flame for about 45 mins till the dal is well cooked and soft, in which case it needs to be monitored and stirred occasionally.
In a small pan, heat the vegetable oil for about half a minute. Add the mustard and let it crackle, then add the cumin, asafoteida powder, whole black pepper, curry leaves and the ginger and stir for a few seconds and switch off the flame.
Add sea salt and the seasoning to the cooked rice/dal mixture and mix.
Serve hot.
**********
Vegan Sweet Pongal
1/2 C Moong Dal
1/2 C Rice
1/4 C Channa Dal (Split Gram)
2 C Water
2 C Soymilk or Almond Milk
2 T Olive Oil
Lightly toast the moong and channa dals in a dry pan for a few minutes, stirring continuously till they have slightly deepened in color.
Cook all the above ingredients in a pressure cooker or a large pan till the rice is cooked well and the dals have become soft.
Stir in:
1 1/2 C Jaggery or Molasses
1/4 t Cardamom Powder
Handful of toasted Cashew nut pieces and Raisins.
1/2 to 1 C water
Bring to boil while stirring continuously and simmer for a few minutes.
Serve hot or cold.
**********
Tamarind Gojju - as a side for the Savory Pongal
1 T any Vegetable Oil
1/4 t Mustard Seeds
1/4 t Cumin Seeds
Pinch Asafoteida Powder
1/4 t Whole Black Pepper
5-6 Curry Leaves
2 Red Chillies
Heat the oil in a small pan for about half a minute and add the mustard seeds (they should crackle immediately). Add the rest of the seasoning ingredients in the order given.
Take it off the flame. Then quickly mix in:
1/2 C Water
1/2 t Tamarind Paste
Sea Salt (to taste)
Put it back on the stove and bring to boil. Reduce the flame a simmer for a few minutes.
Note: If you desire a slightly thicker sauce then mix 1/2 t Gram Flour with a few spoons of water and make a liquidy paste. Stir in the paste into the Gojju while it's still simmering and keep stirring for a few minutes till the sauce has slightly thickened.
**********
Oh will you LOOK at the time! It's 11:30 pm and I need to get to bed. So I'll post the recipe for the Vada Holes some other time. Until then... enjoy the Pongal! :)
love and light,
Susmitha :)
Tuesday, December 16, 2008
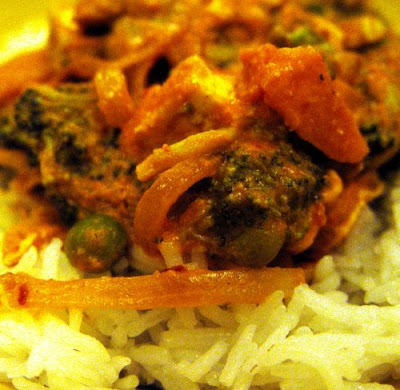
Basmati Rice with Tofu Broccoli Curry
Broccoli doesn't come by all that easy here and even if we find any, it's usually in the third stage of dying. So imagine my thrill when I went to good old dependable Nilgiris (local grocery chain) and found fresh, delicious looking broccoli! :)
We also ended up buying some tofu and fine basmati rice on the same trip and couldn't wait to get home and start cooking!!
Forgive the bad pictures, it was night and I was famished so had to do a quick clickety click in whatever light was available before stuffing my face!
1 Cup Basmati Rice (cooked according to instructions on pack with a dash of salt and a drizzle of extra virgin olive oil)
1 Block of Tofu cut into little cubes
1 Head's worth of Broccoli florets
1 Cup sliced French Beans
3/4 Cup sliced carrots
Handful Green Peas
1 Onion sliced
3 Ripe Tomatoes
1/2 tsp Garlic Paste
2-3 Dried Red Chillies
2 T Olive oil
1/2 tsp Garam Masala powder (available at Indian groceries)
Juice of 1 Lemon
Sea Salt (to taste)
*Put the sliced veggies (except onion) in a microwavable dish and cook for 7-10 minutes.
*Pop the tomatoes, chillies, a few cubes of the tofu, sea salt and garlic paste into a blender container and process into a creamy sauce adding very little water.
*Heat the olive oil in a pan and add the onion, fry for a few minutes till it's cooked.
*Sprinkle on the Garam Masala powder and stir well (you can try using any other spice mix if you like).
*Add the tofu cubes and keep stirring for a few minutes.
*Put in the cooked veggies and stir for a minute.
*Pour the prepared tomato sauce over everything and mix well.
*Let it simmer for 2 minutes.
*Switch off the stove and wait for 1 minute.
*Squeeze the lemon juice and mix well.
*Serve over the cooked basmati rice.
We also ended up buying some tofu and fine basmati rice on the same trip and couldn't wait to get home and start cooking!!
Forgive the bad pictures, it was night and I was famished so had to do a quick clickety click in whatever light was available before stuffing my face!
Basmati Rice with Tofu Broccoli Curry
1 Cup Basmati Rice (cooked according to instructions on pack with a dash of salt and a drizzle of extra virgin olive oil)
1 Block of Tofu cut into little cubes
1 Head's worth of Broccoli florets
1 Cup sliced French Beans
3/4 Cup sliced carrots
Handful Green Peas
1 Onion sliced
3 Ripe Tomatoes
1/2 tsp Garlic Paste
2-3 Dried Red Chillies
2 T Olive oil
1/2 tsp Garam Masala powder (available at Indian groceries)
Juice of 1 Lemon
Sea Salt (to taste)
*Put the sliced veggies (except onion) in a microwavable dish and cook for 7-10 minutes.
*Pop the tomatoes, chillies, a few cubes of the tofu, sea salt and garlic paste into a blender container and process into a creamy sauce adding very little water.
*Heat the olive oil in a pan and add the onion, fry for a few minutes till it's cooked.
*Sprinkle on the Garam Masala powder and stir well (you can try using any other spice mix if you like).
*Add the tofu cubes and keep stirring for a few minutes.
*Put in the cooked veggies and stir for a minute.
*Pour the prepared tomato sauce over everything and mix well.
*Let it simmer for 2 minutes.
*Switch off the stove and wait for 1 minute.
*Squeeze the lemon juice and mix well.
*Serve over the cooked basmati rice.
Labels:
Main Course Dishes
Saturday, December 06, 2008
Vegan Pasta - Penne in Mint Cilantro Pesto Sauce
There used to be a time when I resorted to ketchup... KETCHUP... to make a pasta sauce tasty. *shudders* Don't get me wrong, I'm a HUGE ketchup fan, but only when it's on the side with standard junk food - fries, veggie burgers, pizzas, potato chips, Maggi - you know, that kind of stuff. If at all I use it in cooking, it would probably be just a dash in some dish with an East Asian flair, to complement the soy sauce.
Well, I'm not really the type who can follow a recipe word to word. I always tweak and experiment. A recipe book is something I use for inspiration rather than guidance (my favorites are Very Vegetarian and Vegan Planet). And one important thing I have come to learn through my experimenting is that pesto making is an art of bringing out the rich flavors of the herbs, spices, vegetables and nuts which go into it. The more natural and fresh the ingredients are, the better for a delicious, wholesome pasta meal. A completely vegan pasta is truly delightful!
Of course, just like the rest of my creations, my pestos are always different each time. It's something that just happens naturally because what I put into the sauce just depends on my mood and the provisions in my pantry and fridge. And even a slight variation in the ingredients or a quantity of what's used, the whole taste changes.
To top it all, the personality of the final dish is highly influenced by the basic type of pasta used. Semolina + Salt + Water is what goes into all pastas so does the shape really make a difference in the taste? Yes it totally does! With the way Penne holds the pesto, the pasta is more prominent in the mouth than the sauce. But Fusilli, with its ridges, incorporates the flavors within itself so well that there's a perfect blend of the pasta and the pesto. Then there's the Shell which fills itself with a larger quantity of the sauce and each time you put a piece into your mouth the sauce bursts out in a delicious explosion. And finally the Butterfly, the pesto delicately makes its presence felt as your tongue plays with the interesting texture of the pasta.
The best part is that none of this is as complicated as it sounds. In fact I cook pasta on the nights when I want to create a quick and easy meal that's also interesting, delicious and nutritious.
Here's a recipe for a yummy and healthy Vegan pasta I created earlier tonight for dinner. Use it as a take off point and concoct your own sauce with any combination of herbs and vegetables, nuts and spices. And do let me know how it turns out :)
Penne in Mint Cilantro Pesto Sauce.
Cook 1 Cup of dry Penne in salted boiling water according to the instructions on the pack.
To be blended into a paste/sauce without using any extra water (the liquid from the tomatoes will be enough).
1 C spearmint
1 C cilantro
2 Green chillies
Handful of Almonds
1 T nutritional yeast
1 T flax seed
2 T Extra Virgin Olive Oil
4-5 Ripe Tomatoes
Sea Salt to taste
How to proceed:
Cut 1 large capsicum (green pepper) into cubes. Put in a microwave safe glass dish, cover and cook on high for 3 minutes. Mix in the blended sauce, cover and cook on high for 3 more minutes. Let it sit for a few minutes.
For the microwave haters, this can also be made easily on stovetop. Just stir fry the green pepper in a dash of olive oil very briefly (about a minute), add the pesto sauce and bring it to a boil and immediately switch off the flame.
Mix in the cooked Penne.
Enjoy! :)
Labels:
Main Course Dishes,
Pastas & Noodles
Subscribe to:
Posts (Atom)