Showing posts with label Main Course Dishes. Show all posts

Wednesday, April 24, 2013

Veg Kheema - Guest post by dassana of veg recipes of india


I met dassana, today's special guest, on the blogosphere and when I visited her blog Veg Recipes of India for the first time, I was overcome by a drool attack over all her delicious Indian recipes and the beautiful, step by step photographs.

Her recipes are vegetarian and a lot of them are vegan. My favourite is the amritsari chole. I loved her idea of using black tea while cooking the chickpeas! Ever since I read that recipe, I've often popped tea bags into the pressure cooker while cooking all kinds of beans.

A unique aspect of dassana's writing style on her blog and Facebook page is that she types in lowercase all the time. It's sort of her style. Just thought I'd share that bit of information in case you were wondering why I hadn't capitalised the 'd' in dassana's name. It's because she writes it that way. :)

Now on to the delicious veg kheema recipe that dassana is sharing today.

Thank you for guest posting on Veganosaurus, dassana! :)

--

Veg Kheema - Guest post by dassana of veg recipes of india

susmitha had asked me long time back to guest post for her. not that i had forgotten but life became busy and i was not able to write the guest post. so finally i mailed susmitha that i will be writing the post and here it is.

this recipe of veg kheema is basically lightly spiced minced veggies cooked indian style. kheema is the hindi word which means to mince. the veggies are minced/grated/finely chopped and then steamed with indian herbs and spices. veg kheema goes well with rotis and even bread. they can also be stuffed in burgers or buns with some raw tomato-cucumber slices along with lettuce and you have a healthy snack or brunch.

any vegetables of your choice can be used. the dish is mildy spiced, aromatic & too good to taste and healthy as well. the recipe is easy to make and does not take much of your time.

veg kheema recipe details below:

1 medium size carrot, grated or minced or chopped finely
7-8 mushrooms, chopped finely
7-8 cauliflower florets, grated or minced or chopped finely
7-8 french beans, chopped finely
1/2 cup green peas, boiled
2 medium size tomatoes, finely chopped
1 medium size onion, finely chopped
1 green chilli, finely chopped
1/2 inch ginger and 2-3 garlic - crushed finely in a mortar-pestle or made into a paste
1 black cardamom
1 inch cinnamon
1/2 tp turmeric powder
1/2 tsp red chilli powder
1/2 tsp garam masala powder
1 tsp coriander powder
2 cups water
1-2 tbsp sunflower oil
salt as required

heat oil in a pan.
add whole garam masala spices - black cardamom & cinnamon.
add chopped onion.
fry till light brown.
add the ginger garlic paste.
then add tomatoes and all the spice powders.
fry the whole mixture till the oil separates.
add all the veggies except boiled green peas.
add water and salt.
cover and cook till all veggies are cooked well.
the mixture should become dry and there should be no moisture.
now add the green peas and stir.
check the seasonings.
serve hot garnished with coriander leaves with some rotis, phulkas, naan or bread.

Veg Kheema - Guest post by dassana of veg recipes of india

Thursday, March 21, 2013

Tofu Shiitake Spinach in Balsamic Tomato Sauce


After my super long blog post earlier this week, I didn't think I'd be posting again so soon, but this stew that I made for dinner last night turned out soooo delicious that I had to share a recipe here.

I put it together with a bunch of random ingredients from my fridge and served it with phulkas. This morning, before having more for breakfast, I managed to grab a quick photo on my phone and shared it right away on Instagram. Here's the recipe with the pic.

Tofu Shiitake Spinach in Balsamic Tomato Sauce

Tofu Shiitake Spinach in Balsamic Tomato Sauce

8 small or 5 large Naati (local) Tomatoes
500 gms Tofu
100 gms Spinach
6 Dry Shiitake Mushrooms
10 cloves of Garlic
2 T Balsamic Vinegar
2 tsp Jaggery
1/2 tsp Sugar
1/2 tsp Cinnamon Powder
1/4 tsp Chilli Powder
3 T Olive Oil
Omum (Carom) seeds
1 T Corn Starch
Salt

Tabasco Habenero Sauce (optional)
Black Pepper (optional)

Soak the dry shiitakes in 3/4 C warm water for 10-15 minutes.
Drain and slice the mushrooms.
***Save the soaking water, it's full of flavor!!!***

Drain the tofu and gently squeeze out as much water as possible.
Make large cubes.

Wash and roughly chop the spinach.

Blend the tomatoes with 2-3 cloves of garlic, balsamic vinegar, jaggery, salt and chilli powder.
Add the tofu to the tomato puree and keep aside.

Heat the olive oil in a heavy bottomed pan and add a pinch of omum seeds.
Chop and add the remaining garlic and stir.
Add the shiitakes to the pan and stir fry for a few seconds.
Sprinkle the sugar and cinnamon powder and mix well, stirring for a minute.
Add the chopped spinach and stir fry for a few seconds.

Pour the tomato-tofu sauce into the pan and mix well.
Allow to simmer on low heat for a few minutes, until the raw tomato smell is gone.

Use the shiitake soaking water and make a liquidy paste out of the corn starch.
You need to place the starch in a bowl and add a little water at a time and stir.

Pour this corn starch liquid into the pan and mix well.
Keep stirring and continue to simmer for a few more minutes.
The sauce will thicken just a little bit.

Turn off the heat and serve hot with freshly crushed pepper and a few drops of tabasco habanero sauce drizzled over it.

Enjoy! :)


Friday, January 25, 2013

The Kelvis Sandwich - Guest Post by Ann of An Unrefined Vegan


Today's guest post is by Annie of An Unrefined Vegan. I first discovered Ann's blog while browsing through the Virtual Vegan Potluck last May. Every participating blog had mentioned Ann as the brainchild behind the brilliant VVP idea. :)

When I visited her blog, I found these super yummy Sage & Rosemary Dinner Rolls with Roasted Garlic Coconut Butter and I decided that I would definitely be participating in the next VVP.

For the second VVP, the one for which I made the Hot Spiced Chai with Sesame-Cashew Mylk, Ann had this fantastic dessert on her blog - Maple Creme & Mocha Spice Cake Trifle with Fresh Blueberries. Just the name sounds sooooooo good, doesn't it? You should check out the pictures on her post!

Ann is also an active member of our Vegan Temptivists group and we've been visiting each other on the blogosphere often.

Today, Ann shares a delicious, hearty sandwich recipe with drool worthy pictures here on my blog. Thank you so much for guest blogging on Veganosaurus, Ann. :)

--

The Kelvis Sandwich by Annie

Kel + Elvis = The Kelvis


Born from Kel's frugal nature, this sandwich also takes some inspiration from the overindulgent appetite of The King himself, Elvis Presley, and his love of fried PB & banana sandwiches. You see, I was attempting to make a kind of bean-based bacon which consisted of white beans and various spices that I processed until smooth. After spreading the paste onto a baking sheet and baking for about 20 minutes I ended up with...a very hot bean paste. It didn't slice the way it was supposed to, but it did taste good. I let it sit abandoned in the pan for a few hours - fully intending to toss the whole mess into the garbage can. Instead, Kel squirreled it away in the refrigerator and the next morning I caught him crumbling the bean "bacon" onto his morning toast along with almond butter. He declared it a winner and when I reluctantly tasted it, I agreed. Thusly, the Kelvis was born.

Instead of the paste-like bean bacon, I went with my sure-fire tempeh bacon recipe and for bread - I wanted something special - so I whipped up a batch of maple whole wheat waffles. (Feel free to use a good, hearty bread instead.) A cherry compote sounded more interesting to me than The King's preferred fruit. This is one decadent, filling sandwich and would be perfect for Sunday brunch.

Thank you, Susmitha, for giving me the opportunity to share a recipe on Veganosaurus!

Maple Waffle, Almond Butter, Tempeh Bacon & Cherry Compote Sandwiches
Makes enough to satisfy The King

Maple Whole Wheat Waffles
Makes 7

1 3/4 cups whole wheat pastry flour
1 cup hazelnut flour (or your favorite nut meal)
2 tsp. baking powder
1 tsp. baking soda
2 1/4 cups almond milk (or other nut milk), warmed
1/4 cup coconut oil, melted
1/2 tsp. maple extract, optional
1 tbsp. maple syrup, optional

Tempeh Bacon
Makes ~14 strips

1 8 oz. package tempeh, cut into 1/4" strips
1/4 cup tamari or soy sauce
1/4 cup water or vegetable broth
1 tbsp. maple syrup
1 tsp. Liquid Smoke
lots of ground black pepper

Cherry-Cranberry-Fig Compote
Makes ~3 cups

1 1/2 cups pomegranate-cherry juice (or just cherry juice)
1 1/2 cups fresh cranberries
1 cup dried, tart cherries
1/2 cup dried figs, chopped
1 tbsp. crystallized ginger, chopped
1 cinnamon stick
1/4 tsp. ground allspice
1 10 oz. jar fruit juice-sweetened or sugar-free cherry jam
1 tbsp. flaxseed meal, optional

Almond butter (quantity is up to you)

Make the waffles:
Get the waffle iron heating.

In a large bowl, combine the flours, baking powder and baking soda. In a smaller bowl, whisk together the wet ingredients. Combine with the flour mixture and stir to break down any lumps. Allow to sit for about 15 minutes.

Lightly spray waffle iron with oil and ladle on some of the waffle batter. Cook 4-5 minutes (or per your waffle iron's quirks) and gently remove the waffle. Proceed with remaining batter.

If assembling the Kelvises right away, keep the waffles warm in a 200F oven while you bake the rest of the batter. Otherwise, place the waffles on a cooling rack.

Tempeh Collage

Make the tempeh bacon:
Preheat oven to 425F. Combine the tamari through black pepper in a 9"x9" baking dish (I use glass for ease of cleaning). Lay in the tempeh strips and turn once to coat.

Bake for about 20-25 minutes, turning once halfway through. You're aiming for a dark brown, slightly shiny exterior on the strips, with nearly all of the marinade baked off. Remove from the oven and set aside.

Compote, Tempeh Bacon

Make the cherry compote:
In a large saucepan, combine all of the ingredients through the allspice. Bring to a boil, then lower the heat to a simmer and cook for about 10 minutes. Stir in the cherry jam and cook for an additional minute or two to allow the jam to melt into the compote. Remove from the heat and stir in the flaxseed meal, if using. Set aside. Keep the compote in the refrigerator until ready to use - warm gently before serving with the Kelvis.

Assemble the Kelvis:
Slather almond butter on one half of a waffle; lay on some tempeh bacon strips and top with cherry compote. Top with the remaining waffle half, if desired.

Kel Suggests:
Sprinkle The Kelvis with toasted, chopped pecans for extra crunch.

A few slices of banana couldn't hurt. It's what The King would do.

If reheating the waffles, toast them so they retain their crunch, but serve as an open-faced sandwich so that the roof of your mouth isn't shredded by the crispy waffle.

Monday, January 21, 2013

Farfalle with Crunchy Okra and Red Bell Peppers


Farfalle with Crunchy Okra and Red Bell Peppers

Once in a while, a few of us Bangalore vegan girls meet up to have a pigging out session. Everyone brings one main dish and one dessert and we all eat until we're unable to move. Even though there are monthly Vegan Bengaluru potlucks, we still like to have these separate sessions occasionally because they're quality time spent with a few good friends, it's a small group so we tend to put effort into making extra special things which aren't easy to make in large quantities and most importantly, no boys are allowed! :D

It was to one of these mini potlucks that my friend Bynz brought a delicious pasta dish, Farfalle with Aubergines. It was absolutely amazing so I asked her to send me the recipe, thinking I'd try it sometime when hubby wasn't home because he doesn't like Egg Plants. She sent me a snap of the recipe to my phone and I filed the recipe away in an album and totally forgot about it.

Then last week, on one of the afternoons, I wandered into my kitchen wondering what I could quickly make for lunch, when I spied the Okra that I'd left to dry on a towel. Something clicked at the back of my brain and I suddenly wanted to make Bynz's pasta dish with the Okra in place of the Egg Plants/Brinjal. I just knew they would make for an excellent replacement!

I also decided to add in some Red Capsicum that I had in the crisper and boy was that an awesome move! The dish turned out super delicious and it even tasted good after sitting in the fridge overnight and the Okra had turned soft. This is definitely something I'll be making more often.

Farfalle with Crunchy Okra and Red Bell Peppers

Farfalle with Crunchy Okra and Red Bell Peppers

2 C Dry Farfalle Pasta

2 T Coconut Oil
250 gms Okra/Ladies Finger

2 T Olive Oil
2 T Garlic - roughly chopped
1/2 Red Onion - finely chopped
1 T Celery Leaves - finely chopped
1/2 Red Capsicum/Bell Pepper - chopped
2 t Sugar
1/2 t Red Chilli Powder
Black Salt
Black Pepper - freshly crushed
4 small Tomatoes (preferably the juicy, naati/local variety) - chopped

Wash the okra and wipe properly well with a kitchen towel.
Spread on a fresh towel and allow to dry completely.
Cut off the tops and ends and keep aside.

In a large pot, bring water to a rolling boil and add 1/2 tsp black salt.
Add the pasta and stir.
Cook on medium for 10-12 minutes.
Drain and rinse with cool, running water.
Keep aside.

Meanwhile, heat a heavy bottomed wok and pour in the coconut oil.
When the oil is hot, add the dry okra and stir.
Fry until slightly browned.
Add a dash of black salt and stir well until crispy.
Remove with a slotted spoon onto a tissue paper.
Discard any remaining oil from the bottom of the wok.
Let the wok cool for a few minutes and wipe well with a tissue paper to remove oil residue.

Heat the wok again and add the olive oil.
Add the chopped garlic and stir fry for half a minute.
Add the chopped onion and celery and stir fry for a few minutes.
Add the red bell pepper and stir fry for a few minutes.
Add the spices, sugar and a dash of black salt and mix well.
Allow the sugar to caramelize for a minute.
Add the tomatoes and stir.
Reduce the heat, cover and cook for a few minutes.
Taste and adjust the salt and spices.
Turn off the heat.

Add the cooked pasta to the sauce and mix thoroughly.
Add the crispy fried okra and give it a quick toss.
Serve immediately with crushed pepper on top.
Enjoy! :)

Farfalle with Crunchy Okra and Red Bell Peppers

Tuesday, December 04, 2012

Whole Wheat Buttermylk Biscuits and Tofu Gravy


For a long time I'd only heard about Biscuits and Gravy, the American comfort food from my friends in the US. I finally got to taste them in 2010 as a part of the all you can eat Sunday brunch plate at the Sugar Plum Vegan Café in Sacremento. It was everything I'd expected it to be and more.

Vegan Biscuits and Gravy

This evening, while I was going through an old baking book looking for a Sourdough Bread recipe, I chanced upon a recipe for biscuits and the memory of that breakfast came flooding back. I was overcome by a craving for Biscuits and Gravy and I decided right at that moment that I'd be having it for dinner, no matter how long it took me to prepare it.

As it turned out, it took me barely 30-35 minutes to make this from start to finish. It's hard to believe that deeply satisfying, hit-the-spot kind of food like this is so simple to whip up.

Biscuits

Biscuits are commonly made with all purpose flour but I made mine with whole wheat and they turned out deliciously flakey and crunchy on the outside. A perfect combination with thick, creamy gravy. This also made them healthier than traditional biscuits.

Vegan Biscuits and Gravy

Healthier but not completely healthy. There's an insane amount of baking soda and baking powder used in biscuit recipes. And a lot of fat/oil too. This leaves one with a bloated tummy effect that raising agents usually cause. Nothing that a small swig of Oman Water can't fix, but now I do understand why this is traditionally a breakfast dish and not a dinner dish. haha

I am going to figure out a way to drastically reduce or eliminate the baking powder and soda the next time I make it though. But for now, the biscuit recipe below is totally worth trying! So yum!!!

Vegan Biscuits and Gravy

1 1/2 C Whole Wheat Flour
1 tsp Baking Powder
1/2 tsp Baking Soda
1 tsp Salt
1 tsp Sugar
2-3 T Thick Coconut Oil (or vegan margarine)
1/4 C Cashew Mylk (or other vegan mylk)
1 tsp Vinegar
1/2 C Peanut Mylk Curds (or other vegan yogurt)*

Preheat oven to 220 C / 425 F
Line a baking sheet with foil.
Sieve together the dry ingredients.
Add the coconut oil and rub well to form crumbs.
Whisk the vinegar into the cashew mylk.
Pour the cashew mylk into the dry ingredients and mix.
Slowly add enough of the peanut mylk yogurt to form a soft, slightly sticky dough.
Make a ball and place on a floured surface.
With a floured rolling pin, roll it out into a 1/2 inch thick sheet.
Cut out rounds using a cookie cutter or the edge of a cup/tumbler.
Place on prepared baking sheet and bake for 15 minutes.

*If you don't have any vegan yogurt at home then just whisk the vinegar into 3/4 C of vegan mylk instead of 1/4 C and use that.

Gravy

I looked up gravy recipes and realized that a gravy consists of three main elements. A creamy sauce that's been thickened with the use of a roux. Chunks of something soft/chewy for texture. And interesting spices/flavours. As long as these three are in place, the gravy can be made of any combination of things. So I just used what I had at home and concocted my own version of gravy. I wasn't sure how it would taste but it turned out so delicious that I had to immediately record the recipe so I wouldn't forget it.

Vegan Biscuits and Gravy

2-3 T Olive Oil
1 tsp Garlic - roughly chopped
1/2 tsp Celery (leaves, not stalk) - finely chopped
2 Cherry Peppers (or any other spicy chillies) - chopped
Pinch of Freshly Crushed Black Pepper
1/4 tsp Cinnamon
1 small block Tofu - cubed
1 1/2 C + 1/4 C Cashew Mylk (or other plant based mylk)
1 T Soy Sauce
1 tsp Sugar
1 T Corn Starch
1/4 tsp Tamarind Paste (or something else to add a wee bit of tang)
Salt (if required)

Heat olive oil in a heavy bottomed pan/wok.
Add the chopped garlic, celery and chillies and stir fry for a minute on low heat.
Add the crushed black pepper and cinnamon and mix.
Add the tofu cubes and stir fry for a couple of minutes.
Pour in 1 1/2 C cashew mylk, soy sauce and sugar, mix well and allow to simmer.
Meanwhile, whisk together the corn starch and the remaining 1/4 C cashew mylk.
Pour into the sauce slowly and stir continuously until the mixture thickens.
Turn off the heat.
Add tamarind paste and mix well.
Taste and add a bit of salt if required.

Slice biscuits in half and ladle the gravy over them.
Enjoy hot! :)

Vegan Biscuits and Gravy

Friday, October 26, 2012

Spaghetti and Neat Balls Vegan MoFo day 19


This will be my last Main Course recipe for Vegan MoFo this year. And I've been saving my best recipe for last. :)

Vegan Spaghetti and Tofu Balls

I'm so happy to have touched nineteen posts so far. I haven't decided what I'll do for my twentieth and final day. It might be a round up/flash back type post like I did for day #10. Or perhaps just some yummilicious vegan food piccies, without recipes, since I have no intention of stepping into my kitchen over the next few days! Methinks, I've earned some well-deserved eating out and self pampering. :D

One more thing, I am staying well away from the internet this weekend! We all need a nice break away from blogging and facebooking once in a while and what's a better time than right after all the Vegan MoFo madness? So I shall resurface with my next post on Monday or Tuesday.

On Thursday next week, my blog will be a part of the super innovative, one-day blogging event, Virtual Vegan Potluck! :) This is an idea conceived by my friend Ann of An Unrefined Vegan. They had the first VVP earlier this year, which was when I discovered Ann's blog (among many other awesome ones) and I just knew that when the next VVP happened, I would definitely want to be a part of it. That's why, even though it's right after Vegan MoFo, I singed up for it. Since I've made desserts, salads, soups, starters/snacks and main courses all this month, I decided that I'll be bringing a beverage to the potluck. You can see what it is when you come back here on November 1st. :)

Virtual Vegan Potluck Logo

Now on to today's recipe Spaghetti and Neat Balls. I first ate balls made of tofu at my friend Karol's house, way back in 2009. She had put crumbled tofu, almonds and spinach together with some spices to make these yummy balls. I based the basic idea for my Neat Balls from the ones Karol fed us. :)

This is one of the most scrumptious main courses I've made in all my vegan life. It turned out sooo sooo soooo good!! I'm not going to spend time describing it further. It's really very simple to make. So you can try it out for yourself and experience the deep satisfaction. :)

For the Neat Balls:
1 block tofu (I like the Ka Kim's brand in Bangalore or the one from Towness) - drained, patted dry and crumbled
2 carrots - grated
1 very small turnip - peeled and grated
2 tsp sesame seeds
1 T flax seed powder
2 T corn starch
2 tsp garlic powder
1 tsp coriander powder
1/4 tsp black pepper powder
1/8 tsp turmeric powder
1/8 tsp asafoetida powder
1/8 tsp red chilly powder
1/4 tsp liquid jaggery (or any other liquid sweetener)
1 tsp white wine vinegar
1/2 T extra virgin olive oil
1/2 tsp Salt
2 T nutritional yeast (optional)

For the Tomato Sauce:
5 medium ripe, juicy tomatoes
1 T garlic powder
2 spicy green chillies
1/4 tsp jaggery or liquid jaggery (or any other sweetener)
1/2 tsp Salt

Additional Ingredients:
250 gms spaghetti - cooked in lightly salted water, drained and rinsed
1/2 C Italian basil - chopped fine
1 large green bell pepper/capsicum - sliced and nuked
1 T Daiya pepperjack cheeze (optional)

Preheat oven to 200C/400F.

Knead together all the ingredients for the balls and shape them into... well, balls! haha

Blend the tomato sauce ingredients into a smooth paste, using a few splashes of water if required.

Toss the spaghetti, basil, capsicum and Daiya (if using) together.

Pour the tomato sauce over them, mix and place in a baking dish.

Place the balls over the spaghetti.

Bake for around 30 minutes.

Mix lightly with a fork to coat the balls with the sauce.

Serve hot with crushed pepper and drizzled with Tabasco Chipotle or other hot sauce.

Enjoy! :)

Vegan Spaghetti and Neat Balls

Note: This dish tastes best when baked, but in case you don't have an oven, then you could try frying the balls. I wouldn't recommend boiling or steaming though. Also, if you're not baking, then simmer the tomato sauce for a few minutes before tossing everything in it.

Wednesday, October 24, 2012

Asian Fusion Vermicelli Vegan MoFo day 18


I'm a big fan of fusion food. It's a lot of fun to take the best of various cuisines and meld them together into a unique, experimental dish with its own personality. One of these fusion concoctions that I make often is an Asian vegetable and tofu stir fry tossed with Vermicelli/Semiya (South Indian, semolina based thin noodles).

My favorite local Semiya brand is Anil Roasted Vermicelli. These are really thin and extra long and none of the other brands match Anil's taste and texture.

Since any semolina based noodles or pastas aren't very nutritious, I usually mix a *lot* of veggies with a small amount of Semiya. This ensures that there's a lot of healthy goodness in the meal with just enough grain content to satisfy the carb craving.

Asian Fusion Vermicelli

I would recommend Tamari for this recipe because it's just amaaaaaazingly delicious (almost drinkable straight out of the bottle *slurp*). I pour it into any of my Asian dishes as well as all salads. But, as I mentioned in last week's Summer Rolls with Spicy Peanut Sauce recipe, unfortunately I ran out of my stock from the US long ago and it isn't available here. :( So I've just settled for plain old dark soy sauce that can be picked up at any grocery store.

Asian Fusion Vermicelli

3 C Cabbage - shredded or sliced
1/2 C Beans - chopped to 1 inch pieces
1 Carrot - sliced
1/2 Capsicum - sliced
1 block of Firm or Extra Firm Tofu (200 gms) - drained, blotted and cubed
1 Onion - thinly sliced
1 T Garlic - roughly chopped
1 inch Ginger - grated
1 Green Chilli - chopped into rounds
1 tsp Thai Basil - chopped
1-2 T Dark Soy Sauce
3 T Gingelly (Sesame) Oil

2 C Anil Roasted Vermicelli
1/2 tsp Crunchy Peanut Butter
2 C Water
pinch of Turmeric

Peanuts - roasted and crushed
Tabasco Chipotle Hot Sauce

Pre-cook cabbage, carrots and beans in the microwave for about 5 minutes to make the stir frying go quicker.

Heat gingelly oil in a heavy bottomed wok (baandli).
Add ginger, garlic and green chillies and stir fry for half a minute.
Add onion and Thai basil and stir fry until onions become partially tender.
Add tofu and gently stir fry for a few seconds.
Add capsicum and stir fry for a couple of minutes.
Add remaining vegetables and stir fry for a couple of minutes.
Add soy sauce and heat for half a minute while mixing well.
Turn off the heat and keep aside.

In a pot, bring 2 C of water to a rolling boil with the pinch of turmeric and peanut butter.
Add the vermicelli and keep stirring on medium heat for a few minutes, until most of the water has been absorbed and the vermicelli has been cooked.

Add the stir fried veggie-tofu mixture to the cooked vermicelli and mix very well.
Garnish with roasted, crushed peanuts.

Serve hot drizzled with Tabasco Chipotle Sauce. If you've been reading my recent blog posts, you might already have realized that Tabasco Chipotle is my new best friend. Hubby and I have been pouring it over everything! It's nuts. hehe

Enjoy! :)


Asian Fusion Vermicelli

Tuesday, October 23, 2012

Pasta Shells with Mint Tamarind Tofu Vegan MoFo day 17


Hubby and I drastically cut down on buying packaged dry pasta a while ago. Semolina is basically white flour in a grainy form. There isn't much nutrition or fiber in it. Plus, pasta prices have been hiked up quite a bit. Rs.150 for 500 gms is the lowest price I've seen in the recent times and that seems way too much to pay for half a kilo of semolina and salt.

There are healthier whole wheat pastas and gluten-fee rice/corn varieties available in the market now, but those are double, triple, quadruple the price. I can understand that it's slightly more expensive to produce GF products but just because something is gluten-free, doesn't mean it should cost an arm and a leg.

But giving up pasta entirely is not something I'm willing to do. For starters, it is so darned yummy. On top of that, it's unbelievably easy to whip up dinner when there's a pack of dry pasta on hand! So once in a while, we indulge and buy a big pack of pasta and then use it sparingly.

Conchiglioni and Farfalle are my very favourite kinds. The sauces and flavours get into all the little nooks and crannies and make the end result extra yummy. :)

Pasta Shells with Mint Tamarind Tofu

When hubby and I discovered that Bambino, an old, Indian company known for its Semiya Vermicelli and Elbow Macaroni for many years now, has started to produce Shell Macaroni, we were super happy! Being a local brand, we knew they'd price their products quite reasonably. Nevertheless, we were delightfully surprised to see that they sell nearly 1kg (950 gms) of their Shell Macaroni at Rs.60!!!

Granted that Macaroni Shells are thinner and smaller than regular Conchiglioni Shells and they don't cook to a firm, al dente finish, but the difference isn't that big of a deal really. Especially if one's not looking to make anything fancy but just have an easy and delicious weeknight meal.

I don't have any fixed recipes I follow while making pasta. I just put together things depending on my mood and what's available on hand. I made this dish of Pasta Shells with Mint Tamarind Tofu in the last week of September and wrote down the recipe so I could share it during this last week of Vegan MoFo.

For that matter, most of the Main Courses that'll be on my blog this week have been made in September, while I was preparing for MoFo. So I'm thinking it's going to be a fairly chilled out week. :)

Pasta Shells with Mint Tamarind Tofu

Pasta Shells with Mint Tamarind Tofu

For marinaded mint tamarind tofu:
1 block (200 gms) Tofu
1 small Capsicum
1/2 tsp Tamarind Concentrate Paste
1/8 tsp Turmeric
15-20 fresh Mint Leaves
Tabasco Sauce
Salt

For pasta:
1 1/2 C Shell Pasta
Salt

For final baking:
5 medium Tomatoes
Tabasco Chipotle Sauce
Black Pepper
Salt

For tossing:
Extra Virgin Olive Oil
Vegan Parmesan* (optional)

Rinse and press tofu between tissue paper to remove as much moisture as possible.
Thinly slice capsicum.
Finely chop mint leaves.
Mix everything with the rest of the marinade ingredients and toss well.
Cover and keep aside for 1-2 hours.
Bake uncovered in a preheated oven at 250 C for 15-20 minutes or bake in the microwave using the dual Micro-Convection mode for 5 minutes.

Bring 5 cups of water to a rolling boil and add salt.
Add the pasta shells and cook for 5 minutes, while stirring once in a while.
Turn off the heat, cover and keep aside for another 5 minutes.
Drain and rinse in cool, running water.
Set aside.

Chop tomatoes into large chunks.
Add the cooked pasta and chopped tomatoes to the tofu dish.
Generously shake Tabasco Chipotle Sauce, crush black pepper and sprinkle a dash of salt over everything.
Toss well.
Cover and bake in a 250 C oven for 15-20 minutes or in the Micro-Convection mode for 5 minutes.

Drizzle extra virgin olive oil and sprinkle vegan Parmesan* and toss well.
Serve hot.
Enjoy! :)

Pasta Shells with Mint Tamarind Tofu

*Vegan Parmesan: I mix the pulp leftover from making almond mylk with nutritional yeast and salt and dehydrate it. Then I store the dry 'Parmesan' in an airtight container in in the fridge and sprinkle it over all my pasta dishes.

Monday, October 22, 2012

Mashed Potato Sweet Potato Bake - Vegan MoFo day 16


After a crazy, whirlwind three weeks, we have reached the final week of Vegan Mofo!! *phew* Technically, next week is the final week but that's just got three days whereas this week is the last full week of MoFo goodness. :)

I pre planned a lot in September to have many of the posts scheduled and ready in advance so that during MoFo, I could blog hop and enjoy the delicious vegan food posts all over the blogosphere. It didn't matter, things got crazy anyway, as they always tend to during MoFo month. So I am very proud to have reached 16 posts so far. And I am also quite happy to say that I have met so many awesome Vegan MoFo bloggers over the past three weeks. The Newsify google reader app on my phone is full and bursting and I'll continue to visit 2012 MoFo-ers blogs right until MoFo 2013, when I will have a fresh set of RSS feeds. :)

I've followed a theme throughout Vegan MoFo. Each week was reserved for recipes for one course of a Super Scrumptious Four Course Meal.

Week 1 was Desserts (the sub-theme being 'Mostly Raw') - Avocado Orange Chocolate Mousse, Fig and Cinnamon Ice Cream, Hazelnut Mocha Cheezecakes, Cashew Barfi Truffles and Banana Walnut Cinnamon Vanilla Crème.

Week 2 was Soups and Salads - Carrot Hesarubele Kosumbari, Nalli Kai Salad, Spinach Coconut Mylk Soup and Masala Mandakki.

Week 3 was Snacks and Starters (sub theme was 'Fairly Healthy') - Kandu Unde, Baked Akki Rotti Bites, Summer Rolls with Spicy Peanut Sauce and Sesame Encrusted Roasted Vegetables with Pumpkin Banana Poppy Seed Dip.

Yesterday I had a Bonus Dessert Recipe for Vegan Jamoon.

And now I begin Week 4 with Main Courses.

Today's dish is filling, delicious and really simple to put together. I based the general idea of the recipe on a yummy dish called Epinard à la Crème which I used to enjoy at a local restaurant called Casa Piccola many many years ago (during my pre-vegan days).

I made my baked dish out of potatoes and sweet potatoes mashed together with basic spices. The creamy spinach and tender baby corn go beautifully with the potatoes. The bread crumbs were a last minute addition and ended up being a great, crunchy touch!

Double Mashed Potatoes Bake

We ate this by itself but it can also be served with toasted garlic bread or a nice, leafy salad on the side.

Mashed Potato Sweet Potato Bake

5 medium Potatoes
2 Sweet Potatoes
1 C Spinach
10-12 Baby Corn
Pepper powder
Olive Oil
Salt
Tabasco Sauce
Bread Crumbs

Preheat oven to 225 C.
Boil, peel and mash potatoes and sweet potatoes.
Blanch spinach and chop roughly.
Slice baby corn into rounds.
Mix all ingredients, except Tabasco Sauce and bread crumbs.
Press into a baking dish.
Sprinkle generously with bread crumbs and press lightly.

Bake at 225 C for 10 minutes.
Reduce heat to 180 C and continue baking for 30 more minutes.
Let it cool in the oven for 5-10 minutes.

Serve hot with Tabasco Sauce drizzled on top and optionally a bit of ketchup on the side.
Enjoy! :)

Double Mashed Potatoes Bake

Wednesday, September 26, 2012

Wheat berry Pilaf: guest post by Richa of Vegan Richa


I met Richa sometime in the middle of last year when she dropped into my Facebook page. Her blog, which was then called Hobby and More and is now Vegan Richa, is filled with scrumptious recipes of various kinds with totally drool worthy photographs. But what she's most famous for is her whole lot of creative, amazing bread recipes! It's very obvious that Richa loooooves to bake bread and also make all kinds of interesting dishes with bread, like her Tiramisu and Gulab Jamun French Toasts.

Richa also makes some yummy gluten free breads. I tried her steaming method to make Gluten Free Flatbreads earlier this year and was really happy with the results.

Today I'm happy to have her here as a guest blogger with a delicious, healthy Wheat Berry Pilaf recipe. All those pictures she's clicked of the pilaf are making my mouth water and I can almost feel the chewiness of the wheat berries in my mouth. Yum!

As I mentioned in an earlier post, I'll be participating in Vegan MoFo this year. You can see my Vegan MoFo Sneak Peek album here.

Last year was my first time doing MoFo and it was the first for Richa too. This year she is really busy and was hesitant to participate, but finally she decided to just go ahead and jump into the MoFo madness. :D I can't wait to see all the delicious recipes she comes up with all through October.

Now, without further ado, let's move on to Richa's post...

--

Wheat berry Pilaf

I blog at Vegan Richa, where I vegan-ize Indian food, sweets, yeast breads, and other baked goodies. I met Susmitha I think around Vegan Mofo last year. :) Come to think of it, I met so many wonderful bloggers in that one whirlwind month.

I was instantly attracted to her super cute hand made monsters, beautiful jewellery and amazing and simple food creations!

When Sus asked me to do a guest post in the middle of Summer. I knew I was not going to find time till later. So here I am when the weather is cooling down, and in a few days I will be going crazy trying to blog every day of the month!

Wheat berry Pilaf

For the guest post, I was initially thinking of making some cookies. But Sus has been baking up super fun cookies already lately. So I decided on a delicious whole grain pilaf. For those on a gluten free diet, this pilaf can be made with any whole grains.

Wheat berry Pilaf

For variations: add mushrooms, greens, eggplants, chunky vegetables, nuts, biryani /pulav masala of choice, dried fruit (raisin/cranberries). Or make a simple one with vegetable broth, mushrooms and parsley.

For some of my Whole grain/Rice preparations see here and veganized Indian sweets see here.

Wheat berry Pilaf

Whole wheat berry pilaf

Vegan, soy, corn, nut free recipe

Cook Time: 30 minutes to 1 hour, Serves 2

Ingredients:

1/2 cup dry wheat berries (Gejun grain)

3/4 cup water for pressure cooker, (1.5 cups for saucepan)

extra water for soaking

1 teaspoon organic canola or virgin coconut oil

1 teaspoon cumin seeds

1 green chili chopped

4-5 garlic cloves chopped

1/4 medium onion chopped

1/4 red bell pepper chopped

1/4 cup green peas

1 teaspoon coriander powder or biryani masala blend

chopped cilantro for garnish

Method:

Rinse the berries well and soak overnight in 2 cups water.

In a pressure cooker or pan, add oil.

Heat on medium heat. Add cumin seeds and let them crackle.

Add chili and onions and cook for 4-5 minutes until golden.

Add red bell pepper and peas and cook for a minute.

Add in the rinsed wheat berries, salt and cook on medium for 2 whistles in the pressure cooker, and then on low heat for 15-20 minutes (2-3 more whistles).

If cooking in saucepan, add the rinsed berries, 1.5 cups of water, cover and cook on low until berries are tender. Serve hot.

The water content and cook time depends on the wheat berries(hard or soft), add more water and cook longer if not tender at the suggested time. I use soft white or red wheat berries here.

You can also cook the wheat berries separately like pasta and keep ready. Cook with water and salt until tender.

Serve hot topped with cilantro and lemon juice/wedge.

Wheat berry Pilaf

Thank you for sharing your space with me Susmitha! Hope you all like this post. You can also find me on Facebook, Twitter and Pinterest. Have a great week.

Wheat berry Pilaf

Wednesday, September 12, 2012

Navané Dosé - Foxtail Millet Dosas: guest post by Chinmayie of Love Food Eat


It was a lovely Friday afternoon in April, the day before the first Vegan lunch/demo at Graze, Taj. Himani and I were lounging on bar stools and sipping on green tea. In the open kitchen we were facing, Uday was chatting with us while preparing scrumptious vegan dishes for us to taste for the next day's event. He told us that a food blogger was coming by soon to review the vegan menu on her blog. I remember thinking it'd be nice to meet another local food blogger in person.

The blogger was Chinmayie of Love Food Eat and she arrived at Graze with her husband and her adorable daughter. When I went up and introduced myself, she immediately said, "I visit your blog. A lot!" and then she called over her hubby and said, "you know that vegan blogger I was talking about on the way here? It's her". I was not expecting that at all and needless to say, I was totally flattered. :)

We didn't get to talk much that day because both of us were busy with having lunch and taking photographs. We just exchanged cards and spoke about how we should cook together sometime. It was only after coming back home and visiting her beautiful blog for the first time did I begin to learn about Chinmayie and her work.

Chinmayie is a vegetarian, but a very large portion of her recipes happen to be vegan. Like me, she is an intuitive cook. That means, instead of following recipes, she prefers to experiment with different ingredients and cuisines and whip up all kinds of interesting concoctions. Just look at this gorgeous, gorgeous Jamun Jam she invented!

Jamun Jam

Doesn't it make you want to dip your whole fist in and lick it up? :P

Over the past few months I've gotten to know Chinmayie better, mainly on our Foodies in Bangalore group on Facebook. She leans towards healthy cooking and is quite knowledgeable about plant based nutrition. And she is always interested to learn more about vegan cuisine and try out vegan recipes.

I'm very happy to have her here today with her Navané Dosé. Navané means Foxtail Millet in Kannada and in Karnataka, the word for Dosa is Dosé (the 'e' in both words is pronounced 'ay', as in - say, day, hay...).

Chinmayie has taken lovely shots of the ingredients and the steps involved in making these crispy Foxtail Millet Dosas. Thank you for being here Cinnmayie! :)

Let's move ahead to her guest post now...

--

Navane Dose

Hey All! This is Chinmayie from the blog Love Food Eat. I am here with a guest post for Susmitha's blog.

I have been seeing Veganosaurus from a long time, even before I started blogging. I initially came across her super cool miniature clay sculptures and beautiful jewelry which then lead me to her vegan food blog. I finally met her at a local restaurant recently in a vegan food event. The first words to slip out of my mouth were 'I am a big fan of you and your blog!'

Let's come to the recipe now. Those who know me and my blog, already know my love for millets. I have been working on adding more millets to my diet for more than just health benefits associated with it. While I enjoy them in most forms, my husband and daughter haven't really liked it much. They definitely prefer rice over millets in our daily meals.

A lot of people find it hard to figure out where to start. I also understand that if you are a rice+rasam loving South Indian like me, it'll be hard for you to include a foxtail millet salad into your everyday menu.

Foxtail Millet

I noticed that it's always easier to start liking a new ingredient when it is used in a familiar way. We all love our good old south Indian breakfast staple dosas. We never get tired of them. I grew up eating all kinds of different dosas, not just the rice+lentil kind. We made dosas out of plantains, jackfruit, cucumbers, water melon rind, tender coconut, wheat, finger millets and a lot more… some sweet, some spicy and everything in between. Having eaten all those different kinds, I was sure foxtail millets would work perfectly in a dosa and I wasn't wrong.

Dosa Ingredients

If you wanted to include foxtail millet into your diet and wasn't too sure about using it in its whole form, try this dosa recipe. It works like a dream and tastes super good. You can eat them not just because they are healthy! I served my dosa with some sambar but even a simple coconut chutney will be good.

Dosa Batter

Notes:

You should be able to skip the rice altogether and make the dosas with just millets+lentils also.

Add green or red chilies, cumin, coriander seeds, cilantro leaves etc... while grinding the batter for more flavor.

You can also add grated vegetables and greens to the batter and make thick, pancake like dosas.

If you live in a cooler climate, cover the batter with something warm to help it ferment better.

Left over batter can be refrigerated and used for 3-4 days.

Dosa Roasting

Ingredints:

Foxtail millets - 2 cups

Rice - 1/4 cup

Channa dal - 1/4 cup

Urad dal - 1/4 cup

Toor dal - 1/4 cup

Chopped onion - 1/2 cup

Ginger - 1 inch piece

Salt


Combine the foxtail millet with rice and all the lentils and wash them once. Soak them in clean water for 3-4 hours.

Drain the water fully and place them in a blender with onion, ginger and salt and blend it into a smooth paste. Add enough water to get the batter to a thick pancake batter consistency. Cover and let it ferment for 8-10 hours (or overnight).

After 8-10 hours or the next day, the dosa batter would have fermented well. There might be small little bubbles on the surface and it might smell slightly sour. Mix the batter well.

To make the dosas -

Heat a griddle well, brush it with a thin layer of oil. Pour a ladleful of batter in the center and spread it into a dosa with the help of your ladle. You can either make it thick like a pancake or thin like Crêpes.

When one side of the dosa looks lightly cooked with small bubbles on top, apply a little bit of oil and flip it.

Once ready, serve it with sambar or any kind of chutney.

Yummy Dosa

Saturday, August 11, 2012

Basil and Walnut Sauce with Broccoli and Baby Corn


There's nothing more inspiring to me than a crisper full of fresh vegetables! My tastiest dinners are always made on the evenings my Towness groceries come home.

Town Essentials is a gem of an online grocery store that was recommended to us early this year by our friends Amrita and Vijay of Vegan India! They told us that the quality of vegetables and fruits was very impressive and the service is great. Towness turned out to be all that and much more. The veggies are truly hand picked and so very clean and fresh. And their customer service is hands down *the best* compared to any other Bangalore store we've shopped at or ordered from. They are extremely dependable when it comes to delivering at the promised time and they take very good care to ensure that the veggies reach us in perfect condition.

All other stores seem to be lacking in service when compared to these guys. They've really spoiled our shopping experience for life! :oP

One Towness veggie that I'm most happy with is Broccoli. It isn't always easy to get good, clean Broccoli here in Bangalore. There's usually a lot of effort involved in cleaning it before it's in an acceptable condition to cook with. But Towness magically seems to get its hands on super fresh Broccoli that can be quickly washed, cut and used.

This time, apart from Broccoli, I ordered Baby Corn and Italian Basil from the 'exotic vegetables' section and the moment they hit my kitchen counter, the gears started turning in my head and I found myself whipping up a simple and delicious dinner.

I find local (Naati) Tomatoes to be most flavourful and use them in a lot of my cooking. For a less tangy sauce, use Plum (Hybrid) Tomatoes.

This is a fairly mild sauce but if you like to spice it up a bit, add a fresh Green Chilly while blending the sauce.

Basil and Walnut Sauce

Handful Italian Basil Leaves
Handful Walnuts
1/4 Onion
3-4 Garlic Cloves
2 Medium Tomatoes
Turmeric (a pinch)
Pepper
Salt

Baby Corn (sliced)
Broccoli Florets
Capsicum (sliced)

Lime Juice
Freshly Crushed Pepper

Steam or nuke the veggies with a pinch of salt and keep aside.
Meanwhile, blend the first eight ingredients together into a smooth sauce, using a bit of water if required.
Pour the sauce over the veggies and cook for a few minutes (I microwaved for 3 minutes but if you prefer, you can just boil it in a pan while stirring).
Let it cool for a minute and then add lime juice and mix well.
Crush pepper on top and serve hot.

I served this Basil and Walnut Sauce over Kodo Millet but it will go very well with Rice or Bread.

Enjoy! :)

Saturday, April 14, 2012

Vegan Avial South Indian Yogurt Vegetable Stew


We have various festivals in India which mark the start of a New Year. People from different states and languages mark the beginning of their year based on moon cycles, star cycles, seasons etc. Two weeks ago we had Ugadi here in the state of Karnataka. We celebrate this every year at my parents place where we do the customary eating of "bevu bella". The neem flowers (bevu) are bitter and the jaggery (bella) is sweet. We mix them in a little plate and place it at the holy altar and begin our day by eating a large pinch of this mixture while saying "neem is sweet, jaggery is bitter". This is to signify our acceptance of all bitter experiences and sweet experiences that life throws at us as equal and that without either, life would be incomplete.

After this, we proceed to stuff our faces with delicious festival foods. This year my mom and both my grandmas together made a bunch of stuff, the key ones being maavinakai chitranna (mango and lemon based rice dish), holige saaru (a sweet and sour liquid that we mix with rice and slurp) and holige/obbattu a thin flatbread made of semolina and flour, stuffed with a sweet lentil and jaggery mixture.

I didn't take pictures of any of these because I was too busy enjoying myself with my family and stuffing my face that day. But on hindsight, I did feel bad that I didn't capture everything to share here.

So I decided that since yesterday was the Tamil New Year festival which hubby and I celebrate here at home, I should share at least one recipe with you all.

Avial, is a special South Indian stew (hailing from the states of Tamil Nadu and Kerala) of vegetables simmered in a spicy coconut and yogurt based sauce. It's a very simple recipe but takes time to make because of all the vegetable cutting involved. Traditionally vegetables like yam, drumstick, plantain (raw banana) which are native to South India play the main role in Avial. Other than these potatoes, carrots, french beans and peas are included. Veggies like capsicum (bell peppers), radish, beets, turnips etc... are avoided because they change the texture completely (being very soft when cooked) and don't go well with the yogurt base.

This is what went into my Avial yesterday (I didn't have plantain and drumstick on hand otherwise I'd have definitely included them).

Avial

3 C Vegetables cut into long (approx 1 inch) pieces - yam, carrot, beans, potato, baby corn, peas
1/4 tsp Turmeric
Salt

5-6 Green Chillies
1/4 tsp Cumin
1 inch piece Ginger
2 C Dry Coconut Powder (grated fresh coconut is even better)

1/2 tsp Mustard Seeds
Curry Leaves
1/8 tsp Asafetida Powder
3-4 Dry Red Chillies (each broken into 3-4 pieces)
Coconut Oil

1/2 C Vinegar
1/4 C Lemon/Lime Juice
2 C Peanut Yogurt

Toss the chopped veggies in turmeric and some salt and steam them until tender (about half an hour).

Grind the coconut, ginger, green chillies, cumin and a little more salt together into a paste using water as required.

In a large, heavy bottomed vessel heat a few tablespoons of coconut oil and add the mustard seeds and cover loosely. As soon as they have stopped crackling (half a minute), add the dry red chillies, curry leaves and asafetida.

Add the steamed vegetables and spicy coconut paste and mix together. Add a cup of water, cover and simmer everything together for a few minutes.

Turn off the flame and mix in the vinegar, lemon juice and peanut yogurt. Taste and adjust the salt and sour ingredients.

Serve over steamed rice.

Enjoy! :)

--

Apart from the Avial, I also made two other things (these are old pictures that I clicked a long time ago though):

Jevvarisi payasam - a tapioca pudding of sorts.

Sabbakki Payasa

Parappu vada - spicy, deep fried fritters made of a combination of lentils which can be enjoyed plain or soaked in vegan yogurt.

curd parappu vada

I'll share recipes of these at some other point. For now, make yourself some Avial and enjoy! :)

Tuesday, November 01, 2011

Sambar for Idli - Vegan MoFo Post 19


A bonus post. I guess this is my way of holding on to Vegan MoFo and prolonging the last day. :oP

My first recipe for Vegan MoFo 2011 was for Idlis. I thought it would be apt to end the month with a recipe for Sambar which is commonly served with Idlis.

There are a few different authentic South Indian recipes for homemade Sambar and I enjoy the taste of most of them. The one I'm about to share with you is a quick and simple one.

Sambar

2 C Mixed Vegetables - Carrots, Beans, Potatoes, Chow Chow (Chayote), Peas, Radish etc...
1 Large Diced Onion or 15-20 Peeled Sambar Onions (Shallots) - this is optional
2-3 Diced Tomatoes
1/2 C Toor Dal
1/4 tsp Turmeric Powder
2-3 tsp Sambar Powder (this spice mix tastes best when home made but it is also commercially available in the masalas section of Indian grocery stores)
1-2 tsp Tamarind Paste
1 tsp Jaggery
Salt
For the seasoning: Coconut Oil, Mustard Seeds, Curry Leaves, Dry Red Chillies (broken into halves), Hing (Asafotedia)

Wash and dice the vegetables. Wash the toor dal thoroughly. Bring 3-4 C of water with the turmeric to boil in a pressure cooker. Add the toor dal, vegetables and a small pinch of salt and pressure cook for 5-10 minutes (depending on your pressure cooker). Let it cool completely before opening the lid.

Meanwhile heat 1-2 tsp of the coconut oil in a deep pan. Add mustard seeds and let them crackle for a few seconds. Add the remaining seasoning ingredients. Add the onions/shallots and stir fry until they are tender. Add the sambar powder, tamarind paste, jaggery and salt and mix well. Add the tomatoes and turn off the heat. Cover and keep aside.

Once the vegetables and dal have cooled, add the tomato mixture and bring everything to a boil. Reduce the flame and simmer for a few minutes to allow the flavors to blend. Taste and adjust.

Serve hot ladled over Idlis or cooked rice.

Enjoy! :)

Wednesday, October 19, 2011

Khara Avalakki Dosa - Vegan MoFo Post 16


Due to a family emergency (all good now, thankfully) I skipped doing a MoFo post yesterday. But today I'm back in action with a yummy recipe for you. :)

Dosas are a South India staple dish. Dosa batter is made of lentils or grains (most commonly rice) or a combination of both. There are innumerable varieties of traditional dosas which range from crispy thin crèpes to soft and fluffy pancakes. Avalakki dosa belongs to the latter category.

This batter can be used plain or turned into Khara Avalakki Dosa by adding chopped and grated veggies, green chillies, herbs etc... It can also be poured into Paddu/Paniyaram moulds and turned into a different dish altogether.

Khara Avalakki Dosa

For the plain Avalakki Dosa:

1 C Uncooked Rice
1 C Thick Beaten Rice Flakes (Avalakki/Poha)
1 T Fenugreek Seeds (Methi)
Salt (Rock or Sea)
Thick Peanut or Soy Yogurt (optional)

Soak the rice, beaten rice and fenugreek seeds overnight in water or vegan yogurt or a combination of both in a wide vessel. There should be enough liquid to cover everything.

In the morning, grind them well into a smooth, thick batter gradually adding all of the soaking liquid plus more water if required.

Transfer to a large, airtight container (the batter should fill it only halfway through to give it space to expand), add salt and mix well with your hand.

Cover and let it sit in a warm place for 8-16 hours.

The batter will ferment and grow.

Heat a Dosa pan (Tava) or a flat frying pan.

Pour a ladleful of Avalakki Dosa batter onto the centre of the pan and drizzle with oil.

Cover and cook for about half a minute on a medium-high flame.

When uncovered, there should be bubbles and holes in the Dosa and the top should be cooked well.

You can optionally flip the Dosa over and cook on the other side too for a few seconds.

Remove the Dosa with a metal spatula and serve hot with chutney or pickle or curry.


For Khara Avalakki Dosa, stir in the following into the batter and proceed to cook on the same way as above:

Chopped Onions
Chopped Fresh Cilantro
Grated Carrots and/or Beets
Crushed Green Chillies
Asafoetida Powder (a pinch)
Soaked Channa Dal
Chopped Curry Leaves
Finely Chopped Coconut Pieces

You can also optionally top the batter with sliced tomatoes and then cook it.

All the above ingredients make for a delicious Khara Avalakki Dosa but you can choose to eliminate some of them or add your own stuff. Get creative. :) This is a very versatile batter.

What do you think you'd add to the batter?

Friday, October 14, 2011

Cheezy Potato Rosemary Casserole - Vegan MoFo post 13


Sometimes the foods you put together in a hurry can have an unmatchable taste. This Cheezy Vegan Potato Rosemary Casserole was definitely one of them.

I was so hungry on Monday night and I hadn't even begun to think of what to make for dinner. Suddenly I remembered this delicious potato casserole thingy which we used to enjoy at Casa Piccola during our pre vegan days (yeah, apparently extreme hunger causes long forgotten favorite dishes to pop up in ones head). So I did a quick google search for vegan potato casserole and a whole bunch of recipes came up. I skimmed through a few of them and absorbed ideas. Then I walked into my kitchen and commenced slicing the large, organic potatoes I'd gotten from In The Pink last week.

Since I baked this at night, I wasn't able to get a good picture of the whole thing in the casserole dish. If you think the potatoes look good in this picture, you should have seen them fresh out of the oven. Yum!

Potato Casserole

Preheat oven to 215C/420F

For the potatoes:

3 Large Potatoes (scrubbed clean under running water and thinly sliced)
3 T Olive Oil
3 Cloves of Garlic (finely chopped)
1 T Fresh or Dry Rosemary (gently crushed)
Nutritional Yeast
Black Pepper (freshly crushed)
Salt

Put everything together in an oven safe dish, cover and toss well and keep aside.

For the creamy, cheezy béschamel sauce:

3 T C All Purpose Flour
3 T Daiya Vegan Mozzarella Cheeze
1 C Water

Lightly toast the all purpose flour in a dry pan on a medium-low flame.
Add the daiya, mix well and reduce the flame to low.
Slowly add water and keep stirring continuously until the sauce thickens and becomes creamy (there might be a few small lumps left but that's okay).

How to proceed:

Pour the sauce over the potatoes and mix well.
Cover the baking dish.
Place in the preheated oven.
Bake covered for half and hour.
Then uncover and bake for another twenty minutes.
Turn the oven off and leave the casserole inside for another ten minutes.
Serve hot drizzled with Tabasco sauce and freshly crushed pepper.

Enjoy! :)

Thursday, October 13, 2011

Super Loaded Burritos - Vegan MoFo post 12


So earlier this evening my internet suddenly went off and didn't come back on even after three modem reboots. My first thought was, "Egad! There's no Vegan MoFo post!!"

Thankfully, after about an hour it came back on. *Phew*

I'm seriously reconsidering the post scheduling thing once again. It's been nice to update the blog everyday with a new post, something special to look forward to each day. :) But if I line up a few posts, I think it'll give me more peace of mind.

To schedule or not to schedule, that is the question. Hmm.

Anyways, since today's post involves a long back story and even longer recipe (which is TOTALLY worth the hard work), let me get on with the Burrito talk.

Burrito Fillings

On Sunday a couple of my vegan friends were planning to come over to our house and the plan was for all of us to make Burritos together. Each of us were assigned certain parts of the dish and whatever could be pre-made at their houses, they would prepare that and bring it here.

Mr. Vegantastic is the Burritomeister of our gang. He's been making Burritos for a while now and has this specific set of recipes which he follows. He is very particular about the exact ingredients which go into each thing so he took the trouble to create little document files for each dish and e-mailed them to the rest of us.

My portion of the work involved tortillas and beans. As I've mentioned before, I normally prefer to do a quick soak for beans, but Mr. Vegantastic control freak (and I say that term with love because I am one too when it comes to cooking) was particular that the beans be soaked overnight. So on Saturday night I soaked the beans.

Then on Sunday morning Ms. Pepa's flu took a turn for the worse, poor thing. So she had to drop out. The rest of us thought it over and decided to just throw the plan out the window entirely. But then, I was already in the mood for Burritos so I just decided to take whatever ingredients I had at home and adapt the recipes to my tastes and just make those Burritos anyways.

Cooking alone was less fun, but... on the up side, I could add as many chillies as I liked and there'd be no spice-wusses around to cry about it. :oP

Besides, you know me, I am incapable of cooking by following exact instructions. Intuitive cooks can be like that. ;) So I started with a couple of the basic recipes that Mr. Vegantastic sent, turned them into something else and added a bunch of other ingredients. The end result was amazing! So much so that I over ate and suffered big time. hehe

Thanks for the inspiration Mr. Vegantastic! :)

Burrito Wrap

Wheat and Corn Tortillas:

1 C Whole Wheat Flour
1 C Corn (Maize) Flour
2 tsp Coconut Oil
1/2 tsp Salt

Mix everything together with warm water and form a soft dough. Cover and keep aside for an hour or so.
Pinch off golf ball sized pieces of dough, dip in flour and roll into large tortillas on a flat surface (I am most comfortable using my cleaned kitchen counter top).
Toast on a hot pan on both sides.

Herbed Rice (I've commonly seen basil rice inside burritos but I made this with chives instead):

1 C Rice (Red or Black or Brown)
2 C Water
1 tsp Dried Chives
1/8 tsp Salt

Wash the rice.
Bring water to a rolling boil in a large pot.
Add rice, cover the pot and reduce flame to lowest setting.
Let it cook for half an hour.
Check once and see if the rice is fully cooked and the water has been absorbed. If not cook for another 5-15 mins (cooking time varies by type of rice).
Mix in the salt and chives.

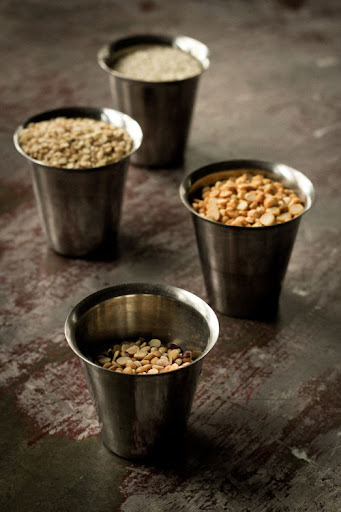
Chilli Beans Spread:

1 C Kidney Beans (Rajma) - not the red ones but the other kind, creamy colored with the dark pink blotches.
1 tsp Red Chilli Powder
1/4 tsp Cumin Powder
1/4 C Olive Oil
Rock Salt (to taste)

Wash and soak beans overnight and drain the water in the morning.
Bring fresh water to boil in a pressure cooker.
Add the soaked beans with the oil, chilli powder, cumin powder and a pinch of salt.
Pressure cook until the beans are very well cooked and soft (time and number of whistles will vary according to your cooker).
Alternately, you can boil it in a large pot too but this will take a lot more time.
Add the remaining salt and cook on a low flame while mashing and stirring.
Most of the beans should be mashed with some chunks left.

Spicy Salsa:

2 Large Tomatoes (chopped)
1/2 Onion (chopped)
5 Cloves of Garlic (chopped)
1/8 tsp Cumin Powder
1 T Olive Oil
Tabasco Sauce
Ketchup

Heat the oil on a medium-low flame.
Add the garlic and onion and saute briefly until softened but not browned.
Mix in the cumin and stir gently until well incorporated.
Increase heat to medium and add the tomatoes.
Stir and simmer gently for a minute or so.
Turn off the flame, add the sauces and mix well.
Cover and keep aside.

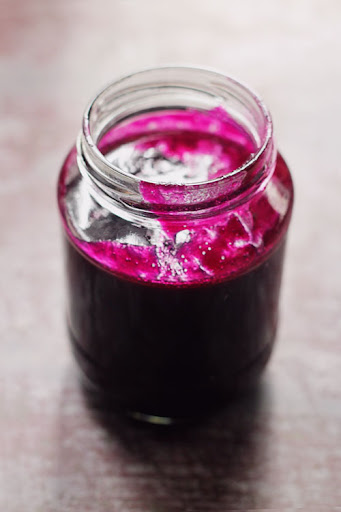
Avocado Pico De Gallo:

1 Large Avocado
2 Tomatoes (chopped)
1/2 Onion (chopped finely)
2 Green Chillies
1 Clove of Garlic
Fresh Cilantro (finely chopped)
Lime/Lemon Juice
Salt

In a mortar and pestle, crush together the green chilli, garlic and salt.
In an airtight container, mash the avacado with your fingers.
Add in all the ingredients and mix well.
Cover tightly and store in fridge.

Roasted Yellow Bell Pepper Salad:

3 Yellow Bell Peppers
1/2 Onion
1 Tomato

Grill the whole bell peppers directly on a flame.
Cover in an airtight container and keep aside for a few minutes.
Slice the onions, tomatoes and bell peppers and mix together.
Keep aside in a closed container to let the flavors of the veggies blend in.
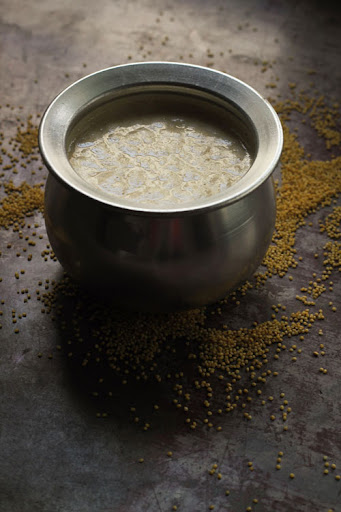
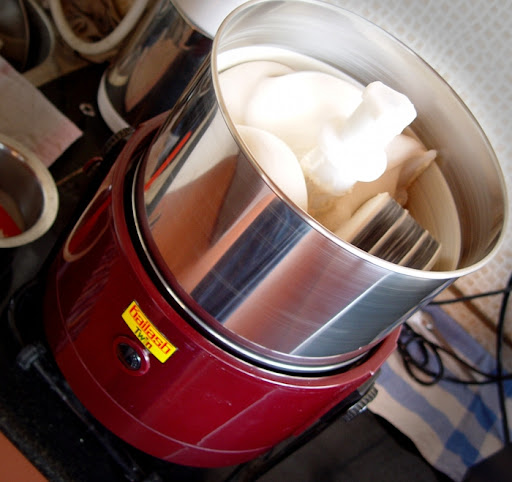
Cashew Sour Cream:

1 C Cashews
2 T Lemon/Lime Juice
2 T Vinegar
1/8 tsp Salt

Soak the cashews for an hour.
Drain the water and rinse.
Put the cashews along with the salt, vinegar and lemon/lime juice in a blender jar.
Process into a smooth, fluffy paste, adding a little bit of water as desired.
Transfer to airtight container and store in the fridge.

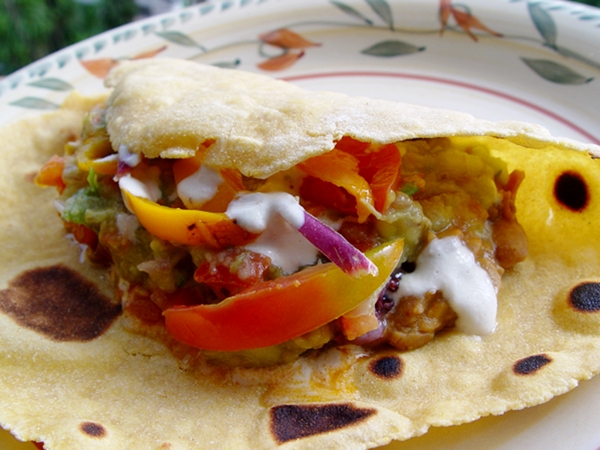
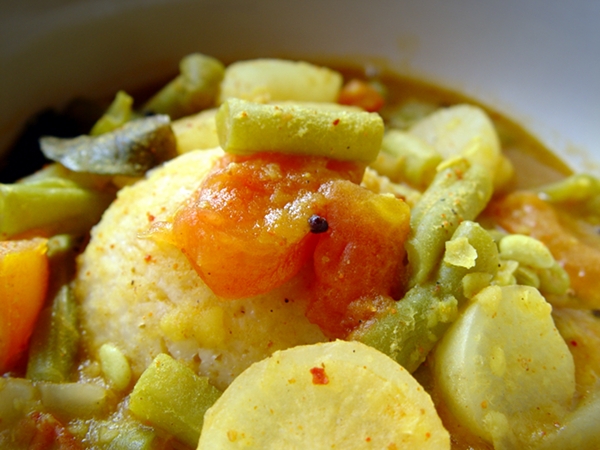
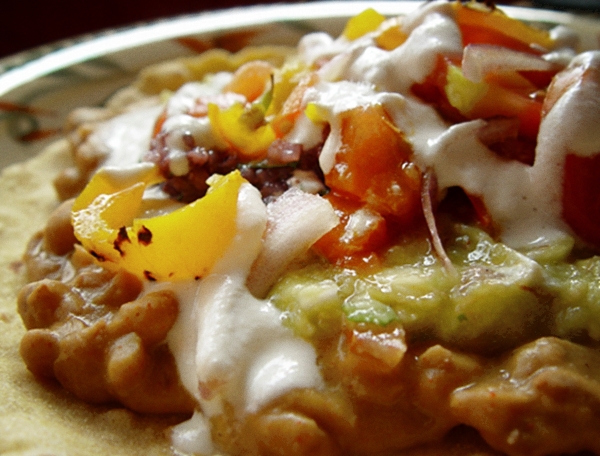
Putting the burrito together:

Place a tortilla on a plate.
Spread some beans in the center.
Put some guacamole over it.
Add some rice on top.
Spoon salsa over.
Top with salad.
Drizzle generously with sour cream.
Roll up and prepare yourself to bite into a delectable chunk of heaven.

Enjoy! :)

Burrito

Saturday, October 08, 2011

Seasoned Peanut Yogurt Black Rice - Vegan Mofo post 7


We've come to the end of the first week of Vegan Mofo and I've successfully managed to post every single day! Woohoo!! :D

Over the past few months, I have found two great local sources of organic produce and grains. One was Pristine Nature, an online store I spoke about on my blog a few weeks ago and the other is In The Pink, a restaurant and bazaar which I will be featuring on my blog very soon.

At both these places, I have been able to obtain black rice which I have gotten addicted to. Pristine Nature sells Burmese black rice and In The Pink has a slightly different variety. But both of them taste equally delicious!

The rice cooks to a beautiful deep grape colour and a sticky texture. It's perfect to be mixed and had with liquidy stuff like sambar, rasam or dal and it works fantastically in stewy dishes like Bisi Bele Bath and Pongal. But my most favorite way to eat it is in the form of Seasoned Curd Rice made of Peanut Yogurt.

This is an exotic twist to a very traditional South Indian dish. :)


For the curd rice, mix together:

1 C Cooked and cooled Black Rice
1 C (or more if you like) Peanut Curds
1/2 t Vinegar/Lemon Juice
Salt

For the seasoning:

1/2 t Coconut Oil
1/4 t Black Mustard Seeds (Sasive)
1/4 t Cumin Seeds (Jeerige)
1 t Split Black Gram Dal (Uddina Bele)
1 t Split Bengal Gram Dal (Kadale Bele)
2 Green Chillies chopped into little circles
Asafoetida Powder (Ingu)
Curry Leaves (Karibevina Soppu)

Heat oil in a small, heavy bottomed pan for half a minute. Add mustard and cumin seeds. They will crackle so cover lightly for a few seconds. Add the dals and stir for a few seconds until they are lightly browned. Add the asafoetida, curry leaves and green chillies. Stir for a few seconds, turn off the heat and stir some more.

Add the seasoning mixture to the prepared curd rice. Mix well and serve.

Enjoy! :)


Notes:

Curd rice is traditionally eaten at the end of a spicy meal.

It tastes great after sitting around for a couple of hours because the curds will ferment and develop a light tangy taste.

You can add grated or finely chopped coconut, pomegranate, fresh grapes or raisins to this according to your taste preferences.

Sunday, October 02, 2011

Idli the fluffy South Indian Rice Cake - Vegan MoFo post 2


Idlis are a staple breakfast food in South India. These fluffy rice cakes are made by soaking, grinding and fermenting a combination of a specific type of rice and urad dal (split black gram). Adding a handful of methi (fenugreek) seeds in the mix makes the Idlis extra soft and fluffy.

AWESOME KITCHEN GADGET ALERT!!! :)

Idli Grinder

I use my trusty Kailash Tilting Wet Grinder to make a super smooth Idli batter. It has a motor unit over which the grinding vessel is placed. The inner base of the vessel has a granite layer. There is also a grinding attachment made of three granite stones which is placed into the vessel where it is held in place. When the machine is turned on the vessel starts to rotate which causes the stones to rotate in the opposite direction. No grain or lentil can hold the hope of staying whole under the pressure of those awesome stones. ;)

The tilting mechanism in my grinder makes it very convenient to pour out the batter without having to carry the weight of the heavy vessel.

For those who make Idlis just occasionally, a good blender with sharp blades will do fine. You just have to remember to soak the urad dal and rice separately and make a very smooth paste of the dal before grinding the rice (the methi seeds are soaked with the rice). But for someone who is looking to be a regular Idli pro, a wet grinder is would make for a very nifty gadget. It's been a truly worthy investment for me! :)

Idlis

Ingredients:

1 C Whole or Split Black Gram
5 C Short Grained Idli Rice (I also like to use Mulleri Red Rice for my Idlis sometimes)
2 T Fenugreek Seeds
Salt

Soak everything (except salt) together in plain water overnight.

Drain the soaking water into a vessel and keep aside.

Set up the idli grinder according to instructions, pour some soaking water into it and switch it on.

With the motor running, slowly add in the rice, dal and methi mixture.

Pour in some more of the water to ensure the steady movement of the grinding stones.

Cover the vessel with the lid and get online and blog for the next 20 minutes.

Look in on the batter and add more water if required (the batter should have a fairly thick but pourable consistency) and let the grinder run for another 15 minutes or so.

Once the batter is completely smooth turn it off and pour it into a large container (batter should fill it only halfway to allow it to expand while fermenting).

Add salt and mix lightly with your hand, cover and keep aside in a warm place for about 12 hours (more if you live in a cold climate).

Once the batter has risen well and attained a slightly sour smell, it is ready for use.

Ladle the batter into Idli mold trays.

Meanwhile, bring water to boil in a steamer and once it begins to boil place the Idli trays into the steamer.

Cover and steam for 8-10 minutes on medium heat.

You should be able to smell the cooked Idlis in the steam wafting out of the steamer.

Carefully remove the Idly trays out of the steamer and let the Idlis cool for a few minutes.

Gently unmold the Idlis using a wide, flatish spoon.

Drizzle sesame oil over the Idlis and serve them hot with Sambar or Coconut Chutney.

Enjoy! :)