Thursday, July 11, 2013

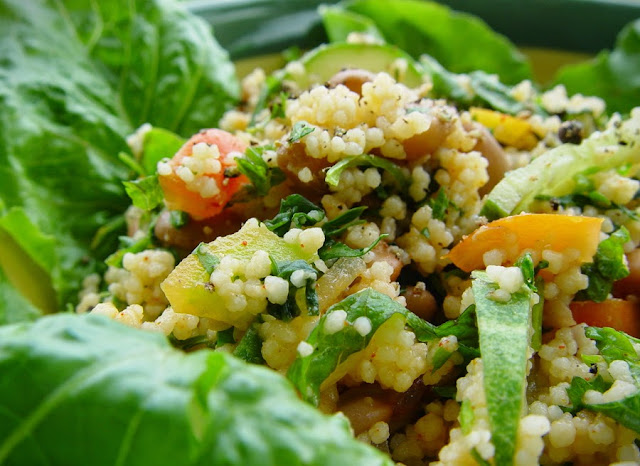
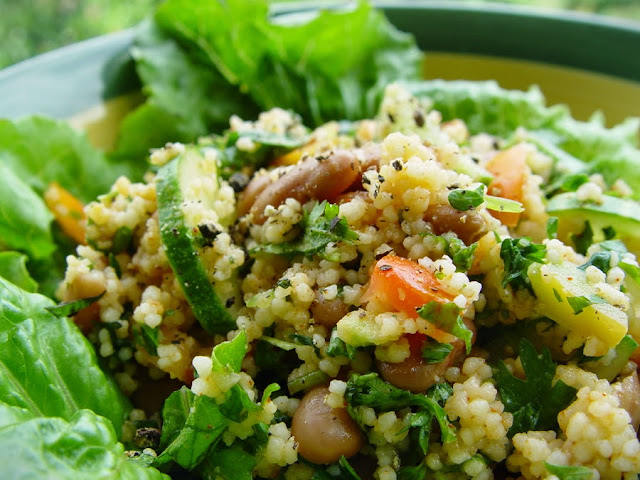
Herbed Couscous Bean Salad


Herbed Couscous Bean Salad

Salads are excellent during summer but once the colder months begin, my hand quickly loses its inclination to reach for raw vegetables. There's a need for more filling, cooked foods. This is why I love salads that include cooked ingredients in them. It's a great way to get those fresh vegetables in along with some hearty components.

If you look through my blog's Recipe Hub, you'll know that I loooooooove pulses of all kinds. There is nothing more satisfying than a big bowl of cooked beans. If I could, I'd just cook beans and eat them plain every single day. And yes, I am well aware of the consequences, as the people of Portlandia have demonstrated so tastefully in the video below. :P


Since we don't have any "designated areas" at our home, I stick to cooking with beans often but not everyday. :D

Herbed Couscous Bean Salad

In the recipe below, I've thrown couscous into the bean and vegetables mix to turn this dish into a complete meal. Even my hubby, who doesn't consider salads a whole meal, was satisfied with this one.

I created this recipe for Global Graynz. They have put together recipe boxes which include the ingredients you will need to make this Herbed Couscous Bean Salad at home.

Herbed Couscous Bean Salad Exotic Ingredients Recipe Box

GG Button

You can visit the links below to purchase the three kinds of ingredients boxes for this recipe:

1. Rare/Exotic Ingredients (home delivery to anywhere in India)
2. All Packaged Ingredients (home delivery to anywhere in India)
3. All Ingredients Including Fresh/Perishable Ones (available in Chennai only)


Herbed Couscous Bean Salad

Herbed Couscous Bean Salad

1 C Instant Couscous
2 C Cooked or Canned Beans - I used Pink Rajma (Kidney Beans) but others will work too
1 C Fresh Herbs - I used Parsley, Basil, Mint and Cilantro
1 Head Romaine Lettuce
1 Cucumber (it's best to use a tender one)
3 Small Tomatoes (preferably the tart, local/naati ones)
1 Small Onion (preferably white)
2 T Sriracha Sauce
1 T Extra Virgin Olive Oil (optional)
1/4 C Lime Juice
1/4 tsp Chilli Powder
Salt - to taste
Whole Black Pepper Corns - for crushing on top

Boil 1 1/2 C of lightly salted water.
Turn off the heat, add couscous, stir, cover and keep aside for 5-6 minutes.
Fluff with a fork and allow to cool down to room temperature.

If you've freshly cooked the beans, allow them to cool down.
They need to be at room temperature or lightly chilled but not hot/warm.
If you're using canned beans, rinse them and keep aside.

Chiffonade or chop the herbs.
Tear the lettuce into pieces.
Make thin half circles of the cucumber.
Finely chop the tomatoes and onion.

Now mix all the salad ingredients together in a large bowl.
Freshly crush pepper on top and serve.
Enjoy! :)

Herbed Couscous Bean Salad

Friday, June 28, 2013

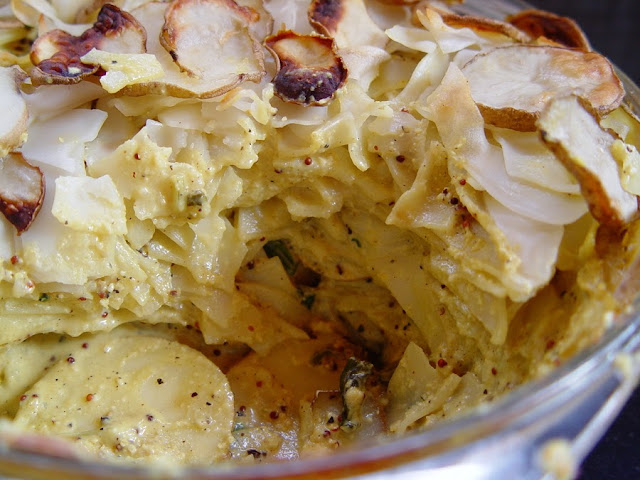
Potato Amaranth Flat Rice Noodles in Cheesy Garlicky Sauce


Potato Amaranth Flat Rice Noodles in Cheesy Garlicky Sauce

This is a delicious, hearty meal that is easy to put together. I love making lasagne-style, layered, baked dishes. They are so flexible and you can put a variety of elements and textures in there. Here I've used Flat Pad Thai Rice Noodles for the pasta layers to make the dish gluten free.

I've very lightly brushed coconut oil on to the top layer of potatoes but that can easily be skipped to make this a recipe that's free of any processed oils.

Potato Amaranth Flat Rice Noodles in Cheesy Garlicky Sauce

Potato Amaranth Flat Rice Noodles in Cheesy Garlicky Sauce

3 Potatoes
1 C Amaranth Greens (Dantina Soppu) - can be replaced with any local greens
1/2 Package Flat Rice Noodles
Optional - Coconut Oil for light brushing

For the Sauce:
1/2 C Cashews
2 T Sesame Seeds
2 T Nutritional Yeast1
10-15 Cloves of Garlic
1 tsp Mustard Seeds
1/2 tsp Agave Nectar - can be replaced with Jaggery Syrup or Sugar
1/4 tsp Turmeric Powder
1/4 tsp Pepper
Salt

Bring lightly salted water to a boil and add the flat rice noodles.
Turn off the heat, cover and keep aside for about 5-8 minutes, until the noodles are soft.
Drain and drop the soft noodles into cold water.
Keep aside.

Meanwhile, grind all the sauce ingredients together into a powder.
Add a little water at a time and blend to obtain a paste.
Add more water and blend into a creamy sauce.

Scrub and wash the potatoes and slice them into thin rounds.
Wash the amaranth leaves, gently squeeze off the water and chop them roughly.

Cover the bottom and sides of a glass2 baking dish with a layer of potatoes.
Top with half the cooked noodles and chopped amaranth.
Pour half of the sauce over this.
Then add another layer of potatoes (saving some for the final layer) and the remaining half of the noodles, amaranth and sauce in the same way.
Finally cover the top with a layer of potatoes.
Lightly brush3 with coconut oil if you like.

Bake in an oven at 220°C for 30 minutes, then increase the heat to 250°C and grill for 15 minutes.
Turn off the oven and remove the dish.
Allow to cool for 15-20 minutes.
Dig into it and serve hot with freshly crushed pepper and Tabasco drizzled on top.
Enjoy! :)

Potato Amaranth Flat Rice Noodles in Cheesy Garlicky Sauce

Notes:

1 Without Nutritional Yeast, the sauce will still be creamy and delicious, but it won't have a cheesy flavour.
2 If you're using a metal baking dish instead, then grease it lightly or line it with foil before using.
3 By brushing, I mean that I used my palms and fingers to rub that oil onto the potatoes so no fancy brushes required here. :p

Potato Amaranth Flat Rice Noodles in Cheesy Garlicky Sauce

Potato Amaranth Flat Rice Noodles in Cheesy Garlicky Sauce

Sunday, June 23, 2013

Veganosaurus Chef's Boxes from Global Graynz


A few weeks ago, I was approached by Karthik Vasudevan of Global Graynz, a new online store in India, specialising in sourcing and selling exotic ingredients from around the world. Here is what I wrote about it on my Facebook page:

"You all know how much I love to mix up local ingredients with global ones in my cooking/baking experiments. And when one of my key ingredients isn't easily available in India, I try to post locally available alternatives in the recipe. Now I finally get to use exotic vegan ingredients to my heart's content and you get to source them easily without the need for replacements. :) Global Graynz has asked me to create vegan recipes for them using products from different parts of the world, and whenever I post a recipe on my blog using these, they will put together a customised recipe box with ingredients in the recipe and list it for sale on their website."

With this information, I posted a survey link they sent me. I was later informed that the majority of the people who took this survey were very interested in this recipe box idea.

So now I have started creating some new vegan recipes designed around the international products available on Global Graynz. Don't worry, I will continue to make recipes with completely local ingredients too. :)

I also sent them a list of speciality plant based products to procure. Once they get those, all of us living here in India can have easy access to Nutritional Yeast, Soy Curlz, The Vegg, Vegan Chocolate Chips and other such cruelty-free goodies.

To start with, I directed Global Graynz to a few existing recipes on my blog and they have created recipe boxes for two of them. These are two of my *most* popular recipes in the past year. :)

Click on the photos below to visit the recipe pages, where you can see the gorgeous Global Graynz recipe boxes at the bottom along with a link to purchase them.

Tofu Walnut Dumplings and Balsamic Vegetables in Quinoa

Tofu Walnut Dumplings and Balsamic Vegetables in Quinoa

and

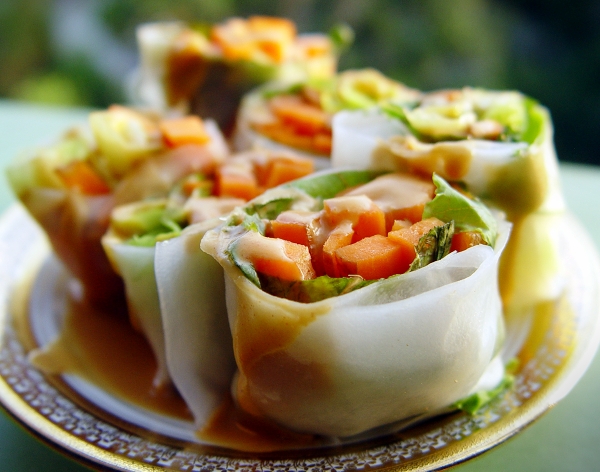
Summer Rolls with Spicy Peanut Sauce

Summer Rolls with Spicy Peanut Sauce

Monday, June 17, 2013

Spiced Pumpkin Mousse - guest post by Rithika of Vegan on the Prowl


Today's special guest blogger, Rithika, is baker extrodinaire at The Green Stove, a vegan bakery in Mumbai, India and blogger at Vegan on the Prowl where she shares her innovative, healthy recipes and stories about her adventures around the world in quest of vegan food. :)

To my knowledge, The Green Stove was the first vegan bakery in India when it was launched. Rithika makes some amazingly drool worthy everyday baked goodies and desserts as well as gorgeous ones for special occasions like weddings, birthdays, anniversaries, etc. You can visit The Green Stove's Facebook Page to get updates about the vegan goodies that are baked.

Rithika and I have been online friends for a few years now. It's hard to believe that we have met in person just one time, on her visit to Bangalore a couple of years ago. She gave me this beautiful dragonfly glass jar that she hand painted with love and I still keep it in my home and cherish it. :)

Hand painted glass jar by Rithika

Now without further ado, let's move to Rithika's recipe for a delicious, innovative and healthy...dessert (but of course)! :) Thanks Rithika! It's a pleasure having you over on Veganosaurus.

--

This guest post is very, very long overdue. Imagine being late on a submission deadline and multiply that by ten, that is how long ago Susmitha asked me to write a guest post for her. She was nice enough (multiplied by ten again) to politely remind me that my deadline was long gone and that last push was enough for me to get my act together. I have only met Susmitha once over a lovely vegan buffet lunch in Bengaluru but I feel like we've been somehow connected from a previous life. She is the most kindhearted, proactive person I know and I love all the work she is doing in Bengaluru to promote compassionate eating and living. I only wish we lived closer so it would push me to do more.

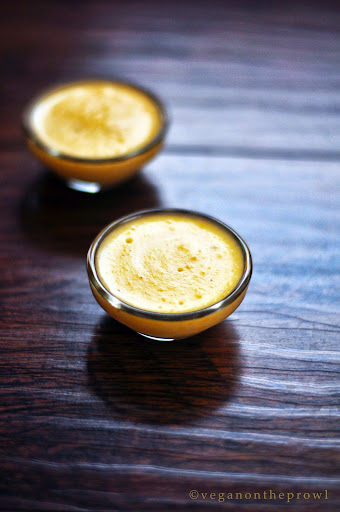
With so many of the recipes on her blog being sweet, I thought it was only apt to come up with something that would go with her persona and her blog. So here is my recipe for a Spiced Pumpkin Mousse.

Spiced Pumpkin Mousse

Spiced Pumpkin Mousse

Ingredients:
3 cups freshly pressed, light Coconut Milk
1 cup peeled and cubed Yellow Pumpkin
1/2 tsp Cinnamon
1/4 tsp All Spice Powder
1/4 tsp Nutmeg Powder
3 tbsp Raw Organic Sugar*
2 tbsp Arrowroot Starch
1/2 tsp Turmeric

*Use a sweetener of your choice and also as much as you like. I find 3 tbsp to be more than enough but you can increase the quantity depending on when it hits your sweet spot!

Steam the cubed Pumpkin for about 15 minutes and purée it until no lumps remain.

In a small bowl, mix the arrowroot starch with a little bit of the coconut milk and stir well until it has dissolved.

In a thick bottomed vessel, add the coconut milk, spices, pumpkin purée and turmeric and heat it over a low flame. After about ten minutes, add the starch mixture and keep stirring continuously. The mixture will eventually start to thicken. When it reaches a thick soup consistency (should take less than 10 minutes) take it off the flame and pour it into individual bowls. Refrigerate for an hour or till it sets into a mousse.

Serve cold.

Spiced Pumpkin Mousse

Thursday, June 13, 2013

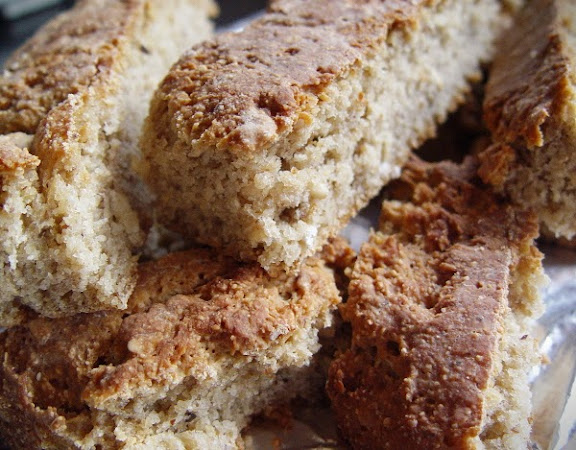
Whole Wheat Foxtail Millet Multi-Seed Bread


Yesterday, a friend of mine who regularly follows my blog and my facebook pages - artbysusmitha and veganosaurus - asked me why there has been a lack of activity on my blog and I decided it was time for some action.

Whole Wheat Foxtail Millet Multi Seed Bread

I made this bread a few weeks ago. I quickly clicked some pics and typed out the ingredients but this laziness causing cloudy weather and busy life in general has been getting in the way of me completing the post, until now.

I started out to make a regular whole wheat, multi-seed bread but at some point I got the idea of putting broken foxtail millet in there and I must say, it was a brilliant move! Sometimes bakers knead chiroti rava/sooji (fine semolina) into the dough to get an interesting texture. But rava is one of those nutrient-less carbs and I wanted to make this bread with whole ingredients, that's why I decided to use the millet rava instead.

Whole Wheat Foxtail Millet Multi Seed Bread

The millet gives the bread an excellent texture! And don't even get me started on the delightfully crunchy, browned crust. Mmmmmmm.

The next time I make this bread, I will turn a portion of it into Rusk. I'm sure that the millet will give it the perfect kind of crunch. It's been so long since I made Rusk. Just the thought of it is making me want to bake right now.

The procedure of making this bread is pretty basic. If you're making bread for the first time, you can watch my step-by-step video tutorial for making basic bread dough to get a general idea about yeast frothing, kneading, etc., and then make this Whole Wheat Foxtail Millet Multi-Seed Bread using the ingredients and recipe below.

Whole Wheat Foxtail Millet Multi Seed Bread

Whole Wheat Foxtail Millet Multi-Seed Bread

3 C Wheat Flour
1/2 C Broken Foxtail Millet (Navane Idli Rava)
1 tsp Sprouted Fenugreek Powder (optional)
2 T Flax Seed Powder
Mixed Seeds - Melon, Black Sesame, White Sesame, Poppy
2 T Wheat Berries - soaked in hot water for 15-30 mins and drained
2 T Coconut Oil + 1 tsp for greasing the mixing bowl
1 T Apple Cider Vinegar (white vinegar can be used instead)
1 tsp Salt
1/4 C + 2 T Sugar
2 tsp Active Dry Yeast
3/4 C Soy or other Vegan Mylk
3/4 C Water
Optional - Vegan Yogurt mixed with Corn Starch (Corn Flour) to brush on top of the bread

  • Mix the water and soy mylk and heat them together in a pan.

  • Add 2 T sugar and stir to dissolve

  • Let the liquid come down to lukewarm temperature.

  • Sprinkle the active dry yeast onto the liquid and keep aside for 10-15 minutes, allowing the yeast to froth and bubble.

  • Meanwhile, in a large bowl, place 2 C of the whole wheat flour with broken foxtail millet, sprouted fenugreek powder, flax seed powder, remaining 1/4 C sugar, salt and 2 T coconut oil.

  • Mix everything together with your fingers, rubbing the oil into the flour.

  • Make a deep well in the centre and once the yeast mixture is frothed and ready, pour it into the well.

  • Add the apple cider vinegar and mix everything with a fork to get a sticky dough.

  • Add as much of the remaining 1 C whole wheat flour as required, a little at a time, and mix with your hand to get a rough ball of dough.

  • Knead in the seeds and wheat berries.

  • Transfer the dough to a floured surface and knead well to form a smooth, elastic dough.

  • Grease the mixing bowl with the remaining 1 tsp of coconut oil.

  • Place the ball of dough into the bowl and swirl around to coat it with oil on all sides.

  • Cover the bowl with a large plastic bag and place it in a warm/sunny spot.

  • Allow the dough to rise for 1 1/2 to 2 hours.

  • After the dough has doubled in volume, punch it down and transfer to a floured surface.

  • Knead very lightly and shape into desired form (loaves, buns, rolls...anything you like).

  • I wanted to make mine into a braided loaf but it expanded so much in the baking tray that the shape got changed. haha

  • Cover again with a plastic bag and allow to rise in a warm place for another 1 1/2 to 2 hours.

  • Preheat oven to 190 C. Optionally lightly brush the top of the bread with the vegan yogurt and corn starch mixture.

  • If you've made loaves then bake in the preheated oven for about 50-55 minutes, if it's rolls/buns then 35-40 minutes will do.

  • Allow the bread to sit in the hot oven for 10-15 minutes after it's done.

  • Take the tray out and allow the bread to cool down in the tray for 1/2 an hour, then transfer to a cooling rack and let it cool down some more.

  • It's okay to slice the bread if it's a little warm but *do not slice into the bread while it's hot!!!*

  • The bread tastes great served with some hot soup/stew or just dipped in some garlic olive oil.

  • Since it doesn't have any additional spices, it even tastes yum with jam.

  • Enjoy! :)


  • Whole Wheat Foxtail Millet Multi Seed Bread

    Thursday, May 30, 2013

    Rose Hip Tea - guest post by Angela of Canned Time


    After a terribly hot summer, we've been having rainy, cloudy days these past couple of weeks. The monsoon season has begun! In this kind of weather, there's a constant craving for hot beverages, hearty stews and deep fried goodies. All I want to do is snuggle up in bed. My body feels like it's been been steeped in lethargy and I go through the movements of my daily life in a hazy, slow motion.

    Talking about steeping, today's guest post by Angela of Canned Time couldn't have come at a better time! She has shared the recipe for a deeply relaxing herbal tea and it sounds like it'll go perfectly with my wallowing-in-laziness plans. :D

    I first met Angela on Facebook when she joined our elite squad of Vegan Temptivists and ever since then we've been visiting each other on our various Internet spaces. :)

    Thank you Angela for guest posting on my blog today and I want to especially thank you for the beautiful, cheerful, colourful photographs. I can almost smell the soothing fragrance of those roses! :)

    Now on to Angela's post.

    --

    Guest posting today at Veganosaurus and it is such fun....thanks Susmitha for featuring my blog and for being such a wonderful friend and blogger ♥

    This is a simple...very simple...herbal tea recipe but it  has given me many hours of peaceful relaxation..............it's just great!

    Rose Hip Tea - Canned-Time.com

    I've discovered a new and healthy way to relax each evening and it's just 'groovy' that a habit can be good for me these days.....

    Rose Hip Tea - from Canned-Time.com

    Who knew that roses, such a lovely thing to look at, can also be a super healthy drink to sip and relax with?

    Rose Hip Tea is a mildly sweet herbal tea made from the fruit of the rose bush, or "hips".

    Rose Hip Tea - From Canned-Time.com

    For an extensive look at Rose Hips, check out my old friend and Foraging Expert Sunny Savage

    Rose Hip Tea - from Canned-Time.com

    Rose Hip Tea is most famous for it's abundance of Vitamin C but also contains significant amounts of A, B-1, B-2, B-3, D, E and K. It also provides plenty of Calcium, Iron, Zinc and lot's of fun flavonoids!  YEA......

    http://usa.paiskincare.com/pages/rosehip-oil-seed-extract-93

    So how can you steep up a cup of this light lovely tea for you?

    Well there are plenty of dried Rose Hip Teas in the market. The one I've been using is from Mountain Rose Herbs. I've had a tough time finding it in health food stores in its 'unpackaged' form, ie: just the dried hips. I do want to try making my own fresh but for now, I'm plenty satisfied with my store bought. I add a little stevia, sometimes a pinch of cinnamon, sometimes a little lemon.

    The Rose Hips can also be brewed and chilled for a summer fresh beverage:

    1) Combine 4 rounded teaspoons cut-and-sifted rose hips (ground in a spice mill or not) or 4 tablespoons whole dried rose hips with 4 cups of water in a nonreactive saucepan. Cover, bring to a boil, then simmer for 5 minutes.

    2) Alternatively, place fresh or crushed dried rose hips in a warmed teapot, pour boiling water over them, and steep, covered, for 10 minutes.

    3) Strain the tea and sweeten if desired with a scant 1/8 teaspoon stevia extract powder or 2 to 4 drops glycerin-based stevia liquid extract per cup. Serve immediately or cool and refrigerate, covered, for as long as 3 days.

    Rose Hip Tea - Canned-Time.com

    I always seem to have a drink, either hot or cold, with me most of the day. If you're like me and are looking for a healthier way to sip on a delicious, non-fattening beverage, be sure to check into Rose Hip Tea. It's a great way to enjoy your nutrients ♥

    Rose Hip Tea - Canned-Time.com

    Thanks Susmitha :)  Enjoy everyone......

    Monday, May 27, 2013

    Video and Recipes from my Vegan Demo at Soul Kadhi


    On 18th May, I was part of a vegan cooking demo and lunch event at Soul Kadhi. I had a really nice time talking about vegan food and showing people how to make a bunch of scrumptious, Indian, vegan dishes along with Chef Ajay.

    The response was very good. There were about 20 participants and all of them said they found the demo interesting and the food delicious. Less than half the attendees were vegan. The rest were people who wanted to learn vegan cooking for various reasons. It was all totally worth the effort! :)

    My hubby captured the demo on video and I spent some time editing and putting it together. The video explains the general outline of the recipes and also contains a few pointers about making vegan mylks and curds. I've shared all the recipes below, after the embedded video. Between the two, you will be able to clearly understand all the steps involved and easily make the recipes at home yourself.

    If you were present for the demo, do drop me a line here in the comments section to let me know how you liked the experience. :)

    Vegan Demo Video


    I already have a blog post explaining the process of making Peanut Curds in detail.

    In all the recipes below, the quantities of ingredients are approximate and certain quantities are not even mentioned. As you prepare the food, taste and adjust often to suit your preferences.

    Basundi

    1/2 C Cashews
    2-3 tsp Sugar
    Small pinch of salt
    Sliced Pistachios
    Crushed Saffron/Elaichi

    In a dry jar, grind together the cashews and sugar into a fine powder.
    Scrape down the sides and grind again until the cashew starts to release its oils and becomes slightly buttery.
    Add a small pinch of salt and a splash of water and blend to a smooth paste.
    Add a little more water and blend into a cream, it should have the consistency of condensed milk.
    Pour into a bowl and garnish with sliced pistachios and crushed saffron and/or elaichi.
    Chill for at least half an hour and serve.

    Notes:
    This dish doesn't need to be cooked and you can make it completely raw by using soaked dates in place of sugar.
    If you like, you can heat the Basundi for a few minutes while stirring continuously and chill it. This makes it a little more creamy but is not really a necessary step.

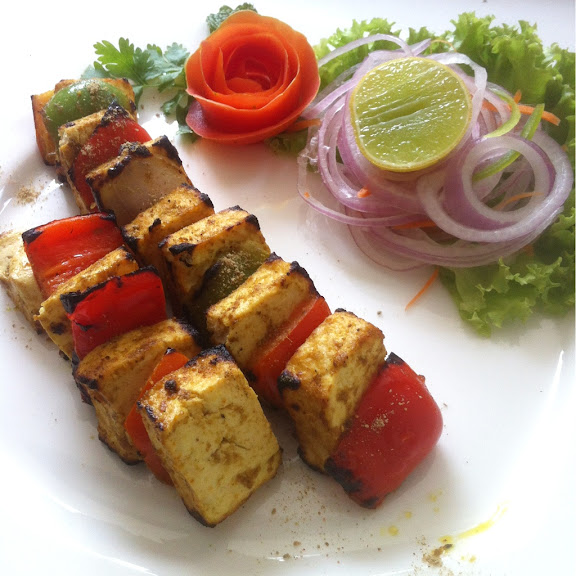
    Tamarind Tofu Tikka

    500 gms Firm Tofu
    1 Onion
    1 Capsicum (preferably red or yellow)
    1 Tomato
    1-2 T Thick Tamarind Paste
    1/4 tsp Dhania Powder
    1/4 tsp Jeera Powder
    1 tsp Kasauri Methi
    1 tsp Chilli Powder
    Mustard Oil
    Chopped Green Chillies
    Chopped Cilantro
    Salt

    Drain and gently squeeze the tofu to remove water.
    Make the tofu into 1 inch cubes.
    Cube the vegetables.
    Mix salt, tamarind paste, spices, herbs and mustard oil with a few spoons of water to get a creamy marinade.
    Toss the cubed tofu and vegetables in the marinade.
    Cover and keep aside for a minimum of 30 minutes.
    If you have more time then marinate overnight in the fridge to meld the flavours very well.
    Skewer and grill on high in a convection oven or tandoor for 8-10 minutes.
    Serve hot.

    Notes:
    You can alternately roast the skewered tikkas on a hot, non stick pan that's greased with oil, turning them occasionally to ensure even grilling. In this case, don't add the chilli powder in a marinade because it will create a lot of smoke. Instead, sprinkle the chilli powder on top of the tikkas after they have been grilled.

    Malai Kofta

    For the Kofta Balls:
    4 Potatoes - boil/steam, peel and grate
    200-250 gms Tofu - drain, rinse, gently squeeze to remove water, grate
    2 T Corn Starch
    Elaichi Powder
    Pepper Powder
    Salt
    Dry Fruits/Nuts - chopped finely and mixed

    Gently mix the grated potatoes and grated tofu together with a fork or spoon.
    Add the remaining ingredients and mix well.
    Dust a clean surface or a plate with corn starch.
    Rub corn starch on your palms and fingers.
    Shape the potato/tofu mixture into balls and make a hole in the center with your finger.
    Place some dry fruits/nuts in the hole and close the ball.
    Shape into elongated balls.
    Deep fry in hot oil until golden.
    If you want to make them more healthy, instead of deep frying, grease the kofta balls with a little oil and bake in a preheated oven at 200 C for about 15 minutes, until the balls have browned lightly.
    Drain on tissue paper and keep aside.

    For the Malai Sauce:
    Ginger-Garlic Paste
    Green Chilli Paste or Pepper Powder
    Thick Cashew Cream
    Elaichi Powder
    Salt
    Sugar (optional)
    Keora/Kewra Water (optional)

    Stir fry the ginger-garlic paste in a dry pan or optionally with a spoon of hot oil.
    Add the green chilli paste (if using) and stir.
    Add the thick cashew cream (this could be raw or cooked cashew cream, either way is fine).
    Add salt, elaichi powder and pepper powder (if using) and stir.
    Optionally add sugar and keora water and mix.
    Let the sauce simmer for a few minutes.
    Adjust the thickness of the sauce with some water.

    How to proceed:
    While the sauce is simmering on low heat, the prepared kofta balls and toss gently.
    Add a splash of water to the sauce to keep it in a constant simmer (so it doesn't start boiling vigorously).
    Simmer the koftas for a minute and turn off the heat.
    Serve hot with rotis or pulaos.

    Kadhi Pakora

    For the Pakoras:
    Besan Flour
    Ajwain
    Sliced Onion
    Chopped Curry Leaves
    Chopped Cilantro
    Chilli Powder
    Salt
    Oil

    Mix everything with some water to make a thick batter.
    Heat oil and drop spoonfuls of the batter.
    Deep fry while occasionally turning over, until crispy and golden brown.
    Drain on tissue paper and keep aside to cool.

    For the Kadhi:
    Peanut Curds
    Besan Flour
    Turmeric Powder
    Oil
    Dhania
    Jeera
    Finely Chopped Garlic
    Thinly Sliced Onion
    Amchoor Powder
    Roasted Red Chillies
    Salt

    Make a thick batter by whisking together besan, peanut curds and turmeric powder.
    Heat a spoon of oil in a pan.
    Add whole jeera and dhania and stir for a few seconds, allowing them to crackle.
    Add the finely chopped garlic and stir.
    Add the thinly sliced onion and stir fry until the onion is translucent and lightly browned.
    Pour in the peanut crud-besan batter and stir well.
    Add amchoor powder and salt and mix well.
    Adjust thickness of the sauce with a little water.
    Add the dry roasted red chillies and simmer.

    How to proceed:
    While the sauce is simmering, add the deep fried pakoras.
    Mix for half a minute and turn off the heat.
    Optionally season with toasted mustard seeds, dhania, jeera and curry leaves.
    Serve over hot, steamed rice.

    Carrot Halwa

    4 Large Carrots - grated
    1/2 C Thick Cashew Cream
    2-3 T Sugar
    1 T Oil
    2 Cloves
    2 Elaichis (crushed)
    Raisins
    Chopped Dates
    Slivered Almonds

    Grate the carrots.
    Heat oil in a heavy bottomed pan, add the cloves and stir.
    Add the grated carrots.
    Stir fry until the carrots are cooked and have reduced in quantity.
    Add thick cashew cream, stir and cook for a few minutes.
    Add crushed elaichi and sugar and stir for a minute.
    Mix in the sliced almonds, chopped dates and raisins and turn off the heat.

    Notes:
    You can reduce the sugar or eliminate it completely and add more dates and raisins for sweetness.
    If you want to avoid oil, steam the carrots whole and grate them, that way you can completely skip the stir frying process.
    You can add finely ground cashew powder instead of cashew cream.

    Enjoy! :)

    Friday, May 17, 2013

    Cool, Summery Chickpea Salad


    As I mentioned a couple of posts ago, tomorrow is my vegan cooking demo at Soul Kadhi. Right now I've come to Soul Kadhi to do a quick discussion about the event but their generator decided to act up and spew ash during the peak lunch time and that has kept Nirmala very occupied for over an hour. So while I wait, I thought I'd start a blog post (and finish it after I get home).

    Poor Nirmala hasn't had a moment's respite. She came to speak to me in the middle but something came up again and she had to go attend to it. It's nice that her mom is around to help out everyday but despite that, Nirmala is constantly on her feet. I have no idea how she manages to run three restaurants full time on the same premises and stay sane!

    A lot of my friends who have tasted my cooking/baking and even a few people who follow my blog have asked me why I haven't started a vegan café or restaurant yet. I really want to, hubby and I even keep talking about it, but I keep procrastinating and the main reason is that I don't know if I'll be able to handle all the stress that goes into running a food establishment.

    I like my work related life to be slow paced. When I create my jewellery, I need to be relaxed and in the zone to come up with beautiful designs which carry positive energy. Similarly, I feel that some of my tastiest and most creative dishes are made when I am taking it easy. I'm afraid of what my cooking will taste like if I am constantly under pressure.

    So if I do take steps to make my dream of a vegan café come true, I know for a fact that all the administration work will have to be done by someone else! My restaurant will be part of the slow food movement. That means, people need to come there with the intention to relax and enjoy the meal at a slow pace. People in a big huff to be served their food will not be allowed. :oP

    Amusingly, my recipe today does not belong to the slow food movement. It can be put together in a breeze and wolfed down in the blink of an eye. hehe

    Cool, Summery Chickpea Salad

    I've used small, Indian Chickpeas aka Gulabi Gram in this salad but even the larger Garbanzo Beans aka Kabuli Channa will taste yummy in this recipe. For that matter, any kind of bean will work, doesn't even have to be Chickpeas.

    I like eating this salad plain or as a side dish with chapathies.

    Cool, Summery Chickpea Salad

    1 C Indian Chickpeas (Gulabi Gram)
    3 Large Tomatoes
    1 Small European Cucumber (regular Cucumber is fine too)
    3 Small Carrots
    1 heaping tsp Peanut Butter (I used the Chia Peanut Butter that my friend Somera> sent me)
    1-2 tsp Balsamic Vinegar (it's okay to use lime juice, tamarind water or any other vinegar instead)
    1/2 tsp Liquid Jaggery (or other sweetener)
    1/2 tsp Red Chilli Powder
    Salt

    Soak the chickpeas overnight.
    Drain, rinse and pressure cook in fresh water for 3-4 whistles.
    Cool, drain (cooking water can be saved and used to cook something else) and keep aside.
    Finely dice the tomatoes and cucumber.
    Grate the carrots.
    Toss all the ingredients together and mix well (using your fingers if required to spread the peanut butter well).
    Cover and chill for a short while.
    Enjoy! :)

    Saturday, May 11, 2013

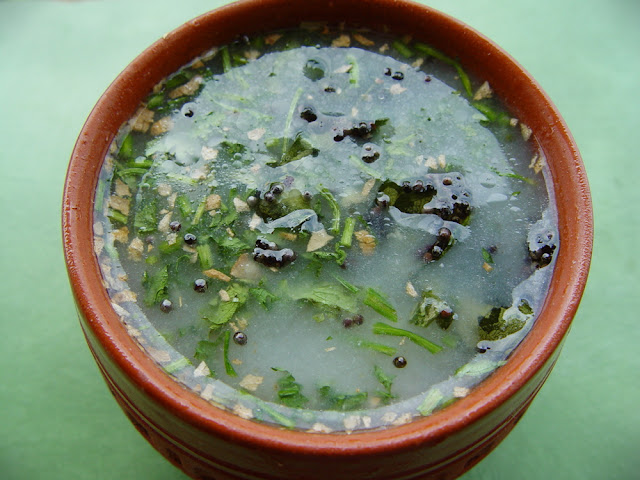
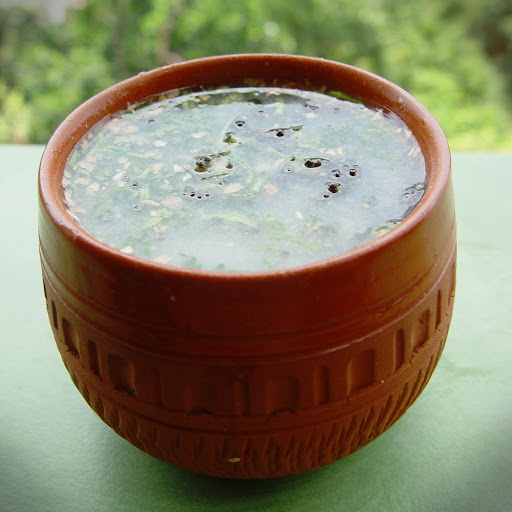
    Rice Mylk Majjige - Spicy South Indian Buttermylk for Virtual Vegan Potluck 3.0


    Rice Mylk Majjige - Spicy South Indian Buttermylk for Virtual Vegan Potluck 3.0

    It's Virtual Vegan Potluck time once again! Wheee.

    If you have been following the VVP blog route, you have arrived here from Veggie4ayear. You can click on the "Go Back" button below to go back to her VVP blog post which is the first in the Beverages category.


    I took part in the VVP for the first time last November. I made Hot Spiced Chai with Cashew/Sesame Mylk which was voted as the Award Winning Recipe in the Beverage Course and got featured on the VVP blog last month. I even got a cool VVP Tee. :)

    This VVP, I'm back with another Beverage offering, complete with a step-by-step HowDo tutorial. Spicy South Indian Buttermylk made of Rice Mylk.

    Rice Mylk Majjige - Spicy South Indian Buttermylk for Virtual Vegan Potluck 3.0

    Buttermilk/Moor/Majjige is a quintessential South Indian beverage. It's made out of yoghurt that's been blended with water, flavoured with lime and spices and seasoned. As I mentioned in my Peanut Curds post, the first thing a South Indian does when they turn vegan is to look for a vegan yoghurt alternative to make Curd Rice. More often than not, vegan Buttermylk is the very next thing curds get turned into.

    Cold Majjige is one of the most delicious things to sip on a hot summer's day. It's spicy and soothing all at the same time. It is chock full of beneficial bacteria which are extremely soothing for your tummy and help to beat the ushna (body heat) that is generated because of all the mangoes you've been indulging in during the summer months. :)

    I really like the gingery, mustard-y goodness, but it can also be prepared in a more simple and non-spicy way by just blending the curds with water, ice (optional), salt and lime. It's pretty tasty that way too.

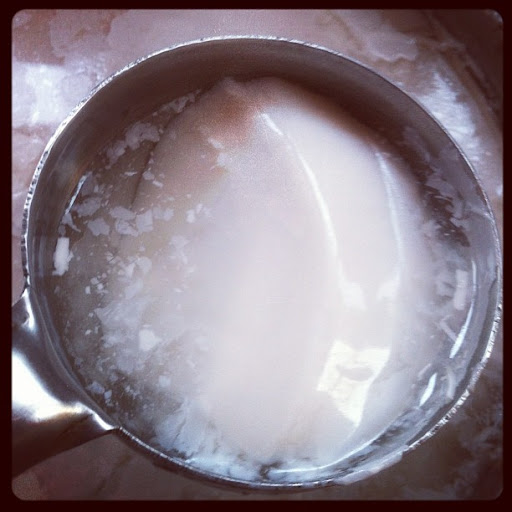
    You can start with any packaged or home made plant based yoghurt - soy, peanut, cashew, oat, rice... It just has to be absolutely plain - unflavoured and unsweetened. I've made this one with Rice Mylk that I turned into curds by adding a few cups of rejuvelac and letting it ferment overnight. Since Rice Mylk is already watery to begin with, I feel it suits the Buttermylk recipe well. And the starch in the rice makes the end result extra soothing.

    Now on to the step-by-step How-Do recipe for Rice Mylk Majjige. Enjoy! :)


    To continue on the VVP path, you can click on the "goforward" button below to be taken to Gazing In's VVP post, which is also a Beverage.


    Or if you want to go to the beginning of the whole list of 169(!!!) blogs which are participating this time in the Virtual Vegan Potluck, you can find them on the host site Vegan Bloggers Unite.

    Thank you AnnieSomerLidiaJason and everyone else behind VVP for making this awesome event possible! :)

    Friday, May 03, 2013

    The Great Vegan Fix - cooking demo and lunch event at Soul Kadhi, Bangalore on Sat, 18th May 2013


    My Hazelnut Chocolate Cake blog post in March was full of updates about all the awesome things happening in my vegan life. One of the things I'd mentioned was an upcoming vegan cooking demo at a local restaurant. I'd promised to tell you more about it as soon as all the details fell into place. They finally have and here's the story...

    It had been a long and pleasantly tiring day. We were all winding down at the end of the first VGF, basking in the overwhelming success and fretting about how we hadn't gotten our hands on certain sinful delicacies which had sold out way too fast. That was when Aditi Shankar walked in and asked for me. She told me she had found me through my blog and wanted to speak to me about another vegan event which involved promoting vegan food.

    I thought she meant an event like VGF, a fair of sorts, and having just finished one after weeks of planning and preparing, I didn't have the capacity to start thinking of another one right away. So Aditi and I decided to connect on Facebook the following week and I promised her I'd be happy to discuss further with her then.

    As it turned out, this event happened to be a vegan cooking demo and lunch at a restaurant called Soul Kadhi. The concept is similar to the demo-lunches I helped organise at Vivanta by Taj last year, but with one significant difference, it's all about promoting Indian vegan food.

    Sould Kadhi Event Poster

    Soul Kadhi is a North Indian cuisine restaurant located on a cozy street just off Richmond Road, in the heart of Bangalore. It is owned and operated by Nirmala Balakrishnan, who also runs two other eateries on the same premises. Though it is not a completely vegetarian joint, they do serve a variety of vegetarian dishes. Unlike typical North Indian restaurants, they don't overly douse their food with fats and oils. Instead, they strive to serve good, simple, comfort food with a homemade feel. In fact, Nirmala says that ever since she opened the restaurant, she's not felt the need to cook at home. Her whole family eats the food served at the restaurant. :)

    Now Nirmala wants to introduce vegan and veganisable options into the menu and that is where I come in. I met with Aditi and Nirmala in March and we came up with some interesting ideas for the event menu. When asked why Soul Kadhi wants to have this vegan event, Nirmala said, "Vegan food has become this trendy/fashionable concept and it is a general impression that to be vegan, one must eat fancy dishes with exotic ingredients. But what people don't realise is that in India, we just happen to eat vegan food at home on a daily basis. So the idea here is to show people that not only are they already eating vegan food as a part of their regular diet, they can also veganise everyday foods which might contain animal derived ingredients."

    Everyday staples like rice, roti, dal, sambar, idli, dosa, etc... are already vegan by default. Most vegans already know how easy it is it be a vegan in India and how it takes barely any changes in day to day cooking/eating for a person to follow a cruelty-free diet. But I was *really* happy to hear a non vegan person understanding and explaining all this. It truly does show that veganism has come a long way in India and is growing each day.

    We fixed an appointment for a cooking/tasting session in early April. I first spent some time in the Soul Kadhi kitchen, teaching Chef Ajay and his staff how to make basic dairy better-natives like peanut mylk/curds, cashew mylk/cream. The next day, we worked together for a couple of hours to create the tamarind tofu tikka, malai kofta, kadhi pakora, gajar ka halwa and basundi.

    Chef Ajay is really nice and down to earth. He was very open to learning about vegan food and since he's an experienced chef, I ended up picking up some valuable cooking pointers from him as well. It was such a pleasure working with him!

    All of us had a scrumptious food tasting session that afternoon. :)

    Tamarind Tofu Tikka
    Tofu Tikka

    Cucumber Raita
    Cucumber Raita

    Kadhi Pakora
    Kadhi Pakora

    Malai Kofta
    Malai Kofta

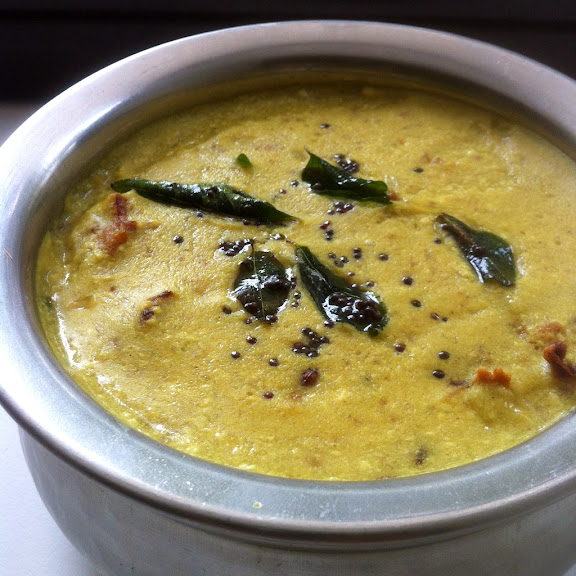
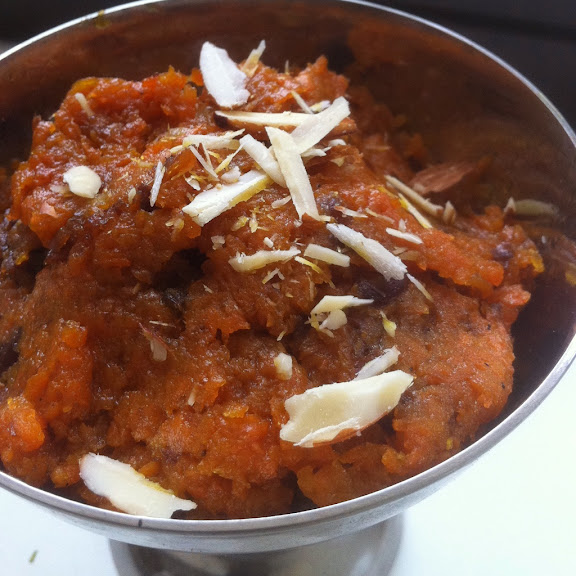
    Gajar Ka Halwa
    Gajar Ka Halwa

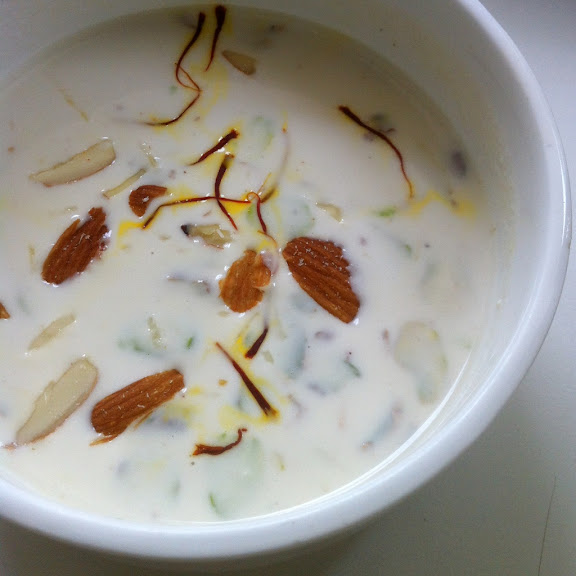
    Basundi
    Basundi

    Everything was delicious but the kadhi was hands down the *best* dish! Nirmala exclaimed to the chef that this vegan kadhi made of peanut curds was even better than his regular kadhi (which is supposed to be really good to begin with). :)

    Event details:

    Location: Soul Kadhi, #3, Laurel Lane, Richmond Town, Bangalore - 560025
    Date: Saturday, 18th May 2013
    Time: 12 noon
    Price: Rs. 500 per person (inclusive of taxes)


    At 12 noon, I will give a short introduction to vegan food. Then the chefs and I will begin the cooking demo and show you how to make the dishes pictured above. It will take about an hour to hour and half.

    This will be followed by a sit down lunch where all the demo-ed dishes will be served, along with steamed rice and tandoori rotis. The lunch is not limited to single portions.

    Registrations for the event begin after 12th May. You can reach Nirmala at +91 96866 01021 and book your place.

    You can additionally RSVP on the Facebook Event Page.

    This will be a nice event for veteran vegans to spend a relaxing afternoon indulging in some delicious fare. It will be even more useful to new vegans who want to learn some interesting vegan recipes and those people who are considering a vegan lifestyle or are curious about what completely plant-based food tastes like.

    I'd love to see some of my fellow Bangalore Vegans at Soul Kadhi on the 18th. More importantly, if you have friends or family members who you've been talking to about switching to a vegan diet, this is an excellent opportunity for you to make them experience vegan food at a restaurant first hand.

    Depending on the response to this event, Soul Kadhi plans to organise more vegan cooking events in the future. They also intend to introduce these and other vegan dishes into their regular menu based on the feedback of the participants.

    Looking forward to seeing you there! :)

    Sunday, April 28, 2013

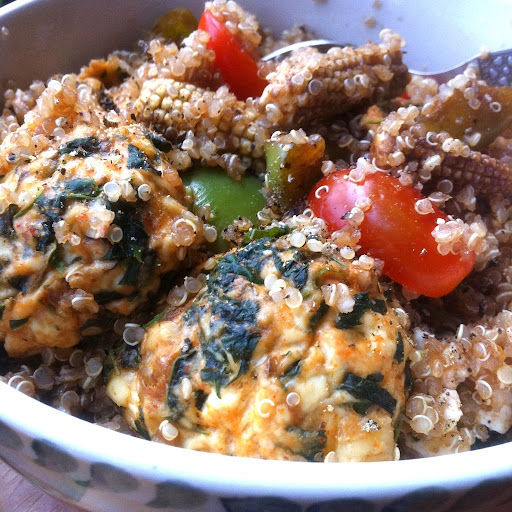
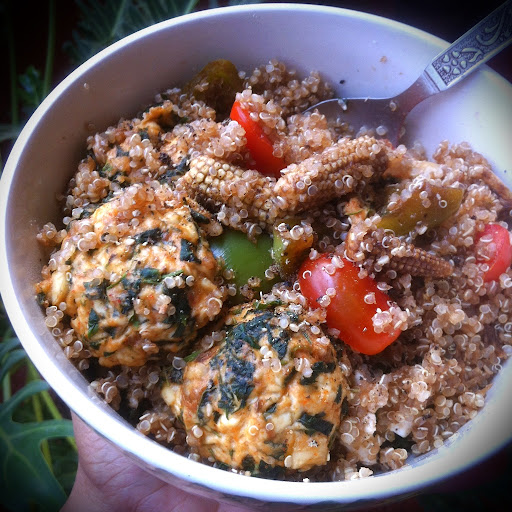
    Tofu Walnut Dumplings and Balsamic Vegetables in Quinoa


    This is one of my totally made up recipes. :D I cooked it up for lunch on a very hungry afternoon and as all hunger powered experiments go, it turned out to be scrumptious.

    I had spent the most part of my late morning visiting my fellow food bloggers' spaces, and the constant barrage of yummy looking vegan food photography had left me feeling famished.

    I *had* to make something delicious and special that would hit the spot and it had to be quick! Really, really quick!

    Thence arrived the fancy looking, fancy sounding, super easy to make Tofu Walnut Dumplings and Balsamic Vegetables in Quinoa! :)

    Tofu Walnut Dumplings and Balsamic Vegetables in Quinoa

    For the Quinoa:

    3/4 C Quinoa
    2 C Water
    Cherry Tomatoes

    Wash the quinoa well under running water and drain.
    Heat a heavy bottomed pan and toast the quinoa for a minute.
    Add the water and bring to a boil.
    Reduce the heat to low and cover with a lid or plate leaving a slight gap for the steam to escape.
    Cook for 15-20 minutes, until all the water has been absorbed and the quinoa is translucent and fluffy.
    Turn off the heat and keep the pot aside.
    Slice the cherry tomatoes into halves and add to the cooked quinoa.
    Mix well, cover and keep aside.

    For the Balsamic Vegetables:

    150 gms Baby Corn
    1 Capsicum
    5-7 large cloves of Garlic
    2 T Balsamic Vinegar
    1 tsp Liquid Jaggery (or any other sweetener)
    1 tsp Soy Sauce

    Slice the baby corn and capsicum any way you like.
    Roughly crush the garlic.
    Toss all ingredients together and keep aside for 10-15 minutes.
    Bake or microwave for 10 minutes.

    For the Tofu Walnut Dumplings:

    500 gms Tofu (I used Silken but Firm might be even better)
    1 C Greens (I used a local green called Chilkavare Soppu)
    1/2 C Walnuts
    1 T Corn Starch (Corn Flour)
    1/2 tsp Red Chilli Powder
    Freshly Crushed Pepper
    Salt

    Blanch the greens, drain, gently squeeze out the excess water and chop finely.
    Break the walnuts roughly into little pieces.
    Drain the tofu and gently squeeze out as much water as possible.
    Place everything in a bowl and mix with your hand while mashing the tofu.
    Shape into balls and place on a baking tray.
    Bake or microwave for 8-10 minutes.
    Then grill/broil for 5 minutes, until it's browned lightly.
    Allow to cool slightly and gently remove from the pan with the help of a spatula or flat spoon.

    How to Proceed:

    Pour the balsamic veggies along with their liquids over the quinoa and mix well.
    Add the tofu walnut dumplings and gently toss, ensuring that the dumplings stay intact.
    Serve hot with freshly crushed pepper on top.
    Enjoy! :)

    Tofu Walnut Dumplings and Balsamic Vegetables in Quinoa

    Update: 23rd June 2013

    The ingredients for this recipe can now be purchased in India in the form of a recipe box from Global Graynz.

    Global Graynz Rare Box Link

    Here are the links to purchase the three kinds of boxes for this recipe:

    1. Rare Ingredients box
    2. All Packaged Ingredients
    3. All Ingredients Including Fresh/Perishable Ones (pictured below)


    Global Graynz Everything Recipe Box

    Wednesday, April 24, 2013

    Veg Kheema - Guest post by dassana of veg recipes of india


    I met dassana, today's special guest, on the blogosphere and when I visited her blog Veg Recipes of India for the first time, I was overcome by a drool attack over all her delicious Indian recipes and the beautiful, step by step photographs.

    Her recipes are vegetarian and a lot of them are vegan. My favourite is the amritsari chole. I loved her idea of using black tea while cooking the chickpeas! Ever since I read that recipe, I've often popped tea bags into the pressure cooker while cooking all kinds of beans.

    A unique aspect of dassana's writing style on her blog and Facebook page is that she types in lowercase all the time. It's sort of her style. Just thought I'd share that bit of information in case you were wondering why I hadn't capitalised the 'd' in dassana's name. It's because she writes it that way. :)

    Now on to the delicious veg kheema recipe that dassana is sharing today.

    Thank you for guest posting on Veganosaurus, dassana! :)

    --

    Veg Kheema - Guest post by dassana of veg recipes of india

    susmitha had asked me long time back to guest post for her. not that i had forgotten but life became busy and i was not able to write the guest post. so finally i mailed susmitha that i will be writing the post and here it is.

    this recipe of veg kheema is basically lightly spiced minced veggies cooked indian style. kheema is the hindi word which means to mince. the veggies are minced/grated/finely chopped and then steamed with indian herbs and spices. veg kheema goes well with rotis and even bread. they can also be stuffed in burgers or buns with some raw tomato-cucumber slices along with lettuce and you have a healthy snack or brunch.

    any vegetables of your choice can be used. the dish is mildy spiced, aromatic & too good to taste and healthy as well. the recipe is easy to make and does not take much of your time.

    veg kheema recipe details below:

    1 medium size carrot, grated or minced or chopped finely
    7-8 mushrooms, chopped finely
    7-8 cauliflower florets, grated or minced or chopped finely
    7-8 french beans, chopped finely
    1/2 cup green peas, boiled
    2 medium size tomatoes, finely chopped
    1 medium size onion, finely chopped
    1 green chilli, finely chopped
    1/2 inch ginger and 2-3 garlic - crushed finely in a mortar-pestle or made into a paste
    1 black cardamom
    1 inch cinnamon
    1/2 tp turmeric powder
    1/2 tsp red chilli powder
    1/2 tsp garam masala powder
    1 tsp coriander powder
    2 cups water
    1-2 tbsp sunflower oil
    salt as required

    heat oil in a pan.
    add whole garam masala spices - black cardamom & cinnamon.
    add chopped onion.
    fry till light brown.
    add the ginger garlic paste.
    then add tomatoes and all the spice powders.
    fry the whole mixture till the oil separates.
    add all the veggies except boiled green peas.
    add water and salt.
    cover and cook till all veggies are cooked well.
    the mixture should become dry and there should be no moisture.
    now add the green peas and stir.
    check the seasonings.
    serve hot garnished with coriander leaves with some rotis, phulkas, naan or bread.

    Veg Kheema - Guest post by dassana of veg recipes of india

    Tuesday, April 23, 2013

    Peanut/Groundnut Mylk Curds/Yogurt Tutorial


    Many new and potential vegans, especially in India, often ask about a plant based replacement for yogurt. Vegan curds can be made with a wide variety of plant mylks - soy, cashew, rice, coconut, almond, oat, peanut/groundnut... Each kind of yogurt has its own consistency and delicious flavour. And all of them have a longer shelf life than the curds made out of animal fluids.

    My favourite of the lot, peanut curds, also happens to be the most popular vegan yogurt among vegans and non-vegans alike. Even my traditional, vegetarian grandmothers really enjoy the soothing, creamy taste and texture it offers.

    Peanut/Groundnut Mylk Curds/Yogurt

    Peanut curds is really versatile. It can be enjoyed straight by the spoonfuls or in the form or good old South Indian curd rice. It can be turned into majjige (buttermilk) or lassi or added into yogurt based dishes like avial, majjige huli, kadhi, raita, etc...

    One of the most visited posts on my blog is Creamy Peanut Milk Curds/Yogurt. I wrote that post when I had newly learnt how to make yogurt out of groundnuts.

    Today I created a video demonstrating the process step by step so that it'll be easier for everyone to understand.

    Watch the clip, if you have any questions, post them as a comment here and I'll reply as soon as possible.

    Enjoy! :)
    Peanut Mylk Yogurt/Curds.


    A few pointers (I've mentioned most of these in my older blog post too):

    - You can optionally strain the cooked peanut mylk before turning it into curds. But I prefer to leave the pulp in there.

    - I have said "green chilli crowns" as one of the starters but the crowns of any variety of chilli can be used.

    - After making the first batch of curds using any of the starters I mentioned on the HowDo, start saving a spoonful of yogurt from each batch you make to use as a starter for the next batch. The flavour of the curds gets better and better with each generation of the lactobacilli.

    - Peanut curds sets well in 8-12 hours (depending on the climate) but let it sit out at room temperature for up to 24 hours if you want it to sour well.

    - The yogurt will stay fine in the fridge for 10-15 days at least. I think it might last longer but we usually finish up even our largest batches within two weeks. It's that yum! :)

    Wednesday, April 17, 2013

    Spicy Mulberry Balsamic Jam


    This isn't a jam jam. It doesn't have a smooth, spreadable consistency. It's more like a sticky, yummy, eat-with-your-fingers type of jam.

    I enjoy jam but I rarely ever make any. I like my fruits fresh and whole and I feel cooking them with loads of sugar takes away from the taste. So I don't have traditional jam making ingredients like pectin in my pantry. That's why this jam is not of a jammy consistency.

    For those occasions when nothing but jam hits the spot (certain weekend mornings come to mind), I have a jar or two of fruity, pink and purple jams in my fridge. I'm a sucker for jams made of berries and grapes and mixed fruits. Yellow jams like mango and pineapple aren't too appealing to me. Not because of their colour, but because they have that tart taste which is distracting when I dip my bread and jam into coffee and take a bite.

    I'm not particular about the make and brand. I appreciate the standard Kissan mixed fruit jam just as much as a fancy artisan one. My latest favourite is Towness' grape and strawberry jam.

    When Towness announced that they were introducing seasonal mulberries at their store for a few days, people started to comment excitedly on their facebook page. Having never tasted this fruit before, I was really tempted to order some even though I usually avoid fruits which are expensive.

    I hadn't realised that 200gms was a lot of mulberries! Hubby and I quickly finished half of it when the box arrived. But there is only so much mulberry one can eat and the other half was sitting in the fridge going soft for a few days. That's why I decided to make jam with it.

    I really don't have quantities for the jam. It was one of those put together-taste-adjust things. So I'll just tell you the ingredients I used and the process I followed and you adjust the quantities to your taste. I think this recipe will work well with other berries too. I can easily picture it made with strawberries, blackberries and blueberries. Let me know if you try it with any of them.

    Spicy Mulberry Balsamic Jam

    Spicy Mulberry Balsamic Jam
    Ingredients listed in descending order of quantities used.

    Mulberries
    Sugar
    Balsamic Vinegar
    Chilli Powder
    Salt

    Wash mulberries and drain.
    Place them in a pan with sugar and cook while stirring.
    Add a bit of salt and continue to stir and cook on medium heat.
    When the whole mixture is mushy, add chilli powder and a generous splash of balsamic vinegar.
    Reduce the heat to low and stir well.
    Taste and adjust the chilli powder and salt quantities.
    Once everything reaches a sort of jammy consistency turn off the heat and allow to cool completely.
    Transfer to a glass jar and store in the fridge.
    Enjoy! :)
    Thursday, April 04, 2013

    Spicy Tamarind Brandy Sorbet


    Summer's here. A wretchedly hot one at that! All cold things are a welcome bliss. So it's no wonder that when my beloved grocery store, Towness announced a recipe contest for their customers, my brain cogs turned towards icy ideas.

    The theme for the contest was tamarind. Though puliyogare is at the top of my favourite tamarind based dishes, I wanted to be creative with my recipe submission. And I mean a little more creative than my usual navane puliyogare (made with foxtail millet instead of the traditional rice) which many of you tasted at VGF in Feb.

    So I thought of making a tamarind based ice cream. But that idea flew right out the window the moment I started picturing how any kind of mylk would coagulate as soon as I started stirring the tamarind in. So I decided on a sorbet.

    Spicy Tamarind Brandy Sorbet

    It started out being a goody goody sorbet, but somewhere in the process of putting random ingredients together, I felt the urge to slosh some brandy into it. *slurp* It added a kick and enhanced all the flavours. I tested it out on a couple of willing 'guinea pigs' (no animal testing here folks, only human testing). Two out of the three people who tried it said it was really good. And since I also enjoyed it thoroughly, I declared it tried, tested and contest worthy.

    And guess what, it won me a dinner voucher to Imli!!! Yay! :D

    I've heard many people speak well about this place so I'm really looking forward to going. I'm getting super hungry just looking at their menu. Yum!

    There were 30+ recipes submitted and 15 of those were shortlisted by the judges for trial. They picked the prepared food from the 15 peoples' homes this last Sunday and after tasting everything for themselves, the winners were announced yesterday.

    Towness Tamarind Recipe Contest Winners

    Here's the recipe if you want to try this out yourself. If you don't consume alcohol, don't worry, just skip the brandy and add a little more chilli powder. It'll still be yummy. :)

    Spicy Tamarind Brandy Sorbet

    2 T tamarind paste
    2 T date syrup or jaggery syrup
    1/4 tsp chaat masala
    1/4 tsp red chilli powder
    2 C water
    Big splash of brandy *hic*

    Blend everything together.
    Transfer to an airtight container and freeze for 2 hours.
    Whip vigorously and freeze again for 5-6 hours.
    Transfer to a grinder jar and blend for a minute.
    Put back into the airtight container and freeze for two to three more hours.
    Serve in small scoops.
    Enjoy! :) *hic*
    This is this the point where I usually end my blog posts, but I realized that while I was talking about prizes, I had to tell you about the one I won in Feb. Heheh yep, apparently I'm on a prize winning streak since I won that Green Foodie Recipe Challenge by The Alternative as well as the VVP T-Shirt in December. :D

    Towness had a Food Photography contest for Valentines month and my Baked Akki Rotti Bites photo got the 2nd Prize. :)

    Baked Akki Rotti Bites Photo

    Towness Food Photography Contest Winners

    When I was asked which restaurant I'd like to have a romantic dinner at, I opted to get vouchers to my favourite grocery store instead. So for the last month, I've been having many romantic dinners. Thank you Towness! :)