Showing posts with label Vegan Dairy Substitutes. Show all posts

Monday, August 02, 2021

Chocolate Brown Rice Roasted Almond Mylk


Slightly angled top view, close up of chocolate brown rice almond mylk with ice

“Good lord! This tastes freaking delicious!!!” I said, as I slurped the smooth, light liquid delightedly. ๐Ÿฅ›๐Ÿคค


It was the first time I tasted rice mylk. I’d purchased it at a grocery store in the US. 


Initially I’d been skeptical to pick it up because the tetra packed almond mylk from the same brand had been an overwhelming disappointment.


But my curiosity won, and here I was, sipping on this incredibly soothing, vanilla flavoured beverage.


After that, I glugged down tumblers and tumblers of rice mylk on a daily basis while I could get my hands on it.


As soon as I got back to Bangalore, I wanted to try making it at home.


I did some research, cooked white rice, and blended it with water.


❗️What emerged was a thick, starchy, undrinkable mess! ๐Ÿ˜‚๐Ÿคฃ


It was nothing like the heavenly tetra packed goodness I’d fallen in love with. But I don’t give up easily. Certainly not after the first try.


It took a couple more experiments, but eventually I zeroed in on the perfect home made rice mylk recipe. ๐Ÿ‘๐Ÿฝ


๐Ÿš Use a variety of rice that doesn’t have all its fibre polished off – brown or red (Rajmudi) work great

๐Ÿ’ฆ Contrary to what you’d expect, the volume of water has to be higher in rice mylk than in nut mylks (like 1/2 C cooked rice to approximately 1 L water)


That’s it. That’s the big secret. ๐Ÿ˜‚


Blend well. Strain. Get ready to *glug glug slurp*.


Some bonus tips:


๐Ÿ“ Cook the rice very well, and cool it completely before blending.

๐Ÿ“ You can add any sweetener (dates, jaggery, maple syrup) and flavour (pure vanilla extract, cocoa powder, cinnamon) while blending and then strain the mylk.

๐Ÿ“ If you have a high powered blender, you might not have much stuff left to strain. But strain it anyway. This mylk is best enjoyed smooth and light!


If you enjoy these hacks that go beyond just recipes, join one of my Demystifying Vegan Cooking small group training sessions.


Rice mylk is very enjoyable when you drink it by itself (lightly sweetened if you like). But it also works well in:


๐ŸŒผ Cereal

๐ŸŒผ Payasam/Pudding

๐ŸŒผ Smoothie

๐ŸŒผ Fermented into Spicy Buttermylk

๐ŸŒผ In baking Cookies, Cakes and Bread

๐ŸŒผ Light, cold beverages


Chocolate Brown Rice Roasted Almond Mylk

2 T Well Cooked Brown Rice

3-4 Roasted Almonds

3 tsp Cocoa Powder

Date Syrup to taste (alternatives: Jaggery, Maple Syrup)

Dash of Pure Vanilla Extract (skip if you don’t have pure extract)

Pinch of Salt

2 Cups of Water


  • Add all ingredients (except water) into a blender jar
  • Pour in a little water and blend into a creamy paste
  • Add the rest of the water and blend until smooth
  • You could optionally strain this
  • Pour over ice and enjoy your refreshing beverage! ☺️


Friday, June 18, 2021

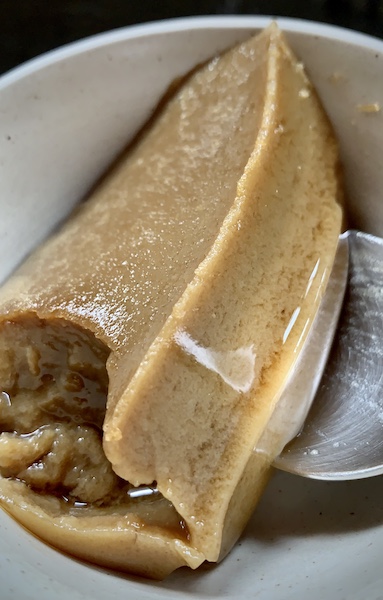
Vegan GiNNada KaDubu (Jun KuDumulu)


Close up of a sweet called GiNNa in Kannada. This is the vegan, cruelty-free version. Rectangular slice, brown in colour, jelly texture. In an off white bowl and a bit of steel spoon showing.

 ๐Ÿฎ GiNNa เฒ—ಿเฒฃ್เฒฃ is a dessert traditionally made out of Jaggery and Colostrum. Let me describe these exotic ingredients to you...

Freshly extracted sugarcane juice is boiled for a long time in large, heated vats. It gets caramelised into a delicious sweetener. That’s Jaggery. ๐Ÿคค

A female is pregnant for a long time. Soon after she gives birth, an antibody rich secretion comes out of her mammary glands to feed her baby. That’s Colostrum. ๐Ÿ˜ณ

Now imagine what kind of a sick, twisted mind decided to put the two together and invent dessert.

Someone sees a cow give birth and says, “hey, let me push that wee baby calf aside, squeeze the very first milk out of his mother’s udders, and cook it with Jaggery.”

And then it just becomes a special, gourmet recipe, passed on from generation to generation.

It’s bloody scary how easy it is for us humans to commodify and normalise the use of things which we have absolutely no business taking! ๐Ÿคฏ๐Ÿ˜จ

Sadly, as a kid, GiNNa was one of my favourite desserts.

Usually I’m not the kind of vegan who feels guilty about my past food choices. What’s done is done. I’m just grateful I make better choices now.

But GiNNa is the one dessert from my past that breaks my heart. ๐Ÿ’”๐Ÿ˜ข

I can’t believe how casually my tastebuds could enjoy something that an innocent new born should’ve been eating. ๐Ÿฎ๐Ÿ„๐Ÿ‘ฉ๐Ÿฝ‍๐Ÿผ

If you still like GiNNa, you don’t have to wait for a cow to give birth and steal her baby’s first food.

Instead, make this Vegan GiNNa anytime you crave it!

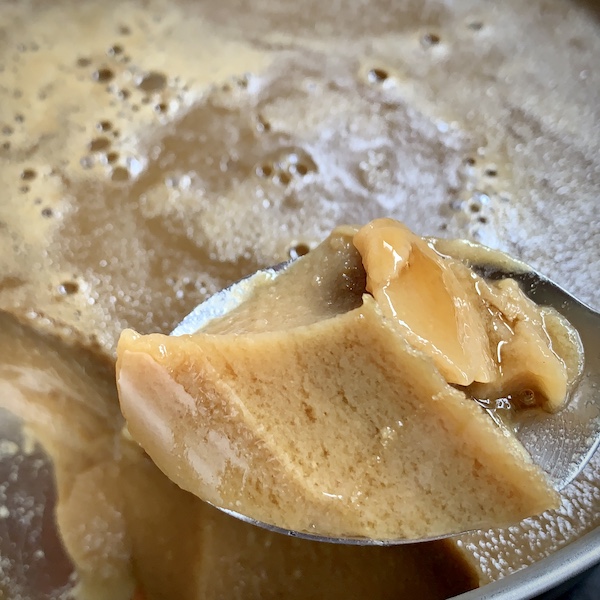
Close up of a caramel brown, jelly like dessert being help up with a steel spoon. More dessert in the background. A vegan version of GiNNa (in Kannada), also known as Junnu (in Telegu).
 

1 1/2 L Soy Mylk
15 g Agar Agar Sheet – cut into small strips
1 1/2 C Jaggery

๐ŸŒปRinse the agar agar strips
๐ŸŒนAdd to soy mylk and bring to boil
๐ŸŒปReduce heat to low and keep cooking, stirring periodically, until the agar dissolves completely (takes 20-30 mins)
๐ŸŒนGently stir in the Jaggery and simmer on low heat for a couple of minutes until it dissolves (don’t let the mylk boil!)
๐ŸŒปTurn off heat and transfer to a tray or individual cups
๐ŸŒนAllow to cool, then let it sit in the fridge for at least 2 hours
๐ŸŒปEnjoy cold!

๐Ÿ“ Other plant based mylks work, but fresh, homemade soy mylk gives the best texture
๐Ÿ“ You can use agar agar powder instead of sheets

Thursday, April 09, 2015

Fermented Cheesy Dip Video


Running Bangalore's first vegan restaurant, Carrots, has taken over my life and I'm loving every minute of it! :)

But I do miss my blogging days. :( It used to be awesome to have time to post recipes and visit my blogging friends' spaces. There was a time when that was the biggest part of my online personality.

Even though I'm rarely posting new recipes and photographs here these days, I feel that it'll be really nice to have some activity happening on my blog.

So I've decided to share videos from the demos we've been having quite regularly at Carrots. :)

In most of these videos you'll see me and my bestie, Chef Ram doing the demo. But occasionally, our other talented chefs will be joining me too.

Besties

Today's video is a recipe for a quick and easy cheesy dip, along with some great ideas on how to use it in preparing a bunch of snacks and dishes. We did this demo last Sunday. I'll share videos from some of the older demos later.


Enjoy! :)

Monday, September 30, 2013

Veganosaurus Raw Food Theme Full Recap - Vegan MoFo 2013 Day 17


It's the last day of the Vegan Month of Food! I'll miss having something awesome to look forward to on the blogosphere each day. But I definitely won't miss the freaky stress associated with having to post every single day. Ha! In fact, I'm taking a break from my blog for the next week (at least). A well deserved holiday.

Over the last month I've shared a series of raw, vegan dishes here. Unfortunately I wasn't able to do 20+ recipes like I'd intended to. :( But I'm glad that at I'm getting at least 17 posts done for MoFo this year.

It's been a really good challenge to create these raw recipes. I've enjoyed it so much, I think I'll be creating raw foods more often. :)

Thank you everyone who has visited me here and at my various social media spaces (Facebook, Twitter, Instagram, Pinterest) throughout this month. Your supportive comments about my recipes, HowDo clips and time-lapse videos have been really encouraging. :)

I think I've had as much fun participating in Vegan MoFo this year as I did last year. Here's a link to my Vegan MoFo album from 2012 if you want to see what I did last time.

I am highly inspired by all the wonderful recipes I've been seeing on my fellow MoFo blogger's spaces! I'm going to spend the next few days just blog hopping and drooling over the goodies. :) Ahhhh bliss!

I'll leave you now with a recap of all the Vegan MoFo posts on my blog throughout this month. Enjoy! :)

Day 1 - Raw Almond Mylk

Raw Almond Mylk


Day 2 - Healthy Green Smoothie

Healthy Green Smoothie


Day 3 - Fruit Sweetened Almond Mylk Ice Cream

Fruit Sweetened Almond Mylk Ice Cream


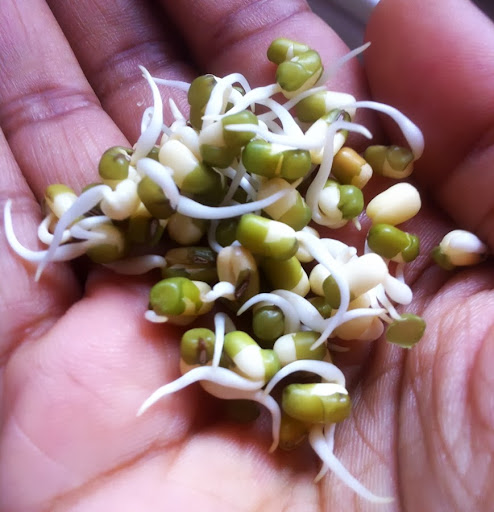
Day 4 - Making Sprouts and Green Cilantro-Mint Chutney(chutney recipe by Dr.Nandita Shah)

Green Moong Sprouts


Day 5 - Raw Almond Mylk Pulp Vadai/Cracker Sandwiches

Raw Almond Mylk Vadai/Cracker Sandwiches


Day 6 - Stuffed Bajji Menasinakayi (Banana Peppers) with Walnut Cilantro Pesto

Stuffed Bajji Menasinakayi (Banana Peppers) with Walnut Cilantro Pesto


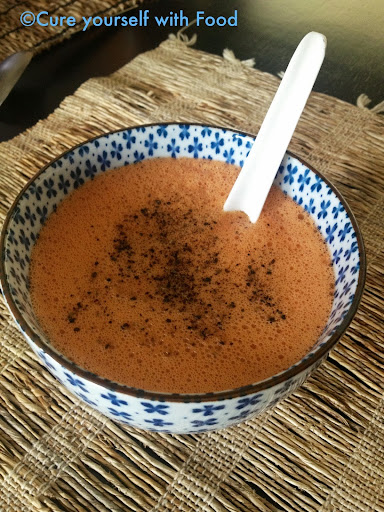
Day 7 - Creamy Tomato Basil Soup (guest post by Manasa of Cure yourself with Food)

Creamy Tomato Basil Soup


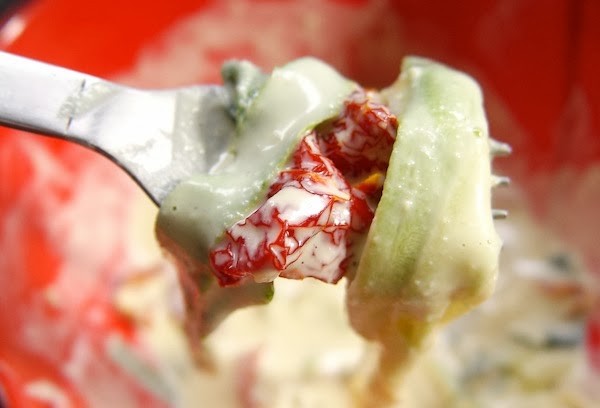
Day 8 - Raw Zucchini Fettuccine and Sun Dried Tomatoes in Cashew Sour Cream Sauce

Raw Zucchini Fettuccine and Sun Dried Tomatoes in Cashew Sour Cream Sauce


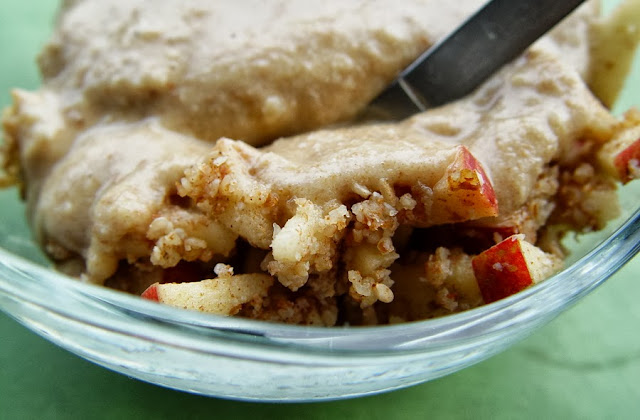
Day 9 - Raw Cinnamon Apple Crumble with Date Almond Sauce

Raw Cinnamon Apple Crumble with Date Almond Sauce


Day 10 - Melon Mustard Gazpacho

Melon Mustard Gazpacho


Day 11 - Mid-MoFo Recap and Giveaway

Mid-MoFo Recap and Giveaway


Day 12 - Ruby Smoothie

Ruby Smoothie


Day 13 - Fermented Cashew Garlic Cheese

Fermented Cashew Garlic Cheese


Day 14 - Noochos Gracias Raw Soup

Noochos Gracia Raw Soup


Day 15 - Frozen Basil Seed Pudding

Frozen Basil Seed Pudding


Day 16 - Lemon Lavender Spoon Cream (guest post by Ashlee of The Little Foxes)

Ashlee's Lemon Lavender Spoon Cream

Thursday, September 19, 2013

Fermented Cashew Garlic Cheese - Vegan MoFo 2013 Day 13


There just has to be a special recipe for lucky day 13 of Vegan MoFo! :) So I'm sharing a recipe that everyone I have given it to loves, regardless of their food choices - Fermented Cashew Garlic Cheese.

Fermented Cashew Garlic Cheese

I posted about Hazelnut Cheese on my blog a couple of years ago, when I newly got into nut cheese making. That one involved rejuvelac. The one I'm sharing with you today is simpler to make and has just two ingredients in it - cashew and garlic! Ok, four if you count the pinch of salt and water. :p

The only important tools required are a clean glass jar with a lid and a blender. The complete process takes about two days, but only 5-10 minutes of that time is spent in doing any work. The rest of the time goes in the soaking and fermenting.

I tried this kind of minimal ingredient, fermented nut cheese for the first time at one of Dr. Nandita's healthy cooking demos a couple of years ago. That was a plain, lightly salted cashew cheese. More recently, I tasted the garlicky version made by Mille of Millie's Vegan Cheese, who also makes and sells a variety of other amazing vegan cheeses, pรขtรฉs, cheese cakes and other awesome goodies.

Fermented Cashew Garlic Cheese

I was blown away by the garlic cheese, but more than me, it was my baby sis who fell head over heels in love with it. Ever since then I've been making this for her on a regular basis. My sis is vegetarian but she does try to avoid dairy. This cashew garlic cheese has acted as a perfect butter substitute for her. Her favourite way to eat it is to mix it with kothmiri thokku (an amazing cilantro pickle that my mom makes) have it on the side with chapathi, akki rotti, rava rotti, etc.

This cheese has a creamy, spreadable consistency and can be generously slathered on pizzas and sandwiches. It can be mixed into pastas and salads and any other dish you can think of putting it into. And most importantly, it can be eaten by the spoonfuls all by itself. :D

Since this is a really simple recipe, I've just created a HowDo for it. I didn't feel the need to type the steps out. So watch the HowDo and make your own cashew garlic cheese.

Sunday, September 01, 2013

Raw Almond Mylk - Vegan MoFo 2013 Day 1


Almonds

Happy MoFo to you
Happy MoFo to yooooou
Happy MoFo, happy MoFo
HaPPy MooooFoooo toooooo yoooooooooou

Welcome to the Vegan Month of Food 2013 everyone! If you didn't already guess, the Happy MoFo song is sung to the tune of the Happy Birthday song. :D

Throughout the month of September, I'll be sharing recipes for Raw Vegan Foods here on my blog. It's been a good challenge for me, pushing myself to create completely raw recipes. I have put together a bunch of dishes over the past couple of weeks and I'm really happy and excited to be sharing them with you over the coming days. I still need to create many more recipes so that I can do at least twenty and possibly thirty blog posts this month.

So far, all the recipes I've concocted are 100% raw and I'm very proud of that. Down the line, there's a chance I might cheat a bit here and there and use one or two non-raw ingredients. But I will ensure that even those recipes are at least 80% raw.

I'm going to focus on using primarily local ingredients in my recipes so that people in India can attempt raw, vegan foods with what is easily accessible to them. I will occasionally indulge in speciality raw food products that might not be available in India. When I do, I'll share links so you can order them online and import them if you wish to do so.

Now that the intro is over, let's go to my first recipe offering for Vegan Mofo 2013! :)

Vegan MoFo 2013 Banner

I thought I'd cover the basics first. Since I'll be using Almond Mylk, in a couple of recipes later, I figured I'd start off by sharing a simple, step-by-step micro tutorial on making Raw Almond Mylk.

Enjoy! :)


See you back here tomorrow. I'm off to blog hop now and check out all the amazing recipes that everyone else has posted on Day 1 of Vegan MoFo 2013. :)

Wednesday, July 31, 2013

Vegan Baking Demo at Carrots on Saturday, 20th July 2013


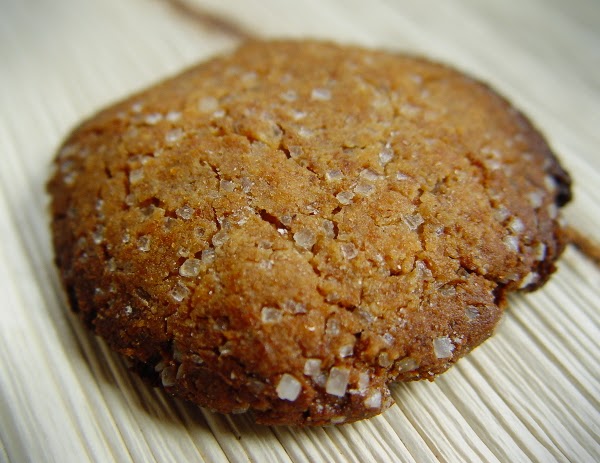
Coconut Almond Sugar Cookie

About ten days ago, I had a vegan baking demo at Carrots, The Healthy Kitchen and Store. I've mentioned Carrots, the first vegan restaurant in Bangalore, in my blog posts many times this year.

Carrots Board

A few weeks ago, Krishna, the co-founder of Carrots, invited me to teach baking/cooking classes to his staff. Many people who follow my blog and facebook page have asked me to conduct vegan baking classes, so I figured that since I was going to teach some recipes to Chef Ram (Carrots' new Bakery Chef), we could extend that into an interesting demo event. We decided on a Monsoon Afternoon Chai and Baked Goodies theme.

Carrots Demo Poster

About 11 people signed up to attend the event but we had a bunch of walk-ins and ended up with a total of 15 participants. A couple of them were my good friends who attended to support me but most others were people I met for the first time. I was very happy that I got to meet and speak with all these new, interesting people. It was also nice to hear that some of them have been following my blog and trying out the recipes here for a while now. :)

The event went well for the most part and despite certain imperfections, many participants said that they enjoyed the demo and would be trying out the recipes at home once I posted them here.

My darling hubby, Milesh, patiently recorded the demo. It has taken me some time to edit the videos. I wanted to do this last week but I was travelling. As soon as I got back this week, I started working on the videos so I could share them here along with the recipes. I've divided them into multiple parts for the purpose of organisation.

I apologize in advance for the annoying background noises in the videos. The screaming toddler, creaking buffet vessels, clanking cutlery, the buzz of customers and staff talking in the background - we hadn't anticipated any of these disturbances. The expectation was that the buffet would be closed and the crowd cleared out by 3:30 or so, leaving us with a fairly silent space to do the demo. The participants themselves were watching the demo with rapt attention and were NOT the ones responsible for the ruckus. :p

Now without further ado, let's move on to the recipes you've all been waiting for.

Vegan Baked Goodies

--

Basic Vegan Chocolate Cake


Dry Ingredients:
1 1/2 C Whole Wheat Flour or Maida
3 T Good Quality Cocoa
1/2 tsp Salt
1 tsp Baking Powder (or 1/2 tsp Baking Powder and 1/2 tsp Baking Soda)

Wet Ingredients:
3/4 to 1 C White or Brown Sugar
5 T Coconut or Olive Oil
1 T White or Apple Cider Vinegar
1 tsp Coffee Powder - or Vanilla/Orange/Almond/Mint Extracts
1 C Cool or Cold Water

* Preheat oven to 180°C / 350°F.
* Lightly grease an 8 or 9 inch, round or square cake pan (no greasing required if using a non-stick pan).

* Sieve the dry ingredients together a few times.
* Whisk all the wet ingredients (except oil) together until at least half the sugar has dissolved.
* Add the oil and whisk some more.

* To make the cake batter, pour the wet ingredients over the dry ingredients and quickly mix until there are no large lumps.
* Pour the cake batter into the prepared pan and immediately pop it into the preheated oven.
* Bake for 40-45 minutes, until a few cracks have formed on the cake's surface.
* Cool completely in the pan.
* Slice and Serve.
* Enjoy! :)

--

Whole Wheat Buns


For the yeast proofing:
1/2 C Warm Water
2 tsp Active Dry Yeast
2 T Sugar

Dry ingredients for the dough:
3-4 C Whole Wheat Flour
1/4 C Sugar - can be less
2 tsp Salt
2 T Flax Seed Powder

Wet ingredients for the dough:
1 C Vegan Mylk or Water
3 T Coconut Oil or Olive Oil

* Add 2 T sugar and yeast to 1/2 C warm water.
* Stir and keep aside for 10-15 minutes, until the yeast has dissolved and is frothing a bit.

* Mix 3 C of the whole wheat flour with the remaining dry ingredients in a large bowl.
* Add the oil and mix.
* Add the yeast mixture and 1 C vegan mylk or water and whisk.

* Gradually add whole wheat flour and mix until the dough comes together into a rough ball.
* Transfer to a floured surface and knead very well until you get a soft, elastic ball of dough.
* Pour some oil in the large mixing bowl, place the ball of dough in it and twirl to coat with oil.
* Cover and allow to rise in a warm spot for 2 hours, until doubled in volume.

* Press down on the risen dough and shape into buns.
* Optionally stuff the buns with your favourite vegetable mixture (a potato palya filling tastes yum).
* Place the buns on a tray, cover and keep aside for 1 hour, until the buns have risen well.

* Preheat oven to 190°C / 375°F.
* Bake the buns for about 40 minutes.
* Cool in the tray for 10 minutes.
* Transfer to cooling rack and cool well.
* Enjoy! :)

--

Quick and Easy, Gluten Free Almond Coconut Cookies


1 C Almond-Sesame Flour (grind almonds and sesame seeds in a ratio of 3:1 to get this flour)
1 C Desiccated Coconut Powder
1/2 C Bajra (Pearl Millet) Flour
1/2 C Sugar
1/4 tsp Salt
Water

* Preheat oven to 250°C / 480°F.
* Lightly grease a baking tray or line it with aluminium foil.

* Mix all the dry ingredients.
* Add a little water at a time to form a stiff dough.
* Pinch off small balls of the dough and flatten into 1 1/2 inch cookies that are about 1/4 inch thick.

* Bake for 10 minutes.
* Allow to cool slightly and transfer to wire rack.
* You can have it warm or at room temperature.
* Enjoy! :)

--

Vegan Mylk and Masala Chai


For the Nut and Seed Mylk:
1/4 C Cashews
1/4 C Sesame Seeds
1/4 C Flax Seeds
Water

* Grind the nuts and seeds together into a fine powder.
* Add a little water at a time and blend to get a smooth, creamy paste.
* Add more water and blend until you reach the desired consistency.

For the Masala Chai:
3/4 C Water
3 Cloves
1 Cardamom Pod
1/2 inch Cinnamon Stick
1/2 inch Fresh Ginger - crushed
5 Black Pepper Corns - crushed
1/2 to 1 tsp Sugar (optional)
1/2 tsp Tea Powder
1/2 to 3/4 C Nut and Seed Mylk (should not be too thick)

* Boil the spices in the water for a couple of minutes.
* Add sugar at this point and boil.
* Add the tea powder and boil for a few seconds.
* Reduce the heat to low, quickly pour in the mylk and stir.
* Bring to a short boil and turn off the heat.
* Strain and serve hot.
* Enjoy! :)

--

If you attended the demo, I'd love to hear your thoughts about how you liked it and how we can make future events a better experience for you.

Thanks for reading and watching all the videos. When you try out the recipes, do leave a comment here letting me know how you like them. :)

Saturday, May 11, 2013

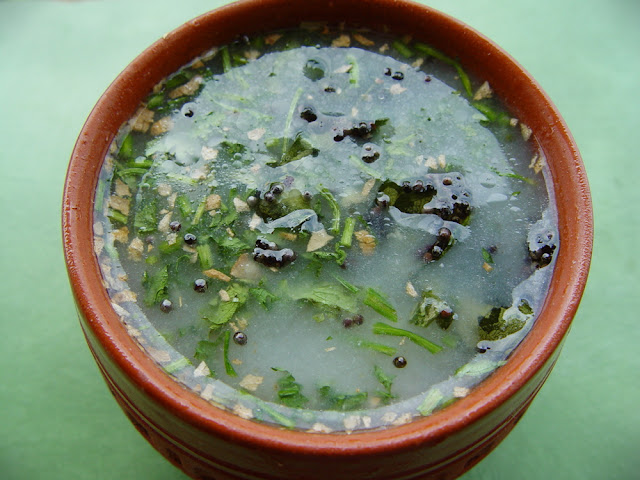
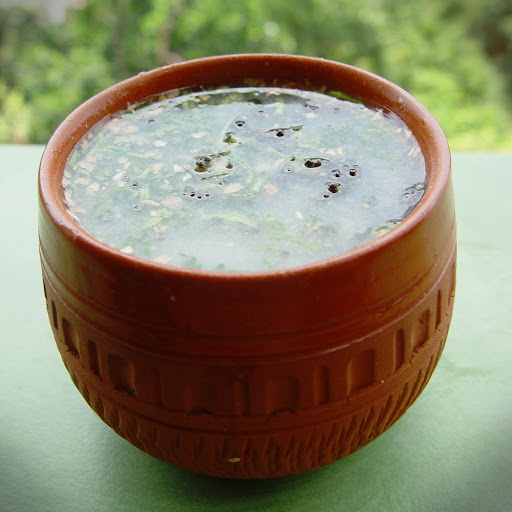
Rice Mylk Majjige - Spicy South Indian Buttermylk for Virtual Vegan Potluck 3.0


Rice Mylk Majjige - Spicy South Indian Buttermylk for Virtual Vegan Potluck 3.0

It's Virtual Vegan Potluck time once again! Wheee.

If you have been following the VVP blog route, you have arrived here from Veggie4ayear. You can click on the "Go Back" button below to go back to her VVP blog post which is the first in the Beverages category.


I took part in the VVP for the first time last November. I made Hot Spiced Chai with Cashew/Sesame Mylk which was voted as the Award Winning Recipe in the Beverage Course and got featured on the VVP blog last month. I even got a cool VVP Tee. :)
This VVP, I'm back with another Beverage offering, complete with a step-by-step HowDo tutorial. Spicy South Indian Buttermylk made of Rice Mylk.

Rice Mylk Majjige - Spicy South Indian Buttermylk for Virtual Vegan Potluck 3.0

Buttermilk/Moor/Majjige is a quintessential South Indian beverage. It's made out of yoghurt that's been blended with water, flavoured with lime and spices and seasoned. As I mentioned in my Peanut Curds post, the first thing a South Indian does when they turn vegan is to look for a vegan yoghurt alternative to make Curd Rice. More often than not, vegan Buttermylk is the very next thing curds get turned into.

Cold Majjige is one of the most delicious things to sip on a hot summer's day. It's spicy and soothing all at the same time. It is chock full of beneficial bacteria which are extremely soothing for your tummy and help to beat the ushna (body heat) that is generated because of all the mangoes you've been indulging in during the summer months. :)

I really like the gingery, mustard-y goodness, but it can also be prepared in a more simple and non-spicy way by just blending the curds with water, ice (optional), salt and lime. It's pretty tasty that way too.

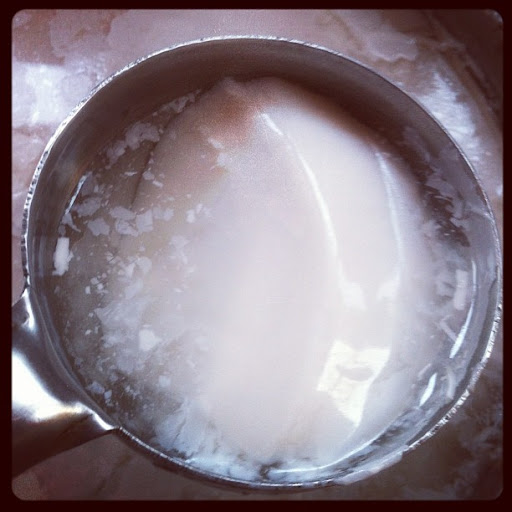
You can start with any packaged or home made plant based yoghurt - soy, peanut, cashew, oat, rice... It just has to be absolutely plain - unflavoured and unsweetened. I've made this one with Rice Mylk that I turned into curds by adding a few cups of rejuvelac and letting it ferment overnight. Since Rice Mylk is already watery to begin with, I feel it suits the Buttermylk recipe well. And the starch in the rice makes the end result extra soothing.

Now on to the step-by-step How-Do recipe for Rice Mylk Majjige. Enjoy! :)


To continue on the VVP path, you can click on the "goforward" button below to be taken to Gazing In's VVP post, which is also a Beverage.


Or if you want to go to the beginning of the whole list of 169(!!!) blogs which are participating this time in the Virtual Vegan Potluck, you can find them on the host site Vegan Bloggers Unite.

Thank you AnnieSomerLidiaJason and everyone else behind VVP for making this awesome event possible! :)

Tuesday, April 23, 2013

Peanut/Groundnut Mylk Curds/Yogurt Tutorial


Many new and potential vegans, especially in India, often ask about a plant based replacement for yogurt. Vegan curds can be made with a wide variety of plant mylks - soy, cashew, rice, coconut, almond, oat, peanut/groundnut... Each kind of yogurt has its own consistency and delicious flavour. And all of them have a longer shelf life than the curds made out of animal fluids.

My favourite of the lot, peanut curds, also happens to be the most popular vegan yogurt among vegans and non-vegans alike. Even my traditional, vegetarian grandmothers really enjoy the soothing, creamy taste and texture it offers.

Peanut/Groundnut Mylk Curds/Yogurt

Peanut curds is really versatile. It can be enjoyed straight by the spoonfuls or in the form or good old South Indian curd rice. It can be turned into majjige (buttermilk) or lassi or added into yogurt based dishes like avial, majjige huli, kadhi, raita, etc...

One of the most visited posts on my blog is Creamy Peanut Milk Curds/Yogurt. I wrote that post when I had newly learnt how to make yogurt out of groundnuts.

Today I created a video demonstrating the process step by step so that it'll be easier for everyone to understand.

Watch the clip, if you have any questions, post them as a comment here and I'll reply as soon as possible.

Enjoy! :)

Peanut Mylk Yogurt/Curds.


A few pointers (I've mentioned most of these in my older blog post too):

- You can optionally strain the cooked peanut mylk before turning it into curds. But I prefer to leave the pulp in there.

- I have said "green chilli crowns" as one of the starters but the crowns of any variety of chilli can be used.

- After making the first batch of curds using any of the starters I mentioned on the HowDo, start saving a spoonful of yogurt from each batch you make to use as a starter for the next batch. The flavour of the curds gets better and better with each generation of the lactobacilli.

- Peanut curds sets well in 8-12 hours (depending on the climate) but let it sit out at room temperature for up to 24 hours if you want it to sour well.

- The yogurt will stay fine in the fridge for 10-15 days at least. I think it might last longer but we usually finish up even our largest batches within two weeks. It's that yum! :)

Wednesday, December 05, 2012

Vegan Boursin Style Cheeze


Boursin is a soft herbed cheese that originates from France. It is extremely easy to make a vegan version at home that's equally rich and creamy but absolutely guilt-free. Vegan cheezes just don't have the kind of bad fats that animal secretion cheeses do. Add to that the zero cholesterol factor and you have something that you can keep on eating and feel really good about. :)

Vegan Boursin Cheeze

There are vegan Boursins which take a few days of time and patience so the cultures can develop. There are also those which require the cashews to be soaked overnight. My friend Isabel of India Outside My Window had made Boursin like that a few months ago and it was sooooooo delicious! But today I'm sharing a super-quick recipe with you. It doesn't contain the beneficial lactobacilli that fermented nut cheezes have but it sure hits the spot. Takes just ten minutes to put together. That's including the several tasting breaks while blending where you can't help but keep licking your fingers. And of course you have to wash them thoroughly before getting back to blending again and then you lick once more and wash and lick and wash and lick and wash... So that bit basically takes five minutes of the ten. :oP

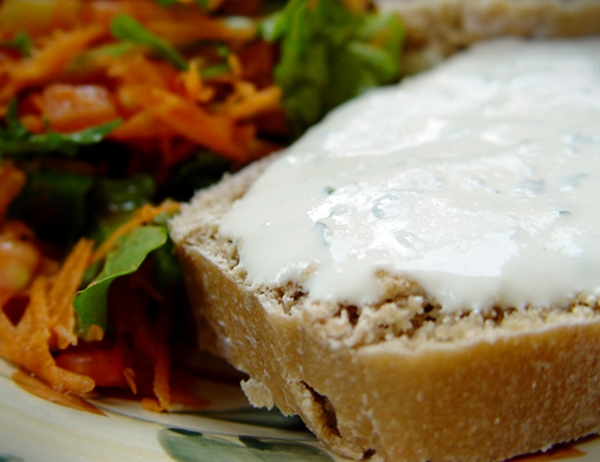
Boursin cheeze is filled with herbs which make it amazingly flavourful. I used the herbs I had at home and you too can use what you have on hand. The consistency of Boursin is usually like a spread but I've made mine slightly more runny. It wasn't intentional, I added a bit more water than I should've but that didn't make it any less delicious. Also, I clicked the pics immediately after blending so the cheeze hasn't set yet. After a couple of hours in the fridge, now when I spread it on bread, it actually stays in place instead of dribbling down the side so temptingly. haha

Vegan Boursin Cheese Spread

The quantity of the tofu and cashew can be adjusted to your liking. Some people make Boursin completely with cashews (or other nuts) with no tofu in it. I need to replenish my stock of sesame seeds but if I had any at home, I'd definitely have put a handful into the mix for an added calcium boost. Also, I haven't mentioned quantities for any of the herbs and flavours because again, those can be added according to your taste.

Vegan Boursin Cheeze

1 C Cashews
250 gms Tofu (1 block from Towness)
Nutritional Yeast
Lime Juice
Whit Wine Vinegar (Apple Cider or Synthetic Vinegar are fine too)
Onion (small piece)
Garlic
Black Salt (regular salt is fine too)
Pinch of Black Pepper Powder
Herbs - Celery (just leaves, no stalk), Thyme, Mint, Cilantro

Grind the cashews into a fine powder in a dry blender jar.
Add everything, except the herbs, into the jar and blend into a smooth, creamy paste using a little water if required.
Taste and adjust the quantity of the salt and lime juice.
Roughly chop the herbs and add them into the blender jar.
Pulse 2 or 3 times.
The herbs should get incorporated but not blended completely.
Place in a glass bowl, cover and keep in the fridge for at least one to two hours.
Slather onto slices of good artisan bread and serve.
Enjoy! :)

This keeps in the fridge for a week to ten days.

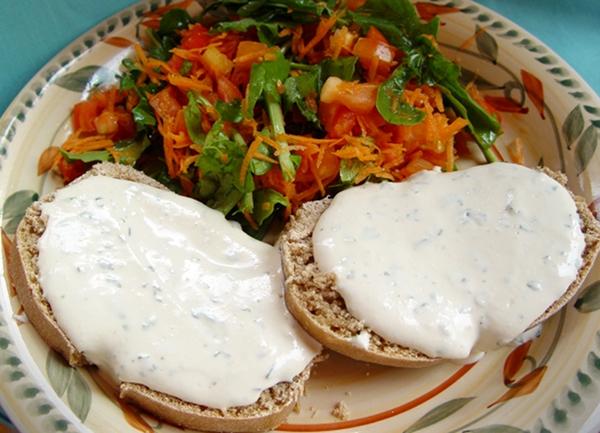
Whole Wheat Sourdough Bread, Vegan Boursin and Rocket Lettuce Salad

This is what I had for lunch today - Whole Wheat Sourdough Bread (I made that yesterday) with Vegan Boursin and Arugula Salad on the side. It was a great, filling and satisfying meal which my tummy with a soothed feeling. :)

Thursday, November 01, 2012

Hot Spiced Chai with Cashew Sesame Mylk for Virtual Vegan Potluck Nov2012


Welcome VVP visitors! I am delighted to have you here. :)

When I signed up under 'Beverages' for the Virtual Vegan Potluck, I had intended to make a decadent, icy, chocolatey vegan shake of sorts. But since I've been over indulging over the past few days and because of the cold, rainy weather we've been having today, I decided to make a hot and comforting beverage instead.

Hot Spiced Chai with Cashew Sesame Mylk

For many years, I've relished the ritual of drinking hot tea every evening. After going vegan (over 9 years ago), I switched to soy for my daily dose of chai. Earlier this year, I discovered the magical taste of chai that's brewed with cashew mylk. It melds with the flavours of the added spices and is super smooth going down the throat. Simply amazing!

Recently, I've started to add a handful of sesame seeds with the cashews while grinding them to make the mylk to boost the healthy, calcium content. It also serves to enhance the taste of the mylk and subsequently, the tea made from it.

The spices in this Masala Chai help digestion and soothe the throat. So sip on some after you've enjoyed all the gastronomical delights that my fellow VVP bloggers have brought to the potluck today to help settle your tummy. ;)

Hot Spiced Chai with Cashew Sesame Mylk

Hot Spiced Chai with Cashew Sesame Mylk

For the raw sesame-cashew mylk:

1/2 C Cashew
1/4 C Sesame Seeds
2 C Filtered Water

Grind the cashews and sesame seeds to a fine powder.
Add 1/4 C water and blend to a smooth cream.
Add remaining 1 3/4 C water and blend well to get mylk.
Pour into a pitcher, cover and store in the fridge for up to a week.

For the tea (serves one person):

1/2 C Water

1 inch Ginger
4 Cloves
1 inch Cinnamon
4 Pepper Corns
1 Cardamom Pod

1 tsp Sugar
1/2 tsp Tea Powder

1/2 C Sesame-Cashew Mylk.

Heat water in a small pan.
Crush the whole spices and add to the water.
Boil for a few minutes to infuse the water with flavours of the spices.
Add sugar and boil for half a minute to dissolve the sugar.
Add tea powder and stir well.
Pour in the sesame-cashew mylk and stir.
Boil for another minute or two on medium heat, until the tea gets frothy.
Turn off the heat.
Strain the tea into a cup/mug through a metal tea strainer.
Press down into the strainer with a spoon to squeeze every last drop of tea into the mug.
Enjoy your piping hot cup of Vegan Masala Chai! :)
*slurp*

Hot Spiced Chai with Cashew Sesame Mylk

Virtual Vegan Potluck, the brainchild of Ann of An Unrefined Vegan, is a twice yearly global blogging event. This time, a hundred and four bloggers will be 'bringing' a vegan dish to the virtual potluck by posting a recipe. The blogs are arranged in order of the courses of a meal. We have Appetizers (18), Beverages (5), Breads (5), Salads (5), Side Dishes (9), Soups (10), Main Dishes (23) and Desserts (29).

Each blog post is linked to the blog before it and after it on the list so it's easy for visitors to jump from one recipe to the next in the order of the courses. My Hot Spiced Chai with Cashew Sesame Mylk is the 22nd recipe on the list. You can start at the beginning of the list by visiting the host site Vegan Bloggers Unite or move to the previous or next blog by clicking on the links below.

Lorna's Tea Room DelightsAir Eater

Thanks for dropping by. :)

Sunday, May 27, 2012

Raw Mango Vegan Sour Cream Salad Dressing Dip


It's mango season right now and I'm a huge fan of sour, raw mangos. I relish them even more than the ripe, sweet fruits. So it was came as no surprise that when I decided to make vegan sour cream, the idea to add a green mango into the mix suddenly popped into my head.

Commonly, vegan sour creams are made of a cashew or tofu base and a tangy component like vinegar or lemon juice. They are extremely adaptable and taste rich and delicious whether they are flavoured with just plain salt or with a complex set of ingredients.

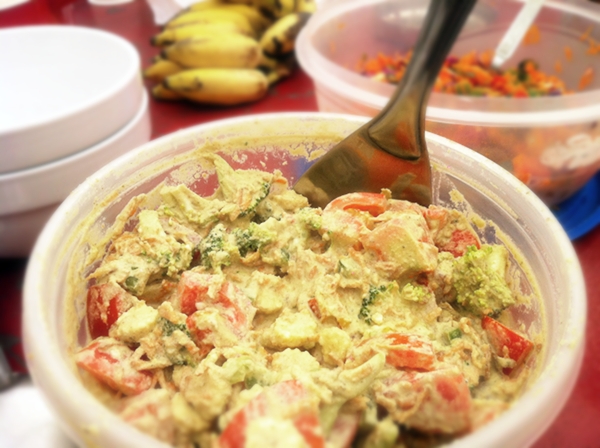
Broccoli dipped in Vegan Mango Sour Cream

This is a very versatile sour cream. It can be used as a spread inside sandwiches and wraps, a dip for raw veggies and tortilla chips, as a creamy salad dressing... so many ways to enjoy it.

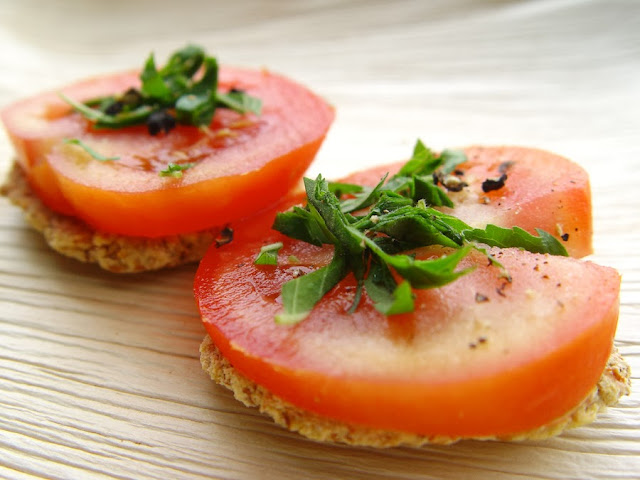
Tomato and Vegan Mango Sour Cream

Yesterday, I made it as a thick sauce for my dish for the Vegan Bengaluru monthly potluck at Jaaga. I poured it over plain, raw veggies - broccoli florets, sliced baby corn, grated carrot, chopped capsicum and diced naati tomatoes. The broccoli florets did an especially good job of sopping up the cream. It was quite a hit. My friend Arun said that the dish didn't taste like what someone new to it would imagine raw food to be like.

Raw Mango Sour Cream Broccoli Baby corn Salad

1 Sour Raw Mango
1/4 C Cashew
1/4 C Almonds
1 T Sesame Seeds
2 Dry Dates
2 Dry Figs
1/4 C Fresh Mint
2 Thin Slices Fresh Ginger
6 Cloves of Garlic
3 Spicy Green Chillies
1 T White Wine Vinegar (even regular white vinegar is fine)
1/4 tsp Turmeric Powder
1 T Nutritional Yeast (optional)
Black Salt (you could use common salt but I prefer this)

Grind together the nuts, seeds and dry fruits into a fine powder.
Add everything else, except Vinegar, and grind well.
Add a little water at a time and blend into a smooth, creamy paste, with breaks in between to ensure that the grinder jar doesn't get heated up.
Chill for 10-15 minutes in the fridge.
Add the vinegar and whip for a few minutes, until slightly fluffy and airy.
Transfer to an airtight glass jar and chill for half an hour.

Enjoy! :)

Mango Sour Cream Salad

I've added this recipe to the Hearth and Soul Blog Hop.

Friday, July 01, 2011

Raw Vegan Hazelnut Cheese


Raw Vegan Hazelnut Cheese


The first time I tasted nut 'cheese' was at VegFest 2010 at Portland, Oregon. I can still remember the explosion in my tastebuds when I put that delicious cheese made of Hazelnuts by Heidi Ho Organics into my mouth! Mmmm mmm!

It's such a pity they were only giving out samples that day. DH and I wanted to buy loads to stuff our faces with. Needless to say, the next time I'm at Portland, Ima gettin' me some Heidi Ho hazelnut cheese.

Heidi Ho Organics Hazelnut Cheese at VegFest 2010

Since nut and seed cheeses are made of raw nuts and seeds which have been put through a fermentation process, they are rich in enzymes, nutrients and lactobacilli (the good kind of bacterial cultures). A most delectable way to put probiotics into your system! :)

I've been wanting to experiment with nut cheese making for a while now but I was under the impression that it is a difficult task and that it needs some 'exotic' ingredients like miso or dulse. That was until I saw this recipe by Dr. Nandita Shah on the Sharan India website. From the first step until the cheese is ready for consumption it takes a few days so it is time consuming process, but the effort which you need to put into it is hardly much. With patience, anyone can make raw, vegan cheeses right in their home. And as we already know, homemade is always the tastiest and healthiest option. :)

So couple of days ago, on a whim I decided to attempt making nut cheese. Luckily, I already had a little bit of rejuvelac on hand and it was enough for the small, experimental quantity I intended to begin with. I decided to go for hazelnuts. Firstly because I was out of cashews and almonds and secondly because hazelnut cheese is the only kind I'd ever tasted (and loved!).

I pretty much followed Dr. Nandita's recipe except that after the cheese was ready, I pressed out the water from the it by putting it into a cloth bag inside a colander and placing a weight over it overnight. I preferred the taste and texture of the pressed version more than the softer kind.

For flavoring, I used nutritional yeast, salt, oregano, a pinch of turmeric for color and a dash of chilli powder (hey, come on, I had to Indianize it at least a wee bit).

So here it is, my very first batch of Raw Vegan Hazelnut Cheese! :)

Raw Vegan Hazelnut Cheese

It's the first of many more to come. I wouldn't call it perfect but it was gosh darned scrumptious! Notice that I say 'was' (past tense)? It's because we gobbled up almost the whole batch during lunch. :D

Next time I'll be tweaking things. I plan to use a combination of nuts and seeds. I'll be blending them into a more creamy finish. And I'll be adding the spices before the fermentation process begins.

Earlier today I was reading up more about making home made raw, vegan cheeses in this amazing, highly informative post. I found the part where it speaks of cheese 'seasons' and moon cycles extremely interesting. I already try to do certain things based on the moon cycle in my day to day life and it makes complete sense to me that the behavior of the lactobacilli would be dependent upon them too.

After having read that post, I'm all riled up and really looking forward to more successful adventures in raw, vegan nut and cheese making. Can't wait to get the next batch started! :)