Showing posts with label Desserts. Show all posts

Tuesday, January 24, 2012

Vegan Hazelnut Kahlua Dark Chocolate Truffles


There's this story my paternal grandma used to tell us when we were kids. It's the Mysore Pak story. My granny is super adorable and she made all these sounds and expressions when she recited it. It was an absolute delight for a child to watch! :)

One day, a man says to his wife, "Darling, I have a hankering for Mysore Pak. Please make some for me".
The wife replies, "I don't know how to make it sweetheart but I'll ask the auntie next door to teach me".
And so she asked the neighbor who very sweetly agreed to teach her.

The wife asked her husband to buy all the ingredients from the market and the following day she went to the neighbor's house for a cooking lesson. She learnt how to toast the flour and add the sugar and the oil (yes, I'm veganizing it!!) and how to spread the mixture into a tray and slice it after it's cooled. As a thank you for teaching her, she gave the neighbor auntie half the Mysore Paks and brought the rest back home.

The Mysore Paks looked and smelt amazing!! The wife bit into one and her eyes went wide. "Mmmmmmm", she said, "my hubby's going to looooove these!!" She couldn't wait for him to come home from work that evening and taste them.

After sometime, she thought to herself, "I have got to eat another, they are so very tasty!" And so she did. A little while later, she couldn't resist having another one.

As the evening neared, she started pacing up and down on the front porch, waiting for her hubby. The excitement was too much! She kept going up to the table where she's placed the Mysore Paks to check on them and each time she checked, she couldn't help but pop one into her mouth. One, then another, then another one.

In this way time passed by and finally the evening arrived. She saw her hubby walking in through the gate. She ran up to him and excitedly told him all about the delicious Mysore Paks she'd made just for him!! She took him lovingly by the hand and led him to the table.

On the table, he saw one lonely Mysore Pak sitting in a tray with a few crumbs here and there.

"Is this all??" asked the hubby with shock.
"There were more", she replied sheepishly, "but I couldn't stop myself from eating them".
"But, but, HOW did you eat them all?" he asked, and regretted it the very next moment because his wife hypnotically reached out to the Mysore Pak, picked it up and said, "Like this!" and as a he gaped in amazement, the Mysore Pak disappeared into her mouth forever.

The End. :oP


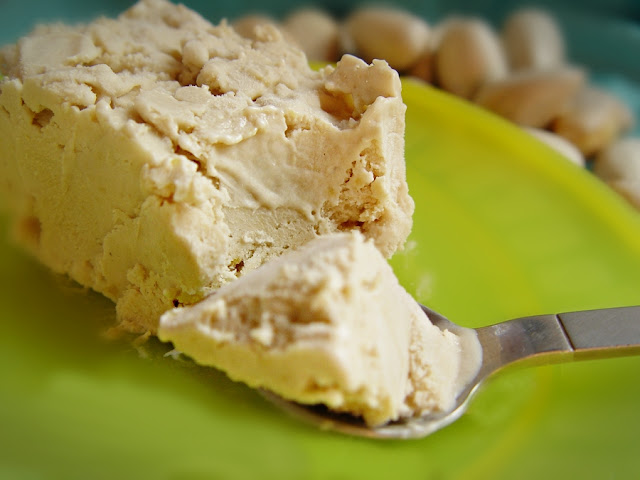
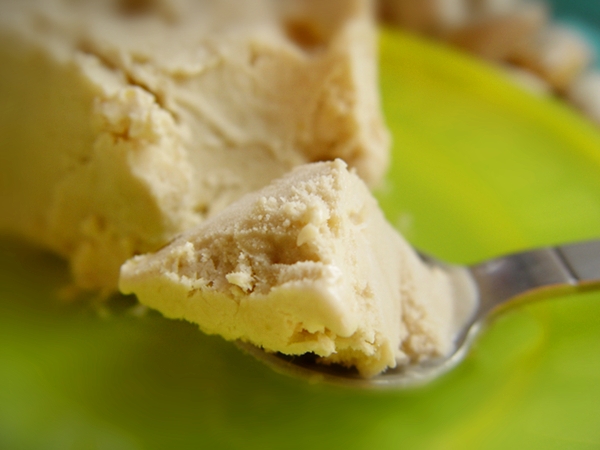
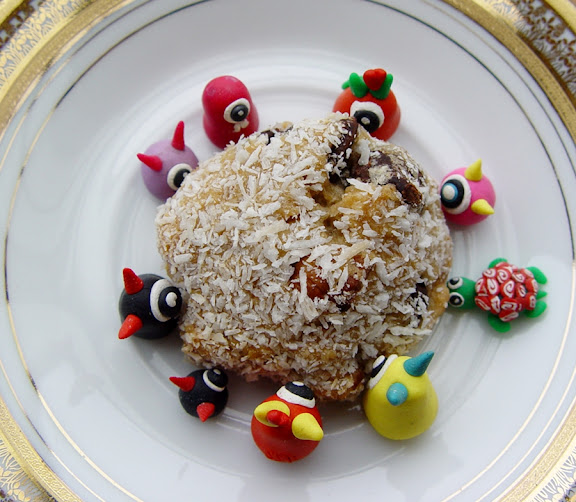
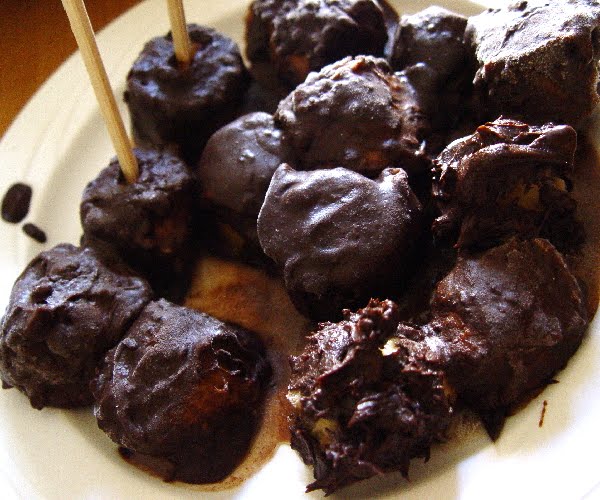
Now why did I tell you this story? Because that is EXACTLY what has been happening to these Vegan Hazelnut Kahlua Dark Chocolate Truffles. Need I say more? :D

Vegan Hazelnut Kahlua Dark Chocolate Truffles

1/2 C Hazelnuts (toasted)
1 Bar 100% Bitter Dark Chocolate
1/2 Bar Semi-Sweet Dark Chocolate
1/4 C Brown Sugar + Agave for more sweetening as required
Kahlua (and/or Dark Rum)
2-3 T Soymilk

Keep half the toasted hazelnuts aside and crush the other half into a medium fine powder (I used a mortar and pestle but you could use a grinder if you like).

Melt the chocolate using the double boiler method. Basically one kettle/pan/vessel at the bottom and another, slightly larger one on top, covering it. Water in the bottom one and broken chocolate in the top one. Place on medium-low flame (water should get hot but not start boiling) and stir chocolate till half of it is melted. Then switch off the stove and continue stirring until it's completely melted.

Add sugar and mix well and keep stirring for a while longer.

Take the chocolate vessel off the water vessel and let it sit until it comes down to room temperature. VERY IMPORTANT!

Add the kahlua and/or rum and the soymilk and mix well. As soon as the alcohol hits, the texture changes slightly but that's absolutely okay.

Let the mixture sit in the fridge for a couple of hours.

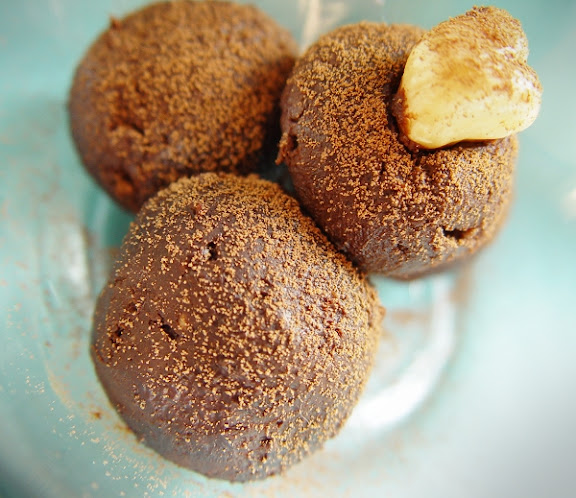
With your palms, shape the chocolate into balls and press a whole hazlenut into the center of each ball as you form it.

Chill for another hour in the fridge.

Start popping them into your mouth and be transported to heaven.

The End. :oP

Wednesday, January 04, 2012

Vegan Jackfruit Coconut Mylk Ice Cream


It all began on Sunday, the first day of the new year, when we were on the way back from buying jackfruits from our regular vendor. My sis had an inspired thought, she said, "hey ka, you should make some awesome dessert with jackfruit... like jackfruit ice cream!" I laughed at first but then I got to thinking for a moment and I was like, "you know what chinni, I think I could!"

My little sis is craaaaazy about jackfruit! In fact, I think it is her favorite fruit in the whole wide world. If she were left on a deserted island with nothing but jackfruit trees, she'd happily survive.

Every time she arrives at the cart, the vendor has a huge, welcoming smile on his face. Maybe it's because he knows he's getting big business or perhaps it heartens him to see someone express so much joy while they eat the fruits of his labor.

Jackfruits are very commonly sold by street vendors here in South India. These men and women open shop in the morning and spend all day cutting open the large fruits, oiling their palms and separating the juicy jackfruit pods from the body of the fruit and selling them. It's a slow, sticky, not so easy procedure but the vendors are pros at it and thanks to them we get to relish the sweet, delicious flavor of these heavenly tropical fruits.

We add jackfruit to a variety of South Indian dishes (we even save the seeds and make some yummy stews and curries with them) but as far as I know, jackfruit ice cream has not been done before. I can proudly say that I invented this whole recipe from scratch. And this means I did keep a note of the measurements, well mostly. :op

Vegan Jackfruit Coconut Mylk Ice Cream

10 Jackfruit pods - deseeded and sliced
1/3 C Brown Sugar
1 very small drop Apple Cider Vinegar
1/2 C Cashews
2 200ml packs of Coconut Mylk (I use the Dabur Hommade brand)
3/4 C Vegan Whipping Cream Liquid (I use Merry Whip but Rich's can be substituted too)
2 T Agave Nectar
Pinch of Salt

Place the jackfruit slices in a heavy bottomed pan, add the brown sugar and the tiny drop of apple cider vinegar on top and cook them together on low heat while stirring continuously to allow the brown sugar to caramelize and the jackfruits to cook and become soft. You should reach a halwa/jam like consistency (5-10 mins). Keep aside and let it cool down to room temperature. Warning: This jam/halwa is highly yummy by itself so you'll have to overcome the temptation to finish it off straight.

In a blender, turn the cashews into a fine powder. To this add the coconut mylk and blend again. Add the rest of the ingredients, including the caramelized jackfruit, and blend some more. Taste and add more agave nectar if required.

Chill everything in the fridge for 8 hours or more.

If you have an ice cream maker, follow the instructions and freeze into ice cream. If you don't, then pour the ice cream liquid into a freezable container and freeze for half an hour, then whip and freeze again for another half an hour and then whip again and so on for 2-3 hours until you get the consistency you desire.

Enjoy! :)

Vegan Jackfruit Coconut Mylk Ice Cream

This thing turned out absolutely amazing!! My dad who recently turned vegan, but still has some misgivings about the superiority of vegan desserts over the non vegan ones, was totally blown away by the Jackfruit Ice Cream. He was like, "Wow! This doesn't taste vegan!" Well, I am now on a mission to teach him that the *best* tasting desserts are the vegan ones. :)

Thursday, December 15, 2011

Raw, Vegan 'Rasmalai'


When I saw this link for Raw, Vegan 'Rasmalai' on my friend P's facebook profile yesterday, I was consumed by the desire to immediately attempt it. One just can't have the words VEGAN and RASMALAI jumping out from the same sentence and resist its pull. Any plans I'd had to laze around after lunch went right out the window. I prepared and gobbled up the chapati and tofu/capsicum curry in a big, fat hurry and lunged for my mixie, all the while showering a thousand blessings upon the heads of Rohit and Rishi of Roshi's who came up with this ingenious, raw concoction.

I tweaked the original recipe a wee bit. Here's the version I followed.

Raw Vegan Rasmalai

Cardamom and Saffron Flavored Cashew Mylk Base:

1/2 C Cashews
2-3 T Agave Nectar
4 Green Cardamom Seeds (crushed)
1 generous pinch Saffron Strands
1 3/4 C Water

Add all ingredients, except water, into a grinder jar and powder well. Add water a little at a time and make a smooth paste. Add the rest of the water and blend well to form a creamy vegan mylk. Keep aside.

Rasgulla Balls:

1 C Cashews
1 C Almonds
1/2 tsp Sesame Seeds (optional ingredient for added calcium)
5 Soft Dates (chopped)

In a dry jar, grind 1/2 C cashews and 1/2 C almonds into a fine powder. Separately grind the rest of the cashews and almonds along with the sesame seeds into small granules.

In a large bowl, mix everything with dates by hand until evenly distributed. Add 2 tablespoons of the cashew mylk and knead. Shape into 1 inch balls and lightly flatten them into saucers.

Place in a wide bowl and pour the prepared cashew mylk over them. Sprinkle sliced pistachios and a small pinch of saffron on top. Cover and keep aside for 7-8 hours for the balls to soak up the mylk and soften (this is the hardest part!!).

Tastes best when served cold.

Raw Vegan 'Rasmalai'

Note: This is a rich, healthy and extremely delicious dessert but it didn't turn out exactly like normal Rasmalai. The mylk did taste like the kind used in Rasmalai but the texture of the balls was not soft and creamy like Rasgulla should be. They were more like a rich, dry fruits barfi/ball soaked in decadent saffron mylk.

I will be redoing this recipe again and next time I will eliminate the dates and also lightly mix and shape the 'dough' rather than kneading.

But in the end, even if it doesn't turn out like Rasmalai, I don't really care because it tastes absolutely heavenly!! Plus it's easy to make, raw and healthy (not a single bad ingredient in there!). I even guiltlessly ate it for breakfast just now. :D

I have a feeling that this will be a staple dessert at our home. :)

Thursday, November 03, 2011

Vegan Vanilla and Agave Nectar Cupcakes from Vegan Cupcakes Take Over The World


This Sunday was supposed to have been my very first vegan bake sale at a local fair called the Sunday Soul Sante. I kept putting off the registering because of sheer laziness and procrastination but then a fellow vegan who makes delicious cheezes out of nuts and tofu very kindly offered to split her stall with me. It was just the push I needed. But yesterday when I called her to confirm, she said that the Sante had been postponed because of the rains. The new date hasn't been fixed yet and it might be a couple of weeks at least before I know.

But in a way it's a good thing that it's not this weekend because now I can relax and prepare. Try a few new recipes, buy ingredients in bulk and get the packaging details organized. I know that cakes and cookies wrapped in cellophane with a little ribbon look adorable but I'm really looking for a more environmentally friendly option.

Since I was all agog with the idea of baking this week, I decided to go ahead and make something special yesterday. So I broke out my copy of Vegan Cupcakes Take Over The World.

Vegan Vanilla and Agave Nectar Cupcakes

I bought this book over a year ago and have truly enjoyed reading it over and over again. The writing style is so amusing and the cupcake photos are TDF! However, I hadn't gotten around to baking anything from it because my older 12 cup nonstick pan doesn't fit into my current oven. But a few weeks ago I treated myself to a 9 cup pan (shiny aluminum, as recommended in the book) and had been really looking forward to taking it for a spin. And finally yesterday it happened. :) I decided to make the Simple Vanilla and Agave Nectar Cupcakes from page 44 of VCTOTW.

This is my first time baking cupcakes with a proper cupcake recipe. In the past I've just used plain yellow cake and brownie batter to make cupcakes. I must say that when using a proper cupcake recipe, the difference in texture is stark!! I was simply blown away by the sponginess and perfect crumb. I *finally* understand what the big deal is with cupcakes as compared to a slice of regular cake. LOL

Needless to say, my baking is going to involve only cupcakes for a while.

Vegan Vanilla and Agave Nectar Cupcakes

I frosted these cupcakes with Vegan Fluffy Buttercream Frosting from page 142. Thanks to a very generous friend of mine, I had some delicious vegan margarine from Australia in my fridge and I also had some non hydrogenated Earth Balance shortening remaining from last year's stock. So I used them and modified the recipe slightly by replacing the soymilk/creamer with cold espresso.

I sprinkled the frosting with dark chocolate shavings, instant coffee granules and drizzled on some liquified chocolate rum ganache. Finally I topped each cupcake with a dark chocolate chunk.

My very first cupcake decorating attempt and it was so much fun! :)

Something crazy happened too. I'd left the cupcake on the window sill and had stepped away for a moment but when I returned, the cupcake had disappeared. I checked the hidden camera and my jaw dropped as I watched the hijack!

Friday, October 28, 2011

Gulab Jamuns and Gratitude - Vegan MoFo Post 17


I've had a pretty physically and mentally exhausting two weeks. It's so not like me to say these words because I normally manage to lead a comfortably slow paced life. But sometimes unexpected stuff happens and all we can do is drop everything else and deal with the unwanted stuff in the best way we can. Anyways, I like keeping things cheerful around here so enough about this topic. I only told you all this because I just wanted to explain my lack of MoFo activity.

I normally have a tendency to focus on the positive (and there is always plenty to be thankful for when we open our eyes and look around us), so today I'll focus on some foodalicious things I've been enjoying with gratitude since my last Vegan MoFo post.

For Diwali every year, the hubs and I have been making Baadushas for the past few years. But this time I decided to attempt Vegan Gulab Jamuns (yet again) and they turned out closer to the regular kind than they have been in a long time. I am very grateful to Richa of Hobby and More for this awesome recipe. I followed it to a T and these beauties were the result. :)

Vegan Gulab Jamuns

I definitely have a bit of a way to go before I perfect the precise Jamun texture, but the almonds and oats that Richa has brilliantly included in the recipe make them so delicious that the texture almost didn't matter!

The next thing that I'm *extremely* thankful for is good friends!! At times like these, there's nothing like hanging out with a few buddies to lighten things up.

A few days ago I had lunch with two of my very close friends from high school. It was so wonderful to meet up with them after a long time. We had lunch at Infinitea (a tea room close to my heart) and yakked away to our hearts' content. We were celebrating M's birthday. She had come with her very sweet hubby. We later dropped into their hotel room to play with her super cute 6 month old munchkin. I love little babies! They bring so much joy!! :)

This is the tea I had at Infinitea. Rose Hip and Hibiscus. What a gorgeous colour!!

Rose Hip and Hibiscus Tea

For many years now, it's been a Diwali tradition for me and my little sis to hang out with our cousins on the terrace at our parents' apartment. We watch the fireworks in the sky all around us and talk and laugh until the wee hours of the morning. This year everything's change and we weren't able to do our yearly ritual. :( But I am thankful for all the sweet memories from years past that I can fondly look back on and I hope that some day we can all be together again.

Diwali has always been about home and family but this year on the night of the main day of Diwali, hubs and I did something different. We went out for dinner with our dear vegan friends to Little Italy, Indiranagar. While the people of Bengaluru were bursting loud crackers outside, our cozy little group was sitting indoors and sharing a delicious vegan meal. We were celebrating World Go Vegan Week. I'm so thankful to have these awesome, cool, compassionate souls in my life.

Out of everything I ate, my favorite was the Zorba Pizza with added capers. Ooh lala! It was a slice of garlicalicious heaven.

Zorba Pizza from Little Italy

All of us shared all the dishes so I got only one slice of this baby but I think I'll be getting myself a whole Zorba pizza the next time I'm at Little Italy.

Tomorrow's our monthly Vegan Bengaluru meeting. The lunch buffet that I was telling you about last week. I already know that this is going to be something that my tummy will be grateful for. Needless to say, my camera's coming along. :)

So here's hoping that life goes back to being simple and peaceful once again so that I can give you all a visual treat of the special vegan lunch buffet very soon.

Monday, October 10, 2011

Sundal and Payasam - Vegan Mofo Post 10


Last week we had a series of festivals called Dussera (also known as Navarathri). Traditionally we have ten days of celebration and this means lots of sweets and snacks. The most important of these festivals for us is Ayudha Pooja. It's a special occasion reserved to give thanks to all the tools, machines and vehicles we are blessed with.

On the day of Ayudha Pooja this year, hubby and I made a simple sweet and snack combination for Naiveidhyam (offering to the Gods and Goddesses). Something quick and delicious which we could eat and share.

Whatever is cooked with the intention of being placed at the altar as a food offering should only be eaten by us after the ritual is over. So while we prepare the food, we don't have the luxury of tasting and adjusting. But for some reason, every time we make Naiveidhyam food, it turns out perfect! This always reminds me that the taste of a dish is largely dependent on the energy and intention of love that goes into preparing it. Positive vibrations always yield beautiful results. :)

Sundal is a savory dish made of Garbanzo Beans/Chickpeas. We can use any kind of chick peas to make these but this time we had Kabuli Channa (the larger ones) on hand so we used them. I normally follow the quick soak method to soak pulses but this time I soaked them overnight.

Channa Sundal

1 C Dry Chickpeas
2 Chopped Green Chillies
2 tsp Coconut Oil
Mustard Seeds
Curry Leaves
Asafoetida Powder (a pinch)
Dessicated Coconut
Chopped Cilantro
Lime Juice
Salt

Wash and soak the chickpeas over night (about 8 hours). Throw out the water, add fresh water and steam for 45 minutes or pressure cook for about 15 minutes until the chickpeas are soft.

In a wide, heavy bottomed pan heat the oil. Add the mustard seeds and let them crackle. Add the chopped green chillies, asafoetida powder and curry leaves and stir for a half a minute.

Now add the cooked chickpeas and salt and a wee bit of the cooking liquid and cook on medium high heat while stir frying continuously. After about 5 mintues of this, once the water has evaporated, add the dessicated coconut and toss well and turn off the heat.

Mix in the lime juice and garnish with the chopped cilantro and serve hot.

--

Payasam is a liquidy dessert which is best eaten hot. It is served at the beginning of traditional South Indian meals.

Payasam can be made with many things - Rice, Dals, Tapioca, Semiya (fine semolina noodles), Broken Wheat etc... This time we made Channa Dal (Split Bengal Gram) Payasam.

Channa Dal Payasam

1 C Channa Dal
1/4 C Dessicated Coconut
1/4 C Grated Jaggery
6 tsp Sugar
1 T Chopped Cashews
1 t Raisins
2 Cardamom Pods (crushed well with a stone/hammer/mortar and pestle)

Soak the channa dal for an hour. Add dessicated coconut and steam (in the soaking water) for half an hour.

Meanwhile, dry roast the cashews to a golden color, add the raisins and stir for a few seconds, until they brown slightly. Keep aside.

Once the channa is ready, add jaggery and sugar and mix well. Bring to a simmer on medium heat and stir till the sugar and jaggery have dissolved. Add the crushed cardamom, lower the heat and simmer for a few minutes.

Turn off the heat and serve hot.

Wednesday, October 05, 2011

Saffron Infused Almond Dessert - Vegan MoFo post 5


As this highly addictive veganmofo madness continues, I have been feeling extremely grateful for my prior procrastination! Over the last few months, I had created a bunch of stuff in my kitchen and taken pictures, but I hadn't updated my blog with all of them. So now, during vegan mofo, since blog hopping and commenting has taken over my online life, I'm able to keep my blog up with the activity because the yummy food pictures are already waiting to be linked here. Phew! See, being lazy has its benefits. :D

This is an almond cream based mousse like dessert I concocted a while ago. It's raw, except for the little bit of agar agar (which needs to be cooked to work well). Pretty simple to make too! It would also have been a super quick dessert if it weren't for the slightly painful almond skin peeling step. But hey, even that is something you get a hang of over time. I've become a lot faster at it now than I used to be during my initial attempts.

Saffron Infused Raw Almond Dessert

1 C Almonds
2 pinches Saffron Strands
Raw Agave Nectar (to taste)
2 T Agar Agar flakes

Soak almonds overnight in filtered water to start the sprouting process.

In the morning, throw out the water and rinse the almonds thoroughly. This step ensures that your body absorbs the enzymes in the almonds better.

Now the part which involves effort. Patiently peel the skin off the almonds. You can pour more water over them so they stay moist through the peeling process, making it easier and quicker.

Blend the peeled almond into a smooth, creamy paste adding a wee bit of of fresh, filtered water.

Add the saffron and agave nectar and blend again. Taste and adjust the level of agave. Keep aside in the blender jar.

Boil 1/2 C water and add the agar agar flakes. Stir and cook on medium flame until the flakes have dissolved. Let it cool for a few minutes until slightly warmer than room temperature.

Pour this agar agar mixture into the blender jar with the almond paste in it and blend for a few beats just to get everything mixed well and whipped up.

Pour the almond cream into individual dessert bowls and chill in the fridge for a few hours.

Serve cold and enjoy! :)

Monday, October 03, 2011

I Scream You Scream We All Scream For Ice Cream - Vegan Mofo post 3


Today's Vegan Mofo post is a photo blog of a few vegan ice creams I've made in the recent past and my ice cream making process.

I never follow exact recipes while making anything (except in my baking) and ice creams are no exception. I just have a method that I stick to and have developed a 'feel' over time for attaining the right texture.

For the base, I usually use a combination of a nut and a creamy fruit or a vegan mylk and vegan whipped cream. To this I add any flavor that hubby and I are in a mood for - coffee powder, melted dark chocolate, pure vanilla extract, saffron, cardamom, rum (any alcohol is to be added only in the last minutes of the freezing process)...- and a sweetener of some sort - sugar, raw agave nectar, maple syrup... - et voila, the vegan ice cream mix is ready! :)

Pointers:

*Tasting and adjusting is of course a must.
*Make it a wee bit sweeter than you might like because after the freezing process the level of sweetness reduces.
*Add a tiny pinch of salt to enhance the taste.
*Chill the mix for over a day before freezing - either in an ice cream maker or by following the whipping and freezing method.

The latter involves whipping and freezing and whipping and freezing and so on once every half an hour for the first two hours of the freezing process. And then once an hour for the next two hours (or until the consistency feels about right). The way to achieve a good ice creamy texture is to use a blender (hand blender would be more convenient than transferring the ice cream into a jar each time) but you can also use a wire whisk, a spatula or a fork.

Without further ado, here are my droolalicious, creamy, scoop-able vegan ice creams. :)

Very Vanilla Cashew Mylk Ice Cream

- recipe for the vanilla cake in the background here
Very Vanilla Cashew Mylk Ice Cream

Cashew Mocha Rum Ice Cream


Cashew Mocha Ice Cream

Raw Pistachio Mango Ice Cream

- recipe here
Raw Pista Mango Ice Cream

Mango Ice Cream


Mango Ice Cream

Monday, September 05, 2011

Ganesha Chaturthi and Yummy Kadubus


I love a good, filling festival feast! But then, who doesn't? No matter what religious festival it is that one is celebrating, the love for the associated food is commonly shared. :)

It's probably because of a combination of the joyous childhood memories we have associated with festivals and the amount of care and hard work which always goes into making food fit for celebration.

Kadubu / Kozakottai

Being a strong believer in the power of spiritual vibrations, I feel that food when it's made with the intention of a offering to a deity as neiveidhya first before being eaten is most sublime.

Among all the festival we grew up celebrating, my fondest memories are of Gowri and Ganesha (not even Diwali with all its fire crackers matches up). For the first half of my life, I lived in a big, happy joint family. We were fourteen of us in one huge bungalow. All festivals were celebrated together, as a family.

On the first day was the Gowri pooja followed on the next day by the Ganesha pooja. The story is that Gowri comes down to Earth on that day to visit her mother and Ganesha (Gowri's youngest son) accompanies her to stay at his grandma's place. And grandma spoils him with all kinds of delicious goodies. After the festivals are done, a few days later Ganesha safely takes his mother Gowri back up to Kailasa (heaven). That's when we leave the clay idols in water as a send off until the following year.

A few days before the festival, when the adults purchased the larger Gowri and Ganesha clay idols for the ritual, they always purchased smaller ones for us kids.

Me, my little sister and our two little cousin brothers used to willingly and enthusiastically wake up at the ungodly hour of 4 am on both festival days, get dressed in traditional clothes and sit at our mini altar to do the ritual to our little Gowri and Ganesha. The girls did the Gowri ritual and the boys did the Ganesha ritual. We even had miniature silver vessels, aarthis and all the other stuff required for the ceremony. And at the end of the ritual, the feast was brought out and placed in front of the deities as an offering. This marked the end of the ceremony. After this, we could commence wolfing down the yummy goodies! :D

Those were such utterly joyful days!!

Ganesha after the pooja

Now hubby and I bring home only the Ganesha (I visit my mom's place and all my aunt's places on the day of the Gowri festival) and perform a simple, short pooja. But we do make sure to cook a whole bunch of the traditional delicacies for the neiveidhya offering so we can stuff ourselves later to our tummies' content. :D

This year we made three types of kadubus/kozakottais, unfermented idli with coconut cilantro chutney, sundal out of small, brown channa and these miniature steamed snacks (don't really know what they are called).

For the three kadubu fillings - coconut jaggery, sesame jaggery, savory urad dal - we followed the recipes from Subbu's Kitchen. For the outer rice dough covering we used a slightly different method.

Kadubu Dough

1 C rice flour
1 C water
2 tsp oil
a pinch of salt

Mix everything into a paste in a heavy bottomed pan and place on medium heat. Stir continuously (will take maybe 5-10 minutes) and let it cook until the paste starts coming together into a ball of dough.

Take the pan off the stove and once the dough cools a bit, dip your palm in cold water and knead the dough until it's smooth. Follow instructions to make various fillings, stuff and steam.

Kadubus / Kozakottais inside

Fun Little Savory Steamed Snacks

These are usually made out of leftover kadubu dough but I like them so much that I always make extra dough just for these. :)

Kadubu dough
1 tsp moong dal and 1 tsp channa dal (soaked together for half an hour)
2 fresh green chillies, asafoetida and salt (crushed well together)
2 tsp chopped fresh cilantro

Mix everything together.
Form into fun little shapes - ball, stick, ring, disk etc...
Steam along with the kadubu for 5-8 minutes.


Another Ganesha Chaturthi dish that I truly relish is Kandundes (didn't make them this time around though). They are made of four kinds of lentils soaked together and ground to a thick paste along with spices, shaped into balls and steamed. Then they are dunked in a yogurt based gravy and served. I make these on non festival days too because then I get to add onion (a festival no no) and also a bunch of chopped veggies. I either serve those in a vegan yogurt based gravy or just plainly spiced vegan yogurt. I'll share a recipe for those the next time I make them.

What goodies do you prepare for Gowri Pooja and Ganesha Chaturthi and which ones are your favorites?

Tuesday, June 28, 2011

Raw Vegan Mango Pistachio Ice Cream


This one is soooooo easy peasy to make! Doesn't look like it and definitely doesn't taste like it. It's so delicious that you'd think it took hours of labor. Well, I didn't even need to make the effort of pulling out the ice cream maker for it. :oP

When you start with just plain fruits you can get a sorbet out of it. Well sorbets are light and slightly icy and can be nice sometimes, but they are just not ice creams! However, by adding a nut into the mix, you can achieve the kind of rich, creamy texture that all ice creams should have.

The beauty of this raw ice cream is that it has only healthy ingredients and you can eat as many scoops as you like without guilt (unless you're allergic to nuts).


Raw Vegan Mango Pistachio Ice Cream


3 very ripe mangoes (I used large Alphonsos)
1/4 cup plain, raw pistachios (without the shells) + 1-2 tsp (chopped/sliced)
Raw agave nectar to taste

Peel, cube and chill the mangoes in the fridge for a day.
Soak the 1/4 C pistas in filtered water for 5-6 hours.
Drain the pistas completely and chuck the water away.
Place the pistas in a blender/grinder/food processor and grind well.
Add the mangoes and blend some more, until you get a creamy mixture (it'll have the color of avocado).
Squirt in a little bit of the raw agave nectar and blend again.
Taste, add more agave if you desire and blend more.
Transfer to a freezer safe container, add sliced pista and whip with hand whisk for a few minutes.
Freeze overnight.
Transfer to fridge and leave for about an hour to soften it. Serve with an ice cream scoop. Enjoy! :)

Note: You can refreeze it after you've had your fill and then leave it in the fridge again for a while before eating each time.

Wednesday, May 18, 2011

Vegan Pineapple Pastry


Since my very vanilla cake recipe was such a hit, I thought I'd share the pineapple pastry recipe too. When we say 'pastry' here in India, we refer to a form of extra succulent cake. The main way this decadence is obtained is by dousing the cake with flavored sugar syrup to add moistness. Another thing that makes a pastry what it is, is the inclusion of fresh or canned fruits to enhance the richness of the flavors and textures.

Vegan Pineapple Pastry

1 Basic Yellow Cake made by replacing the pure vanilla extract with 1/2 t of pineapple essence
1 small can of Pineapple Slices in Syrup
Vegan Whipped Cream like Rich's Non-Dairy Whip Topping or Merry Whip

After the cake has cooled completely, slice it horizontally to form two layers.
Place one layer of cake in a large container and pierce randomly with a fork.
Pour half the syrup from the pineapple can over this layer of cake.
Cover with a thin layer of vegan whipped cream.
Spread most of the pineapple pieces over this saving some for the final topping.
Cover with the second layer of cake and pierce it randomly with a fork.
Pour the remaining syrup evenly over this.
Spread vegan whipped cream over the top and sides of the cake and cover it completely.
Place the remaining pineapple slices on top of the cake in an aesthetically appealing way.

Cover the container and place the pineapple pastry in the fridge. Let it sit for at least a day to soak up the syrup and some of the whipped cream. Serve cold and enjoy! :)

Will last for a minimum of one week when stored in a tightly closed container inside the fridge.

Vegan Pineapple Pastry

Note: Pastries and cakes taste more delicious as the days go by. Especially chocolate flavored ones. I personally prefer them most two days after they've been made.

Wednesday, May 11, 2011

Vegan Very Vanilla Cake


Basic Vanilla Cake:

1 3/4 C all purpose flour
2 t arrowroot powder (optional)
1 t baking powder
1 t baking soda
1/4 C brown sugar
3/4 C white sugar
3 t pure vanilla extract
1 t vinegar or lemon juice
5 T oil (canola or sunflower)
1 C cold water

Preheat oven to 180C/350F.

Lightly oil a 9 inch baking pan and keep it aside.

In a large mixing bowl, sieve together the flour, arrowroot powder, baking powder and baking soda about 6-7 times (the more number of times you sieve, the fluffier the cake will be).

Mix the remaining ingredients separately and beat well to dissolve the sugar to some extent.

Pour the wet ingredients over the dry ingredients and whisk together with a few quick strokes just until no lumps remain (too much mixing is not advisable). Pour the cake batter into the baking pan and immediately pop into the preheated oven.

Bake for about 35 minutes. Test by inserting a toothpick into the center of the cake and see if it comes out clean. If so, the cake is done. If not, then bake for a few more minutes.

Remove the pan from the oven and keep it aside. Let the cake cool completely before you remove it from the pan.

This cake is delicious eaten as it is but it can also be enjoyed layered with vegan whipped cream.

Vegan Very Vanilla Cake

Vanilla Cream Cake:

Prepare vegan whip topping by carefully following the directions on the package. Rich's is the most well known brand of non-dairy whip topping in India. I also like to use the Merry Whip brand which is available at the Institute of Baking, Bangalore (these guys also carry another non-dairy brand called Gold Top but stay away from that one because it tastes too artificial essence-y!)

Slice the cooled cake horizontally to form two layers. On a large plate, place the bottom layer. Cover it with some of the whipped cream. Place the top layer over this and cover the whole cake with whipped cream with the help of a spatula.

Chill in the fridge for a couple of hours before serving.

The cake is best stored in a closed container in the fridge. It will last at least a week IF it hasn't been finished well before that. :)

Friday, April 29, 2011

Vegan Whole Wheat Cinnabuns


Last year I had the pleasure of tasting a gourmet cinnamon roll at Cinnaholic and I was absolutely blown away by it! Ever since then I've been craving a cinnabun as perfect in taste and texture as that particular roll. Now if it were up to me, every time I craved a cinnabun, I'd just teleport right on over to Cinnaholic and stuff my face to my heart's content. Heck, I'd even be happy to be their employee just so I could be constantly enveloped in the smell of cinnamon rolls baking. And that says a lot because if you know me, you'd know I'm not into 'work'. But let's face it, it's going to be at least another year before I perfect my teleportation powers and Berkley is too far away from Bangalore to risk it. Imagine if I apparate in some remote island in the middle of the Indian Ocean where no one's heard of cinnamon rolls?? *shudders*

So my only option has been to bake and bake with the aim to arrive at the recipe for an amazing cinnabun. Something to keep my happy until the next time I'm able to experience a heavenly Cinnaholic cinnamon roll once more.

I first took a non vegan clover leaf rolls recipe and then tweaked it and tweaked it some more to not only veganize it and make it healthy with whole wheat in the mix but to also get the perfect, fluffy texture. Then when those rolls turned out great, I finally decided to take the leap and adapt that recipe into one for cinnabuns. And FINALLY, these delicious Vegan Whole Wheat Cinnabuns came into being. :)

Vegan Whole Wheat Cinnabuns

Baking bread takes a bit of effort and a LOT of patience. But both these things pay off ten fold when your house is filled by the smell of bread baking and your mouth delighted with the amazing taste of artisan bread which you had the satisfaction of making with your own two hands.

So plan in advance, assign a day to make an event out of it and enjoy the process!

Vegan Whole Wheat Cinnabuns

1 1/4 C soymilk
1/2 C agave nectar or maple syrup or sugar syrup
4 T olive oil
2 t active dry yeast
1/4 t sugar
1 1/2 T raw flax seed powder
1 t salt
1 C All Purpose Flour
3-4 C Whole Wheat Flour
1/4 C or more Cinnamon powder

Heat the soymilk until lukewarm (test the temperature with your knuckle). Pour into a large mixing bowl and whisk in the agave nectar, oil and yeast. Sprinkle the sugar on top. Leave for 15 minutes for the yeast to dissolve. It should be all bubbly and frothy by the end of this time.

Add the salt, 2 T of the cinnamon powder and flax seed powder and beat a little. Slowly whisk in the 1 C all purpose flour and 2 1/2 cups of the whole wheat flour a little at a time while continuing to beat it as much as possible. Once the dough gets too thick to beat, add just a little more flour and mix with your palms to obtain a rough dough.

Form this dough into a ball and transfer it onto a flat, floured surface (I use my cleaned granite counter top). Knead well for about 10 mins at least (add a little more whole wheat flour while kneading if the dough is sticky but make sure it doesn't get too dry) until it reaches a smooth, elastic consistency.

An effective way to knead is to press the dough away from you with the base of your palms, then fold the dough over towards you and then it press again.

Form the kneaded dough into a ball. Grease the mixing bowl with a little bit of oil. Place the dough ball into the bowl and twirl it around until it's coated with the oil. Cover with a clean plastic grocery bag and let it sit in a sunny spot for about 2 hours. It should rise and double in volume by the end of this time.

Punch down the dough and give it a quick knead for a few seconds. Roll it out into a large rectangle about 1 centimeter (a little less than 1/2 inch) thick and place it with the long side towards you. Lightly coat this rectangle with a very thin layer of agave nectar and sprinkle generously with cinnamon powder. starting from your side, gently roll up the dough to form a long, log shape. Cut this log into 1 inch slices and place them on a baking sheet covered with parchment paper about 1 inch apart. Cover again with the plastic bag and let them sit for 1 1/2 hours to double in volume.

Preheat the oven to 180C/350F. Bake the rolls for about 35 minutes. Enjoy the smell of cinnabuns wafting through your home.

Cool slightly on the baking sheet. Transfer to a cooling rack. Serve warm and be transported to another dimension.

Vegan Whole Wheat Cinnabuns

Wednesday, March 09, 2011

Special Vegan Chocolate Mousse


I prefer to make this with freshly home made tofu when possible. Since I make soymilk at home anyways, making tofu is just another step. Turns out sooo creamy and soft!

If you can't make tofu at home, then use silken tofu. In India, the only silken tofu we get commercially is Mori-Nu (yeah, the terribly expensive imported brand.... but hey, for special occasions, this mousse is TOTALLY worth it!)

Most local tofu brands use vinegar to break the soymilk and that makes the texture and taste of the final tofu suitable only for savory dishes. You could try asking at an Asian restaurant if they make their tofu in house and if you can buy some off of them. They'll most likely be using gypsum aka calcium sulphate or nigari aka magnesium chloride to break the milk to get that soft and creamy texture.

Special Vegan Chocolate Mousse

1 Package/block firm silken tofu
1/2 C Vegan semi sweet dark chocolate chips or bar broken to small pieces
Pure vanilla extract
Maple Syrup (Sugar can also be used)
Soymilk
Small dash of olive oil
Rum - the good kind

Melt chocolate chips by tempering on a double boiler.
Bring down to room temperature.
Blend melted chocolate, tofu and maple syrup (according to taste) until completely
smooth.
Add vanilla, olive oil and rum and blend again.
If required, add a splosh of soymilk and blend again until creamy and
fluffy.
The consistency should be like a very thick smoothie.
Transfer into little bowls and place in the fridge (not freezer).
Let it set for at least 2 hours (more if you have time).

Enjoy!

The simplest, most delicious vegan mousse eva!! :)

Special Vegan Chocolate Mousse

Friday, January 28, 2011

Vegan Chocolate Chip Coconut Pecan Cookies


My chinni wanted chocolate chip cookies and my DH wanted coconut ones. The happy compromise? My favorite vegan chocolate chip cookies with a coconutty twist. :)

Vegan Chocolate Chip Coconut Pecan Cookies

1 C Whole Wheat Flour
1 C All Purpose Flour
1 T Baking Powder
1 t Pure Vanilla Extract (if you don't have the pure kind, then don't bother using it at all)
1/2 C Agave Nectar
3/4 C Chopped Pecans
1 C Vegan Dark Semi-Sweet Chocolate Chips
1 C Cold Ricemilk or Water
Dessicated Coconut Powder

Preheat oven to 180C/350F

Spread as much coconut powder as you like on a small plate.

Put the rest of dry ingredients (except pecans and chocolate chips) in a large bowl and mix. Make a deep well in the center. Pour the wet ingredients into the hole and mix everything. Stir in the pecans and chocolate chips.

Form cookie dough into little balls and roll them around in the coconut powder and press gently. Place on cookie sheets 1-2 inches apart.

Bake for 20 minutes. Cool for 5 minutes on the sheet. Transfer to cooling rack.

Serve hot or cold. Enjoy! :)

These cookies were so yum that the Veganosaurus monsters loved them too! They had a big munching party and there was plenty to go around. They ate and they ate and they ate and in the end they fell over backwards, patted their tummies and fell into a deep, chocolate-y, comatose sleep.

Monsters Eating Cookies

Monday, November 29, 2010

Vegan Baadusha Recipe


Do you know why Baadusha starts with 'baad'? Because it is one baaadass sweet! heheh Ok stop cringing, I promise not to make anymore poor jokes for the rest of this post. :oP

We've been making these babies for Diwali in the recent years. One of the quickest desserts to make! The only 'work' involved is the deep frying and even that can be easy with a partner. In my case, I shape the Baadushas and pop them into the oil and DH deep fries them and transfers them into the sugar syrup. 10-15 minutes of this et voilà, all done! :)

Baadusha

2 C maida/all purpose flour (I do intend to try these out with whole wheat flour at some point though)
1/2 C cold coconut oil + more for deep frying
2 C sugar
2 C water + more for the dough
A generous pinch of baking soda
Tiny pinch of salt
Chopped nuts - pista, almond, cashew

Fry the chopped nuts in a bit of coconut oil until lightly brown, strain and keep aside.

Pour this strained oil plus the remainder of the 1/2 C oil into the flour along with the salt and rub everything together until crumbs form.

Sprinkle the soda on top, add a little bit of water and knead into a soft dough.

Cover with a moist cloth and keep aside for about 15 minutes.

Meanwhile, prepare a slightly thick sugar syrup with the sugar and water by boiling them together.

While the syrup is still warm, heat the oil for deep frying.

Shape the dough into little balls, flatten them and press your thumb (or index or whichever finger you like) down in the middle to form a crater in each one.

In batches, deep fry them in the hot oil on a medium flame until golden brown and transfer them directly into the warm sugar syrup.

Let them soak for about 10 minutes.

Using a slotted spoon, transfer them onto a plate and place the nuts in the craters.

After they cool slightly, the sugar syrup will harden a bit and form a layer on top.

At this point the Baadushas are ready to munch on. :)

Friday, November 12, 2010

Vegan Chocolate Chip Cookies


I often make these delicious vegan chocolate chip cookies and they are always a hit! :) Most recently, I made it for one of the Diwali nights for all my cousins and they were polished off super quickly! I have been asked for the recipe multiple times and I figured it's high time I post it up on my blog so I can just link it the next time someone asks me how to make them. :)

Vegan Chocolate Chunk Cookies

1 C whole wheat flour
1 C all purpose flour (maida)
1 C vegan chocolate chips (chopped vegan dark chocolate bars would work too)
3/4 chopped walnuts or pecans
3/4 maple syrup (can be replaced with sugar syrup too but please no date syrup or liquid jaggery because they just don't produce the best taste or texture)
1/2 C oil (I like to use either coconut or olive oil)
1 T Baking Powder
1 t Vanilla Extract
1/8 t Salt
1/2 C water (or any vegan milk like ricemilk/soymilk etc...)

Preheat oven to 180 C/350 F
Mix the dry ingredients together (except chocolate and nuts).
Add wet ingredients and mix.
Stir in the chocolate and walnuts.
Pop some fresh cookie dough in your mouth and take a deep, blissful breath.
Resist the temptation to finish the rest of the dough.
Drop by spoonfuls onto cookie sheet.
Bake for 15-20 mins.

Serve hot and enjoy! :)

Thursday, September 16, 2010

Chocolate Dipped Bananas


Chocolate Dipped BananasConsidering how delicious these frozen treats are, it's hard to believe how easy they are to make! :)

2 large, very ripe bananas
1/4 C dark semi-sweet vegan chocolate chips
1 T vanilla ricemilk

Peel and freeze the bananas overnight. Remove from freezer and cut into chunks.

Melt the chocolate chips with the ricemilk. You can do this by either tempering in a double boiler or in a microwave by heating for 30 seconds at a time (maximum 2 times) and stirring until the chocolate is completely melted and smooth.

Dip the banana chunks into the chocolate with the help of a fork and arrange on a plate lined with wax paper (I didn't use the wax paper but it would make things a bit easier if you did). The chocolate sets very quickly because the bananas are frozen so work as quickly as possible.

Re freeze everything for a couple of hours.

This tastes yummy straight out of the freezer but I also like to warm it up in the mircowave for about 20 seconds for a melty, gooey dessert. :)

Bananas on Foodista

Wednesday, June 09, 2010

Crunchy Coconut Biscuits


Crunchy Coconut BiscuitsCoconut biscuits (cookies are called biscuits here) were one of my top favorites while growing up. Particularly the ones sold at local bakeries. Sadly they are not vegan at the bakeries so I don't buy them anymore. Needless to say, I couldn't resist putting together my own recipe for them and am highly pleased with the results.

If you have the ingredients on hand, this is one quick and easy easy recipe. I find that these biscuits taste best when freshly out of the oven. So it's a great idea to mix together all the ingredients (except water) and store them in the fridge in an airtight container. Then whenever the craving hits you, just pull out as much as you like, mix in the water and bake.

Crunchy Coconut Biscuits

1 C all purpose flour
1 C dessicated coconut (dry coconut powder)
1 C brown sugar
1/2 C coconut oil (yes it must to be coconut oil)
1/4 t salt
1 t baking powder

Mix all the dry ingredients together. Rub the oil into the mixture. Add a little cold water, just enough to form a dough. Knead the dough a little.

Pinch off balls, lightly flatten on your palm and place on a cookie sheet.

Preheat oven to 180 C/ 350 F. Bake for about 20 minutes, until the edges brown.

Let them cool for a couple of minutes on the sheet and then transfer them to a cooling rack.

The sugar caramelizes in the oil and gives a special crunch to these biscuits. When you eat them warm they will be slightly chewey. After cooling completely, they become fully crunchy. Both ways are yum! :)

Monday, December 14, 2009

Caramelized Bananas


Last weekend we attended this awesome seminar by Dr. Neal Barnard and Dr. Nandita Shah (of SHARAN India). It was 2 1/2 days of highly interesting lectures, super-fun cooking demos and yummy, healthy, vegan food. Both doctors are really nice people and patiently answered all of our questions - the intelligent as well as the silly ones. :)

One of my favorite recipes demonstrated by Dr. Nandita was Caramelized Bananas. These bananas are scrumptious! They contain absolutely no added sweetener and are ridiculously simple to make! It barely takes 10 minutes to get the whole thing done!

Did I mention they're delicious? :)

Caramelized Bananas

Sesame seeds - toasted well in a dry pan.
Ripe Bananas - cut in half lengthwise and horizontally.

Heat a pan (non-stick/Teflon makes things a lot easier). Place the bananas in a single layer in the pan. Gently flip the bananas once in a while as they cook. Once they reach a delicious looking golden color take them off the flame.

Serve sprinkled with the toasted sesame seeds.

I bet it takes you lesser time to make this dish than in took me to type it out for you. Enjoy! :)