Showing posts with label Desserts. Show all posts

Monday, May 14, 2012

Simple Healthy Vegan Gluten Free Coconut Almond Bajra Cookies Biscuits


A few weeks ago, hubby and I decided to try a GF diet for a while, just to see how we'd feel. After 3 weeks of this, we didn't really see any marked differences in our health (probably because we are already pretty healthy to begin with) but since it is a healthy diet anyways we decided to switch to an as-Gluten-Free-as-possible diet. This means, we do indulge in wheat products once in a while, but mainly stick to other grains.

In this period of being GF, I've cooked and baked with a variety of local millets and have thoroughly enjoyed it. Luckily for us, we even had a Millet Mela (Fair) during this period where we could stock up on a variety of grains and flours.

Among the flours, the one that seems to be best suited for baking is the Pearl Millet flour. Pearl Millet is known as Bajra in Hindi and Sajje in Kannada (my language). It is native to regions which are prone to drought and cannot support the growth of wheat, rice or other such grains which require a high water content. I've tasted Sajje Rottis, a sort of thin, crispy flatbreads made of Pearl Millet, as a child. One of my aunts, who is from the Northern part of Karnataka (a fairly dry area), used to bring them back whenever she visited her hometown and all of us kids used to delight in eating it dipped in a spicy peanut powder and yogurt mixture.

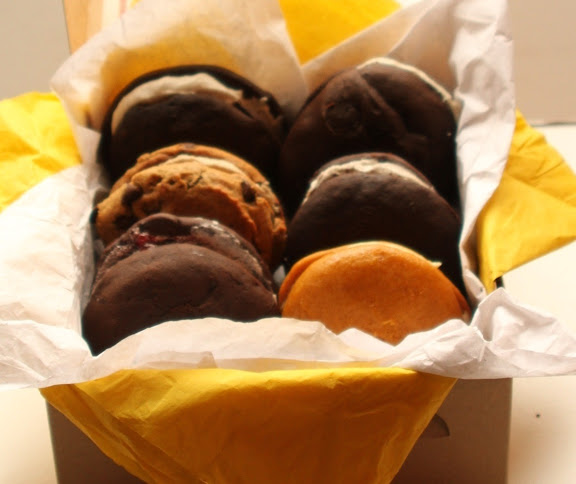
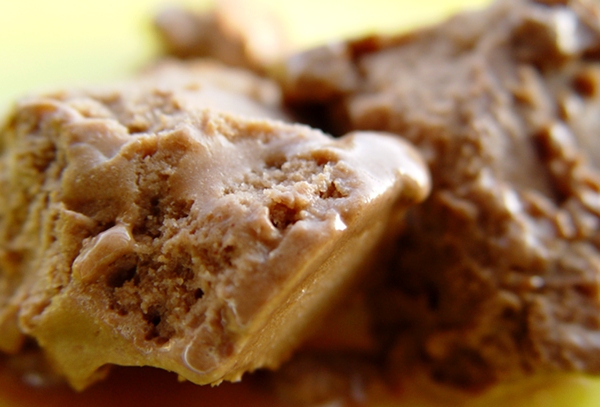
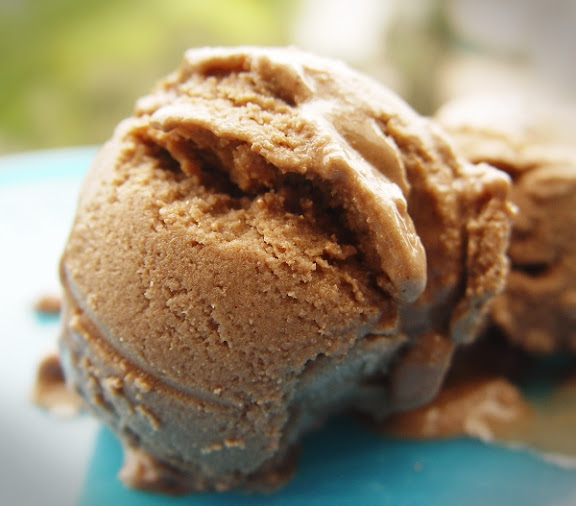
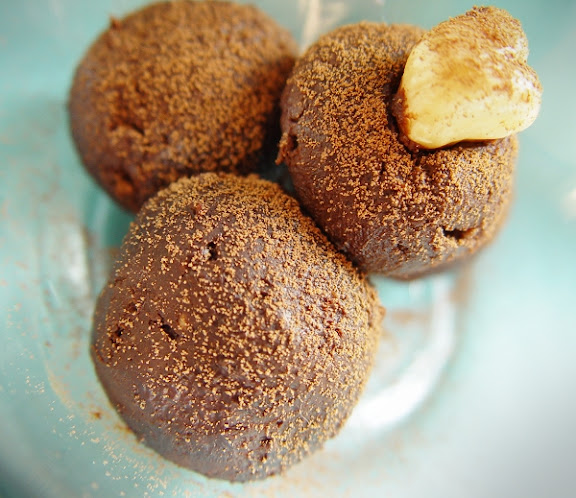
Until I attended the Millet Mela, I didn't know that Sajje was in fact Bajra and that it could be used to make anything, other than the Sajje Rottis. haha But once I did learn this, I've bought a lot of Sajje flour and have been experimenting with it, as you can see in my GF Flatbread post from 2 weeks ago. Since the grain itself has a really nice flavor, whatever I've made with it has turned out pretty tasty. But the most delicious of all are these Healthy Coconut Almond Bajra Cookies/Biscuits.

Gluten Free, Vegan, Coconut Almond Bajra Cookies

I started with Dr.Nandita Shah's Healthy Cookie Recipe from the SHARAN India website. It's a an extremely simple, quick and very versatile recipe. I made a few changes to it based on the ingredients I had on hand and came up with this one. It really hit that cookie craving spot. :)

Plus, because it has no refined oils, white flour or baking powder, hubby and I could stuff our faces with as many as we liked. The sugar syrup is the only 'unhealthy' ingredient in my recipe because I don't like Date Syrup or Jaggery in my baked goods. I would have preferred Agave or Maple Syrup but I had run out of them.

Simple Healthy Vegan Gluten Free Coconut Almond Bajra Cookies Biscuits


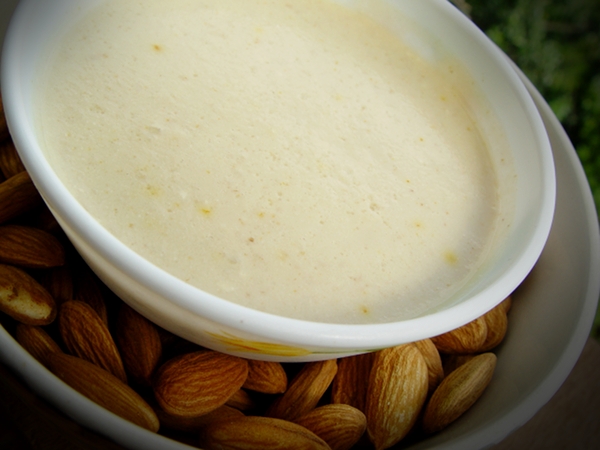
1 C Dry Coconut Powder (Desiccated Coconut)
1 C Almonds - ground into a coarse powder
1/2 C Bajra Flour
1/2 C Sugar Syrup
1 Tbsp Tahini (Sesame Butter)
Salt (a small pinch)

Mix everything together in a bowl.
Lick a few fingerfuls of the yummilicious cookie dough.
Wash hands. :oP
Form half inch balls of the dough between your palms.
Flatten slightly and place on a wax paper lined baking sheet.
Bake at 250 C (480 F) for 10-15 minutes, until the edges and top have browned.
Press the top of a cookie with your fingertip to check for doneness. If it's slightly soft it's okay but it shouldn't be doughy.
Let it cool in the turned off oven for a few minutes.
Transfer to cookie racks and cool completely.
Enjoy! :)

Simply, Healthy, Gluten Free, Vegan Cookies

Before I end this post, I'd like to request all of you to please visit Richa's Fundraiser for VSPCA.


VSPCA is a wonderful organisation, doing amazing work for the animals! It is an organisation that is very close to my heart and the preferred charity for my Art by Susmitha etsy store. I've donated a few of my jewelry creations to this fundraiser.


So please visit the fundraiser page and pitch in by bidding on the many, many beautiful and delicious offerings.

Friday, May 11, 2012

Chia Chow: guest post by GiGi of Veganville


Today I'm super happy to introduce the first guest blogger here at Veganosaurus...the very vitty qveen of Voppee Pies and Veganville...ladiessss and gennnntlemen, let's hear it forrrr...GiGi Anber!! *loud cheering and applause*

I met Geegers here on our Vegan Etsy team and the first thing that stuck out about her was her sense of humour. GiGi, with her videos and her stories, runs her own brand of comedy show on her blog Veganville. She has some yummy vegan recipes up there too but I have to admit that it's the hilarious back stories she gives them which take me back there time and again.

She is also the owner of the Veganville Etsy Shop where she offers some highly delicious looking baked goodies. I can't wait for my next trip to the US just so I can try some of these amazing looking Voppee Pies!

Veganville Voppee Pies

The recipe that GiGi has shared with us here is a healthy Chia Pudding. The replacement for Chia seeds in India are Sabja seeds, the kind used in Faloodas. Sabja has been used for its healing properties in Ayurveda for aeons.

While Chia hails from the Mint family, Sabja belongs to the Basil family. However, they are very similar in properties. They form the same kind of ooey gooey layer around them when soaked in water for many hours, they are very cooling and rehydrating to the body and they give a good cleanse to the intestines. Not to mention, they are both so darned yummy!

Now let's get on to GiGi's post.

--

Chia Chow


Chia seeds made a comeback last year. Posts and recipes were everywhere. The vegan boards were lit up like chia seed Christmas trees. For me the light was on and nobody was home. See it took me a while to get on board the chia seed party boat. I'm not sure if it's because I lost the coolness factor or that the ubiquitous gelatinous chia is $14.95 a bag at my local Whole Foods. Anyway what the hell was I going to do with all those seeds? When I found out the seeds are actually the very same seeds that go into growing those TV chia pets they show on late night commercials, I procrastinated even more. I mean if I give into these chia seed pet seeds what would I give into next - thigh busters and JLo pendants? Still, all those chia puddings look pretty enticing, a little like tapioca only a whole lot healthier, and who doesn't like a good tapioca? Okay, my mom doesn't, that's who. My mom detests tapioca; she thinks it looks like little balls of sn_ _. I probably shouldn't say that on a food blog but what the heck, it’s true. That's what she thinks.

Shaggy Chia Pet

I gave in and bought the seeds and just when I was about to make a super duper chia pudding, crazy boy aka the husband brought home the first blueberries of the season. Since this is a guest post for Susmitha, ice cream maker to the stars. I just had to whip some cold creamy delicious blueberry and crème dessert up first. And because I am all about shameless self promotion you will have to visit my blog if you want the the recipe. Nananannana. I hope there is a translation in India for nanananana, since I intend to publish this blog in many languages.

Blueberry and Crème Dessert

I digress. Chia has been called the ancient food of the future. Clearly it is called this because if you make a pudding now you won’t be eating it any time soon. Chia has also been known to increase energy, prolong hydration and build muscle and tissue. This is also good since you might have to stay up all night waiting for the crazy ass pudding to set. I guess I could have slept or watched some more infomercials, but I was excited to see how much energy I would derive from the pudding. I couldn't wait to see how speedy I would get if I coupled the chia with my morning cup of Joe. Energy and speedy = good in my book.

I read about some chia recipe flops. There are a lot of hot and bothered chia blog recipe comments out there, really. Like, "Hey my stupid chia never solidified", and "this slop was supposed to be my breakfast", and "this chia looks the same now as when I went to sleep", and another one "your stupid chia recipe sucks". Still I risked it all and forged ahead.


Chia Pudding

4 C almond milk
1C maple syrup or agave
¾ C chia seeds
1 tsp vanilla non-alcoholic flavoring
Nutmeg and cinnamon to taste

Mix together the almond milk, vanilla extract, and maple syrup until combined. Gently fold in the chia seeds. Pour the mixture into an 8"x11" baking dish Refrigerate over night. If you’re awake, stir.

Here is what happened at the Chia Seed unveiling the next day which happened to be my birthday. (April)


Sure, you might have to wait until your birthday for the chia to set and you might need a a new haircut but I think it would totally be worth it. The pudding is delicious with a scoop of vegan ice cream on top. Why not try of one of Susmitha’s many scrumptious ice cream recipes? Or come see me over at my blog, Veganville. Shameless, shameless I know. But I am kind of nice.

Chia Pudding


Thank you for having me, my friend. You are as delightful as your confections :)

Monday, May 07, 2012

My Vegan Chocolate Mousse Demo Video at Vivanta by Taj


Last week I shared a video of my first demo on making nut milks and ice creams at Vivanta by Taj on 28th April. It was a part of the Vegan Demo and Lunch event organized at their fine dining restaurant, Graze in association with FIAPO.

There was another such event again last Saturday (5th May) with a completely different menu than the first event. After Sous Chef Uday Nathan had finished demoing the first three courses of the menu, I showed everyone how to make the dessert, Chocolate Mousse made of Tofu. It was really nice of Uday to readily let me do this demo at his event.

The Mousse was originally not part of the menu, the accompaniment for the Cinnamon Coconut Mylk Ice Cream (the other portion of the dessert) was to be Espresso Brownies. But a week before the first event, members of the press were to drop in for dinner on short notice. I hadn't taught Uday how to make the brownies yet. Well, I'd given him the recipe but he wanted me to be present in is kitchen when attempting it for the first time because he was nervous about trying a Vegan Brownie out himself and getting the texture right. That's when I told him how to make Chocolate Mousse with Tofu. It was simple enough to explain on the phone and after a couple of phone calls, he had picked up the method.

That night the press people were completely blown away by the Tofu Mousse. Not surprising to me, as almost everyone has this reaction to the Vegan Mousse. :) They had high praises for it in their newspaper write-ups. After that, making it a part of the menu was a no-brainer.

Here's a video of my demo:


You'll get to read more about the event with pictures of the food in another blog post.

Tuesday, May 01, 2012

Video of my first vegan demo at Vivanta by Taj Bangalore


A few weeks ago, a friend from Mumbai contacted a few of us Bangalore Vegans to let us know that the Taj was planning to hold a vegan demo and lunch event and the chef had mentioned to FIAPO, the event facilitators that he needed help with veganising the food. This project interested me very much and I went to Taj Residency (aka Vivanta by Taj) to meet Sous Chef Uday Nathan of Graze (their European cuisine restaurant).

Uday said that he thought veganising food would be very difficult and asked me to help him with the menu by cooking with him for the next few days and also on the days of the demos (they planned to have two and then maybe more later). I laughed and assured him that vegan food can be very simple to make and he just needs to stop thinking in terms of what he cannot use and start looking in the direction of the various dairy better-natives.

On the next day I got a chance to step into their kitchen and I taught him how to make almond milk, cashew milk, cashew cream and vegan ice cream. I also gave him a few more recipes and pointers on veganising stuff. That one session was all it took for Uday to see how easy vegan cooking can be. "Deceptively simple" is what he called it. :)

Over the following weeks Uday designed two delicious menus for 4 course meals and he consulted me for a few inputs here and there (mostly over the phone). I taught him how to make vegan chocolate mousse with tofu for when the press people (The Hindu and The New Indian Express) visited and there wasn't enough time to make the espresso brownies as originally planned. The mousse was such a big hit that it quickly replaced the brownies in the menu.

The first demo and lunch was on last Saturday, 28th April and I got a chance to do a mini demo at the end of Uday's main demo. I showed the process of making almond milk and also explained how to make nut milks, nut butters, nut creams and vegan ice cream using these. The next demo is on 5th May and I'll be demoing something else on that day.

I'll be sharing a fully detailed blog post, bursting with pictures of course, of the demo and the delicious meal we had as soon as I'm done working on the pics. For now, here's a video of my mini demo that hubby shot.

Tuesday, April 24, 2012

Cherry Nirvana Vegan Ice Cream


A few days ago my dear friend GiGi of Veganville said to me, "you are an ice cream inspiration". I know I have made some kickass vegan ice creams but so have many other vegans I know, including GiGi herself. So I never really thought of myself as an inspiration in the field until she said those words. Now when someone gives you that kind of a heartfelt compliment, you just *got* to live up to it. Thank you Geegers! :)

Turtle Mountain is hubby and my most favorite vegan ice cream company. Whenever we go to the US, we fill our freezer and our tummies with Purely Decadents and So Deliciouses to the point of bursting! If they branched out to India, we'd be their biggest (pun intended :oP) customers. Hubby wrote in and told them this. Sadly they don't plan to come here in the near future. :( Something about logistics and maintaining optimum temperatures while shipping overseas blah blah blah. Excuses, excuses! We can find all kinds of international puscreams on the shelves here so I don't see why veganlicious TM can't come too. Humph! But enough of the ranting, because making something happen is waaaay more rewarding than sitting around pining for it.

I have tapped into my vegan ice cream ninja powers and there's going to be no vegan ice cream that I will be left desiring for. Whether it's an existing flavor from a brand that isn't available to me or a new combination that suddenly clicks in my head, it's going to get created in my kitchen. So there!

Cherry Nirvana Ice Cream

I started by making an ice cream inspired by one of Turtle Mountain's *best* offerings... Cherry Nirvana. It's hubby's absolute favorite and when I grabbed a can of dark cherries in syrup to make Black Forest Pastries, I decided to save some and attempt Cherry Nirvana. The result wasn't the exact same as the original of course, but it was pretty close and extremely delicious.

Cherry Nirvana Vegan Ice Cream


2 C thawed but cold unwhipped non-dairy whipping cream (Rich's is the commonly available vegan one in Bangalore but there are other brands too and this time I used something called Value Star which I found at Metro)
2 C chilled soymilk
1/2 C sugar (or more if you like)
pinch salt
drop of almond essence
1/2 C dark cherries along with the syrup
1/2 C dark chocolate chunks (I broke into chunks Trader Joe's Almonds in Dark Chocolate Pound Plus bar which a very kind friend brought back for me from the US, but any other vegan plain dark chocolate bar can be used too)

Blend the first five ingredients together. Add the cherries in syrup and pulse a few times so there are cherry pieces floating around.

Chill in the fridge for a a few hours.

If you have an ice cream maker:

Pour into your ice cream maker and process.

In the last few minutes, add the chocolate chunks.

Transfer to airtight container and freeze for another hour at least before serving.

If you don't have an ice cream maker:

Whip the thoroughly chilled mixture with a wire whisk for a few minutes.

Mix in the dark chocolate chunks.

Pour into an airtight container and pop it into the freezer.

After half an hour, take it out, whip it with a spatula or fork and freeze it again.

Continue doing this every half an hour for about 2-3 hours until you reach the desired ice cream consistency.

Note: Whether you use an ice cream maker or not, after a day of freezing the ice cream, you will need to thaw it for a few minutes each time to be able to scoop it into neat, round servings.

Enjoy! :)


Thursday, March 29, 2012

Vegan Hazelnut Butter Chocolate Ice Cream


I admit that I am verrrry partial to the combination of toasted hazelnuts with chocolate over other flavours so my claims here might seem like they're coloured by this favoritism, but believe me when I say that is not the case.

This ice cream starts tasting amazing even before it becomes ice cream! Each step of the recipe process is more delicious than the previous one - the simple nut butter, the sweet chocolate hazelnut cream, the heavenly pre-ice cream mylk... OMG the things they did to my tongue!!

I took a lot of will power on my part for this thing to actually reach its goal of becoming ice cream. But I am so glad I pushed through because this is THE BEST ice cream that I have ever made. Period.

And the kicker? It is dangerously simple to make!

So without further ado, I present to you...

Vegan Hazelnut Butter Chocolate Ice Cream

Vegan Hazelnut Butter Chocolate Ice Cream

3/4 C Hazelnuts
3/4 C Cashew Nuts
6 T + 2 tsp Sugar
2 T Cocoa Powder
Pinch of Salt
Pinch of Soy Lecithin (optional)
Handful of Ice Cubes
3 C Filtered Water

Toast the hazelnuts to bring out their flavor and set aside until they are cooled completely.

Rub them between your fingers to remove as much of the skin as possible.

Grind the hazelnuts and cashews together, with breaks in between to scrape down the sides of the jar, until they start releasing oil and turn buttery.

Add the sugar, cocoa powder, salt and soy lecithin (if adding) and blend again.

Add 1 C of water, a little at a time and bring to a creamy consistency. Throw in the ice cubes and blend well. Add the remaining water and blend and whip for a minute or so until it's a nice, frothy mixture.

If you have the patience, let this chill in the fridge for a few hours and then pour into your ice cream maker. I didn't have the patience nor the confidence in my resistance to glug, therefore I skipped the chilling step and went straight to the ice cream making step.

In the ice cream maker, it will reach a soft-serve consistency. After it's ready, transfer to an airtight container and freeze for an additional hour or two to get a scoopable consistency.

Vegan Hazelnut Butter Chocolate Ice Cream

If you don't own an ice cream maker, don't worry. Just pour the pre ice cream mylk in an airtight container and freeze. Every half an hour, take it out of the freezer and whip vigorously with a spatula. Repeat this step 3-4 times. Then finally freeze for an hour and you have your ice cream ready.

After a day or so in the freezer, I've seen that home made ice creams become slightly hard/icy. For the perfect consistency, transfer the container to the fridge and let it thaw for half an hour before serving.

Enjoy!! :)

Friday, February 24, 2012

Steamed Ragi Sweet, my guest post on Tongue Ticklers.


Steamed Ragi Sweet, my guest post on Tongue Ticklers.

Want to know what that is and how to make it? Check out my guest post on Tongue Ticklers (that website has unfortunately disappeared now).

Tongue Ticklers is a vegan blog run by Harini. It's filled with beautiful food photography, interesting recipes and lots of handy tips on vegan and gluten free cooking and baking. I'm super happy to have a guest post featured on it. :)

Tuesday, January 24, 2012

Vegan Hazelnut Kahlua Dark Chocolate Truffles


There's this story my paternal grandma used to tell us when we were kids. It's the Mysore Pak story. My granny is super adorable and she made all these sounds and expressions when she recited it. It was an absolute delight for a child to watch! :)

One day, a man says to his wife, "Darling, I have a hankering for Mysore Pak. Please make some for me".
The wife replies, "I don't know how to make it sweetheart but I'll ask the auntie next door to teach me".
And so she asked the neighbor who very sweetly agreed to teach her.

The wife asked her husband to buy all the ingredients from the market and the following day she went to the neighbor's house for a cooking lesson. She learnt how to toast the flour and add the sugar and the oil (yes, I'm veganizing it!!) and how to spread the mixture into a tray and slice it after it's cooled. As a thank you for teaching her, she gave the neighbor auntie half the Mysore Paks and brought the rest back home.

The Mysore Paks looked and smelt amazing!! The wife bit into one and her eyes went wide. "Mmmmmmm", she said, "my hubby's going to looooove these!!" She couldn't wait for him to come home from work that evening and taste them.

After sometime, she thought to herself, "I have got to eat another, they are so very tasty!" And so she did. A little while later, she couldn't resist having another one.

As the evening neared, she started pacing up and down on the front porch, waiting for her hubby. The excitement was too much! She kept going up to the table where she's placed the Mysore Paks to check on them and each time she checked, she couldn't help but pop one into her mouth. One, then another, then another one.

In this way time passed by and finally the evening arrived. She saw her hubby walking in through the gate. She ran up to him and excitedly told him all about the delicious Mysore Paks she'd made just for him!! She took him lovingly by the hand and led him to the table.

On the table, he saw one lonely Mysore Pak sitting in a tray with a few crumbs here and there.

"Is this all??" asked the hubby with shock.
"There were more", she replied sheepishly, "but I couldn't stop myself from eating them".
"But, but, HOW did you eat them all?" he asked, and regretted it the very next moment because his wife hypnotically reached out to the Mysore Pak, picked it up and said, "Like this!" and as a he gaped in amazement, the Mysore Pak disappeared into her mouth forever.

The End. :oP


Now why did I tell you this story? Because that is EXACTLY what has been happening to these Vegan Hazelnut Kahlua Dark Chocolate Truffles. Need I say more? :D

Vegan Hazelnut Kahlua Dark Chocolate Truffles

1/2 C Hazelnuts (toasted)
1 Bar 100% Bitter Dark Chocolate
1/2 Bar Semi-Sweet Dark Chocolate
1/4 C Brown Sugar + Agave for more sweetening as required
Kahlua (and/or Dark Rum)
2-3 T Soymilk

Keep half the toasted hazelnuts aside and crush the other half into a medium fine powder (I used a mortar and pestle but you could use a grinder if you like).

Melt the chocolate using the double boiler method. Basically one kettle/pan/vessel at the bottom and another, slightly larger one on top, covering it. Water in the bottom one and broken chocolate in the top one. Place on medium-low flame (water should get hot but not start boiling) and stir chocolate till half of it is melted. Then switch off the stove and continue stirring until it's completely melted.

Add sugar and mix well and keep stirring for a while longer.

Take the chocolate vessel off the water vessel and let it sit until it comes down to room temperature. VERY IMPORTANT!

Add the kahlua and/or rum and the soymilk and mix well. As soon as the alcohol hits, the texture changes slightly but that's absolutely okay.

Let the mixture sit in the fridge for a couple of hours.

With your palms, shape the chocolate into balls and press a whole hazlenut into the center of each ball as you form it.

Chill for another hour in the fridge.

Start popping them into your mouth and be transported to heaven.

The End. :oP

Wednesday, January 04, 2012

Vegan Jackfruit Coconut Mylk Ice Cream


It all began on Sunday, the first day of the new year, when we were on the way back from buying jackfruits from our regular vendor. My sis had an inspired thought, she said, "hey ka, you should make some awesome dessert with jackfruit... like jackfruit ice cream!" I laughed at first but then I got to thinking for a moment and I was like, "you know what chinni, I think I could!"

My little sis is craaaaazy about jackfruit! In fact, I think it is her favorite fruit in the whole wide world. If she were left on a deserted island with nothing but jackfruit trees, she'd happily survive.

Every time she arrives at the cart, the vendor has a huge, welcoming smile on his face. Maybe it's because he knows he's getting big business or perhaps it heartens him to see someone express so much joy while they eat the fruits of his labor.

Jackfruits are very commonly sold by street vendors here in South India. These men and women open shop in the morning and spend all day cutting open the large fruits, oiling their palms and separating the juicy jackfruit pods from the body of the fruit and selling them. It's a slow, sticky, not so easy procedure but the vendors are pros at it and thanks to them we get to relish the sweet, delicious flavor of these heavenly tropical fruits.

We add jackfruit to a variety of South Indian dishes (we even save the seeds and make some yummy stews and curries with them) but as far as I know, jackfruit ice cream has not been done before. I can proudly say that I invented this whole recipe from scratch. And this means I did keep a note of the measurements, well mostly. :op

Vegan Jackfruit Coconut Mylk Ice Cream

10 Jackfruit pods - deseeded and sliced
1/3 C Brown Sugar
1 very small drop Apple Cider Vinegar
1/2 C Cashews
2 200ml packs of Coconut Mylk (I use the Dabur Hommade brand)
3/4 C Vegan Whipping Cream Liquid (I use Merry Whip but Rich's can be substituted too)
2 T Agave Nectar
Pinch of Salt

Place the jackfruit slices in a heavy bottomed pan, add the brown sugar and the tiny drop of apple cider vinegar on top and cook them together on low heat while stirring continuously to allow the brown sugar to caramelize and the jackfruits to cook and become soft. You should reach a halwa/jam like consistency (5-10 mins). Keep aside and let it cool down to room temperature. Warning: This jam/halwa is highly yummy by itself so you'll have to overcome the temptation to finish it off straight.

In a blender, turn the cashews into a fine powder. To this add the coconut mylk and blend again. Add the rest of the ingredients, including the caramelized jackfruit, and blend some more. Taste and add more agave nectar if required.

Chill everything in the fridge for 8 hours or more.

If you have an ice cream maker, follow the instructions and freeze into ice cream. If you don't, then pour the ice cream liquid into a freezable container and freeze for half an hour, then whip and freeze again for another half an hour and then whip again and so on for 2-3 hours until you get the consistency you desire.

Enjoy! :)

Vegan Jackfruit Coconut Mylk Ice Cream

This thing turned out absolutely amazing!! My dad who recently turned vegan, but still has some misgivings about the superiority of vegan desserts over the non vegan ones, was totally blown away by the Jackfruit Ice Cream. He was like, "Wow! This doesn't taste vegan!" Well, I am now on a mission to teach him that the *best* tasting desserts are the vegan ones. :)

Thursday, December 15, 2011

Raw, Vegan 'Rasmalai'


When I saw this link for Raw, Vegan 'Rasmalai' on my friend P's facebook profile yesterday, I was consumed by the desire to immediately attempt it. One just can't have the words VEGAN and RASMALAI jumping out from the same sentence and resist its pull. Any plans I'd had to laze around after lunch went right out the window. I prepared and gobbled up the chapati and tofu/capsicum curry in a big, fat hurry and lunged for my mixie, all the while showering a thousand blessings upon the heads of Rohit and Rishi of Roshi's who came up with this ingenious, raw concoction.

I tweaked the original recipe a wee bit. Here's the version I followed.

Raw Vegan Rasmalai

Cardamom and Saffron Flavored Cashew Mylk Base:

1/2 C Cashews
2-3 T Agave Nectar
4 Green Cardamom Seeds (crushed)
1 generous pinch Saffron Strands
1 3/4 C Water

Add all ingredients, except water, into a grinder jar and powder well. Add water a little at a time and make a smooth paste. Add the rest of the water and blend well to form a creamy vegan mylk. Keep aside.

Rasgulla Balls:

1 C Cashews
1 C Almonds
1/2 tsp Sesame Seeds (optional ingredient for added calcium)
5 Soft Dates (chopped)

In a dry jar, grind 1/2 C cashews and 1/2 C almonds into a fine powder. Separately grind the rest of the cashews and almonds along with the sesame seeds into small granules.

In a large bowl, mix everything with dates by hand until evenly distributed. Add 2 tablespoons of the cashew mylk and knead. Shape into 1 inch balls and lightly flatten them into saucers.

Place in a wide bowl and pour the prepared cashew mylk over them. Sprinkle sliced pistachios and a small pinch of saffron on top. Cover and keep aside for 7-8 hours for the balls to soak up the mylk and soften (this is the hardest part!!).

Tastes best when served cold.

Raw Vegan 'Rasmalai'

Note: This is a rich, healthy and extremely delicious dessert but it didn't turn out exactly like normal Rasmalai. The mylk did taste like the kind used in Rasmalai but the texture of the balls was not soft and creamy like Rasgulla should be. They were more like a rich, dry fruits barfi/ball soaked in decadent saffron mylk.

I will be redoing this recipe again and next time I will eliminate the dates and also lightly mix and shape the 'dough' rather than kneading.

But in the end, even if it doesn't turn out like Rasmalai, I don't really care because it tastes absolutely heavenly!! Plus it's easy to make, raw and healthy (not a single bad ingredient in there!). I even guiltlessly ate it for breakfast just now. :D

I have a feeling that this will be a staple dessert at our home. :)

Thursday, November 03, 2011

Vegan Vanilla and Agave Nectar Cupcakes from Vegan Cupcakes Take Over The World


This Sunday was supposed to have been my very first vegan bake sale at a local fair called the Sunday Soul Sante. I kept putting off the registering because of sheer laziness and procrastination but then a fellow vegan who makes delicious cheezes out of nuts and tofu very kindly offered to split her stall with me. It was just the push I needed. But yesterday when I called her to confirm, she said that the Sante had been postponed because of the rains. The new date hasn't been fixed yet and it might be a couple of weeks at least before I know.

But in a way it's a good thing that it's not this weekend because now I can relax and prepare. Try a few new recipes, buy ingredients in bulk and get the packaging details organized. I know that cakes and cookies wrapped in cellophane with a little ribbon look adorable but I'm really looking for a more environmentally friendly option.

Since I was all agog with the idea of baking this week, I decided to go ahead and make something special yesterday. So I broke out my copy of Vegan Cupcakes Take Over The World.

Vegan Vanilla and Agave Nectar Cupcakes

I bought this book over a year ago and have truly enjoyed reading it over and over again. The writing style is so amusing and the cupcake photos are TDF! However, I hadn't gotten around to baking anything from it because my older 12 cup nonstick pan doesn't fit into my current oven. But a few weeks ago I treated myself to a 9 cup pan (shiny aluminum, as recommended in the book) and had been really looking forward to taking it for a spin. And finally yesterday it happened. :) I decided to make the Simple Vanilla and Agave Nectar Cupcakes from page 44 of VCTOTW.

This is my first time baking cupcakes with a proper cupcake recipe. In the past I've just used plain yellow cake and brownie batter to make cupcakes. I must say that when using a proper cupcake recipe, the difference in texture is stark!! I was simply blown away by the sponginess and perfect crumb. I *finally* understand what the big deal is with cupcakes as compared to a slice of regular cake. LOL

Needless to say, my baking is going to involve only cupcakes for a while.

Vegan Vanilla and Agave Nectar Cupcakes

I frosted these cupcakes with Vegan Fluffy Buttercream Frosting from page 142. Thanks to a very generous friend of mine, I had some delicious vegan margarine from Australia in my fridge and I also had some non hydrogenated Earth Balance shortening remaining from last year's stock. So I used them and modified the recipe slightly by replacing the soymilk/creamer with cold espresso.

I sprinkled the frosting with dark chocolate shavings, instant coffee granules and drizzled on some liquified chocolate rum ganache. Finally I topped each cupcake with a dark chocolate chunk.

My very first cupcake decorating attempt and it was so much fun! :)

Something crazy happened too. I'd left the cupcake on the window sill and had stepped away for a moment but when I returned, the cupcake had disappeared. I checked the hidden camera and my jaw dropped as I watched the hijack!

Friday, October 28, 2011

Gulab Jamuns and Gratitude - Vegan MoFo Post 17


I've had a pretty physically and mentally exhausting two weeks. It's so not like me to say these words because I normally manage to lead a comfortably slow paced life. But sometimes unexpected stuff happens and all we can do is drop everything else and deal with the unwanted stuff in the best way we can. Anyways, I like keeping things cheerful around here so enough about this topic. I only told you all this because I just wanted to explain my lack of MoFo activity.

I normally have a tendency to focus on the positive (and there is always plenty to be thankful for when we open our eyes and look around us), so today I'll focus on some foodalicious things I've been enjoying with gratitude since my last Vegan MoFo post.

For Diwali every year, the hubs and I have been making Baadushas for the past few years. But this time I decided to attempt Vegan Gulab Jamuns (yet again) and they turned out closer to the regular kind than they have been in a long time. I am very grateful to Richa of Hobby and More for this awesome recipe. I followed it to a T and these beauties were the result. :)

Vegan Gulab Jamuns

I definitely have a bit of a way to go before I perfect the precise Jamun texture, but the almonds and oats that Richa has brilliantly included in the recipe make them so delicious that the texture almost didn't matter!

The next thing that I'm *extremely* thankful for is good friends!! At times like these, there's nothing like hanging out with a few buddies to lighten things up.

A few days ago I had lunch with two of my very close friends from high school. It was so wonderful to meet up with them after a long time. We had lunch at Infinitea (a tea room close to my heart) and yakked away to our hearts' content. We were celebrating M's birthday. She had come with her very sweet hubby. We later dropped into their hotel room to play with her super cute 6 month old munchkin. I love little babies! They bring so much joy!! :)

This is the tea I had at Infinitea. Rose Hip and Hibiscus. What a gorgeous colour!!

Rose Hip and Hibiscus Tea

For many years now, it's been a Diwali tradition for me and my little sis to hang out with our cousins on the terrace at our parents' apartment. We watch the fireworks in the sky all around us and talk and laugh until the wee hours of the morning. This year everything's change and we weren't able to do our yearly ritual. :( But I am thankful for all the sweet memories from years past that I can fondly look back on and I hope that some day we can all be together again.

Diwali has always been about home and family but this year on the night of the main day of Diwali, hubs and I did something different. We went out for dinner with our dear vegan friends to Little Italy, Indiranagar. While the people of Bengaluru were bursting loud crackers outside, our cozy little group was sitting indoors and sharing a delicious vegan meal. We were celebrating World Go Vegan Week. I'm so thankful to have these awesome, cool, compassionate souls in my life.

Out of everything I ate, my favorite was the Zorba Pizza with added capers. Ooh lala! It was a slice of garlicalicious heaven.

Zorba Pizza from Little Italy

All of us shared all the dishes so I got only one slice of this baby but I think I'll be getting myself a whole Zorba pizza the next time I'm at Little Italy.

Tomorrow's our monthly Vegan Bengaluru meeting. The lunch buffet that I was telling you about last week. I already know that this is going to be something that my tummy will be grateful for. Needless to say, my camera's coming along. :)

So here's hoping that life goes back to being simple and peaceful once again so that I can give you all a visual treat of the special vegan lunch buffet very soon.

Monday, October 10, 2011

Sundal and Payasam - Vegan Mofo Post 10


Last week we had a series of festivals called Dussera (also known as Navarathri). Traditionally we have ten days of celebration and this means lots of sweets and snacks. The most important of these festivals for us is Ayudha Pooja. It's a special occasion reserved to give thanks to all the tools, machines and vehicles we are blessed with.

On the day of Ayudha Pooja this year, hubby and I made a simple sweet and snack combination for Naiveidhyam (offering to the Gods and Goddesses). Something quick and delicious which we could eat and share.

Whatever is cooked with the intention of being placed at the altar as a food offering should only be eaten by us after the ritual is over. So while we prepare the food, we don't have the luxury of tasting and adjusting. But for some reason, every time we make Naiveidhyam food, it turns out perfect! This always reminds me that the taste of a dish is largely dependent on the energy and intention of love that goes into preparing it. Positive vibrations always yield beautiful results. :)

Sundal is a savory dish made of Garbanzo Beans/Chickpeas. We can use any kind of chick peas to make these but this time we had Kabuli Channa (the larger ones) on hand so we used them. I normally follow the quick soak method to soak pulses but this time I soaked them overnight.

Channa Sundal

1 C Dry Chickpeas
2 Chopped Green Chillies
2 tsp Coconut Oil
Mustard Seeds
Curry Leaves
Asafoetida Powder (a pinch)
Dessicated Coconut
Chopped Cilantro
Lime Juice
Salt

Wash and soak the chickpeas over night (about 8 hours). Throw out the water, add fresh water and steam for 45 minutes or pressure cook for about 15 minutes until the chickpeas are soft.

In a wide, heavy bottomed pan heat the oil. Add the mustard seeds and let them crackle. Add the chopped green chillies, asafoetida powder and curry leaves and stir for a half a minute.

Now add the cooked chickpeas and salt and a wee bit of the cooking liquid and cook on medium high heat while stir frying continuously. After about 5 mintues of this, once the water has evaporated, add the dessicated coconut and toss well and turn off the heat.

Mix in the lime juice and garnish with the chopped cilantro and serve hot.

--

Payasam is a liquidy dessert which is best eaten hot. It is served at the beginning of traditional South Indian meals.

Payasam can be made with many things - Rice, Dals, Tapioca, Semiya (fine semolina noodles), Broken Wheat etc... This time we made Channa Dal (Split Bengal Gram) Payasam.

Channa Dal Payasam

1 C Channa Dal
1/4 C Dessicated Coconut
1/4 C Grated Jaggery
6 tsp Sugar
1 T Chopped Cashews
1 t Raisins
2 Cardamom Pods (crushed well with a stone/hammer/mortar and pestle)

Soak the channa dal for an hour. Add dessicated coconut and steam (in the soaking water) for half an hour.

Meanwhile, dry roast the cashews to a golden color, add the raisins and stir for a few seconds, until they brown slightly. Keep aside.

Once the channa is ready, add jaggery and sugar and mix well. Bring to a simmer on medium heat and stir till the sugar and jaggery have dissolved. Add the crushed cardamom, lower the heat and simmer for a few minutes.

Turn off the heat and serve hot.

Wednesday, October 05, 2011

Saffron Infused Almond Dessert - Vegan MoFo post 5


As this highly addictive veganmofo madness continues, I have been feeling extremely grateful for my prior procrastination! Over the last few months, I had created a bunch of stuff in my kitchen and taken pictures, but I hadn't updated my blog with all of them. So now, during vegan mofo, since blog hopping and commenting has taken over my online life, I'm able to keep my blog up with the activity because the yummy food pictures are already waiting to be linked here. Phew! See, being lazy has its benefits. :D

This is an almond cream based mousse like dessert I concocted a while ago. It's raw, except for the little bit of agar agar (which needs to be cooked to work well). Pretty simple to make too! It would also have been a super quick dessert if it weren't for the slightly painful almond skin peeling step. But hey, even that is something you get a hang of over time. I've become a lot faster at it now than I used to be during my initial attempts.

Saffron Infused Raw Almond Dessert

1 C Almonds
2 pinches Saffron Strands
Raw Agave Nectar (to taste)
2 T Agar Agar flakes

Soak almonds overnight in filtered water to start the sprouting process.

In the morning, throw out the water and rinse the almonds thoroughly. This step ensures that your body absorbs the enzymes in the almonds better.

Now the part which involves effort. Patiently peel the skin off the almonds. You can pour more water over them so they stay moist through the peeling process, making it easier and quicker.

Blend the peeled almond into a smooth, creamy paste adding a wee bit of of fresh, filtered water.

Add the saffron and agave nectar and blend again. Taste and adjust the level of agave. Keep aside in the blender jar.

Boil 1/2 C water and add the agar agar flakes. Stir and cook on medium flame until the flakes have dissolved. Let it cool for a few minutes until slightly warmer than room temperature.

Pour this agar agar mixture into the blender jar with the almond paste in it and blend for a few beats just to get everything mixed well and whipped up.

Pour the almond cream into individual dessert bowls and chill in the fridge for a few hours.

Serve cold and enjoy! :)

Monday, October 03, 2011

I Scream You Scream We All Scream For Ice Cream - Vegan Mofo post 3


Today's Vegan Mofo post is a photo blog of a few vegan ice creams I've made in the recent past and my ice cream making process.

I never follow exact recipes while making anything (except in my baking) and ice creams are no exception. I just have a method that I stick to and have developed a 'feel' over time for attaining the right texture.

For the base, I usually use a combination of a nut and a creamy fruit or a vegan mylk and vegan whipped cream. To this I add any flavor that hubby and I are in a mood for - coffee powder, melted dark chocolate, pure vanilla extract, saffron, cardamom, rum (any alcohol is to be added only in the last minutes of the freezing process)...- and a sweetener of some sort - sugar, raw agave nectar, maple syrup... - et voila, the vegan ice cream mix is ready! :)

Pointers:

*Tasting and adjusting is of course a must.
*Make it a wee bit sweeter than you might like because after the freezing process the level of sweetness reduces.
*Add a tiny pinch of salt to enhance the taste.
*Chill the mix for over a day before freezing - either in an ice cream maker or by following the whipping and freezing method.

The latter involves whipping and freezing and whipping and freezing and so on once every half an hour for the first two hours of the freezing process. And then once an hour for the next two hours (or until the consistency feels about right). The way to achieve a good ice creamy texture is to use a blender (hand blender would be more convenient than transferring the ice cream into a jar each time) but you can also use a wire whisk, a spatula or a fork.

Without further ado, here are my droolalicious, creamy, scoop-able vegan ice creams. :)

Very Vanilla Cashew Mylk Ice Cream

- recipe for the vanilla cake in the background here
Very Vanilla Cashew Mylk Ice Cream

Cashew Mocha Rum Ice Cream


Cashew Mocha Ice Cream

Raw Pistachio Mango Ice Cream

- recipe here
Raw Pista Mango Ice Cream

Mango Ice Cream


Mango Ice Cream

Monday, September 05, 2011

Ganesha Chaturthi and Yummy Kadubus


I love a good, filling festival feast! But then, who doesn't? No matter what religious festival it is that one is celebrating, the love for the associated food is commonly shared. :)

It's probably because of a combination of the joyous childhood memories we have associated with festivals and the amount of care and hard work which always goes into making food fit for celebration.

Kadubu / Kozakottai

Being a strong believer in the power of spiritual vibrations, I feel that food when it's made with the intention of a offering to a deity as neiveidhya first before being eaten is most sublime.

Among all the festival we grew up celebrating, my fondest memories are of Gowri and Ganesha (not even Diwali with all its fire crackers matches up). For the first half of my life, I lived in a big, happy joint family. We were fourteen of us in one huge bungalow. All festivals were celebrated together, as a family.

On the first day was the Gowri pooja followed on the next day by the Ganesha pooja. The story is that Gowri comes down to Earth on that day to visit her mother and Ganesha (Gowri's youngest son) accompanies her to stay at his grandma's place. And grandma spoils him with all kinds of delicious goodies. After the festivals are done, a few days later Ganesha safely takes his mother Gowri back up to Kailasa (heaven). That's when we leave the clay idols in water as a send off until the following year.

A few days before the festival, when the adults purchased the larger Gowri and Ganesha clay idols for the ritual, they always purchased smaller ones for us kids.

Me, my little sister and our two little cousin brothers used to willingly and enthusiastically wake up at the ungodly hour of 4 am on both festival days, get dressed in traditional clothes and sit at our mini altar to do the ritual to our little Gowri and Ganesha. The girls did the Gowri ritual and the boys did the Ganesha ritual. We even had miniature silver vessels, aarthis and all the other stuff required for the ceremony. And at the end of the ritual, the feast was brought out and placed in front of the deities as an offering. This marked the end of the ceremony. After this, we could commence wolfing down the yummy goodies! :D

Those were such utterly joyful days!!

Ganesha after the pooja

Now hubby and I bring home only the Ganesha (I visit my mom's place and all my aunt's places on the day of the Gowri festival) and perform a simple, short pooja. But we do make sure to cook a whole bunch of the traditional delicacies for the neiveidhya offering so we can stuff ourselves later to our tummies' content. :D

This year we made three types of kadubus/kozakottais, unfermented idli with coconut cilantro chutney, sundal out of small, brown channa and these miniature steamed snacks (don't really know what they are called).

For the three kadubu fillings - coconut jaggery, sesame jaggery, savory urad dal - we followed the recipes from Subbu's Kitchen. For the outer rice dough covering we used a slightly different method.

Kadubu Dough

1 C rice flour
1 C water
2 tsp oil
a pinch of salt

Mix everything into a paste in a heavy bottomed pan and place on medium heat. Stir continuously (will take maybe 5-10 minutes) and let it cook until the paste starts coming together into a ball of dough.

Take the pan off the stove and once the dough cools a bit, dip your palm in cold water and knead the dough until it's smooth. Follow instructions to make various fillings, stuff and steam.

Kadubus / Kozakottais inside

Fun Little Savory Steamed Snacks

These are usually made out of leftover kadubu dough but I like them so much that I always make extra dough just for these. :)

Kadubu dough
1 tsp moong dal and 1 tsp channa dal (soaked together for half an hour)
2 fresh green chillies, asafoetida and salt (crushed well together)
2 tsp chopped fresh cilantro

Mix everything together.
Form into fun little shapes - ball, stick, ring, disk etc...
Steam along with the kadubu for 5-8 minutes.


Another Ganesha Chaturthi dish that I truly relish is Kandundes (didn't make them this time around though). They are made of four kinds of lentils soaked together and ground to a thick paste along with spices, shaped into balls and steamed. Then they are dunked in a yogurt based gravy and served. I make these on non festival days too because then I get to add onion (a festival no no) and also a bunch of chopped veggies. I either serve those in a vegan yogurt based gravy or just plainly spiced vegan yogurt. I'll share a recipe for those the next time I make them.

What goodies do you prepare for Gowri Pooja and Ganesha Chaturthi and which ones are your favorites?

Tuesday, June 28, 2011

Raw Vegan Mango Pistachio Ice Cream


This one is soooooo easy peasy to make! Doesn't look like it and definitely doesn't taste like it. It's so delicious that you'd think it took hours of labor. Well, I didn't even need to make the effort of pulling out the ice cream maker for it. :oP

When you start with just plain fruits you can get a sorbet out of it. Well sorbets are light and slightly icy and can be nice sometimes, but they are just not ice creams! However, by adding a nut into the mix, you can achieve the kind of rich, creamy texture that all ice creams should have.

The beauty of this raw ice cream is that it has only healthy ingredients and you can eat as many scoops as you like without guilt (unless you're allergic to nuts).


Raw Vegan Mango Pistachio Ice Cream


3 very ripe mangoes (I used large Alphonsos)
1/4 cup plain, raw pistachios (without the shells) + 1-2 tsp (chopped/sliced)
Raw agave nectar to taste

Peel, cube and chill the mangoes in the fridge for a day.
Soak the 1/4 C pistas in filtered water for 5-6 hours.
Drain the pistas completely and chuck the water away.
Place the pistas in a blender/grinder/food processor and grind well.
Add the mangoes and blend some more, until you get a creamy mixture (it'll have the color of avocado).
Squirt in a little bit of the raw agave nectar and blend again.
Taste, add more agave if you desire and blend more.
Transfer to a freezer safe container, add sliced pista and whip with hand whisk for a few minutes.
Freeze overnight.
Transfer to fridge and leave for about an hour to soften it. Serve with an ice cream scoop. Enjoy! :)

Note: You can refreeze it after you've had your fill and then leave it in the fridge again for a while before eating each time.

Wednesday, May 18, 2011

Vegan Pineapple Pastry


Since my very vanilla cake recipe was such a hit, I thought I'd share the pineapple pastry recipe too. When we say 'pastry' here in India, we refer to a form of extra succulent cake. The main way this decadence is obtained is by dousing the cake with flavored sugar syrup to add moistness. Another thing that makes a pastry what it is, is the inclusion of fresh or canned fruits to enhance the richness of the flavors and textures.

Vegan Pineapple Pastry

1 Basic Yellow Cake made by replacing the pure vanilla extract with 1/2 t of pineapple essence
1 small can of Pineapple Slices in Syrup
Vegan Whipped Cream like Rich's Non-Dairy Whip Topping or Merry Whip

After the cake has cooled completely, slice it horizontally to form two layers.
Place one layer of cake in a large container and pierce randomly with a fork.
Pour half the syrup from the pineapple can over this layer of cake.
Cover with a thin layer of vegan whipped cream.
Spread most of the pineapple pieces over this saving some for the final topping.
Cover with the second layer of cake and pierce it randomly with a fork.
Pour the remaining syrup evenly over this.
Spread vegan whipped cream over the top and sides of the cake and cover it completely.
Place the remaining pineapple slices on top of the cake in an aesthetically appealing way.

Cover the container and place the pineapple pastry in the fridge. Let it sit for at least a day to soak up the syrup and some of the whipped cream. Serve cold and enjoy! :)

Will last for a minimum of one week when stored in a tightly closed container inside the fridge.

Vegan Pineapple Pastry

Note: Pastries and cakes taste more delicious as the days go by. Especially chocolate flavored ones. I personally prefer them most two days after they've been made.

Wednesday, May 11, 2011

Vegan Very Vanilla Cake


Basic Vanilla Cake:

1 3/4 C all purpose flour
2 t arrowroot powder (optional)
1 t baking powder
1 t baking soda
1/4 C brown sugar
3/4 C white sugar
3 t pure vanilla extract
1 t vinegar or lemon juice
5 T oil (canola or sunflower)
1 C cold water

Preheat oven to 180C/350F.

Lightly oil a 9 inch baking pan and keep it aside.

In a large mixing bowl, sieve together the flour, arrowroot powder, baking powder and baking soda about 6-7 times (the more number of times you sieve, the fluffier the cake will be).

Mix the remaining ingredients separately and beat well to dissolve the sugar to some extent.

Pour the wet ingredients over the dry ingredients and whisk together with a few quick strokes just until no lumps remain (too much mixing is not advisable). Pour the cake batter into the baking pan and immediately pop into the preheated oven.

Bake for about 35 minutes. Test by inserting a toothpick into the center of the cake and see if it comes out clean. If so, the cake is done. If not, then bake for a few more minutes.

Remove the pan from the oven and keep it aside. Let the cake cool completely before you remove it from the pan.

This cake is delicious eaten as it is but it can also be enjoyed layered with vegan whipped cream.

Vegan Very Vanilla Cake

Vanilla Cream Cake:

Prepare vegan whip topping by carefully following the directions on the package. Rich's is the most well known brand of non-dairy whip topping in India. I also like to use the Merry Whip brand which is available at the Institute of Baking, Bangalore (these guys also carry another non-dairy brand called Gold Top but stay away from that one because it tastes too artificial essence-y!)

Slice the cooled cake horizontally to form two layers. On a large plate, place the bottom layer. Cover it with some of the whipped cream. Place the top layer over this and cover the whole cake with whipped cream with the help of a spatula.

Chill in the fridge for a couple of hours before serving.

The cake is best stored in a closed container in the fridge. It will last at least a week IF it hasn't been finished well before that. :)

Friday, April 29, 2011

Vegan Whole Wheat Cinnabuns


Last year I had the pleasure of tasting a gourmet cinnamon roll at Cinnaholic and I was absolutely blown away by it! Ever since then I've been craving a cinnabun as perfect in taste and texture as that particular roll. Now if it were up to me, every time I craved a cinnabun, I'd just teleport right on over to Cinnaholic and stuff my face to my heart's content. Heck, I'd even be happy to be their employee just so I could be constantly enveloped in the smell of cinnamon rolls baking. And that says a lot because if you know me, you'd know I'm not into 'work'. But let's face it, it's going to be at least another year before I perfect my teleportation powers and Berkley is too far away from Bangalore to risk it. Imagine if I apparate in some remote island in the middle of the Indian Ocean where no one's heard of cinnamon rolls?? *shudders*

So my only option has been to bake and bake with the aim to arrive at the recipe for an amazing cinnabun. Something to keep my happy until the next time I'm able to experience a heavenly Cinnaholic cinnamon roll once more.

I first took a non vegan clover leaf rolls recipe and then tweaked it and tweaked it some more to not only veganize it and make it healthy with whole wheat in the mix but to also get the perfect, fluffy texture. Then when those rolls turned out great, I finally decided to take the leap and adapt that recipe into one for cinnabuns. And FINALLY, these delicious Vegan Whole Wheat Cinnabuns came into being. :)

Vegan Whole Wheat Cinnabuns

Baking bread takes a bit of effort and a LOT of patience. But both these things pay off ten fold when your house is filled by the smell of bread baking and your mouth delighted with the amazing taste of artisan bread which you had the satisfaction of making with your own two hands.

So plan in advance, assign a day to make an event out of it and enjoy the process!

Vegan Whole Wheat Cinnabuns

1 1/4 C soymilk
1/2 C agave nectar or maple syrup or sugar syrup
4 T olive oil
2 t active dry yeast
1/4 t sugar
1 1/2 T raw flax seed powder
1 t salt
1 C All Purpose Flour
3-4 C Whole Wheat Flour
1/4 C or more Cinnamon powder

Heat the soymilk until lukewarm (test the temperature with your knuckle). Pour into a large mixing bowl and whisk in the agave nectar, oil and yeast. Sprinkle the sugar on top. Leave for 15 minutes for the yeast to dissolve. It should be all bubbly and frothy by the end of this time.

Add the salt, 2 T of the cinnamon powder and flax seed powder and beat a little. Slowly whisk in the 1 C all purpose flour and 2 1/2 cups of the whole wheat flour a little at a time while continuing to beat it as much as possible. Once the dough gets too thick to beat, add just a little more flour and mix with your palms to obtain a rough dough.

Form this dough into a ball and transfer it onto a flat, floured surface (I use my cleaned granite counter top). Knead well for about 10 mins at least (add a little more whole wheat flour while kneading if the dough is sticky but make sure it doesn't get too dry) until it reaches a smooth, elastic consistency.

An effective way to knead is to press the dough away from you with the base of your palms, then fold the dough over towards you and then it press again.

Form the kneaded dough into a ball. Grease the mixing bowl with a little bit of oil. Place the dough ball into the bowl and twirl it around until it's coated with the oil. Cover with a clean plastic grocery bag and let it sit in a sunny spot for about 2 hours. It should rise and double in volume by the end of this time.

Punch down the dough and give it a quick knead for a few seconds. Roll it out into a large rectangle about 1 centimeter (a little less than 1/2 inch) thick and place it with the long side towards you. Lightly coat this rectangle with a very thin layer of agave nectar and sprinkle generously with cinnamon powder. starting from your side, gently roll up the dough to form a long, log shape. Cut this log into 1 inch slices and place them on a baking sheet covered with parchment paper about 1 inch apart. Cover again with the plastic bag and let them sit for 1 1/2 hours to double in volume.

Preheat the oven to 180C/350F. Bake the rolls for about 35 minutes. Enjoy the smell of cinnabuns wafting through your home.

Cool slightly on the baking sheet. Transfer to a cooling rack. Serve warm and be transported to another dimension.

Vegan Whole Wheat Cinnabuns